manuals.online logo
Brands
  1. Home
  2. •
  3. Brands
  4. •
  5. Heat & Glo
  6. •
  7. Fireplace Accessories
  8. •
  9. Heat & Glo 350X-AU User manual

Heat & Glo 350X-AU User manual

1
Heat & Glo • LOGS-350X, LOGS-SL5 Installation Instructions • 2279-935 • 12/17
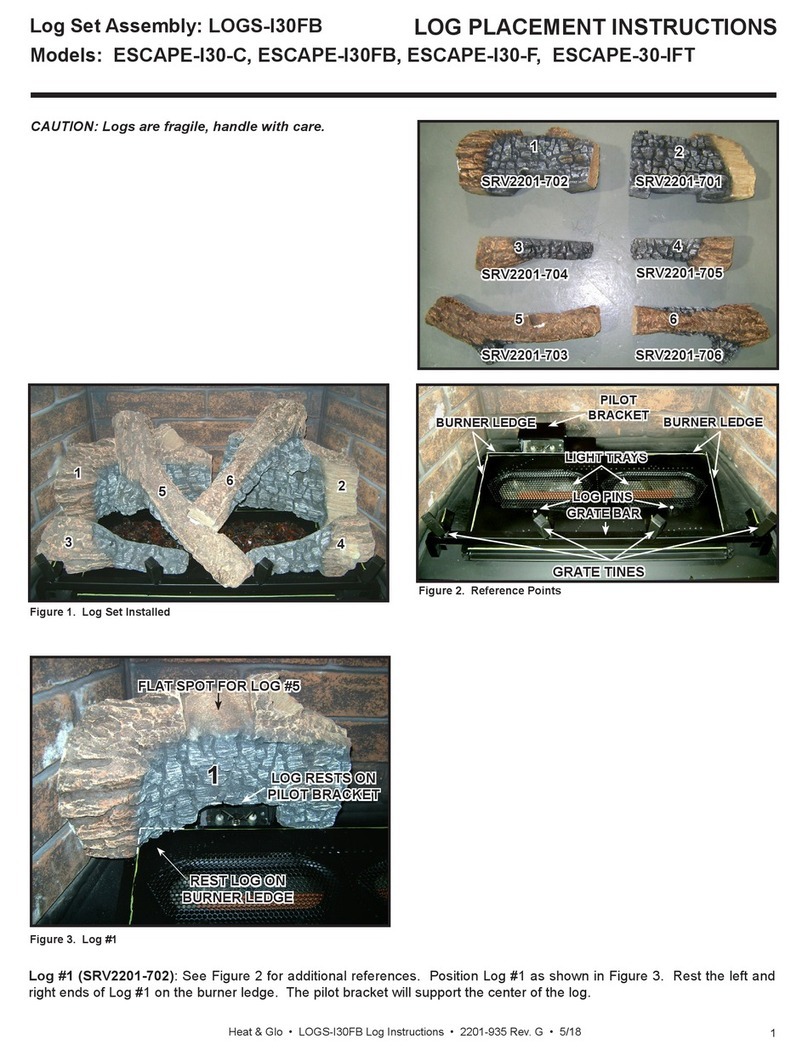
LOG PLACEMENT
INSTRUCTIONS
Install Logs
Overview
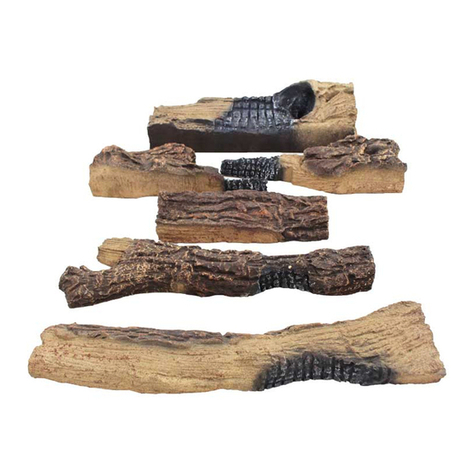
These are common log instructions for the 350X-AU,
550X-AU models. Both models use the same number
of components, which are scaled up or down in size, de-
pending on the model of replace installed. Each size
log set consists of ve logs.
*The photos shown in these instructions depict an 350X-
AU.
Log Pins
The overall size and placement of the burner assembly
within the rebox is very similar between all sizes. How-
ever, each burner top has different burner ports and log
pin congurations. See Figure 1 for log pin locations.
The log pins, along with the indentations in the hearth
components, will aid in correctly positioning the two rear
logs and small burner log. The indentations are shown
in Figure 4.
Figure 1. Log Pin and Glowing Ember Locations
Figure 2. Example of Log Pin Holes
Log Placement Tips
• The rear left log, rear right log and small burner
log utilize holes in the bottom side of the logs that
correspond to the log pins on the burner. Reference
Figure 1 and Figure 2.
Additionally, the rear left log and rear right log are
located by indentations in the right and left hearth
components. See Figure 5.
Note: 350X-AU model does not utilize a hearth
indentation in the left hearth.
• The Top left and top right logs, which lay across the
rear left and rear right logs, utilize the “indentations” in
the rear left and rear right logs for proper placement.
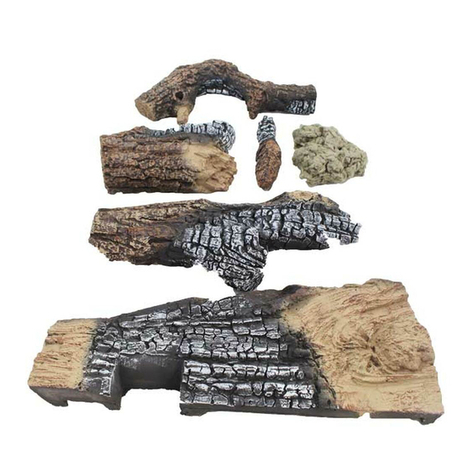
Figure 3. Log Set Components
350X-AU
550X-AU
550XLP-AU
EMBERS
LOG PINS
LOG PIN HOLES
REAR RIGHT LOG
REAR LEFT LOG
BURNER LOG
TOP LEFT LOG
TOP RIGHT LOG
CAUTION: Logs are fragile, handle with care.
NOTICE: Paint Touch Up Kit (2372-099) may be ordered
from your dealer to repair chips and scratches if necessary.
Log Set Assembly: LOGS-350X, LOGS-SL5
Models: 350X-AU, 550X-AU
Heat & Glo • LOGS-350X, LOGS-SL5 Installation Instructions • 2279-935 • 12/17
2
The rear left log will be positioned to maintain about
a 1-1/4 in. (32 mm) rear gap between the rear left log
and the back wall. The rear left log will maintain about
a 3/4 in. (19 mm) gap from the left wall. See Figure 4.
Figure 4. Rear Left Log Installed
Install Glowing Embers®
3. Remove the Glowing Embers®from packaging and in-
stall the ember material as shown in Figure 1. Care
should be taken to avoid placing ember material direct-
ly over ports and to avoid using excessive amounts of
ember material.
Figure 5. Rear Right Log Installed
Install Rear Logs
1. Remove large rear left log from the packaging and install
the log by locating it on the back left log pin(s). The left
side of the log will reside within the indentation in the
left hearth component. See Figure 5.
Note: 350X-AU model does not utilize a hearth
indentation on the left hearth. See Figure 4.
REAR GAP
SIDE GAP
2. Remove the large rear right log from packaging and
install it by locating it on the back right log pin. On
some models, it may be necessary to lift the rear left
log slightly to install the rear right log. The right side
of the log will reside within the indentation in the right
hearth component. See Figure 5.
350X-AU Models: The rear right log will be posi-
tioned to maintain about a 2 in. (51 mm) rear gap
between the rear right log and the back wall. The
rear right log will maintain a 3/4 in. (19 mm) gap from
the right wall.
550X-AU Models: The rear right log will be posi-
tioned to maintain about a 1 in. (25 mm) rear gap be-
tween the rear right log and the back wall refractory.
The rear right log maintain a 1 in. (25 mm) gap from
the right wall. See Figure 5.
REAR GAP
SIDE GAP
WARNING! Risk of Explosion! Follow ember placement
instructions. DO NOT place embers directly over burner
ports. Replace ember material annually. Improperly
placed embers interfere with proper burner operation.
• Embers CANNOT be placed directly over ports. Care
should be taken not to cover the lighting trail of ports
(from back to front).
• When placing Glowing Embers®onto the burner care
should be taken so that the ports are not covered. Place
the 18 mm ember pieces near the port holes in the burner
top. Failure to follow this procedure will likely cause lighting
and sooting problems.
INDENTATIONS
3
Heat & Glo • LOGS-350X, LOGS-SL5 Installation Instructions • 2279-935 • 12/17
4. Remove small burner log from packaging. This log
has two holes on the bottom. These holes correspond
to two log pins located on the burner top. Place the
small burner log on the two log pins. See Figure 6.
When properly placed, this log will rest on both the
burner and ember tray/Teco-Sil.
Install Front Logs
Figure 6. Burner Log Installed
Figure 8. Location of Right Log Indentation
5. Remove top left log from packaging. Place upper
portion of the log into the indentation on the rear left
log. The bottom right tip of the log will rest on the
ember tray and the Teco-Sil rock. See Figure 7 and
Figure 8.
Figure 7. Location of Left Log indentation
INDENTATION-LEFT LOG
Figure 9. Top Right Log Installed - Log Set Complete
6. Remove top right log from packaging. There are
indentations located in the right rear log and small
burner log to locate the log. Place log into indenta-
tions as shown in Figure 8 and Figure 9.
INDENTATIONS-RIGHT LOG
INDENTATION

Other manuals for 350X-AU

1

This manual suits for next models

3

Other Heat & Glo Fireplace Accessories manuals
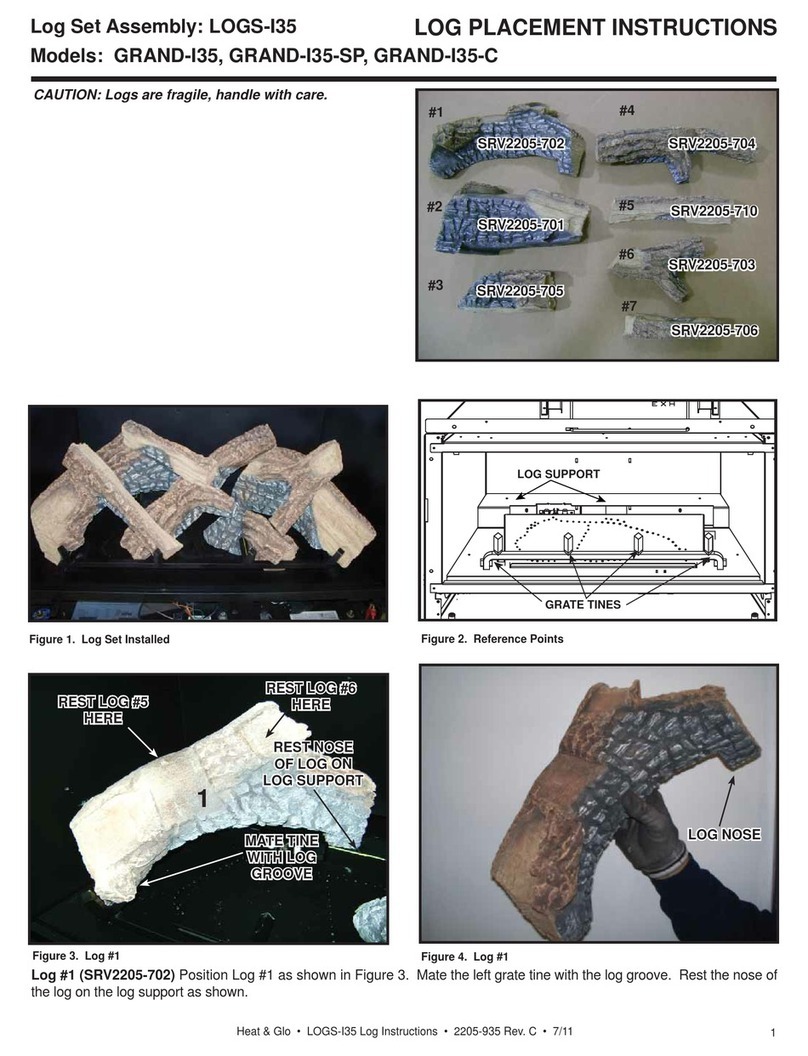
Heat & Glo LOGS-Cerona36 User manual

Heat & Glo

Heat & Glo LOGS-Cerona36 User manual

Heat & Glo LOGS-SL750TRS-D User manual

Heat & Glo

Heat & Glo LOGS-SL750TRS-D User manual

Heat & Glo GD415ATPB User manual

Heat & Glo

Heat & Glo GD415ATPB User manual

Heat & Glo PRIMO-II Series User manual

Heat & Glo

Heat & Glo PRIMO-II Series User manual

Heat & Glo SL-550F User manual

Heat & Glo

Heat & Glo SL-550F User manual
Heat & Glo GRL-850-AU Owner's manual

Heat & Glo

Heat & Glo GRL-850-AU Owner's manual

Heat & Glo LOGS-SL550TRS-D User manual

Heat & Glo

Heat & Glo LOGS-SL550TRS-D User manual

Heat & Glo LOGS-I30FB User manual

Heat & Glo

Heat & Glo LOGS-I30FB User manual

Heat & Glo LOGS-I35 User manual

Heat & Glo

Heat & Glo LOGS-I35 User manual

Heat & Glo OGL-42 Manual

Heat & Glo

Heat & Glo OGL-42 Manual

Heat & Glo LOGS-350TRS-D User manual

Heat & Glo

Heat & Glo LOGS-350TRS-D User manual

Heat & Glo LOGS-I35FB User manual

Heat & Glo

Heat & Glo LOGS-I35FB User manual

Heat & Glo Tonic SLR-C User manual

Heat & Glo

Heat & Glo Tonic SLR-C User manual

Heat & Glo LOGS-750TRS-E User manual

Heat & Glo

Heat & Glo LOGS-750TRS-E User manual

Heat & Glo 6000CMOD-IPI User manual

Heat & Glo

Heat & Glo 6000CMOD-IPI User manual

Heat & Glo VPK-DV User manual

Heat & Glo

Heat & Glo VPK-DV User manual

Heat & Glo LOGS-6000G User manual

Heat & Glo

Heat & Glo LOGS-6000G User manual

Heat & Glo LOGS-6000GLX User manual

Heat & Glo

Heat & Glo LOGS-6000GLX User manual

Heat & Glo Firescreen User manual

Heat & Glo

Heat & Glo Firescreen User manual

Heat & Glo LOGS-2128 User manual

Heat & Glo

Heat & Glo LOGS-2128 User manual

Heat & Glo COSMO32-IFT User manual

Heat & Glo

Heat & Glo COSMO32-IFT User manual

Heat & Glo PORTRIM6-BR User manual

Heat & Glo

Heat & Glo PORTRIM6-BR User manual

Heat & Glo LOGS-6000GL User manual

Heat & Glo

Heat & Glo LOGS-6000GL User manual

Heat & Glo PRIMO-II-48 User manual

Heat & Glo

Heat & Glo PRIMO-II-48 User manual
Popular Fireplace Accessories manuals by other brands

Town & Country Fireplaces TC30 Black Diamond instructions

Town & Country Fireplaces

Town & Country Fireplaces TC30 Black Diamond instructions

pleasant hearth FA995TC instructions

pleasant hearth

pleasant hearth FA995TC instructions

Valor LX2 Series installation manual

Valor

Valor LX2 Series installation manual

Jøtul I 80 Installation and operating instructions
Jøtul

Jøtul I 80 Installation and operating instructions

FireplaceXtrordinair ProBuilder 36 CleanFace Installation

FireplaceXtrordinair

FireplaceXtrordinair ProBuilder 36 CleanFace Installation

Nordpeis Me Ceiling SA-ME000-C24 manual

Nordpeis

Nordpeis Me Ceiling SA-ME000-C24 manual

Empire Comfort Systems FBB21 installation instructions

Empire Comfort Systems

Empire Comfort Systems FBB21 installation instructions

kozy heat NCK-C39-D quick start guide

kozy heat

kozy heat NCK-C39-D quick start guide

pleasant hearth WS104L instructions

pleasant hearth

pleasant hearth WS104L instructions

Dimplex SOP-495-AL install guide

Dimplex

Dimplex SOP-495-AL install guide

Napoleon S50 installation instructions

Napoleon

Napoleon S50 installation instructions

Jetmaster VisionLINE AIR instruction manual

Jetmaster

Jetmaster VisionLINE AIR instruction manual

RSF Woodburning Fireplaces FDDHE Installation instruction

RSF Woodburning Fireplaces

RSF Woodburning Fireplaces FDDHE Installation instruction

Travis Industries DVL EmberGlo GSR2 Insert owner's manual

Travis Industries

Travis Industries DVL EmberGlo GSR2 Insert owner's manual

Hearth and Home Technologies DV425 quick start guide

Hearth and Home Technologies

Hearth and Home Technologies DV425 quick start guide

CMC Masonry Fireplace Enclosure Installation & operation instructions

CMC

CMC Masonry Fireplace Enclosure Installation & operation instructions

Hearth & Home LOGS-550BE-B Log Placement Instructions

Hearth & Home

Hearth & Home LOGS-550BE-B Log Placement Instructions

Valor 725RTB Black installation instructions

Valor

Valor 725RTB Black installation instructions

manuals.online logo
manuals.online logoBrands
  • About & Mission
  • Contact us
  • Privacy Policy
  • Terms and Conditions

Copyright 2025 Manuals.Online. All Rights Reserved.