manuals.online logo
Brands
  1. Home
  2. •
  3. Brands
  4. •
  5. HEIDENHAIN
  6. •
  7. Media Converter
  8. •
  9. HEIDENHAIN AK LIC 211 User manual

HEIDENHAIN AK LIC 211 User manual

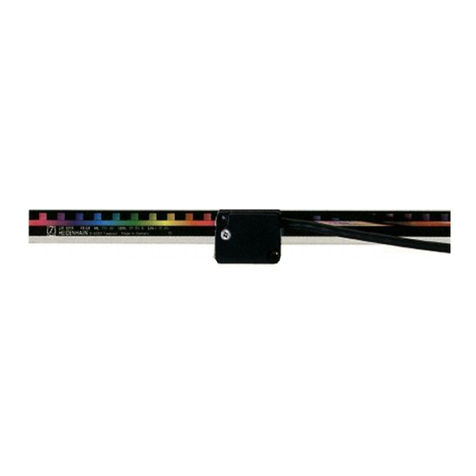
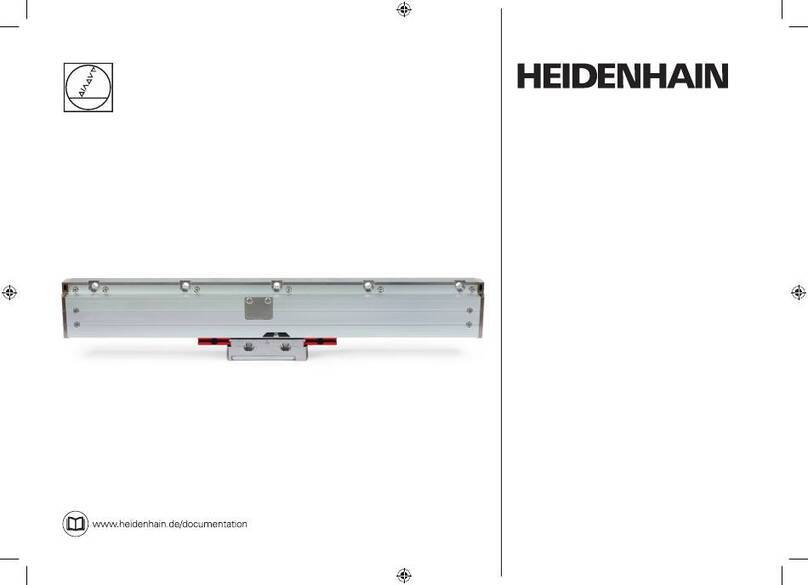
LIC 2117 / 2197F / 2197M / 2197P
LIC 2119 / 2199F / 2199M / 2199P
Mounting Instructions
Montageanleitung
Instructions de montage
Istruzioni di montaggio
Instrucciones de montaje
AK LIC 211
AK LIC 219F, M, P
6/2016
Sistema lineal de medida absoluto abierto
Cabezal captador
Estas instrucciones de montaje són válidas para:
Sistema di misura lineare aperto assoluto
Testina di scansione
Le presenti istruzioni di montaggio si applicano per:
Système de mesure linéaire absolu à règle nue.
Tête captrice
Ce Guide d'installation est valable pour :
Absolutes offenes Längenmessgerät.
Abtastkopf
Diese Montageanleitung ist gültig für:
Absolute exposed linear encoder
Scanning headThese Mounting Instructions refer to:
2
Índice
Dimensiones en mm
Página
3 Advertencias
4 Elementos suministrados
5 Posibilidades de montaje del cabezal
captador
6 Montaje
9 Trabajos finales
10 Diagnóstico
Indice
Pagina
3 Avvertenze
4Standard di fornitura
5 Possibilità di montaggio della testina di
scansione
6 Montaggio
9 Operazioni finali
10 Diagnostica
Dimensioni in mm
Sommaire
Page
3Avertissements
4Contenu de la livraison
5Possibilités de montage de la tête captrice
6Montage
9Opérations finales
10 Diagnostic
Cotes en mm
Inhalt
Seite
3 Warnhinweise
4Lieferumfang
5 Montagemöglichkeiten des Abtastkopfes
6 Montage
9 Abschließende Arbeiten
10 Diagnose
Maße in mm
Content Page
3Warnings
4 Items supplied
5Possibilities for mounting the scanning head
6Mounting
9Final steps
10 Diagnosis
Dimensions in mm
3
Advertencias
Atención: El montaje y la puesta en marcha deben realizarse por un especialista cualificado bajo estricto cumplimiento de las disposiciones de
seguridad locales.
No conectar ni desconectar bajo tensión.
¡La instalación debe realizarse desconectada de la corriente!
Avvertenze
Attenzione: far eseguire montaggio e messa in servizio da un tecnico qualificato in ottemperanza alle disposizioni di sicurezza locali.
Collegare o staccare i collegamenti soltanto in assenza di tensione.
L'impianto deve essere privo di tensione!
Avertissements
Attention : Le montage et la mise en service doivent être assurés par un personnel qualifié, dans le respect des consignes de sécurité locales.
Ne procéder à une connexion/déconnexion que lorsque l'appareil est hors tension.
L'installation doit être hors tension !
Warnhinweise
Achtung: Die Montage und Inbetriebnahme ist von einer qualifizierten Fachkraft unter Beachtung der örtlichen Sicherheitsvorschriften vorzunehmen.
Die Steckverbindung darf nur spannungsfrei verbunden oder gelöst werden.
Die Anlage muss spannungsfrei geschaltet sein!
Note: Mounting and commissioning is to be conducted by a qualified specialist under compliance with local safety regulations.
Do not engage or disengage any connections while under power.
The system must be disconnected from power!
Warnings
4
0.75 mm
Suministro
Lámina espaciadora
Standard di fornitura
Pellicola distanziatrice
Contenu de la livraison
Feuille d'écartement
Lieferumfang
Abstandsfolie
Items supplied
Spacer foil
5


















































 

























 





















 





















 

























À =
LIC 2117/2197x
LIC 2119/2199x
Posibilidades de montaje del cabezal captador Distancia de montaje entre el cabezal captador y la cinta
Possibilità di montaggio della testina di scansione Distanza di montaggio della testina di scansione dal nastro graduato
Possibilités de montage de la tête captrice Distance de montage entre la tête captrice et le ruban de mesure
Montagemöglichkeiten des Abtastkopfes Montageabstand Abtastkopf zu Maßband
Possibilities for mounting the scanning head Mounting clearance between scanning head and scale tape
6









Montaje
Retirar la tapa protectora. No rozar la graduación.
En caso de necesidad, limpiar la graduación de la cinta métrica cuidadosamente con
un trapo limpio que no suelte pelusa y con alcohol destilado o con alcohol isopropílico.
No rozar la graduación.
Montaggio
Rimuovere le protezioni. Non toccare la graduazione.
All'occorrenza, pulire accuratamente la graduazione del nastro e della testina di
scansione con un panno pulito che non lascia pelucchi e alcol denaturato o isopropilico.
Non toccare la graduazione!
Montage
Retirer le bouchon de protection. Ne pas toucher la gravure.
Au besoin, nettoyer la gravure du ruban de mesure ou de la tête captrice avec
précaution, à l'aide d'un chiffon sans peluches et d'alcool distillé ou isopropylique.
Ne pas toucher la gravure !
Montage
Schutzkappe entfernen. Teilung nicht berühren.
Bei BedarfTeilung des Maßbandes und des Abtastkopfes mit fusselfreiemTuch
und destilliertem Spiritus oder Isopropylalkohol vorsichtig reinigen.
Teilung nicht berühren!
Mounting
Remove the protective cover. Do not touch the graduation.
If necessary: Clean the graduation of the scale tape and scanning head with a
lint-free cloth and distilled spirit or isopropyl alcohol.
Do not touch the graduation!
7
Atención: ¡Observar la posición correcta de la cinta respecto al cabezal captador!
Ajustar la distancia de montaje de 0.75 mm con la lámina espaciadora.
Atornillar el cabezal captador (Md= 1.15 Nm).
Attenzione: prestare attenzione alla corretta posizione del nastro graduato
rispetto alla testina!
Regolare con pellicola distanziale la distanza di montaggio di 0,75 mm.
Avvitare la testina di scansione (Md= 1,15 Nm).
Attention : Veiller à la bonne position du ruban de mesure par rapport à la
tête captrice !
Avec la feuille d'écartement, régler l'écart de montage de 0,75 mm.
Visser la tête captrice (Md= 1,15 Nm).
Achtung: Auf die richtige Lage Maßband zu Abtastkopf achten!
Mit Abstandsfolie 0.75 mm Montageabstand einstellen.
Abtastkopf anschrauben (Md= 1.15 Nm).
Attention: Ensure correct position of the scale tape to the scanning head!
Use the spacer foil to set the mounting clearance to 0.75 mm.
Screw on the scanning head (Md= 1.15 Nm).
8








Montaje
Radios de flexión del cable de conexión admitidos.
R1: flexión fija, R2: flexión alternativa
Distancia mínima de las fuentes de interferencias
Montaggio
Raggi di curvatura ammessi dei cavi di collegamento.
R1: curvatura fissa, R2: flessioni ripetute
Distanza minima da sorgenti di disturbo
Montage
Rayons de courbure admissibles pour les câbles de raccordement.
R1: courbure permanente, R2: courbure fréquente
Distance minimale des sources parasites
Montage
Zulässige Biegeradien der Anschlusskabel.
R1: Dauerbiegung, R2: Wechselbiegung
Mindestabstand von Störquellen
Mounting
Permissible bending radii of connecting cables.
R1: For rigid configuration, R2: For frequent flexing
Minimum distance from sources of interference
9
Trabajos finales
Comprobar la resistencia eléctrica entre la carcasa del conector y la máquina.
Valor teórico: 1 máx.
Operazioni finali
Verificare la resistenza elettrica tra alloggiamento del connettore e macchina.
Valore nominale: 1 max
Opérations finales
Contrôler la résistance électrique entre le boîtier du connecteur et la machine.
Valeur nominale : 1 max.
Abschließende Arbeiten
Elektrischen Widerstand zwischen Steckergehäuse und Maschine prüfen.
Sollwert: 1 max.
Final steps
Check the resistance between the connector housing and the machine.
Nominal value: 1 max.
10
Diagnóstico
Para el diagnóstico HEIDENHAIN ofrece la unidad PWM 20. Se compone de los siguientes elementos:
•PWM 20
•Adjusting and Testing Software (ATS) – Versión 2.8.01 con una base de datos local de sistemas de medida para la configuración automática de
sistemas de medida. Disponible también para ser descargado gratuitamente desde la página web de HEIDENHAIN en el area de descarga de
software.
Diagnostica
Per la diagnostica HEIDENHAIN offre il PWM 20 (set diagnostico). È composto dai seguenti componenti:
•PWM 20
•Adjusting andTesting Software (ATS) – Versione 2.8.01 con database encoder locale integrato per il rilevamento automatico del sistema di misura.
È disponibile anche per il download gratuito alla homepage HEIDENHAIN nella sezione per il download del software.
Diagnostic
Pour le diagnostic, HEIDENHAIN propose le phasemètre PWM 20. Il se compose des éléments suivants :
•PWM 20
•Logiciel de réglage et de contrôle (logiciel ATS) – Version 2.8.01 avec base de données des systèmes de mesure locale intégrée pour détecter
automatiquement les systèmes de mesure connectés. Ce logiciel est téléchargeable gratuitement depuis la zone de téléchargement accessible
via la page d'accueil de HEIDENHAIN.
Diagnose
Zur Diagnose bietet HEIDENHAIN das PWM 20 (Phasen-Winkel-Messgerät) an. Es besteht aus folgenden Komponenten:
•PWM 20
•Adjusting andTesting Software (ATS) – Version 2.8.01 mit integrierter lokaler Messgeräte-Datenbank zur automatischen Messgeräte-Erkennung.
Steht auch zum freien Download auf der HEIDENHAIN-Homepage im Software-Downloadbereich zur Verfügung.
Diagnosis
HEIDENHAIN offers the PWM 20 (phase angle measuring unit) for diagnosis. It consists of the following components:
•PWM 20
•Adjusting and Testing Software (ATS) – version 2.8.01 with integrated local encoder database for automatic encoder identification.
Also available for downloading free of charge from the software download area on the HEIDENHAIN homepage.
11




1.
2.
ID 543734
Para más información: ver modo de empleo del software ATS.
Conexión de los sistemas de medida.
Establecer la conexión al sistema de medida.
Per ulteriori informazioni vedere il manuale di istruzioni Software ATS.
Collegare l'encoder.
Realizzare il collegamento con l'encoder.
Pour plus d'informations, voir le Manuel d'utilisation du logiciel ATS.
Raccorder le système de mesure.
Etablir la liaison avec le système de mesure.
Weitere Informationen siehe Betriebsanleitung ATS-Software.
Messgerät anschließen.
Verbindung zum Messgerät herstellen.
For further information, see ATS Software Operating Instructions
Connect the encoder.
Establish a connection to the encoder.
12
3.
4.

Diagnóstico
Introducción del número ID del sistema.
Diagnostica
Inserire il numero ID del prodotto.
Diagnostic
Saisie du numéro ID de l'appareil.
Diagnose
Eingabe der Geräte-ID-Nummer.
Diagnosis
Enter the encoder ID number.
13
5.
7.
6.



14
8.

Diagnóstico
Desplazar el cabezal a lo largo de todo el recorrido de medición
(tener en cuenta los valores mínimos).
Finalizar la medición
Tener en cuenta: Si no se alcanzan las zonas verdes o si se sufren fuertes fluctuaciones de la señal en todo el recorrido de medición deben
verificarse las tolerancias de montaje y comprobar la ausencia de suciedad.
Diagnostica
Spostare l'unità di scansione sull'intera corsa utile
(rispettare i valori minimi).
Terminare la misurazione.
Importante: se non vengono raggiunti i campi verdi oppure in caso di forti oscillazioni del segnale sull'intera corsa utile, controllare le tolleranze di
montaggio e verificare la presenza di sporco o contaminazione.
Diagnostic
Déplacer la tête captrice sur toute la longueur de mesure
(tenir compte des valeurs minimums).
Terminer la mesure.
Attention : Si les zones vertes ne sont pas atteintes ou s'il existe de fortes variations de signal sur l'ensemble de la longueur de mesure, vérifier
les tolérances de montage et s'assurer qu'il n'y a pas de salissures.
Diagnose
Abtasteinheit über die ganze Messlänge verfahren
(Minimumwerte beachten).
Messung beenden
Beachten: Wenn die grünen Bereiche nicht erreicht werden oder bei starken Signalschwankungen über die gesamte Messlänge, Anbautoleranzen
kontrollieren und auf Verschmutzung überprüfen.
Diagnosis
Traverse the scanning unit over the entire measuring length
(pay attention to the minimum values).
Complete the measurement.
Note: If the green ranges are not reached or if strong signal oscillations occur over the entire measuring length, check the mounting tolerances
and check for contamination.
15
10.
9.


Interrumpir la conexión al sistema de medida.
Staccare il collegamento con l'encoder.
Couper la liaison avec le système de mesure.
Verbindung zum Messgerät trennen.
Separate the connection to the encoder.






 
 

 

 

 

 


*I1065912-90*
1065912-90 · Ver00 · Printed in Germany · 6/2016 · H

This manual suits for next models

11

Other HEIDENHAIN Media Converter manuals

HEIDENHAIN LS 4 7 Series User manual

HEIDENHAIN

HEIDENHAIN LS 4 7 Series User manual

HEIDENHAIN EQN 1325.049 User manual

HEIDENHAIN

HEIDENHAIN EQN 1325.049 User manual

HEIDENHAIN LC 4 5 Series User manual

HEIDENHAIN

HEIDENHAIN LC 4 5 Series User manual

HEIDENHAIN LIC 3107 User manual

HEIDENHAIN

HEIDENHAIN LIC 3107 User manual

HEIDENHAIN RCN 729 EnDat User guide

HEIDENHAIN

HEIDENHAIN RCN 729 EnDat User guide

HEIDENHAIN ERN 1321 User manual

HEIDENHAIN

HEIDENHAIN ERN 1321 User manual

HEIDENHAIN LC 2 1 Series User manual

HEIDENHAIN

HEIDENHAIN LC 2 1 Series User manual

HEIDENHAIN LIDA 573 User manual

HEIDENHAIN

HEIDENHAIN LIDA 573 User manual

HEIDENHAIN LC 2x1 User manual

HEIDENHAIN

HEIDENHAIN LC 2x1 User manual

HEIDENHAIN LS 1 7 Series User manual

HEIDENHAIN

HEIDENHAIN LS 1 7 Series User manual

HEIDENHAIN LIC 4113 User manual

HEIDENHAIN

HEIDENHAIN LIC 4113 User manual

HEIDENHAIN AK ECA 4410 User manual

HEIDENHAIN

HEIDENHAIN AK ECA 4410 User manual

HEIDENHAIN ERP 880 User manual

HEIDENHAIN

HEIDENHAIN ERP 880 User manual

HEIDENHAIN IK 5000 QUADRA-CHEK User manual

HEIDENHAIN

HEIDENHAIN IK 5000 QUADRA-CHEK User manual

HEIDENHAIN AK LIC 311 User manual

HEIDENHAIN

HEIDENHAIN AK LIC 311 User manual

HEIDENHAIN ERN 1387 User manual

HEIDENHAIN

HEIDENHAIN ERN 1387 User manual

HEIDENHAIN LB 302 User manual

HEIDENHAIN

HEIDENHAIN LB 302 User manual

HEIDENHAIN ECN 1113 User manual

HEIDENHAIN

HEIDENHAIN ECN 1113 User manual

HEIDENHAIN ECI 13 Series User manual

HEIDENHAIN

HEIDENHAIN ECI 13 Series User manual

HEIDENHAIN ROD 431.025 User manual

HEIDENHAIN

HEIDENHAIN ROD 431.025 User manual

HEIDENHAIN MSL 41 User manual

HEIDENHAIN

HEIDENHAIN MSL 41 User manual

HEIDENHAIN ECN 1324 S User manual

HEIDENHAIN

HEIDENHAIN ECN 1324 S User manual

HEIDENHAIN EIB 5000 User manual

HEIDENHAIN

HEIDENHAIN EIB 5000 User manual

HEIDENHAIN LIDA 473 User manual

HEIDENHAIN

HEIDENHAIN LIDA 473 User manual

Popular Media Converter manuals by other brands

Cross Technologies 2016-75-213 instruction manual

Cross Technologies

Cross Technologies 2016-75-213 instruction manual

Cross Technologies 2016-03A instruction manual

Cross Technologies

Cross Technologies 2016-03A instruction manual

Vdwall LVP909 Series user manual

Vdwall

Vdwall LVP909 Series user manual

Toshiba VEC008Z installation manual

Toshiba

Toshiba VEC008Z installation manual

AJA FS2 Installation and operation guide

AJA

AJA FS2 Installation and operation guide

Elo TouchSystems E174 Operation manual

Elo TouchSystems

Elo TouchSystems E174 Operation manual

RoboGuard HQ user manual

RoboGuard

RoboGuard HQ user manual

Digigram PYKO-in user manual

Digigram

Digigram PYKO-in user manual

DeLOCK 86441 user manual

DeLOCK

DeLOCK 86441 user manual

almando Masterplay installation manual

almando

almando Masterplay installation manual

Apantac US-3000 user manual

Apantac

Apantac US-3000 user manual

Lenkeng LKV376 user manual

Lenkeng

Lenkeng LKV376 user manual

CYP EL-8500VA Operation manual

CYP

CYP EL-8500VA Operation manual

OSEE HCC6830N user manual

OSEE

OSEE HCC6830N user manual

Delta Electronics PMT Series instruction manual

Delta Electronics

Delta Electronics PMT Series instruction manual

Audio Technica ATW-SC410 user manual

Audio Technica

Audio Technica ATW-SC410 user manual

Cameo iDMX Core user manual

Cameo

Cameo iDMX Core user manual

Motrona IT251 operating manual

Motrona

Motrona IT251 operating manual

manuals.online logo
manuals.online logoBrands
  • About & Mission
  • Contact us
  • Privacy Policy
  • Terms and Conditions

Copyright 2025 Manuals.Online. All Rights Reserved.