manuals.online logo
Brands
  1. Home
  2. •
  3. Brands
  4. •
  5. HEIDENHAIN
  6. •
  7. Media Converter
  8. •
  9. HEIDENHAIN ROD 431.025 User manual

HEIDENHAIN ROD 431.025 User manual

DR. JOHANNES HEIDENHAIN GmbH
Technical support, measuring systems { +49 8669 31-3104 . E-mail [email protected]
744045-92 · Ver02 · Printed in Germany · 5/2015 · H *I_744045-92*
ROD 431.025
ROD 431.026
WELLA1 65B
ANELA1 62S12
BELEA1 30
BEILA2 518963-04
5/2015
Montageanleitung
Mounting Instructions
Instructions de montage
Istruzioni di montaggio
Instrucciones de montaje
Drehgeber für separate Wellenkupplung.
Rotary encoders for separate shaft coupling.
Capteurs rotatifs pour accouplement d'arbre séparé.
Encoder con giunto albero separato.
Generador rotativo acoplamiento al eje por separado.
Lieferumfa g:
Items supplied:
Objet de la four iture:
Standard di fornitura:
Sumi istro:
War hi weise
Warnings
Recomma dtio s
Avvertenze
Adverte cias
Störquellen
Noise sources
Sources parasites
Sorgenti didisturbo
Fuentes de interferencias
> 100 mm
M
> 100 mm > 200 mm
DIN 6912

M5x50

8.8
DIN 7500

CE

2.5x8

StZn
Achtu g: Die Montage und Inbetriebnahme ist von einer qualifizierten Fachkraft unter Beachtung der
örtlichen Sicherheitsvorschriften vorzunehmen.
Zusätzlich muss der Maschinenhersteller/-konstrukteur die erforderlichen weiteren Angaben zur
Endmontage (z.B. Anzugsmomente, Losdrehsicherung für Schrauben ja/nein) für die jeweilige
Anwendung selbst festlegen.
Montageflächen und Schrauben müssen sauber und fettfrei sein.
Die Steckverbindung darf nur spannungsfrei verbunden oder gelöst werden.
Die Anlage muss spannungsfrei geschaltet sein!
Note: Mounting and commissioning is to be conducted by a qualified specialist under compliance with
local safety regulations.
In addition to this the machine manufacturer or designer himself must define the other data required
for final assembly (e.g. tightening torque anti-rotation lock for screws required or not) for the
respective application.
Mounting surfaces and screws must be clean and free of grease.
Do not engage or disengage any connections while under power.
The system must be disconnected from power.
Atte tio : Le montage et la mise en service doivent être assurés par un personnel qualifié dans le
respect des consignes de sécurité locales.
Dautre part, le fabricant/constructeur de la machine doit définir dautres données nécessaires au
montage final (p.ex. couples de serrage, sécurité frein de vis oui/non) pour l´application concernée.
Les surfaces de montage et les vis doivent être propres et exemptes de graisse.
Le connecteur ne doit être connecté ou déconnecté quhors potentiel.
Léquipement doit être connecté hors potentiel!
Attenzione: Il montaggio e la messa in funzione devono essere eseguite da personale qualificato
nel rispetto delle norme di sicurezza locali.
Inoltre il costruttore della macchina deve definire le ulteriori procedure necessarie per completare
il montaggio (ad esempio: coppia di serraggio sicurezza allentamento viti sì/no) di ogni
specifica applicazione.
Superfici di montaggio e vite devono essere pulite e libere da grasso.
I cavi possono essere collegati o scollegati solo in assenza di tensione.
Limpianto deve essere spento!
Ate ció : El montaje y la puesta en marcha deben ser realizados por un especialista cualificado,
observando las prescripciones locales de seguridad.
Adicionalmente, el fabricante/constructor de la máquina debe determinar él mismo el resto de
indicaciones requeridas para el montaje final para cada aplicación en particular (p.ej., par de apriete,
seguro antigiro para tornillos sí/no).
Las superficies de montaje y los tornillos deben estar limpios y sin grasa.
Conectar o desconectar el conector sólo en ausencia de tensión.
¡La instalación debe ser conectada en ausencia de tensión!
Referenzmarkenlage Welle - Kappe
Reference mark for shaft/cap alignment
Position marque de référence arbre - capot
Posizione indice di riferimento per allineamento alberto/coperchio
Posición marca de referencia para alineación eje-carcasa
Allgemei e Hi weise
General Information
I formatio s gé érales
Informazioni generali
I formació ge eral
Ø 4.5 mm
R = 18 mm
Biegeradius Kabel R
Bending radius Cables R
Rayon de courbure R
Piegatura R
Radio de curvatura R
Ku de seitige A schlussmaße (mm)
Required mating dimensions (mm)
Co ditio s requises pour le mo tage (mm)
Quote per il montaggio (mm)
Cotas de mo taje requeridas (mm)
= Lagerung
Bearing
Roulement
Cuscinetto
Rodamiento
A
2°51
¢
45
²
0
0°1
¢
0.02
A
1
10
M5
¬ 8.5
7.5±0.1
15
17
30 min.
A
¬
9.25
55±0.1
¬ 2.3H11
13±0.1
0.2x45°
9 +1
0
Befestigu g der Statorkupplu g (mm)
astening the stator coupling (mm)
ixation de l
accouplement statorique (mm)
issaggio dello statore del giunto (mm)
Fijaci
ó del acoplamie to estátor (mm)
A schlussbelegu g
Pin Layout
Raccordeme ts
Piedinatura
Distribució del co ector
Die Sensorleitung ist intern im Messgerät mit der Versorgungsleitung verbunden.
The sensor line is connected inside the encoder to the supply line.
La ligne sensor est reliée à
la
ligne d aliment
ation
en interne dans le système de mesure.
La linea del sensore è collegata internamente allo strumento di misura con la linea di alimentazione.
La línea de sensor está unida internamente en el aparato de medida con la línea de alimentación.
123456
a
b
Schirm auf Crimphülse
Shield on crimp sleeve
Blindage sur douille crimp
Schermo sulla bussola a crimpare
Blindaje a casquillo de crimpado
1
6
a
b
3a
2b
2a
U
P
Se sor
0 V
0 V
4b 4a
Se sor
U
P
1a
6b
5b
6a 5a
1b
/
Ua2 Ua0
Ua0
Ua1 Ua2
Ua1 UaS
3b
SW4
ID 350 378-14
Mo tage
Assembly
Mo tage
Montaggio
Mo taje
DIN 6912

M5x50

8.8
Md = 5
+
0.5 Nm
2.
Md = 5
+
0.5 Nm
3.
4.
¬ 6x10
SW3/SW4
1.
Schirm auf Gehäuse
Shield on housing
Blindage sur boîtìer
Schermatura sulla carcassa
Blindaje a carcasa
Demo tage i umgekehrter Reihe folge
Disassembly in reverse order
Demo tage da s l'ordre i verse
Smontaggio in sequenza inversa
Desmo taje e orde co trario
Messgerät von Welle abdrücken
Press the encoder off the shaft
Extraire lencodeur de larbre en appuyant
Staccare il sistema di misura dallalbero
Separar el sistema de medida del eje
1.
ca. 360° .... 720°
2.
M10
Elektrischen Widerstand prüfen
Check the electrical resistance
Contrôler la résistance électrique
Verificare la resistenza elettrica
Comprobar la resistencia eléctrica
< 1 W
Schraubensicherung nicht entfernen
Do not remove threadlocker
Ne
pas
retirer
le
blocage
des
vis
Non rimuovere il frenafiletto
No retirar el seguro tornillo

This manual suits for next models

1

Other HEIDENHAIN Media Converter manuals

HEIDENHAIN ECI 119 EnDat01 User manual

HEIDENHAIN

HEIDENHAIN ECI 119 EnDat01 User manual

HEIDENHAIN KCI 120 Dplus User manual

HEIDENHAIN

HEIDENHAIN KCI 120 Dplus User manual

HEIDENHAIN RON 785 User manual

HEIDENHAIN

HEIDENHAIN RON 785 User manual

HEIDENHAIN RON 785 User manual

HEIDENHAIN

HEIDENHAIN RON 785 User manual

HEIDENHAIN LIC 4113 User manual

HEIDENHAIN

HEIDENHAIN LIC 4113 User manual

HEIDENHAIN ERN 461 User manual

HEIDENHAIN

HEIDENHAIN ERN 461 User manual

HEIDENHAIN EIB 5000 User manual

HEIDENHAIN

HEIDENHAIN EIB 5000 User manual

HEIDENHAIN LB 302 User manual

HEIDENHAIN

HEIDENHAIN LB 302 User manual

HEIDENHAIN LIC 4009 User manual

HEIDENHAIN

HEIDENHAIN LIC 4009 User manual

HEIDENHAIN ERO 6070 User manual

HEIDENHAIN

HEIDENHAIN ERO 6070 User manual

HEIDENHAIN LIP 481 V User manual

HEIDENHAIN

HEIDENHAIN LIP 481 V User manual

HEIDENHAIN LS 106 Series User manual

HEIDENHAIN

HEIDENHAIN LS 106 Series User manual

HEIDENHAIN KGM 181 User manual

HEIDENHAIN

HEIDENHAIN KGM 181 User manual

HEIDENHAIN LIC 3107 User manual

HEIDENHAIN

HEIDENHAIN LIC 3107 User manual

HEIDENHAIN TTR ERM 2404 User manual

HEIDENHAIN

HEIDENHAIN TTR ERM 2404 User manual

HEIDENHAIN LIDA 477 User manual

HEIDENHAIN

HEIDENHAIN LIDA 477 User manual

HEIDENHAIN LIP 471R User manual

HEIDENHAIN

HEIDENHAIN LIP 471R User manual

HEIDENHAIN LIDA 473 User manual

HEIDENHAIN

HEIDENHAIN LIDA 473 User manual

HEIDENHAIN ERA 7480 User manual

HEIDENHAIN

HEIDENHAIN ERA 7480 User manual

HEIDENHAIN LC 2 1 Series User manual

HEIDENHAIN

HEIDENHAIN LC 2 1 Series User manual

HEIDENHAIN LP 111 User manual

HEIDENHAIN

HEIDENHAIN LP 111 User manual

HEIDENHAIN ERN 1387 User manual

HEIDENHAIN

HEIDENHAIN ERN 1387 User manual

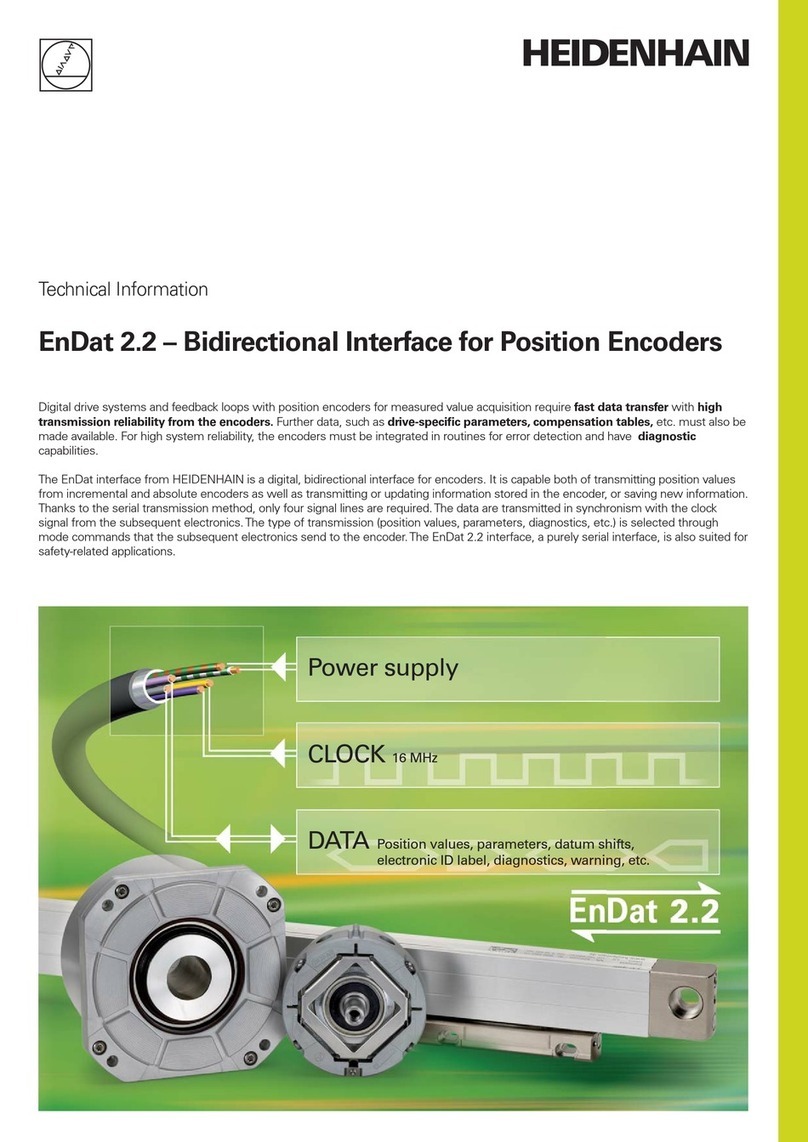
HEIDENHAIN EnDat 2.2 Manual

HEIDENHAIN

HEIDENHAIN EnDat 2.2 Manual

HEIDENHAIN ND 220 User manual

HEIDENHAIN

HEIDENHAIN ND 220 User manual

Popular Media Converter manuals by other brands

Z3 Technology Z3-HE4K-01 User instructions

Z3 Technology

Z3 Technology Z3-HE4K-01 User instructions

Baumer ATD 2A Installation and operating instruction

Baumer

Baumer ATD 2A Installation and operating instruction

Boston Acoustics Horizon TRio manual

Boston Acoustics

Boston Acoustics Horizon TRio manual

DRAKE DUC864 manual

DRAKE

DRAKE DUC864 manual

Philips MCM2250 Mounting instructions

Philips

Philips MCM2250 Mounting instructions

AV TOOL AVT-3190HD instruction manual

AV TOOL

AV TOOL AVT-3190HD instruction manual

Brompton Technology Tessera M2 user manual

Brompton Technology

Brompton Technology Tessera M2 user manual

Moxa Technologies NPort 5100A Series Quick installation guide

Moxa Technologies

Moxa Technologies NPort 5100A Series Quick installation guide

Transition Networks SBFTF1011-140 user guide

Transition Networks

Transition Networks SBFTF1011-140 user guide

ADF HD67059-232-B2 user manual

ADF

ADF HD67059-232-B2 user manual

Imagine communications Selenio 6800 HUC6800+C Installation and operation manual

Imagine communications

Imagine communications Selenio 6800 HUC6800+C Installation and operation manual

NAIM DAC-V1 Reference manual

NAIM

NAIM DAC-V1 Reference manual

Moxa Technologies TCF-142-M-ST Quick installation guide

Moxa Technologies

Moxa Technologies TCF-142-M-ST Quick installation guide

MultiChoice 50645 owner's manual

MultiChoice

MultiChoice 50645 owner's manual

Gefen EXT-HD-3G-C user manual

Gefen

Gefen EXT-HD-3G-C user manual

MuxLab 500021 Installation instructions manual

MuxLab

MuxLab 500021 Installation instructions manual

NetUP Streamer HD v3 8-24x user manual

NetUP

NetUP Streamer HD v3 8-24x user manual

Vigitron MaxiiFiber Vi50000U Installation

Vigitron

Vigitron MaxiiFiber Vi50000U Installation

manuals.online logo
manuals.online logoBrands
  • About & Mission
  • Contact us
  • Privacy Policy
  • Terms and Conditions

Copyright 2025 Manuals.Online. All Rights Reserved.