manuals.online logo
Brands
  1. Home
  2. •
  3. Brands
  4. •
  5. Henny Penny
  6. •
  7. Commercial Food Equipment
  8. •
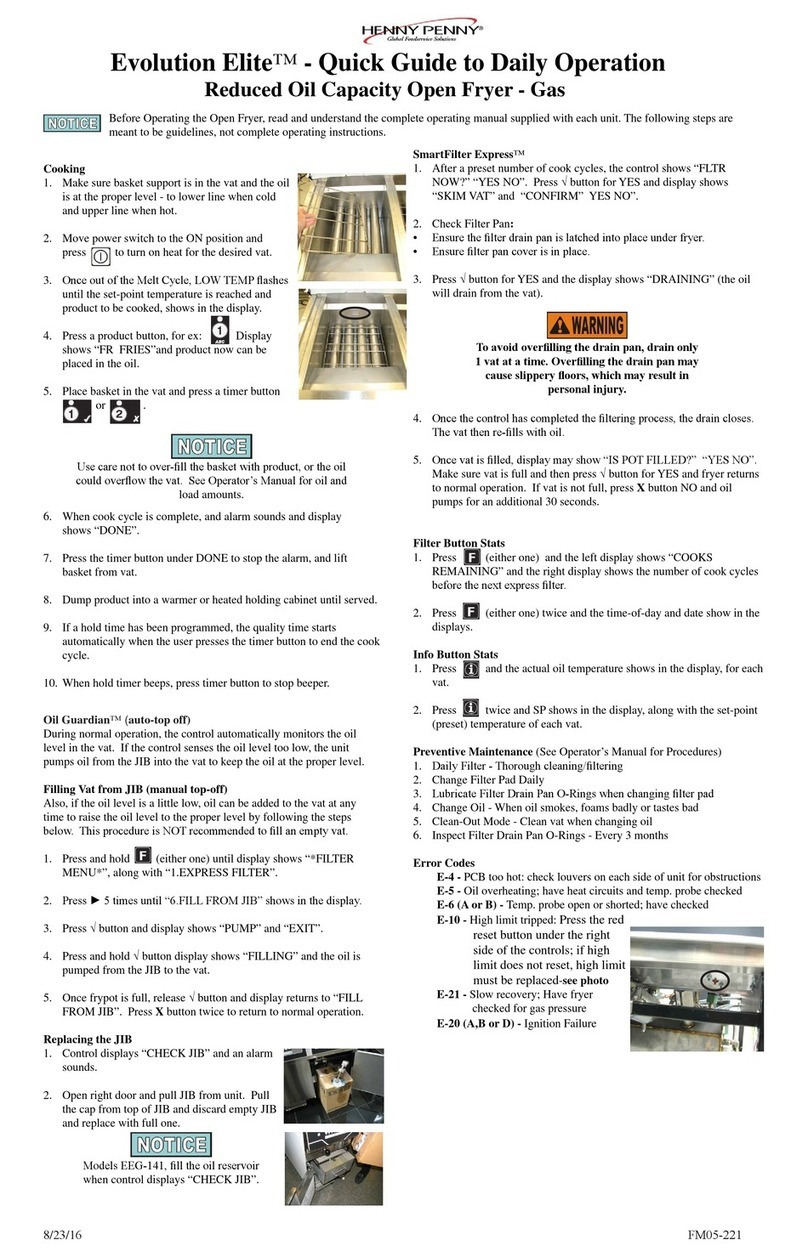
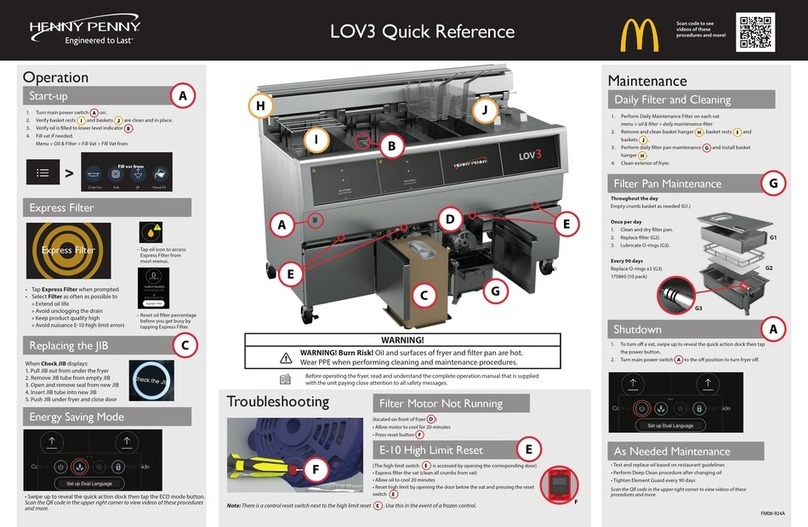
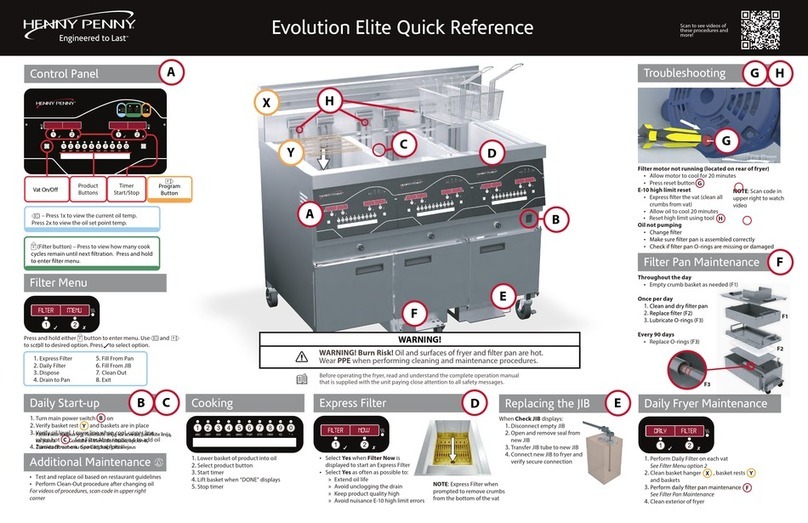
  9. Henny Penny McDonald's LOV MVE 07X Electric Series User manual

Henny Penny McDonald's LOV MVE 07X Electric Series User manual

ROTINA DE FILTRAGEM
1. O óleo deve estar quente
(temperatura de cozimento).
Pressione o botão TEMP para
conrmar a temperatura.
O ÓLEO QUENTE PROVOCAQUEIMADURAS GRAVES.
Se houver algum problema, consulte o manual ou entre em contato com a Henny Penny Corp. 1-800-417-8405 ou 937-456-8405
(ambos nos EUA)
Estas instruções são apenas diretrizes, e não instruções de operação completas. Leia e compreenda totalmente o manual do operador
fornecido com cada unidade.
Vista os equipamentos de proteção: use apenas equipamentos de segurança aprovados pelo McDonald’s, incluindo
avental, protetor facial e luvas.
2. Gire a alavanca preta de limpeza para
a posição de ltragem (fechada) e
verique se a bandeja está no lugar.
3. Pressione para que o visor exiba
“OFF”.
4. Gire a alavanca vermelha do
dreno para abrir o dreno. 5. Depois que o óleo for drenado,
limpe o tanque.
6. Gire a alavanca amarela de retorno
para a posição aberta para ligar
a bomba.
7. Feche a alavanca vermelha
de drenagem. 8. Pressione para ligar
o visor.
9. Quando o tanque estiver cheio, deixe
o óleo borbulhar por 15 segundos
e então gire a alavanca amarela de
retorno para a posição fechada
para parar a bomba.
10. “IS POT FILLED” “YES
NO” (o tanque está cheio? sim
não) será exibido no visor.
Verique se o tanque está
cheio e pressione .
11. Começando na etapa 2, repita
as etapas acima para
cada tanque.
IMPORTANTE: Depois que
o último tanque for ltrado, gire
a alavanca de limpeza para
a posição COOK (aberta).
3/3/2015
Portuguese - FM08-459-A
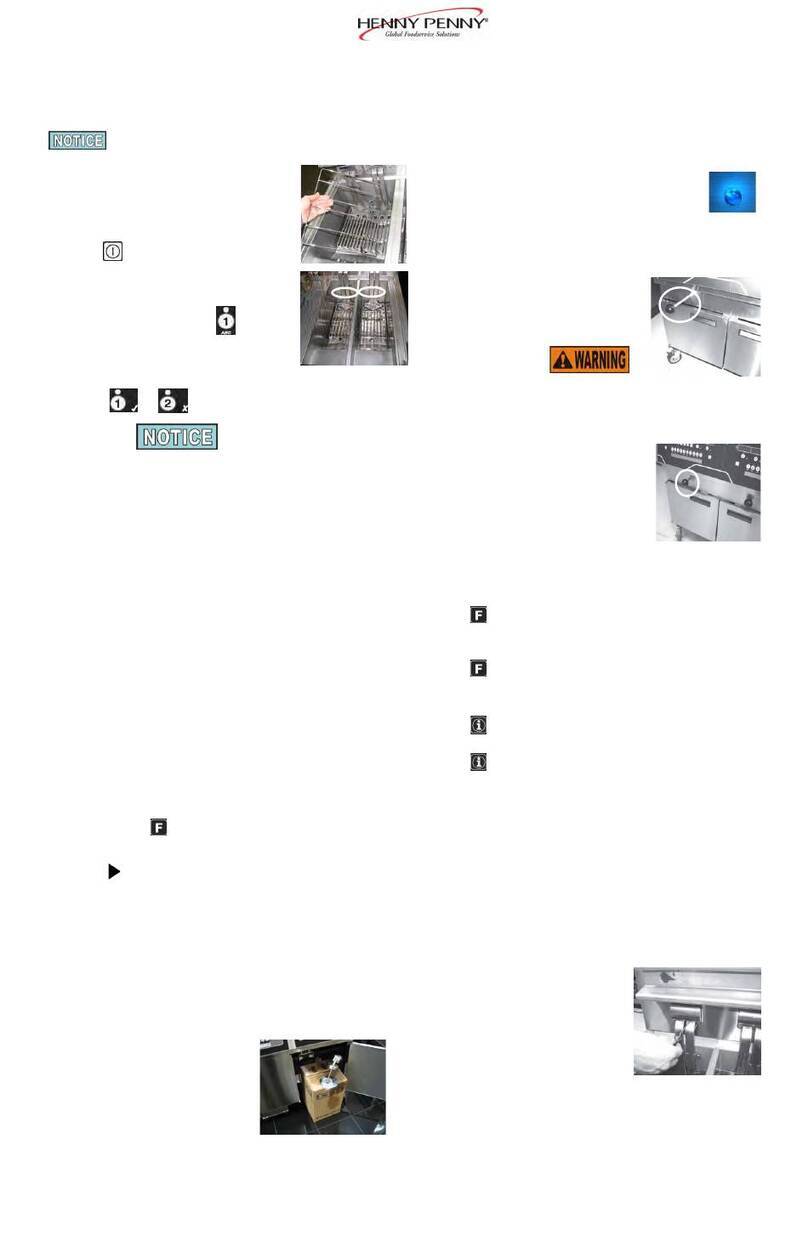
FILTER ROUTINE
1. Oil must be hot
(cooking temperature). Press
the TEMP button to conrm the
temperature.
HOT OILWILLCAUSE SEVERE BURNS.
Any problems, refer to manual or contact Henny Penny Corp. 1-800-417-8405, or 937-456-8405.
These instructions are meant to be guidelines, not complete operating instructions. Read and understand the complete operator’s manual
supplied with each unit.
Put on protective gear: Use all McDonald’s approved safety equipment including, apron, face shield and gloves.
2. Turn black purge handle to FILTER
(CLOSE) position, and make sure
lter pan is in place.
3. Press so the display reads
“OFF”.
4. Turn red drain handle to open
drain. 5. Once oil is drained, clean vat. 6. Turn yellow return handle to
open position to start pump.
7. Close red drain handle. 8. Press to turn the display
ON.
9. Once vat is full, let oil bubble
for 15seconds and then turn
yellow return handle to closed
position to stop pump.
10. “IS POT FILLED” “YES NO”
shows in display. Conrm vat
is full and press .
11. Starting with step 2, repeat
above steps to lter each vat. IMPORTANT: Once last vat
is ltered, turn purge handle to
COOK (OPEN) position.
Guia de alerta do McDonald’s
ERRO DE FILTRAGEM “IS POT FILLED?” (o tanque está cheio?) = Durante o procedimento de ltragem,
o visor pode exibir “IS POT FILLED?”. Se o tanque estiver cheio, pressione o botão para retomar a operação
normal. Se o tanque não estiver cheio, feche a válvula de drenagem, abra a válvula de abastecimento e pressione
o botão Filter para bombear o óleo da bandeja para o tanque.
“E-31” “HEATING ELEMENTSARE UP” (há elementos de aquecimento elevados) = Elementos de aquecimento
foram elevados durante a manutenção do ltro e não foram abaixados. Abaixe os elementos de aquecimento.
“E-10” “HI LIMIT TRIPPED” (limite máximo disparado) = Deixe a fritadeira esfriar por 15 a 20 minutos
e restabeleça o limite máximo pressionando e liberando o lado elevado da chave do tanque que não está operando;
há uma única chave de restabelecimento atrás da porta de cada reservatório. Se o limite máximo não for
restabelecido, chave um técnico.
“E-15” “DRAIN IS OPEN” (dreno aberto) =Verique se a alavanca de drenagem está completamente fechada.
FRYER ON BUT NOT HEATING OR “E-22” “NO HEAT” (fritadeira ligada, mas sem aquecer; ou E-22 - sem
aquecimento) = Tanque desconectado ou disjuntor desligado
Se houver algum problema, consulte o manual ou entre em contato com a Henny Penny Corp. 1-800-417-8405 ou 937-456-8405
(ambos nos EUA)
Estas instruções são apenas diretrizes, e não instruções de operação completas. Leia e compreenda totalmente o manual do operador
fornecido com cada unidade.
O ÓLEO QUENTE PROVOCAQUEIMADURAS GRAVES.
3/3/2015
Portuguese - FM08-458-A
McDonald’s Alert Guide
FILTER ERROR “IS POT FILLED?” = During the ltering procedure, the display may show “IS POT FILLED?”.
If the vat is full, press the button to resume normal operation. If the vat is not full, close drain valve and open ll
valve and press the Filter Button to pump the oil from the pan back into the vat.
“E-31” “HEATING ELEMENTSARE UP” = Heating elements have been left up during maintenance lter. Lower
heating elements.
“E-10” “HI LIMIT TRIPPED” = Allow fryer to cool for 15-20 minutes and reset high limit by pressing down and
releasing raised side of the switch for the vat that is not operating; a single reset switch is located behind the door of
each well. If high limit does not reset, call for service.
“E-15” “DRAIN IS OPEN” = Make sure drain handle is completely closed.
FRYER ON BUT NOT HEATING OR “E-22” “NO HEAT” = Vat unplugged or circuit breaker off
Any problems, refer to manual or contact Henny Penny Corp. 1-800-417-8405, or 937-456-8405.
These instructions are meant to be guidelines, not complete operating instructions. Read and understand the complete operator’s manual
supplied with each unit.
HOT OILwILLcAUSE SEvERE BURNS.
1. Mantenha os botões e pressionados ao mesmo tempo até que LEVEL - 1 (nível 1) seja exibido no visor. Libere os botões.
2. O visor exibirá “LEVEL 1” (nível 1) e “ENTER CODE” (inserir código). Insira o código 1, 2, 3, 4. “PRODUCT” (produto)
e “SELECTN” (seleção) serão exibidos nos visores.
3. Pressione o botão e ‘SELECT PRODUCT’(selecionar produto) e “FR FRIES” (fritas) ou “NUGGETS” serão exibidos
nos visores.
4. Use os botões ◄ e ► para navegar entre os 40 produtos ou pressione o botão do produto desejado.
5. Pressione o botão , o produto será exibido no visor esquerdo e “MODIFY?” (alterar?) e “YES NO” (sim não) serão
exibidos no visor direito.
Pressione o botão para alterar esse produto ou o botão para escolher outro produto.
6. Se o botão for pressionado, use os botões de produtos para inserir o nome do produto como se estivesse digitando em um
celular. Quando a letra desejada for exibida no visor, pressione o botão ► para prosseguir para a próxima letra.
7. Quando inserir o nome completo, pressione o botão ▼ e “COOK TIME” (tempo de cozimento) será exibido no visor. Use os
botões de produtos para alterar o tempo, em minutos e segundos, até um máximo de 59:59.
8. Pressione o botão ▼ e “TEMP” (temperatura) será exibido no visor. Pressione os botões de produtos para alterar a temperatura.
O intervalo de temperatura é de 190°F (88°C) a 380°F (193°C).
9. Pressione o botão ▼ e “COOK ID” (ID do cozimento) será exibido no visor. Insira o nome abreviado do produto (por ex.: NUG)
10. Pressione o botão ▼ e “DUTY 1” (serviço 1) será exibido no visor. Pressione os botões de produtos para ajustar um alarme (por
ex.: 0:30 ajusta um alarme para 30 segundos depois do início do ciclo de cozimento).
11. Pressione o botão ▼ e “DUTY 2” (serviço 2) será exibido no visor e um segundo alarme poderá ser programado.
12. Pressione o botão ▼ e “QUAL TMR” (temporizador de qualidade) será exibido no visor. Pressione os botões de produtos para
ajustar um tempo de espera.
13. Pressione o botão ▼ até que “AIF DISABLE” (desativar AIF) seja exibido no visor junto com “YES” (sim) ou “NO” (não).
Usando os botões ◄ e ►, mude o visor para “YES” (sim) se o produto não tiver que ser incluído na operação de ltragem
intermitente ou “NO” (não) se ele tiver.
14. Pressione o botão ▼ até que “ASSIGN BTN” (atribuir botão) seja exibido no visor junto com o produto (por ex.: NUGGETS).
Se o produto já tiver um botão de produto atribuído a ele, o LED estará aceso. Para atribuir outros botões de produtos ao produto
especíco, mantenha o botão de produto pressionado durante 3 segundos e o LED permanecerá aceso. Para remover um produto
de um botão, mantenha o botão do produto com o LED aceso pressionado e o LED se apagará.
15. Para programar outro produto, pressione o botão e “SELECT PRODUCT” (selecionar produto) será exibido no visor.
Prossiga com a etapa 3 acima.
16. Pressione o botão 3 vezes para encerrar a programação.
Para adicionar ou alterar um
item do menu
3/3/2015
Portuguese - FM08-457-A
1. Press and hold and buttons at same time until LEVEL - 1 shows in the display. Release buttons.
2. Displays show “LEVEL 1” and “ENTER CODE”. Enter code 1, 2, 3, 4. “PRODUCT” and “SELECTN” show in the displays.
3. Press button and ‘SELECT PRODUCT’and “FR FRIES” or “NUGGETS” show in the displays.
4. The ◄ and ► buttons scroll through the 40 products, or press the desired product button.
5. Press button and the product shows in the left display and “MODIFY?”, and “YES NO” shows in the right display.
Press button to change this product, or press button to choose another product.
6. If button was pressed, use the product buttons to enter product name like entering text on your cell. Once the desired letter
shows in the display, press ► button to continue to the next letter.
7. Once name is complete, press ▼ button and “COOK TIME” shows in the display. Use the product buttons to change the time in
minutes and seconds, to a maximum of 59:59.
8. Press ▼ button and “TEMP” shows in the display. Press the product buttons to change the temperature. The temperature range
is 190°F (88°C) to 380°F (193°C).
9. Press ▼ button and “COOK ID” shows in the display. Enter abbreviated product name (Ex: NUG)
10. Press ▼ button and “DUTY 1” shows in the display. Press the product buttons to set an alarm (Ex: 0:30 sets an alarm at 30
seconds after the start of the cook cycle.
11. Press ▼ button and “DUTY 2” shows in the display, and a second alarm can be programmed.
12. Press ▼ button and “QUAL TMR” shows in the display. Press product buttons to set holding time.
13. Press ▼ button and “AIF DISABLE” shows in the display and “YES” or “NO”. Using ◄ and ► buttons, change the display to
“YES” if that product is to not be included in the automatic intermittent ltration counts, or “NO” if it is to be included.
14. Press ▼ button and“ASSIGN BTN” shows in the display, along with the product (ex: NUGGETS). If this product already has
a product button assigned to it, that LED will be lit. To assign other product buttons to that product, press and hold the product
button for 3 seconds and that LED stays lit. To remove a product from a button, press and hold the product button with a lit LED
and the LED goes out.
15. To program another product, press button and “SELECT PRODUCT” shows in display. Continue with step 3 above.
16. Press button 3 times to end programming.
To Add or Change a Menu Item

Other Henny Penny Commercial Food Equipment manuals
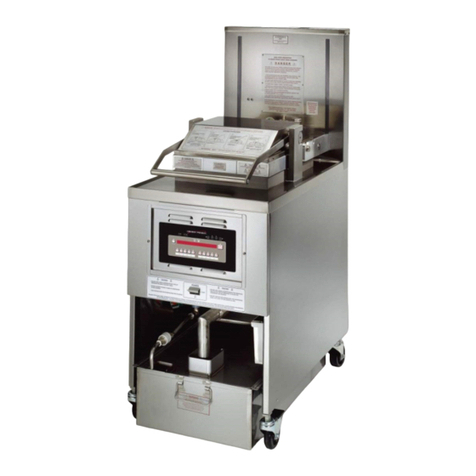
Henny Penny EVOLUTION ELITE EEG-141 User manual

Henny Penny

Henny Penny EVOLUTION ELITE EEG-141 User manual

Henny Penny Velocity Series User manual

Henny Penny

Henny Penny Velocity Series User manual

Henny Penny Wendy's EvolutionElite EEG-253 User manual

Henny Penny

Henny Penny Wendy's EvolutionElite EEG-253 User manual

Henny Penny LOV3 User manual

Henny Penny

Henny Penny LOV3 User manual

Henny Penny Evolution Elite Gas 16X User manual

Henny Penny

Henny Penny Evolution Elite Gas 16X User manual

Henny Penny LOV 100 Series User manual

Henny Penny

Henny Penny LOV 100 Series User manual

Henny Penny KFC KVE 07X User manual

Henny Penny

Henny Penny KFC KVE 07X User manual

Henny Penny HHC-98 Series User manual

Henny Penny

Henny Penny HHC-98 Series User manual

Henny Penny Evolution Elite 14X User manual

Henny Penny

Henny Penny Evolution Elite 14X User manual

Henny Penny LOV3 User manual

Henny Penny

Henny Penny LOV3 User manual

Henny Penny LOV3 User manual

Henny Penny

Henny Penny LOV3 User manual

Henny Penny HHC-901 User manual

Henny Penny

Henny Penny HHC-901 User manual

Henny Penny LOV3 User manual

Henny Penny

Henny Penny LOV3 User manual

Henny Penny Evolution Elite Gas 14X User manual

Henny Penny

Henny Penny Evolution Elite Gas 14X User manual

Henny Penny PFE-590 User manual

Henny Penny

Henny Penny PFE-590 User manual
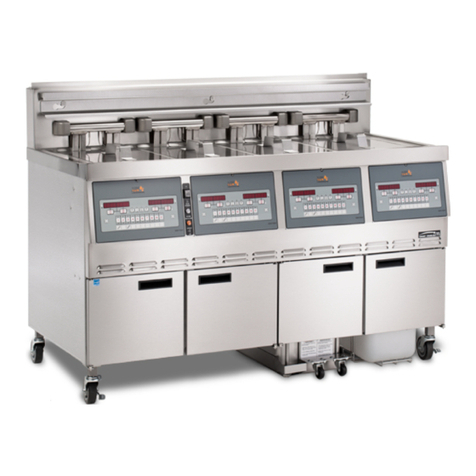
Henny Penny FlexFusion FPG-221 Operating and maintenance instructions

Henny Penny

Henny Penny FlexFusion FPG-221 Operating and maintenance instructions

Henny Penny CW-216 User manual

Henny Penny

Henny Penny CW-216 User manual

Henny Penny LOV3 User manual

Henny Penny

Henny Penny LOV3 User manual

Henny Penny ODS-450 User manual

Henny Penny

Henny Penny ODS-450 User manual

Henny Penny Wendy's Evolution Elite EEG-153 User manual

Henny Penny

Henny Penny Wendy's Evolution Elite EEG-153 User manual

Henny Penny Evolution Elite EEE-141 User manual
Henny Penny

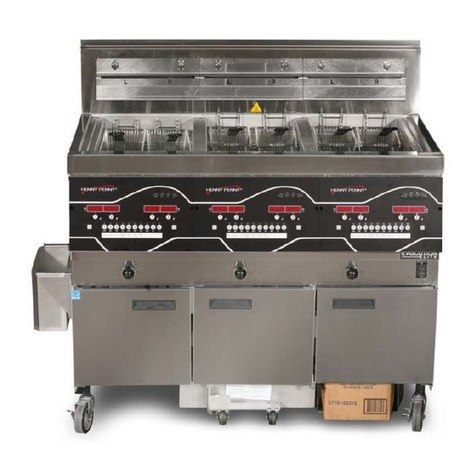
Henny Penny Evolution Elite EEE-141 User manual

Henny Penny FlexFusion FPG-615 User manual

Henny Penny

Henny Penny FlexFusion FPG-615 User manual

Henny Penny Evolution Elite Gas 14X User manual

Henny Penny

Henny Penny Evolution Elite Gas 14X User manual

Henny Penny FlexFusion FPG-221 Operating instructions

Henny Penny

Henny Penny FlexFusion FPG-221 Operating instructions

Popular Commercial Food Equipment manuals by other brands

Rosko JULIEN RO-FFG-115-N installation guide

Rosko

Rosko JULIEN RO-FFG-115-N installation guide

Structural Concepts grocerant DP8HP60WD.5718B Installation & operating manual

Structural Concepts

Structural Concepts grocerant DP8HP60WD.5718B Installation & operating manual

Diamond PPL-800 manual

Diamond

Diamond PPL-800 manual

Hendi 630402 manual

Hendi

Hendi 630402 manual

Bonnet Neve MULTITINY PLUS User instructions

Bonnet Neve

Bonnet Neve MULTITINY PLUS User instructions

Festive York YB7 Installation and operating manual

Festive

Festive York YB7 Installation and operating manual

Rühle AR 20 Quick installation guide

Rühle

Rühle AR 20 Quick installation guide

CARTER-HOFFMANN LOGIX7 Series Owner's and operator's manual

CARTER-HOFFMANN

CARTER-HOFFMANN LOGIX7 Series Owner's and operator's manual

Perlick TOBIN ELLIS LIMITED EDITION SIGNATURE Series Installation and operation instructions

Perlick

Perlick TOBIN ELLIS LIMITED EDITION SIGNATURE Series Installation and operation instructions

Hendi SALAMANDER 264119 user manual

Hendi

Hendi SALAMANDER 264119 user manual

Angelo Po 090GRG Use and installation  manual

Angelo Po

Angelo Po 090GRG Use and installation manual

MBM EC408/SC installation instructions

MBM

MBM EC408/SC installation instructions

Antunes MES-1200 manual

Antunes

Antunes MES-1200 manual

Vollrath FlexVent installation manual

Vollrath

Vollrath FlexVent installation manual

Moffat MH9 OPERATING & SERVICE MANUAL

Moffat

Moffat MH9 OPERATING & SERVICE MANUAL

Fri-Jado STO 6 - I user manual

Fri-Jado

Fri-Jado STO 6 - I user manual

Feli NCM-102 Operation manual

Feli

Feli NCM-102 Operation manual

Daub DR user manual

Daub

Daub DR user manual

manuals.online logo
manuals.online logoBrands
  • About & Mission
  • Contact us
  • Privacy Policy
  • Terms and Conditions

Copyright 2025 Manuals.Online. All Rights Reserved.