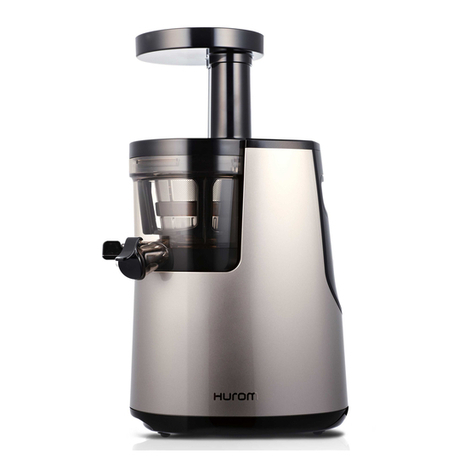
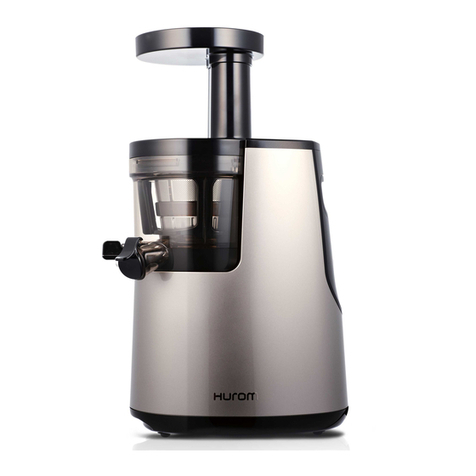
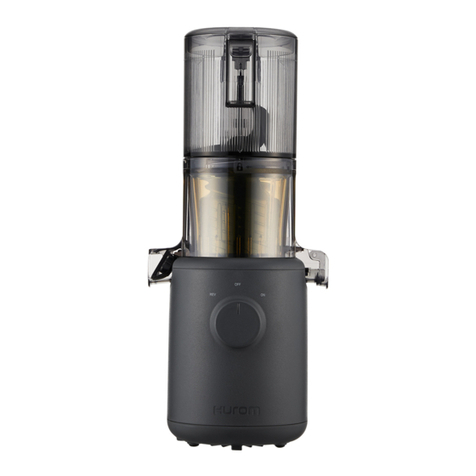
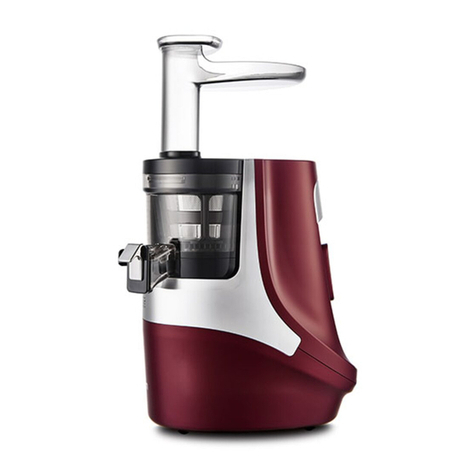
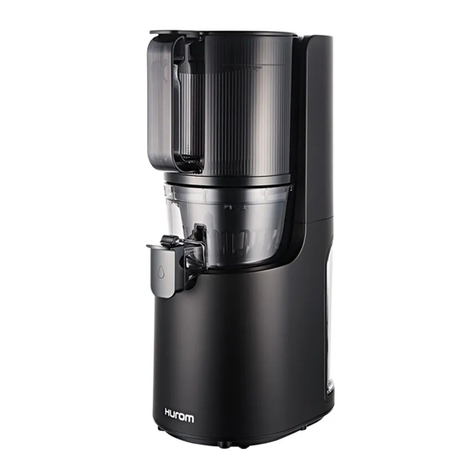
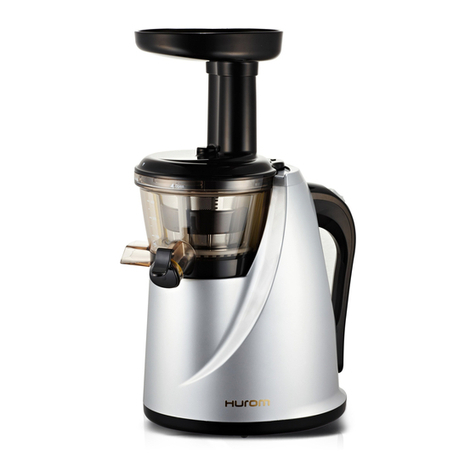
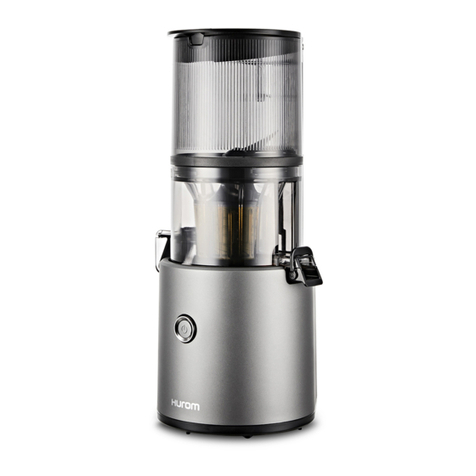
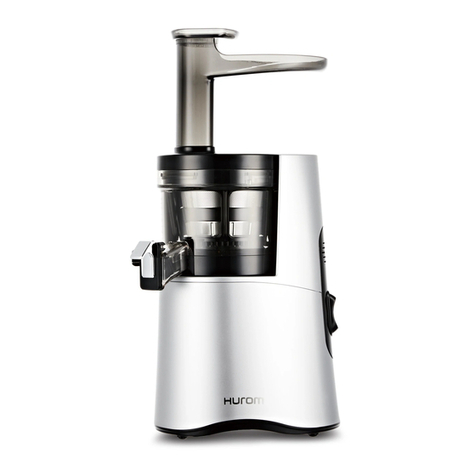
HUROM H320N Series User manual

※ 발주용 인쇄시 본 페이지(시방서) 삭제 후 진행
시방서
DESIGN SPECIFICATION
R&D2본부 디자인팀 자재명(자재번호 / 파일명 / 버전) : 작성일 :
❶ 사이즈
❷ 인쇄도수
❸ 지류
❹ 페이지
❺ 제본
❻ 후가공
1. 자재 사양
2. 기재 언어
3. 제작 및 수정일자
4. 수정사항
※ 발주용 인쇄 시 필히 본 페이지(시방서) 삭제 후 진행하세요. 본 파일은 시방과 인쇄파일을 포함합니다. 유관의 부서와 업체의 견적 / 사양 / 발주 인쇄 진행 / 품질검사 외에는 사용을 금합니다.
인쇄물 시방서 개정 : 19' 11
전주경 4DC010914 사용설명서 통합 H320N Series 유럽,미국권역_V.01 2021. 03. 24
150 x 220 mm
표지- 1도 인쇄
내지- 1도 인쇄
M 메트지 100g
76페이지
중철
없음
영문, 독일어, 프랑스어, 스페인어,
이태리어, 러시아어, 폴란드어
1. 2022.03.24_V.01
1. 해당없음

p03 English p14 Deutsch p24 français p36 español p46 italiano p56 русский p66 Polski
TM

02
P.03-P.13 English
Instruction Manual | H320N Series
[ Home use only / Warranty not included ]
P.66-P.75 Polski
Instrukcja użytkowania | Seria H320N
[ Tylko do użytku domowego / Gwarancja nie jest wliczona w cenę ]
P.14-P.23 Deutsch
Bedienungsanleitung | Serie H320N
[ Nur für den privaten Gebrauch / Garantiekarte nicht eingeschlossen ]
P.24-P.35 Français
Mode d'emploi | SérieH320N
[ Utilisation domestique uniquement / Garantie non incluse ]
P.36-P.45 Español
Manual de instrucciones | Serie H320N
[Solo para uso doméstico/Garantía no incluida]
P.46-P.55 Italiano
Manuale di istruzioni | Serie H320N
[ Solo per uso domestico / Garanzia non inclusa ]
P.56-P.65 Русский
Руководство пользователя | H320N Series
[Только для домашнего использования. Гарантия не включена]

03
English
IMPORTANT SAFEGUARDS
WHEN USING ELECTRICAL APPLIANCES, BASIC SAFETY PRECAUTIONS SHOULD
ALWAYS BE FOLLOWED INCLUDING THE FOLLOWING:
WHEN USING ELECTRICAL APPLIANCES, BASIC SAFETY PRECAUTIONS SHOULD
ALWAYS BE FOLLOWED. READ ALL INSTRUCTIONS.
TO PROTECT AGAINST RISK OF ELECTRICAL SHOCK, DO NOT PUT THE MAIN
BODY (MOTOR) IN WATER OR ANY OTHER LIQUID.
THIS APPLIANCE IS NOT INTENDED FOR USE BY PERSONS (INCLUDING
CHILDREN) WITH REDUCED PHYSICAL, SENSORY, OR MENTAL CAPABILITIES, OR
LACK OF EXPERIENCE AND KNOWLEDGE, UNLESS THEY ARE CLOSELY
SUPERVISED AND INSTRUCTED CONCERNING USE OF THE APPLIANCE BY A
PERSON RESPONSIBLE FOR THEIR SAFETY. CLOSE SUPERVISION IS NECESSARY
WHEN ANY APPLIANCE IS USED BY OR NEAR CHILDREN. CHILDREN SHOULD BE
SUPERVISED TO ENSURE THAT THEY DO NOT PLAY WITH THE APPLIANCE.
TURN THE APPLIANCE OFF, THEN UNPLUG FROM THE OUTLET WHEN NOT IN
USE, BEFORE ASSEMBLING OR DISASSEMBLING PARTS AND BEFORE
CLEANING. TO UNPLUG, GRASP THE PLUG AND PULL FROM THE OUTLET.
NEVER PULL FROM THE POWER CORD.
AVOID CONTACTING MOVING PARTS. DO NOT ATTEMPT TO DEFEAT ANY SAFETY
INTERLOCK MECHANISMS.
DO NOT OPERATE ANY APPLIANCE WITH A DAMAGED CORD OR PLUG, OR AFTER
THE APPLIANCE MALFUNCTIONS, OR IS DROPPED OR DAMAGED IN ANY
MANNER. RETURN APPLIANCE TO THE NEAREST AUTHORIZED SERVICE
FACILITY FOR EXAMINATION, REPAIR OR ELECTRICAL OR MECHANICAL
ADJUSTMENT.
THE USE OF ATTACHMENTS NOT RECOMMENDED OR SOLD BY THE
MANUFACTURER MAY CAUSE FIRE, ELECTRIC SHOCK OR INJURY.
DO NOT LET CORD HANG OVER EDGE OF TABLE OR COUNTER.
ALWAYS MAKE SURE HOPPER IS SECURELY FASTENED IN PLACE BEFORE
MOTOR IS TURNED ON. DO NOT UNFASTEN HOPPER WHILE JUICER IS IN
OPERATION.
BE SURE TO TURN SWITCH TO OFF POSITION AFTER EACH USE OF YOUR JUICER.
MAKE SURE THE MOTOR STOPS COMPLETELY BEFORE DISASSEMBLING.
DO NOT PUT YOUR FINGERS OR OTHER OBJECTS INTO THE JUICER WHILE IT IS
IN OPERATION. IF FOOD BECOMES LODGED IN OPENING, USE FOOD PUSHER OR
ANOTHER PIECE OF FRUIT OR VEGETABLE TO PUSH IT DOWN. WHEN THIS
METHOD IS NOT POSSIBLE, TURN THE MOTOR OFF AND DISASSEMBLE JUICER
TO REMOVE THE REMAINING FOOD.
DO NOT USE OUTDOORS.
DO NOT PLACE ON OR NEAR A HOT GAS OR ELECTRIC BURNER OR IN AHEATED
OVEN.
DO NOT USE APPLIANCE FOR OTHER THAN INTENDED USE.
SAVE THESE INSTRUCTIONS
1.
2.
3.
4.
5.
6.
7.
8.
9.
10.
11.
12.
13.
14.

04
CONTENTS
P.04
P.05
P.06
P.08
P.09
P.10
P.11
P.12
P.13
01 Make sure read <Precautions for Safe Use>.
02 Follow <Precautions for Safe Use>.
03 Precautions are classified as follows.
1. Read 'Safety Precautions' (p. 04~05) and use the
appliance properly.
2. After reading the manual, keep it in a convenient
location for future reference.
3. Do not use it abroad which has different power
supply and voltage.
4. Any quality improvements is subject to change
without notice.
Before Reading Manual
1. Precautions for Safe Use
Do not insert any foreign objects such as a finger
or iron pin into any crack or hole in the product
body. It may cause a fire, electric shock, injury and/or
malfunction. For after-sales service and maintenance
of a product, contact the HUROM Customer Service
Center.
When the power plug is damaged, do not repair or
remodel it yourself and, instead, visit an after-sales
service center or branch store.
Do not get wet or splash water on the product body.
Make sure that no water or foreign material goes into
the product's power switch.
Do not control the power switch with wet hands.
For safety, ground the power outlet at all times.
Also, do not ground it to a gas pipe, plastic water pipe,
or telephone line. Make sure to use a grounded outlet.
Do not attempt to dismantle any parts of the
chamber set or insert foreign objects such as a
finger or spoon into the inlet or juice outlet during
operation.
Do not use it within children's reach. Children
should be carefully supervised so that they do not
play with this device. There is a risk of an injury or
malfunction if children accidentally hit and knock it
down.
A person who is not familiar with handling the
product should not use it him/herself. Anyone with
physical or mental problems or who lacks experience
and knowledge should not use it without a supervisor
present.
Donotusetheproduct while wearingorholdingany
items with magnetic force (e.g. magnetic bracelets).
Placing magnetic objects near the product may cause
malfunction.
Caution A violation of any of the caution marks
may lead to a serious injury or death.
Do not operate the product unless the product body
set and chamber set are securely connected.
If there is a gas leak, etc., do not touch the power
cord but, instead, open the windows and thoroughly
ventilate the area.
Ifthescrewstopsrotatingduringoperation,press
the operation switch in the [REV] direction for 3 to
5 seconds to activate the reverse operation. Then,
once the reverse rotation is completely stopped,
press the switch again in the [ON] direction. If the
product is continuously in the stopped state, it may
overheat the motor and cause damage to parts and
impairment of functions. If the problem continues,
stop the product and contact the HUROM Customer
Center.
Do not move the product body, or disassemble
or assemble the chamber set or parts during
operation. Make sure to stop the operation and pull
out the power cord beforehand.
Warning A violation of any of the warning
marks may cause a serious injury or death.
Do not insert or pull the power cord with wet hands.
Do not use any current other than that specified
on the warranty card and product specifications. It
may cause electric shock, fire and/or performance
impairment. Connecting to a different voltage may
reduce the motor's lifespan or lead to a malfunction.
Securely insert the power cord plug all the way into
an outlet.
Do not bend, tie, damage or pull the power cord by
force, or place it near a high temperature or heat
such as a gas stove. Also, do not place any heavy
object on top of the product, wedge it into a narrow
space, or alter it.
Do not remodel it under any circumstances. Also,
do not attempt to dismantle or repair it yourself.
1. Precautions for Safe Use
2. Precautions During Use
3. Power Switch Guide /
4. Precautions Before Juicing
5. How to Assemble
6. Assembly and Disassembly of Silicone
7. How to Use
8. When the Screw Stops during Operation
9. How to Disassemble and Clean
10. Before Requesting Repair

05
English
When using the product, be careful so that a tie,
long necklace, scarf, etc. doesn’t get into the inlet.
Place this product on an even and stable surface
for use.
When inserting ingredients into the inlet, do not
use a chopstick, spoon, any hard object or anything
other than the pusher.
Do not use the product for more than 30 minutes
continuously each time. It may overheat the motor
to cause malfunction. To operate it again, completely
stop the device for about 5 minutes before use.
Do not exert any excessive shock to or drop the
product.
If the device produces any unusual sounds,
excessive heat or smoke, stop using it immediately
and contact the Customer Service Center. The smell
experienced when using a new product will naturally
go away over time.
Pull the power cord plug from the outlet when it is
not in use. Also, when pulling the power cord, make
sure to grab the plug to pull it.
Do not clean the product at a temperature of 80°C
or higher. Do not place it in a dishwasher, dryer,
microwave, etc. It may cause malfunction and/or
deformation of parts.
The product weighs approximately 6.2 kg. When
moving the product, make sure to securely hold
the product body with both hands. If you move it by
holding just the chamber or the sides of the product
body, the body may fall to cause a bodily injury or
malfunction.
Do not use this household-use product for
commercial purposes. Excessive extraction of a
large amount of ingredients may cause damage
to the parts. In case it is to be used for commercial
purposes, please contact the Customer Service
Center on the method of use.
Make sure to thoroughly understand how to
prepare ingredients and prepare them properly
before inserting them.
-Poorly prepared ingredients may hinder the
extraction process and/orcause damage tothe product.
Ingredients in need of extra care
- When using boiled ingredients, such as boiled
potatoesandboiled sweetpotatoes,or softingredients,
such as bananas, ripened kiwis, or tomatoes, alone,
the juice may pool inside the chamber and not be
extracted properly. Insert only a small amount or use
them with other ingredients.
-When inserting walnuts, peanuts, almonds,
sunflower seeds, pine nuts, beans, etc., add only a
2. Precautions During Use
small amount or add them with other ingredients
after soaking them in water.
Ingredients unable to be juiced
- Do not insert ingredients that cannot be juiced such
as sesame seeds, coffee beans, Chinese peppers,
tree barks and pine needles. Do not insert mudfish,
eels, shrimp, marsh snails, squids, etc.
- Do not insert fruits soaked in alcohol, honey or
sugar (grapes, raspberries, mulberries, etc.) and
enzymes (glasswort, rock pine enzymes, etc.).
- Do not insert ingredients whose attributes make
them difficult to be juiced such as silverberries, aloe,
cactus, quince, yams, kudzu root, sugar cane, acorn
and dandelions.
- Do not insert ice made by freezing water.
It is recommended that you consume extracted
vegetable juice immediately, if possible, and do not
refrigerate it for a long period of time.
Do not use this product for pulverizing grains. It
may cause damage or malfunction.
Do not re-extract juice from pulp that has already
been juiced.
Do not conduct any idle run of the product before
inserting any ingredients.
Do not insert ingredients into the hopper above
the guided limit mark.
Do not use it for more than 30 minutes
continuously.
- It may overheat the motor to cause malfunction.
However, when using it continuously, pause the
operation and use it after a break of over 5 minutes.
Do not insert a chopstick or spoon into the juice/
pulp outlet during operation.
When inserting ingredients, do not use anything
other than the pusher. It may damage the parts or
cause a bodily injury and/or malfunction.
Do not operate the power switch with wet hands.
- It may cause electric shock, short circuit and/or
fire. Do not get foreign substances on or near the
power switch.
Use it with the juice cap open.
- The juice can flow backwards into the hopper if the
juice cap is closed while juicing.
Do not use it when the top of the product body is
wet from extracted juice or water.
Note
1. Withered ingredients, which have been stored for
a long time in the refrigerator, or frozen fruits may
produce only a small amount of juice or none at all.
2. If the product is not cleaned immediately after
use, the pulp may dry up, which makes it difficult to
disassemble and clean it and also cause performance
impairment. So, if possible, clean it immediately after
use.
06
※If you have an allergy, make sure to select
proper ingredients for your body when
preparing the ingredients.
※For the method of and notes on using the
device for each ingredient, please refer to the
recipe book.
※Prepare ingredients in sizes able to be
inserted into the hopper. If you want to juice
a large volume or perform fast juicing, cut
the ingredients into smaller pieces before
inserting them. For about 1 kg, repeat the
"disassemble and clean after juicing" step for
use.
※Do not insert ingredients into the hopper
above the guided limit mark.
※When using boiled or soft ingredients alone,
the juice may pool inside the chamber and
not be extracted properly. Insert only a small
amount or use them with other ingredients.
※When juicing fibrous fruits and vegetables,
the juice may thicken.
※Inserting the following ingredients, which
are impossible to be juiced, may lead to
damage or malfunction.
- Ingredients that cannot be juiced such as
sesame seeds, coffee beans, Chinese peppers,
tree barks and pine needles, as well as mudfish,
eels, shrimp, marsh snails, squids, etc.
- Fruits soaked in alcohol, honey or sugar
(grapes, raspberries, mulberries, etc.) and
enzymes (glasswort, rock pine enzymes, etc.)
- Ingredients whose attributes make them
difficult to be juiced such as silverberries, aloe,
cactus, quince, bananas, yams, kudzu root,
sugar cane, acorns and dandelions
- Boiled ingredients such as boiled potatoes and
sweet potatoes
- Ice made by freezing water
※ Do not use it for pulverizing grains.
※Refer to the instructions in <Precautions
During Operation> (refer to p. 5).
4. Precautions Before Juicing
3. Power Switch Guide
Press the operation switch for operation.
누름
정회전
역회전
작동스위치 정회전
역회전
[ ] : Stop - Used to stop the
product's operation
[ ] : Reverse rotation
- Used when the operation
halts while in use due to
ingredient overload ※
It only
works when the reverse
operation switch [REV]
is being pressed, and it
stops when the switch is
released.
누름
정회전
역회전
작동스위치 정회전
역회전
정회전
역회전
정지상태
작동스위치 정회전
역회전
off(정지) 정지
정회전
역회전
정지상태
작동스위치 정회전
역회전
off(정지) 정지
[ ] : Operation - Used to
start juicing

07
English
Soft fruits
Single extraction (berries, cherry tomatoes,
pineapples, etc.)
※Thoroughly clean and cut the ingredients into
small pieces that can fit in the hopper inlet. For
fruits and vegetables with stalks, remove the
stalks first.
Mixed extraction (strawberries, kiwi, bananas,
tomatoes, mangoes, etc.)
※For dry and viscous ingredients, mix them
with other ingredients for extraction. Remove the
peel and stalks, and also remove seeds, if there
are any.
Root vegetables
Carrots, beets, ginger, sweet potatoes, potatoes,
garlic, etc.
Wash the ingredients in running water to remove
dirt and other foreign substances. For fibrous
ingredients such as ginger, peel the outer skin and
cut them into small pieces. For long ingredients,
cut them vertically for extraction.
Leaf and stem vegetables
Celery, kale, cabbage, water parsley,
wheatgrass, chives, etc.
Cut the ingredients into 3-cm or shorter pieces for
extraction. Since leaf and stem vegetables are
rough and fibrous, they are not easily juiced and
can get caught in the Multi-screw.
• When juicing ingredients other than root, leafy
and stem vegetables, the juice may stagnate.
• As certain ingredients need extra care during
preparation, please refer to the following instructions on
how to prepare the ingredients.
• When juicing several times or in bulk, make sure to
cut ingredients into small pieces, and then repeat the
"disassemble and clean after juicing" step.
• For faster juicing, mince the ingredients into fine pieces.
Citrus fruits
Grapefruit, oranges, lemons, etc.
Prepare the ingredients by peeling and cutting them
into smaller pieces to fit in the hopper inlet. Remove
all hard, unchewable seeds before insertion.
Fruits with thick peel
Pineapples, dragon fruit, melons, watermelons,
pomegranate, etc.
Prepare the ingredients by peeling and cutting them
into smaller pieces to fit in the hopper inlet. Remove
all hard, unchewable seeds before insertion.
Seeded fruits
Grapes, apples, peaches, persimmons, plums,
cherries, pears, Korean melons, etc.
For ingredients containing hard, unchewable seeds
or large-sized seeds such as those in peaches, make
sure to remove the seeds first and cut and prepare
only the flesh. Hard seeds may stop the operation or
damage the parts. Apple seeds contain toxicity so
remove them as much as possible. For grapes, pluck
each grape from the bunch after cleaning them
horoughly. Do not extract only the ingredients that are
too soft; instead, mix them with other fruits and
vegetables.
4-1. How to Prepare Ingredients
How to Use Each Strainer
Used to extract vegetables and fruit to make juice
A coarse strainer has large openings so it is primarily used to
make thick juice with solid flesh. It is ideal for when using
bananas, strawberries and other ingredients whose flesh is soft
as well as ingredients with thick juice. It is useful to make a
smoothie, latte or soup.
Fine
Strainer
Coarse
Strainer

08 5. How to Assemble
Assemble the fine strainer (④) and rotation brush (⑤) as shown in the figure. Push it all the way in.
Align the fine strainer + rotation brush set, assembled on the chamber(
⑦
⑦
), on the chamber groove as
shown in the figure.
Insert the screw on the assembled chamber. Push it all the way in until it no longer goes in.
Assemble it by making the hopper cover (①-1) stand vertically in the hopper (②-1).
Align the hopper [ ] assembly guide mark (②-3) with the chamber [ ] assembly guide mark (
⑦
⑦
-2)
to connect.
Turn the assembled hopper clockwise until its guide mark is aligned with the chamber assembly guide
mark [ ].
If the internal components are not assembled correctly, then the hopper won't close.
Check that the discharge cover and the loop (
⑦
⑦
-4) of the chamber are properly fastened.
1. Close the discharge cover and fasten it with the loop.
2. If the packing is not in place or the lever is not fastened properly, juice may leak or the lever may open
during extraction.
Place the well-assembled chamber set onto the product body (
⑧
⑧
).
Assemble the chamber set and connect it to the product body.
01
01
02
02
03
03
04
04
05
05
06
06
07
07
04
04
03
03
05
05
08
08
07
07
06
06
①-1
②-1
⑦-2
⑦-2
②-3
②-3
⑦-4
⑦-4
⑧
⑧
01
01
④
④
⑤
⑤
02
02
④+⑤
④+⑤
⑦
⑦

09
English
6. Assembly and Disassembly of Silicone
※Silicone packings are consumables that are
recommended to be replaced once every 6 to 12
months. They are available for purchase through the
Customer Service Center.
01
01
02
02
03
03
(The juicer may leak if the product is not assembled
properly.)
Hold and take out the packing as if you are pulling it
back.
After cleaning, insert one side of the packing first as if
you are hooking it.
Insert the remaining part and press down the
perimeter.
After cleaning, insert in a way that the round side of the
packing faces outward while the grid grooves face upward.
Assemble the packing as shown in the figure.
01
01
02
02
03
03
Grab one side and pull it back to detach it.
After cleaning, check the top and bottom of the
packing and insert it as if you are hooking one side.
Firmly press the remaining part of the packing
without any folded area.
Extraction Packing
Seal Packing
Juice Cap Packing
Hopper Packing
After cleaning the silicone brush, pull it from the inside
to the outside to assemble it as shown in the figure.
Grab the top and bottom of the outer blades of the
silicone brush to pull it tightly.
Chamber Packing
Rotating brush packing
01
01
02
02
02
02
01
01
01
01
02
02

10 7. How to Use
04
04
07
07
05
05
08
08
06
06
01
01
03
03
02
02
누름정회전
역회전
작동스위치 정회전
역회전
누름
정회전
역회전
작동스위치 정회전
역회전
정회전
역회전
정지상태
작동스위치 정회전
역회전
off(정지) 정지

11
English
8.
When the Screw Stops during Operation
01
01
02
02
01 For 2 to 3 times, repeat the process of pressing
the operation switch in the [REV] direction for 3
to 5 seconds and then releasing it. The reverse
rotation [REV] is a function that returns and lifts the
ingredients upward. It only works when the switch is
being pressed in the [REV] direction, and the screw
rotation stops when the switch is released.
02 After the screw is completely stopped after
reverse rotation, press the operation switch in the
[ON] direction to start the operation again.
When operating the extraction [ON] or reverse
rotation [REV] function, completely stop the screw
first and then operate the switch in the direction of
the function to be operated next.
Note
If it does not work even after following the above
steps, unplug the power cord from the outlet,
remove the chamber set, wash it, and use it again.
The motor will continue to spin after the machine
is turned off but it will slow down and come to a
complete halt.
누름
정회전
역회전
작동스위치 정회전
역회전
누름
정회전
역회전
작동스위치 정회전
역회전
정회전
역회전
정지상태
작동스위치 정회전
역회전
off(정지) 정지
01 Open the hopper cover.
① Press the lever of the hopper cover to open it.
Overloading the product with ingredients may
damage the product.
02 Add the juicing ingredients below the limit mark
of the hopper.
① Use soft ingredients by mixing them with others.
03 Close the hopper cover and keep the juice cap
open.
① Before pressing the extraction switch [ON], put a
juice cup in place first.
②The juice can flow backwards into the hopper if
the juice cap is closed. If the juice does not come
out even after opening the juice cap, then open the
hopper cover and remove the content.
04 Press the operation switch [ON] to start
operation.
① The "click" sound when the product is operating
is the sound of the chamber set and the motor
binding together.
05 To add more ingredients during operation, use
the additional inlet or open the hopper cover.
① Operation stops when the hopper cover is open.
②Do not use anything other than the designated
pusher.
③In case the ingredients spin but fail to be ground up
in the hopper during extraction, use the pusher to
press the ingredients down.
06 Let the machine operate for about 1 more minute
after all ingredients go down in the hopper.
① It slowly presses and squeezes the ingredients so it
takes some time until the last ingredient is juiced.
②Removing the remaining pulp by additionally
operating the machine after extraction makes it
more convenient to detach the hopper and clean
the parts.
07 Once the juicing and pulp removal are finished,
press the power switch to stop the machine.
① The machine stops 3 seconds after it is stopped by
pressing the power switch.
08 Pour any remaining juice by tilting the chamber
forward.
① For thickly concentrated juice made of tomatoes,
etc., the juice may still remain in the chamber.

12
※After the product stops operating completely,
pull the power cord plug with dry hands. Even
after the product is stopped, the motor will slowly
come to a stop so wait about 3 seconds before
detaching the chamber set.
01 Detach the chamber set from the product body.
Turn the hopper to open it and then sequentially pull
each of the parts to disassemble them.
02 Wash the parts with a cleaning brush under
running water.
03 Open the discharge cover and juice cap to clean
the chamber.
04 Wipe the product body with a damp towel or soft
cloth.
05 Detach and wash silicone packings after use.
- Residue may still be stuck.
(hopper packing, juice cap packing, extraction
packing, seal packing, chamber packing, Silicone
Brush)
06 You can sterilize the parts by soaking them in
warm water diluted with baking soda, citric acid or
vinegar.
※Failure to clean the product immediately after use
may cause its stainless steel parts and other parts
to corrode or become discolored due to salt and pulp
from the ingredients. Also, contaminants may be
dried up and stuck inside, which makes it difficult to
disassemble and clean them and may also cause
performance impairment. Be sure to clean and air-
dry it completely immediately after use and store it in
a clean place. For long-term storage, use a cleaning
brush to wash it. Do not clean with boiling or high-
temperature water or use a cleansing sponge, steel
sponge, abrasives and other sharp cleaning tools. Do
not place it in a dishwasher or dish dryer.
9. How to Disassemble and Clean

13
English
01. A "click" sound is heard when
the product begins to operate.
It is the sound of the motor and the screw binding together. It is not considered to be
a malfunction.
02. It does not operate only with
the product body.
Check if the chamber set and product body are properly assembled. Make sure to
turn the power off when assembling or disassembling the product.
03. Assemble it so that it is
aligned with the safety sensor.
Check if it is assembled in accordance with the guide mark. Make sure to turn the
power off when assembling or disassembling the product.
04. It does not work.
Check if the power cord is properly inserted. The machine may not work after a long
period of (30 minutes or longer). It will operate normally after the heat of the product
body (motor) cools down.
05. It stops during a normal
operation.
Check if the hopper is properly assembled. If the hopper is assembled incorrectly, the
product will not work. It will operate only when the lock symbol on the chamber and the
hopper's assembly guide mark are assembled in a way that they face each other. Check
if the product is assembled according to the steps specified in the assembly guide.
Refer to the assembly guide page (page 8). Haven't anexcessive amount ofingredients
or extremely thick ingredients inserted? Refer to Page 11 of the manual to activate a
reverse rotation.
For safety, a timer, which automatically stops after about 5 minutes from the start of
operation, is set. Press the switch again briefly to start operation.
06. There are crack marks
caused by a Multi-screw or
scratch marks at the top of the
Multi-screw.
In the process of making the molding, curve-shaped marks are created on the sides
and top of the Multi-screw in addition to the straight-lined mold marks. They are
normal parts and do not affect the operation at all.
07. Juice leaks through the pulp
outlet immediately after the
ingredients are inserted.
Depending on the inserted ingredients, small amounts of juice may leak through the
pulp outlet.
This is not a product defect but, rather, a phenomenon caused by the characteristics of
the ingredients. The leakage will stop once the product starts running. If the leakage
continues, contact the Customer Service Center.
08. Juice flows back into the
hopper.
Did you extract juice with the juice cap closed? When juicing with the juice cap
closed, the juice may flow backward into the hopper. If the contents are not sufficiently
discharged even after opening the juice cap again, open the hopper cover and empty
out the contents.
09. Juice leaks between the
hopper and the chamber, or
between the chamber and the
product body.
Is the hopper packing or chamber packing assembled correctly? The juice will
leak if the hopper packing or chamber packing has been assembled upside-down or
incompletely. Check if the packing is assembled properly.
10. The hopper does not open.
There may be excessive pulp remaining inside. Operate the produce to discharge the
pulp inside or repeat the process of activating a reverse rotation for about 10 seconds
and then stopping 2 to 3 times. Then, the hopper will open without any issue.
Weren't any foreign substances or solid matters (hard seeds such as persimmon
seeds) inserted? If any foreign substances or solid matters are inserted, parts may be
damaged more seriously when attempting a reverse rotation so contact the Customer
Service Center and request for after-sales service.
11. The chamber shakes (during
extraction).
Slightshaking mayoccur due tothe kineticforce ofthe motor insidethe product body.
Slight and notable motions occur depending on the ingredients characteristics (hard,
tough, etc.). This is a common phenomenon that happens when the screw rotates, and
it is not considered to be a malfunction. The shaking may seem relatively greater when
juicing hard ingredients than when juicing soft, succulent ingredients.
(e.g.: Carrots, potatoes, white radishes, beets, kohlrabi, etc.)
12. The discharge cover is closed
but the pulp is discharged.
Even if the lever is closed, pulp will be discharged naturally. Depending on the
ingredients used, there may be a difference in the amount and speed of discharge.
13. An unusual noise is heard
while juicing.
It is a natural sound produced when ingredients are being crushed. If the ingredients
are hard or tough like apples, carrots, cabbage, celery, beets, etc., the extraction noise
may be louder than that heard when juicing softer ingredients.
10. Before Requesting Repair
Check the following before asking for repair. For follow-up service and any inquiry you may have while using
the product, please contact our Customer Center, or homepage at http://www.globalhurom.com Check the
manufacturer’s number or the number under the barcode when requesting for follow-up service or parts.

14
INHALT
p.14
p.15
p.16
p.18
p.19
p.20
p.21
p.22
p.23
01 Bitte lesen Sie die <Vorsichtsmaßnahmen zur
sicheren Verwendung> durch.
02 Befolgen Sie die <Vorsichtsmaßnahmen zur
sicheren Verwendung>.
03 Es bestehen folgende Vorsichtsmaßnahmen:
1. Lesen Sie die „Sicherheitshinweise“ (S. 14–15) und
beachten Sie diese bei der Verwendung.
2. Bewahren Sie die Bedienungsanleitung nach dem Lesen
zum Nachschlagen an einem leicht zugänglichen Ort auf.
3. Verwenden Sie das Gerät nicht im Ausland mit anderen
Steckdosenformaten und Voltzahlen.
4. Alle Qualitätsverbesserungen sind als Änderungen
vorbehalten.
Vor dem Lesen des Bedienungsanleitung
1. Vorsichtsmaßnahmen zur sicheren
Verwendung
Keinesfalls Änderungen vornehmen. Das Gerät nie selbst
zerlegen oder reparieren.
Keine Fremdkörper wie Finger oder Nadeln in Ritzen
oder Öffnungen des Produktgehäuses einführen. Dies
kann zu Feuer, einem elektrischen Schlag und/oder
Funktionsstörungen führen. Für Kundendienst oder
Produktwartung das HUROM Kundendienstzentrum
kontaktieren.
Einen beschädigten Netzstecker nicht selbst reparieren
oder verändern, sondern in ein Kundendienstzentrum oder
eine Zweigstelle bringen.
Das Produktgehäuse darf nicht nass oder mit Wasser
bespritzt werden. Es ist darauf zu achten, dass weder
Wasser noch Fremdkörper in den Netzschalter des Produkts
gelangen.
Den Schalter nicht mit nassen Händen anfassen.
Aus Sicherheitsgründen muss die Netzsteckdose immer
geerdet sein. Sie darf ebenfalls nicht über eine Gasleitung,
Kunststoffwasserleitung oder Telefonlinie geerdet sein.
Immer eine geerdete Steckdose verwenden.
Versuchen Sie nicht, das Hauptbehälter-Set zu zerlegen
oder während des Betriebs Fremdkörper wie Finger oder
Löffel in die Einfüllöffnung/ den Saftauslass einzuführen.
Außerhalb der Reichweite von Kindern verwenden.
Kinder sollten beaufsichtigt werden, um sicherzugehen,
dass sie nicht mit dem Gerät spielen.
Es besteht eine Gefahr von Verletzung oder
Funktionsstörungen, wenn Kinder das Gerät versehentlich
anstoßen oder auf den Boden fallen lassen.
Eine Person, die mit der Handhabung des Produkts nicht
vertraut ist, sollte es nicht unbeaufsichtigt verwenden.
Personen mit physischen oder geistigen Behinderungen oder
mangelnder Erfahrung und Kenntnis sollten das Gerät nicht
unbeaufsichtigt verwenden.
Verwenden Sie das Produkt nicht, wenn Sie magnetische
Gegenstände tragen oder in der Hand halten (z. B.
magnetische Armbänder). Wenn sich magnetische
Gegenstände in der Nähe des Produkts befinden, kann es zu
Funktionsstörungen kommen.
Vorsichtshinweis Die Nichtbeachtung der
Warnhinweise kann zu schweren Verletzungen oder Tod
führen.
Das Produkt nicht in Betrieb nehmen, bevor das
Produktgehäuse und Hauptbehälter-Set sicher
miteinander verbunden sind.
Bei einem Gasleck das Netzkabel nicht berühren, die
Fenster öffnen und den Raum gründlich durchlüften.
Wenn die Pressschnecke während des
Gerätebetriebs stoppt, den Netzschalter auf [REV]
drehen und 3 bis 5 Sekunden lang gedrückt halten,
um den Rückwärtslauf zu aktivieren. Wenn der
Rückwärtslauf komplett gestoppt ist, den Schalter
erneut auf [ON] drehen. Wird das Gerät längere Zeit
gestoppt, können Überhitzung des Motors, Beschädi-
Warnung Die Nichtbeachtung der Warnhinweise
kann zu schweren Verletzungen oder Tod führen.
Das Stromkabel nicht mit nassen Händen anfassen.
Ausschließlich die Netzspannung verwenden, die auf dem
Garantieschein und denProduktspezifikationen angegeben
ist. Es kann sonst zu einem elektrischen Schock, Brand
und/oder Verletzungen kommen. Der Anschluss an eine
andere Netzspannung kann die Lebensdauer des Motors
reduzieren oder zu Funktionsstörungen führen.
Den Netzstecker vollständig in eine Steckdose einführen.
Das Netzkabel nicht biegen, knicken, beschädigen oder
gewaltsam herausziehen bzw. in die Nähe von Hitzequellen
wie einen Gasherd legen. Auf dem Produkt dürfen keine
schweren Objekte abgelegt werden, es darf nicht auf
engem Raum eingeklemmt oder verändert werden.
1. Vorsichtsmaßnahmen zur sicheren Verwendung
2. Vorsichtsmaßnahmen während der Verwendung
3. Anleitung Netzschalter /
4. Vorsichtsmaßnahmen vor der Entsaftung
5. Zusammenbau
6. Ein- und Ausbau von Silikon
7. Verwendung
8. Wenn die Pressschnecke während des Betriebs
anhält
9. Anleitung zu Ausbau und Reinigung
10. Vor Reparaturanfragen

15
Deutsch
gung von Teilen oder Funktionsstörungen auftreten.
Wenn das Problem andauert, schalten Sie das Gerät
aus und kontaktieren Sie Ihren HUROM Kundendienst.
Während des Betriebs das Produktgehäuse nicht
bewegen oder das Hauptbehälter-Set bzw. Geräteteile
zerlegen oder zusammenbauen. Darauf achten, vorher den
Betrieb zu stoppen und das Netzkabel herauszuziehen.
Beim Produktgebrauch darauf achten, dass keine
Krawatte, Halskette, Schal etc. in die Einfüllöffnung
gelangt.
Platzieren Sie das Produkt für den Gebrauch auf einer
ebenen und stabilen Oberfläche.
Beim Einfüllen der Zutaten in die Einfüllöffnung keine
Essstäbchen, Löffel, harte oder andere Gegenstände außer
den Stopfer verwenden.
DasGerätnichtlängerals30MinutenamStückverwenden.
Eine Überhitzung des Motors kann zu Funktionsstörungen
führen. Für die erneute Inbetriebnahme das Gerät vor dem
Gebrauch 5 Minuten lang ausschalten.
Das Gerät keiner übermäßigen Kraft oder Druck
aussetzen bzw. nicht fallen lassen.
Wenn das Gerät ungewöhnliche Geräusche erzeugt,
heiß wird oder Rauch erzeugt, schalten Sie es bitte sofort
aus und kontaktieren Sie das Kundendienstzentrum. Der
Geruch beim Erstgebrauch des Produkts verschwindet im
Laufe der Zeit.
Das Netzkabel aus der Steckdose ziehen, wenn das Gerät
nicht verwendet wird. Darauf achten, das Kabel mit dem
Stecker aus der Steckdose zu ziehen.
Das Produkt nicht bei Temperaturen von 80°C oder höher
reinigen. Das Gerät nicht in eine Geschirrspülmaschine,
Mikrowelle etc. geben, dies kann Funktionsstörungen und/
oder eine Verformung der Geräteteile verursachen.
Das Produktgewicht beträgt ca. 6,2 kg. Beim Bewegen
des Produkts darauf achten, das Produktgehäuse mit
beiden Händen festzuhalten. Wenn nur der Hauptbehälter
oder Seiten des Produktgehäuses gehalten werden, kann
das Gehäuse zu Boden fallen und Körperverletzung oder
Funktionsstörungen verursachen.
Dieses Haushaltsprodukt darf nicht für kommerzielle
Zwecke verwendet werden. Durch die übermäßige
Entsaftung großer Mengen von Zutaten können die
Geräteteile beschädigt werden.
Falls das Gerät für kommerzielle Zwecke verwendet
wird, kontaktieren Sie bitte das Kundendienstzentrum für
Informationen über die Verwendungsmethode.
Stellen Sie sicher, dass Sie genau verstehen, wie die
Zutaten vorzubereiten sind, und bereiten Sie sie vor dem
Einfüllen richtig vor.
- Falsch vorbereitete Zutaten können den Entsaftungsvorgang
behindern und/oder Produktschäden hervorrufen.
Zutaten, die besondere Sorgfalt erfordern
- Wenn gekochte Zutaten, wie z. B. gekochte Kartoffeln
2. Vorsichtsmaßnahmen beim
Gebrauch
und Süßkartoffeln, oder weiche Zutaten wie Bananen,
reife Kiwis oder Tomaten allein verwendet werden, kann
sich der Saft im Behälter stauen und das Entsaften
erschwert werden. Nur kleine Mengen einfüllen oder
mit anderen Zutaten verwenden.
- Walnüsse, Erdnüsse, Mandeln, Sonnenblumenkerne,
Pinienkerne, Bohnen etc. nur in kleinen Mengen einfüllen,
in Wasser einweichen und gemeinsam mit anderen Zutaten
hinzufügen.
Für die Entsaftung ungeeignete Zutaten
- Keine Zutaten einfüllen, die für eine Entsaftung ungeeignet
sind, wie Sesamkörner, Kaffeebohnen, getrocknete
Chilischoten, Baumrinde und Kiefernadeln. Keine/n Fisch, Aal,
Krabben, Schnecken, Tintenfische etc. einfüllen
- Keine in Alkohol, Honig oder Zucker eingelegte Früchte
(Trauben, Himbeeren, Brombeeren etc.) und enzymhaltige
Produkte (Salzbohnen, Föhrenenzym etc.)
- Keine Zutaten einführen, die von Natur aus schwer zu
entsaften sind, wie z. B. Ölfrüchte, Aloe vera, Kaktus, Quitte,
Yams, Kudzu-Wurzel, Zuckerrohr, Ahorn und Löwenzahn.
- Keine Eiswürfel einführen.
Es wird empfohlen, Gemüsesaft sofort zu konsumieren und
nicht über längere Dauer im Kühlschrank aufzubewahren.
Dieses Gerät nicht für das Mahlen von Körnern verwenden.
Trester darf nicht erneut entsaftet werden.
Das Produkt nicht im Leerlauf vor dem Einführen von
Zutaten verwenden.
Keine Zutaten in den Trichter oberhalb der Grenzmarke
einfüllen.
DasGerät nichtlänger als 30Minuten amStückverwenden.
- Eine Überhitzung des Motors kann Funktionsstörungen
verursachen. Bei einer längeren Verwendung den Betrieb
stoppen und nach einer Pause von 5 Minuten erneut starten.
Während des Betriebs keine Essstäbchen oder Löffel in
die Einfüllöffnung / den Tresterauslass einführen.
Für das Einfüllen von Zutaten nur den Stopfer verwenden.
Ansonsten besteht die Gefahr von Körperverletzung und/oder
Funktionsstörungen.
Den Schalter nicht mit nassen Händen anfassen.
- Dies kann zu einem elektrischen Schlag, Kurzschluss und/
oder Feuer führen. Fremdkörper vom Netzschalter fernhalten.
Bei der Verwendung den Saftdeckel offen lassen.
- Der Saft kann in den Trichter zurückfließen, wenn der
Saftdeckel während der Entsaftung geschlossen ist.
Nichtverwenden,wenndieOberseitedesProduktgehäuses
nass ist (Saft oder Wasser).
Anmerkung
1. Vertrocknete Zutaten, die lange Zeit im Kühlschrank
aufbewahrt wurden, oder gefrorene Früchte ergeben nur
wenig oder gar keinen Saft.
2. Wenn das Produkt nicht sofort nach der Verwendung
gereinigt wird, kann der Trester eintrocknen, sodass der
Ausbau und die Reinigung der Bauteile erschwert werden
und eventuell die Geräteleistung beeinträchtigt wird. Daher
sollte das Gerät immer sofort nach der Verwendung gereinigt
werden.

16
※Bei Allergien bitte darauf achten, bei
der Vorbereitung die geeigneten Zutaten
auszuwählen.
※Für die Methode und Anmerkungen zur
Verwendung des Geräts für die einzelnen Zutaten
siehe Anleitung zur Zubereitung.
※Die Zutaten in der richtigen Größe vorbereiten,
um in den Trichter zu passen. Für die Entsaftung
großer Mengen oder auf hoher Stufe die Zutaten
vor dem Einfüllen in besonders kleine Stücke
schneiden. Für etwa 1 kg den Anwendungsschritt
"Ausbau und Reinigung nach Entsaftung"
wiederholen.
※Keine Zutaten in den Trichter oberhalb der
Grenzmarke einfüllen.
※Wenn gekochte oder weiche Zutaten allein
verwendet werden, kann sich der Saft im Behälter
stauen und das Entsaften erschwert werden.
Nur kleine Mengen einfüllen oder mit anderen
Zutaten verwenden.
※Bei der Entsaftung von faserhaltigen Obst- und
Gemüsesorten kann der Saft verdicken.
※Wenn die folgenden schwer zu entsaftenden
Zutaten eingefüllt werden, können Beschädigung
oder Funktionsstörungen des Produkts auftreten.
- Zutaten, die für eine Entsaftung ungeeignet sind,
wie z. B. Sesamsamen, Kaffeebohnen, Chilischoten,
Baumrinde und Tannennadeln sowie Fisch, Aal,
Garnelen, Schnecken, Tintenfisch etc.
- In Alkohol, Honig oder Zucker eingelegte Früchte
(Trauben, Himbeeren, Brombeeren etc.) und
enzymhaltige Produkte (Salzbohnen, Föhrenenzym
etc.)
- Zutaten, die von Natur aus schwierig zu entsaften
sind wie (Ölfrüchte, Aloe vera, Kaktus, Quitte, Yams,
Kudzu-Wurzel, Zuckerrohr, Ahorn und Löwenzahn)
- Gekochte Zutaten wie gekochte Kartoffeln oder
Süßkartoffeln
- Eiswürfel
※ Nicht verwenden, um Körner zu mahlen.
※Siehe Anleitungen in <Vorsichtsmaßnahmen
beim Gebrauch> (siehe S. 15).
4. Vorsichtsmaßnahmen vor
der Entsaftung
3. Anleitung Netzschalter
Den Netzschalter drücken, um den Betrieb
zu starten.
누름
정회전
역회전
작동스위치 정회전
역회전
[ ] : Stop - Wird betätigt,
um den Gerätebetrieb zu
stoppen
[ ] : Rückwärtslauf
- Wird betätigt, wenn der
Gerätebetrieb aufgrund
zu großer Zutatenmengen
stoppt ※ Funktioniert
nur, wenn der Schalter
Rückwärtslauf [REV]
gedrückt wird, und
stoppt, wenn der Schalter
losgelassen wird.
누름
정회전
역회전
작동스위치 정회전
역회전
정회전
역회전
정지상태
작동스위치 정회전
역회전
off(정지) 정지
정회전
역회전
정지상태
작동스위치 정회전
역회전
off(정지) 정지
[ ] : Betrieb - Wird
betätigt, um die Entsaftung
zu starten

17
Deutsch
Weiches Obst
Einfache Entsaftung (Beeren, Kirschtomaten,
Ananas etc.)
※Die Zutaten sorgfältig säubern und in kleine
Stücke schneiden, die in die Trichteröffnung
passen. Bei Obst- und Gemüsesorten mit Stängeln
diese zuerst entfernen.
Gemischte Extraktion (Erdbeeren, Kiwi, Banane,
Tomate, Mango etc.)
※Trockene und dickflüssige Zutaten mit
anderen Zutaten zur Entsaftung vermischen.
Schale und Stiele sowie eventuell vorhandene
Kerne entfernen.
Wurzelgemüse
Karotten, Rüben, Ingwer, Süßkartoffeln,
Kartoffeln, Knoblauch etc.
Die Zutaten unter laufendem Wasser waschen,
um Schmutz und Fremdstoffe zu entfernen.
Faserhaltige Zutaten wie Ingwer zuerst schälen
und dann in kleine Stücke schneiden. Lange
Zutaten zur Entsaftung vertikal schneiden.
Blatt- und Stängelgemüse
Sellerie, Kale, Kraut, Wasserkresse,
Weizengras, Schnittlauch etc.
Für die Entsaftung die Zutaten in höchstens 3 cm
große Stücke schneiden. Da Blatt- und
Stängelgemüse faserhaltig sind, sind sie schwer
zu entsaften und können sich in der Universal-
Press-Schnecke verfangen.
• Beim Entsaften anderer Zutaten als
Wurzelgemüse, Blatt- und Stängelgemüse kann
der Saft stagnieren.
• Da bestimmte Zutaten speziell vorbereitet werden
müssen, lesen Sie bitte die nachstehenden Anleitungen zur
Vorbereitung.
• Für die Entsaftung großer Mengen oder mehrmals
hintereinander die Zutaten vor dem Einfüllen in kleine
Stücke schneiden. Dann den Anwendungsschritt "Ausbau
und Reinigung nach Entsaftung" wiederholen.
• Für schnelleres Entsaften die Zutaten in besonders kleine
Stücke schneiden.
Zitrusfrüchte
Grapefruit, Orangen, Zitronen etc.
Die Zutaten vorbereiten, schälen und in kleine Stücke
schneiden, um in die Trichteröffnung zu passen. Alle
harten Kerne vor dem Einfüllen entfernen
Früchte mit dicker Schale
Ananas, Drachenfrucht, Melone, Wassermelone,
Granatapfel
Die Zutaten vorbereiten, schälen und in kleine Stücke
schneiden, die in die Trichteröffnung passen. Alle
harten Kerne vor dem Einfüllen entfernen.
Kernhaltige Früchte
Trauben, Apfel, Pfirsich, Dattelpflaume, Pflaume,
Kirsche, Birne, koreanische Melone etc.
Bei Zutaten mit harten oder großen Kernen, wie z. B.
Pfirsichen, den Kern zuerst entfernen und dann das
Fruchtfleisch schneiden und vorbereiten. Harte
Kerne können den Betrieb stoppen oder Geräteteile
beschädigen. Apfelkerne enthalten Giftstoffe und
sollten daher soweit möglich entfernt werden. Bei
Trauben jede Traube einzeln vom Strang entfernen
und waschen. Nicht nur besonders weiche Zutaten
entsaften, sondern mit anderen Obst- und
Gemüsesorten vermischen.
4-1. Vorbereitung der Zutaten
Verwendung jedes Siebs
Für die Entsaftung von Gemüse und Obst
Ein Smoothie-Sieb hat breite Öffnungen und wird hauptsächlich
verwendet, um Dicksaft aus festem Fruchtfleisch zu erhalten.
Ideal für Bananen, Erdbeeren und andere Zutaten mit weichem
Fruchtfleisch sowie Zutaten für Dicksaft. Praktisch für die
Zubereitung von Smoothies, Milchdrinks oder Suppe.
Feinsieb
Smoothie-
Sieb

18 5. Zusammenbau
Feinsieb (④) und Rotationsbürste (⑤) zusammensetzen (siehe Abbildung). Ganz nach unten drücken.
Feinsieb + Rotationsbürsten-Set zusammengesetzt am Behälter anbringen und an der Kerbe
ausrichten (siehe Abbildung)
Die Schraube am zusammengebauten Behälter einsetzen. Bis zum Anschlag nach unten drücken.
Zusammenbauen, sodass der Trichterdeckel (①-1) vertikal auf dem Trichter (②-1) aufliegt.
Die Zusammenbaumarkierung (②-3) des Trichters [ ] mit der Zusammenbaumarkierung (
⑦
⑦
-2) des
Hauptbehälters [ ] ausrichten, um sie zusammenzufügen.
Den zusammengebauten Trichter im Uhrzeigersinn drehen, bis seine Zusammenbaumarkierung mit
der Zusammenbaumarkierung [ ]des Behälters ausgerichtet ist
Wenn die internen Teile nicht richtig zusammengefügt sind, kann der Trichter nicht geschlossen werden.
Prüfen, ob der Entleerdeckel und die Schlaufe (
⑦
⑦
-4) des Hauptbehälters richtig geschlossen sind.
1. Den Entleerdeckel schließen und mit der Schlaufe befestigen.
2. Wenn die Dichtung nicht richtig eingelegt oder der Hebel nicht richtig geschlossen ist, kann Saft austreten,
oder der Hebel kann sich während der Entsaftung öffnen.
Das richtig zusammengebaute Hauptbehälter-Set mit dem Produktgehäuse (
⑧
⑧
) zusammenfügen.
Das Hauptbehälter-Set zuerst zusammenbauen und dann am Produktgehäuse anbringen.
01
01
02
02
03
03
04
04
05
05
06
06
07
07
04
04
03
03
05
05
08
08
07
07
06
06
①-1
②-1
⑦-2
⑦-2
②-3
②-3
⑦-4
⑦-4
⑧
⑧
01
01
④
④
⑤
⑤
02
02
④+⑤
④+⑤
⑦
⑦

19
Deutsch
6. Ein- und Ausbau von Silikon
※Dichtungsringe aus Silikon sind Verbrauchsprodukte,
die alle 6 bis 12 Monate ersetzt werden sollten. Sie sind
beim Kundendienstzentrum erhältlich.
01
01
02
02
03
03
(Der Entsafter kann undicht sein, wenn das
Produkt nicht richtig zusammengebaut ist)
Die Dichtung durch Rückziehen herausnehmen.
Nach der Reinigung zuerst eine Seite der Dichtung mit
einer Einhakbewegung einlegen.
Den restlichen Teil einlegen und den Bereich nach unten
drücken.
Dichtung Entsafter
Nach der Reinigung so einsetzen, dass die
runde Seite der Dichtung nach außen und die
Rasternuten nach oben zeigen.
Die Dichtung wie in der Abbildung dargestellt
zusammenbauen
Dichtung Saftausguss-Verschlusskappe
Dichtung Trichter
01
01
02
02
03
03
Eine Seite fassen und durch Rückziehen ablösen.
Nach der Reinigung die Ober- und Unterseite
der Dichtung prüfen und sie durch eine einseitige
Einhakbewegung einsetzen.
Den restlichen Teil der Dichtung ohne Knicke fest eindrücken.
Dichtung Hauptbehälter
Dichtung Verschluss
Die Silikonbürste zuerst reinigen und
dann von innen nach außen ziehen, um sie
zusammenzubauen (siehe Abbildung).
Die Silikonbürste an den äußeren Lamellen
oben und unten anfassen und fest ziehen.
Dichtung Rotationsbürste
01
01
02
02
02
02
01
01
01
01
02
02
Other manuals for H320N Series
1
Table of contents
Languages:
Other HUROM Juicer manuals

HUROM
HUROM HU-100 Ultem User manual

HUROM
HUROM HU-100 Ultem User manual

HUROM
HUROM H-101 Series User manual

HUROM
HUROM HP Series User manual

HUROM
HUROM HG Elite User manual

HUROM
HUROM HP Series User manual

HUROM
HUROM H-200 Series User manual

HUROM
HUROM HG Elite User manual

HUROM
HUROM HV Series User manual

HUROM
HUROM H-AA Series User manual

HUROM
HUROM HW Series User manual

HUROM
HUROM H-AA Series User manual

HUROM
HUROM HQ Series User manual

HUROM
HUROM HU-100W User manual

HUROM
HUROM H-AA Series User manual

HUROM
HUROM H-AF User manual

HUROM
HUROM HH series User manual

HUROM
HUROM HH series User manual

HUROM
HUROM HL Series User manual

HUROM
HUROM H-200 Series User manual