manuals.online logo
Brands
  1. Home
  2. •
  3. Brands
  4. •
  5. iDataLink
  6. •
  7. Automobile Accessories
  8. •
  9. iDataLink maestro Rr User manual

iDataLink maestro Rr User manual

NOTICE: Automotive Data Solutions Inc. (ADS) recommends having this installation performed by a certified technician. Logos and trademarks used here in
are the properties of their respective owners.
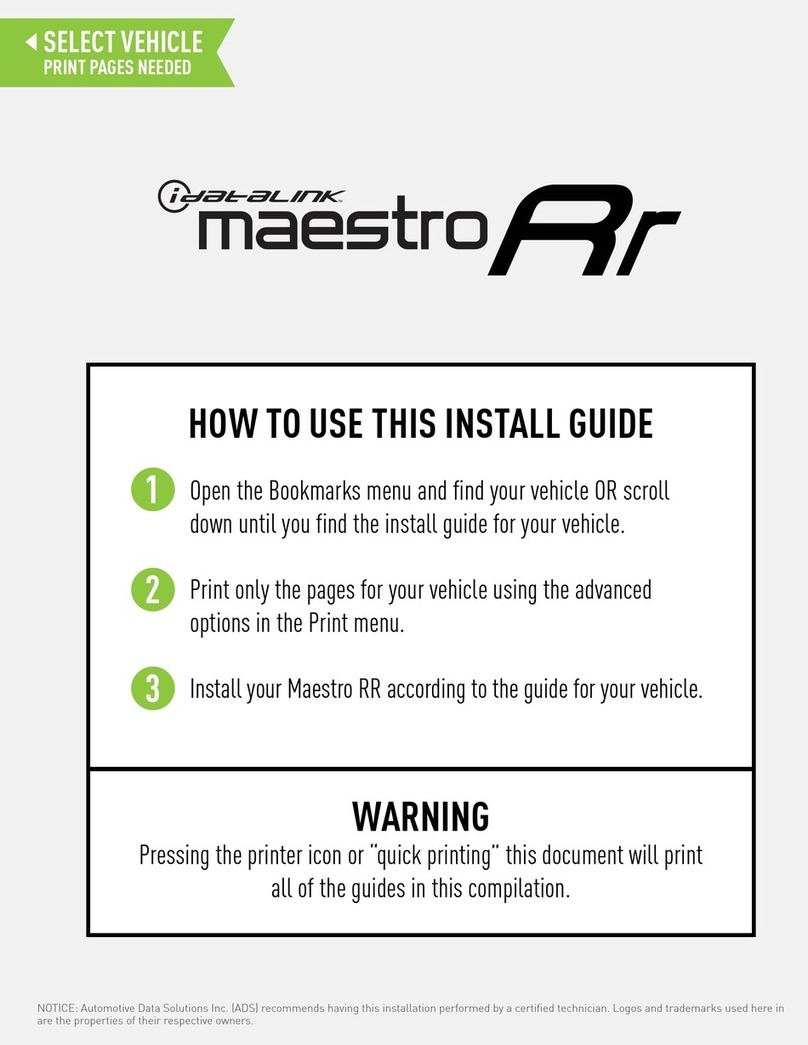
WARNING
Pressing the printer icon or “quick printing” this document will print
all of the guides in this compilation.
Open the Bookmarks menu and find your vehicle OR scroll
down until you find the install guide for your vehicle.
Print only the pages for your vehicle using the advanced
options in the Print menu.
Install your Maestro RR according to the guide for your vehicle.
HOW TO USE THIS INSTALL GUIDE
1
2
3
SELECT VEHICLE
PRINT PAGES NEEDED
OPTIONAL ACCESSORIES
None
PROGRAMMED FIRMWARE
ADS-RR(SR)-AUD01-DS
PRODUCTS REQUIRED
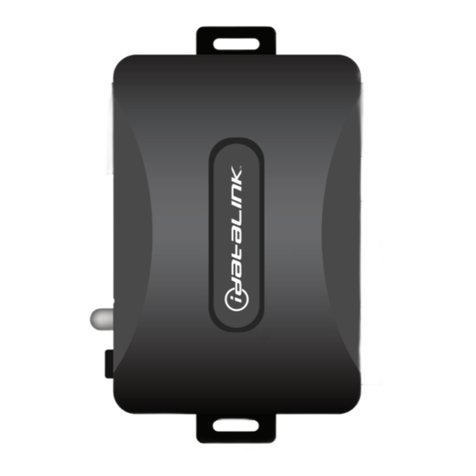
iDatalink Maestro RR Radio Replacement Interface
iDatalink Maestro VW1 Installation Harness
INSTALL GUIDE
AUDI A3
20062012
retains steering wheel controls, MFD anD More!
NOTICE: Automotive Data Solutions Inc. (ADS) recommends having this installation performed by a certified technician. Logos and trademarks used here
in are the properties of their respective owners.
ADS-RR(SR)-AUD01-DS maestro.idatalink.com
auDi a3 2006-2012
Automotive Data Solutions Inc. © 2017 2
WELCOME
NEED HELP?
Congratulations on the purchase
of your iDatalink Maestro RR Radio
replacement solution. You are
now a few simple steps away from
enjoying your new car radio with
enhanced features.
Before starting your installation,
please ensure that your iDatalink
Maestro module is programmed
with the correct firmware for your
vehicle and that you carefully review
the install guide.
Please note that Maestro RR will
only retain functionalities that
were originally available in the
vehicle.
1 866 427-2999
[email protected]
maestro.idatalink.com/support
www.12voltdata.com/forum
TABLE OF CONTENTS
Installation Instructions 3
Wiring Diagram 5
Radio Wire Reference Chart 6
ADS-RR(SR)-AUD01-DS maestro.idatalink.com
auDi a3 2006-2012
Automotive Data Solutions Inc. © 2017 3
INSTALLATION INSTRUCTIONS
Note 1: The OEM amplifier cannot be retained with this
solution.
Note 2: The OEM backup camera cannot be retained with
this solution. It can be retained by using a third party
component to composite video converter.
STEP 1
• Unbox the aftermarket radio and locate its main harness.
• Connect the wires shown on the next page from
aftermarket radio main harness to the VW1 T-harness and
match the wire functions.
STEP 2
• Connect the factory harness to the VW1 T-harness.
• Mate the male and female 4 pin WHITE connectors of the
VW1 T-harness.
• Do not use any of the RCA plugs (WHITE, GRAY, GREEN &
PURPLE) of the VW1 T-harness.
STEP 3
• Plug the OBDII connector into the OBDII of the vehicle,
under driver dash.
STEP 4
• Plug the aftermarket radio harnesses into the aftermarket
radio.
• Plug the Data cable to the data port of the aftermarket
radio.
• Insert the Audio cable into the iDatalink 3.5 mm audio jack
of the aftermarket radio.
STEP 5
• Connect all the harnesses to the Maestro RR module then
proceed to module setup.
The module is now ready to be used.
Insert the aftermarket radio in the dashboard housing and
test all the functionalities.
Reassemble the dashboard carefully.
OEM BLUETOOTH SETUP
Only one Bluetooth system can be set for hands free calling.
This must be determined before installation. Both the
factory and aftermarket systems can be used for Bluetooth
audio streaming. If the aftermarket Bluetooth is chosen for
hands free calling, the aftermarket microphone must be
installed in the vehicle and the factory Bluetooth module
must be unplugged. In most vehicles, it is located under the
passenger seat. If the vehicle is equipped with Bluetooth
but there is no Bluetooth module under the passenger’s
seat then the Bluetooth system is built into the MDI module.
Unplugging the MDI module will disable both factory
systems.
2013 Kenwood Radios:
For these radio models, the OEM Bluetooth is turned OFF
by default. To turn ON the OEM Bluetooth, insert the key
into the ignition and turn it to the ACC position. The Radio
will turn on and the setup screen will appear. Scroll to the
bottom and select the vehicle set up menu by pressing SET.
Go to the option OEM Bluetooth and select ON. Press the
return arrow then scroll to the bottom of the page select
FINISH.
2014 Kenwood Radios:
For these radio models, the OEM Bluetooth is turned ON
by default. To turn OFF the OEM Bluetooth, insert the key
into the ignition and turn it to the ACC position. The radio
will turn ON and the setup screen will appear. Scroll to the
bottom and select the vehicle set up menu by pressing SET.
Go to the option OEM Bluetooth and select OFF.
2014 Alpine Radios:
For these radio models, the OEM Bluetooth is turned ON by
default. To turn OFF the OEM Bluetooth, insert the key into
the ignition and turn it to the ACC position. The radio will
turn ON and the main screen will appear. Select the settings
button, in the top right corner, then select GENERAL.
Select INTEGRATION SETUP then select HANDS FREE
CONNECTION. Two options will be available ON or OFF,
select OFF.
1
ADS-RR(SR)-AUD01-DS maestro.idatalink.com
auDi a3 2006-2012
Automotive Data Solutions Inc. © 2017 4
INSTALLATION INSTRUCTIONS
AIRBAG WARNING LIGHT
If an airbag warning light turns ON after starting the vehicle
without having the airbag light plugged in, select Clear Airbag
Warning to turn OFF that warning light.
Kenwood Radios:
Main Menu>>Setup>>Sources>>Volkswagen Setup>>Vehicle
Features>>Clear Airbag Warning
Alpine Radios:
Settings>>General>>Idatalink Setup>> Maestro
Module>>Volkswagen Setup>>Vehicle Features>>Clear Airbag
Warning
TROUBLESHOOTING TIPS:
• To reset the module back to its factory settings, turn the
key to the OFF position then disconnect all connectors
from the module. Press and hold the module’s
programming button and connect all the connectors
back to the module. Wait, the module’s LED will flash
RED rapidly (this may take up to 10 seconds). Release the
programming button. Wait, the LED will turn solid GREEN
for 2 seconds.
• For technical assistance call 1-866-427-2999 or e-mail
“[email protected]”. Visit us at “maestro.idatalink.
com/support” and “www.12voltdata.com/forum/”
1
ADS-RR(SR)-AUD01-DS maestro.idatalink.com
auDi a3 2006-2012
Automotive Data Solutions Inc. © 2017 5
C
A
H
F
G
D
C
A
G
F
H D
1
WIRING DIAGRAM
STEP 1
STEP 2
STEP 3
STEP 4
STEP 5
MAESTRO RR MODULE
WHITE - LF SPEAKER (+)
WHITE/BLACK - LF SPEAKER (-)
GRAY - RF SPEAKER (+)
GRAY/BLACK - RF SPEAKER (-)
GREEN - LR SPEAKER (+)
GREEN/BLACK - LR SPEAKER (-)
PURPLE/BLACK - RR SPEAKER (-)
YELLOW - 12V (+)
BLACK - GROUND
RED - ACCESSORY (+)
BROWN (NOT CONNECTED)
(NOT CONNECTED)
(NOT CONNECTED)
(NOT CONNECTED)
(NOT CONNECTED)
(NOT CONNECTED)
ORANGE - ILLUMINATION (+)
PURPLE/WHITE - REVERSE LIGHT (+)
LTGREEN - E-BRAKE (-)
BLUE/WHITE - AMP. TURN ON (+)
MAIN
HARNESS
DATA
CABLE
AUDIO
CABLE
PURPLE - RR SPEAKER (+)
CONNECT TO
AFTERMARKET RADIO
VW1 T-HARNESS
FACTORY RADIO
HARNESS
OBDII CONNECTOR
WIRES FROM
VEHICLE
YELLOW/BLACK - FOOT BRAKE
PINK - VEHICLE SPEED
SEE CHART ON
NEXT PAGE FOR
RADIO WIRE
COLORS
WHITEWHITE
ADS-RR(SR)-AUD01-DS maestro.idatalink.com
auDi a3 2006-2012
Automotive Data Solutions Inc. © 2017 6
RADIO WIRE REFERENCE CHART
Wire
Description Polarity Wire Color on Maestro
T-Harness Wire Color on Alpine cable Wire Color on Kenwood cable Wire Color on Pioneer cable
Illumination (+) Orange N/A Orange/White Orange/White
Reverse Light (+) Purple/White Orange/White Purple/White Purple/White
E-Brake (-) Lt Green Yellow/Blue Lt Green Lt Green
Foot Brake (+) Yellow/Black Yellow/Black N/A N/A
VSS (vehicle speed sensor) (DATA) Pink Green/White N/A Pink
OPTIONAL ACCESSORIES
None
PROGRAMMED FIRMWARE
ADS-RR(SR)-AUD01-DS
PRODUCTS REQUIRED
iDatalink Maestro RR Radio Replacement Interface
iDatalink Maestro VW1 Installation Harness
INSTALL GUIDE
AUDI A4
20042008
retains steering wheel controls, MFD anD More!
NOTICE: Automotive Data Solutions Inc. (ADS) recommends having this installation performed by a certified technician. Logos and trademarks used here
in are the properties of their respective owners.
ADS-RR(SR)-AUD01-DS maestro.idatalink.com
auDi a4 2004-2008
Automotive Data Solutions Inc. © 2017 2
WELCOME
NEED HELP?
Congratulations on the purchase
of your iDatalink Maestro RR Radio
replacement solution. You are
now a few simple steps away from
enjoying your new car radio with
enhanced features.
Before starting your installation,
please ensure that your iDatalink
Maestro module is programmed
with the correct firmware for your
vehicle and that you carefully review
the install guide.
Please note that Maestro RR will
only retain functionalities that
were originally available in the
vehicle.
1 866 427-2999
[email protected]
maestro.idatalink.com/support
www.12voltdata.com/forum
TABLE OF CONTENTS
Installation Instructions 3
Wiring Diagram 5
Radio Wire Reference Chart 6
ADS-RR(SR)-AUD01-DS maestro.idatalink.com
auDi a4 2004-2008
Automotive Data Solutions Inc. © 2017 3
INSTALLATION INSTRUCTIONS
Note 1: The OEM amplifier cannot be retained with this
solution.
Note 2: The OEM backup camera cannot be retained with
this solution. It can be retained by using a third party
component to composite video converter.
STEP 1
• Unbox the aftermarket radio and locate its main harness.
• Connect the wires shown on the next page from
aftermarket radio main harness to the VW1 T-harness and
match the wire functions.
STEP 2
• Connect the factory harness to the VW1 T-harness.
• Mate the male and female 4 pin WHITE connectors of the
VW1 T-harness.
• Do not use any of the RCA plugs (WHITE, GRAY, GREEN &
PURPLE) of the VW1 T-harness.
STEP 3
• Plug the OBDII connector into the OBDII of the vehicle,
under driver dash.
STEP 4
• Plug the aftermarket radio harnesses into the aftermarket
radio.
• Plug the Data cable to the data port of the aftermarket
radio.
• Insert the Audio cable into the iDatalink 3.5 mm audio jack
of the aftermarket radio.
STEP 5
• Connect all the harnesses to the Maestro RR module then
proceed to module setup.
The module is now ready to be used.
Insert the aftermarket radio in the dashboard housing and
test all the functionalities.
Reassemble the dashboard carefully.
OEM BLUETOOTH SETUP
Only one Bluetooth system can be set for hands free calling.
This must be determined before installation. Both the
factory and aftermarket systems can be used for Bluetooth
audio streaming. If the aftermarket Bluetooth is chosen for
hands free calling, the aftermarket microphone must be
installed in the vehicle and the factory Bluetooth module
must be unplugged. In most vehicles, it is located under the
passenger seat. If the vehicle is equipped with Bluetooth
but there is no Bluetooth module under the passenger’s
seat then the Bluetooth system is built into the MDI module.
Unplugging the MDI module will disable both factory
systems.
2013 Kenwood Radios:
For these radio models, the OEM Bluetooth is turned OFF
by default. To turn ON the OEM Bluetooth, insert the key
into the ignition and turn it to the ACC position. The Radio
will turn on and the setup screen will appear. Scroll to the
bottom and select the vehicle set up menu by pressing SET.
Go to the option OEM Bluetooth and select ON. Press the
return arrow then scroll to the bottom of the page select
FINISH.
2014 Kenwood Radios:
For these radio models, the OEM Bluetooth is turned ON
by default. To turn OFF the OEM Bluetooth, insert the key
into the ignition and turn it to the ACC position. The radio
will turn ON and the setup screen will appear. Scroll to the
bottom and select the vehicle set up menu by pressing SET.
Go to the option OEM Bluetooth and select OFF.
2014 Alpine Radios:
For these radio models, the OEM Bluetooth is turned ON by
default. To turn OFF the OEM Bluetooth, insert the key into
the ignition and turn it to the ACC position. The radio will
turn ON and the main screen will appear. Select the settings
button, in the top right corner, then select GENERAL.
Select INTEGRATION SETUP then select HANDS FREE
CONNECTION. Two options will be available ON or OFF,
select OFF.
1
ADS-RR(SR)-AUD01-DS maestro.idatalink.com
auDi a4 2004-2008
Automotive Data Solutions Inc. © 2017 4
INSTALLATION INSTRUCTIONS
AIRBAG WARNING LIGHT
If an airbag warning light turns ON after starting the vehicle
without having the airbag light plugged in, select Clear Airbag
Warning to turn OFF that warning light.
Kenwood Radios:
Main Menu>>Setup>>Sources>>Volkswagen Setup>>Vehicle
Features>>Clear Airbag Warning
Alpine Radios:
Settings>>General>>Idatalink Setup>> Maestro
Module>>Volkswagen Setup>>Vehicle Features>>Clear Airbag
Warning
TROUBLESHOOTING TIPS:
• To reset the module back to its factory settings, turn the
key to the OFF position then disconnect all connectors
from the module. Press and hold the module’s
programming button and connect all the connectors
back to the module. Wait, the module’s LED will flash
RED rapidly (this may take up to 10 seconds). Release the
programming button. Wait, the LED will turn solid GREEN
for 2 seconds.
• For technical assistance call 1-866-427-2999 or e-mail
“[email protected]”. Visit us at “maestro.idatalink.
com/support” and “www.12voltdata.com/forum/”
1
ADS-RR(SR)-AUD01-DS maestro.idatalink.com
auDi a4 2004-2008
Automotive Data Solutions Inc. © 2017 5
C
A
H
F
G
D
C
A
G
F
H D
1
WIRING DIAGRAM
STEP 1
STEP 2
STEP 3
STEP 4
STEP 5
MAESTRO RR MODULE
WHITE - LF SPEAKER (+)
WHITE/BLACK - LF SPEAKER (-)
GRAY - RF SPEAKER (+)
GRAY/BLACK - RF SPEAKER (-)
GREEN - LR SPEAKER (+)
GREEN/BLACK - LR SPEAKER (-)
PURPLE/BLACK - RR SPEAKER (-)
YELLOW - 12V (+)
BLACK - GROUND
RED - ACCESSORY (+)
BROWN (NOT CONNECTED)
(NOT CONNECTED)
(NOT CONNECTED)
(NOT CONNECTED)
(NOT CONNECTED)
(NOT CONNECTED)
ORANGE - ILLUMINATION (+)
PURPLE/WHITE - REVERSE LIGHT (+)
LTGREEN - E-BRAKE (-)
BLUE/WHITE - AMP. TURN ON (+)
MAIN
HARNESS
DATA
CABLE
AUDIO
CABLE
PURPLE - RR SPEAKER (+)
CONNECT TO
AFTERMARKET RADIO
VW1 T-HARNESS
FACTORY RADIO
HARNESS
OBDII CONNECTOR
WIRES FROM
VEHICLE
YELLOW/BLACK - FOOT BRAKE
PINK - VEHICLE SPEED
SEE CHART ON
NEXT PAGE FOR
RADIO WIRE
COLORS
WHITEWHITE
ADS-RR(SR)-AUD01-DS maestro.idatalink.com
auDi a4 2004-2008
Automotive Data Solutions Inc. © 2017 6
RADIO WIRE REFERENCE CHART
Wire
Description Polarity Wire Color on Maestro
T-Harness Wire Color on Alpine cable Wire Color on Kenwood cable Wire Color on Pioneer cable
Illumination (+) Orange N/A Orange/White Orange/White
Reverse Light (+) Purple/White Orange/White Purple/White Purple/White
E-Brake (-) Lt Green Yellow/Blue Lt Green Lt Green
Foot Brake (+) Yellow/Black Yellow/Black N/A N/A
VSS (vehicle speed sensor) (DATA) Pink Green/White N/A Pink
OPTIONAL ACCESSORIES
None
PROGRAMMED FIRMWARE
ADS-RR(SR)-AUD01-DS
PRODUCTS REQUIRED
iDatalink Maestro RR Radio Replacement Interface
iDatalink Maestro VW1 Installation Harness
INSTALL GUIDE
AUDI R8
20092015
retains steering wheel controls, MFD anD More!
NOTICE: Automotive Data Solutions Inc. (ADS) recommends having this installation performed by a certified technician. Logos and trademarks used here
in are the properties of their respective owners.
ADS-RR(SR)-AUD01-DS maestro.idatalink.com
auDi r8 2009-2015
Automotive Data Solutions Inc. © 2017 2
WELCOME
NEED HELP?
Congratulations on the purchase
of your iDatalink Maestro RR Radio
replacement solution. You are
now a few simple steps away from
enjoying your new car radio with
enhanced features.
Before starting your installation,
please ensure that your iDatalink
Maestro module is programmed
with the correct firmware for your
vehicle and that you carefully review
the install guide.
Please note that Maestro RR will
only retain functionalities that
were originally available in the
vehicle.
1 866 427-2999
[email protected]
maestro.idatalink.com/support
www.12voltdata.com/forum
TABLE OF CONTENTS
Installation Instructions 3
Wiring Diagram 5
Radio Wire Reference Chart 6
ADS-RR(SR)-AUD01-DS maestro.idatalink.com
auDi r8 2009-2015
Automotive Data Solutions Inc. © 2017 3
INSTALLATION INSTRUCTIONS
Note 1: The OEM amplifier cannot be retained with this
solution.
Note 2: The OEM backup camera cannot be retained with
this solution. It can be retained by using a third party
component to composite video converter.
STEP 1
• Unbox the aftermarket radio and locate its main harness.
• Connect the wires shown on the next page from
aftermarket radio main harness to the VW1 T-harness and
match the wire functions.
STEP 2
• Connect the factory harness to the VW1 T-harness.
• Mate the male and female 4 pin WHITE connectors of the
VW1 T-harness.
• Do not use any of the RCA plugs (WHITE, GRAY, GREEN &
PURPLE) of the VW1 T-harness.
STEP 3
• Plug the OBDII connector into the OBDII of the vehicle,
under driver dash.
STEP 4
• Plug the aftermarket radio harnesses into the aftermarket
radio.
• Plug the Data cable to the data port of the aftermarket
radio.
• Insert the Audio cable into the iDatalink 3.5 mm audio jack
of the aftermarket radio.
STEP 5
• Connect all the harnesses to the Maestro RR module then
proceed to module setup.
The module is now ready to be used.
Insert the aftermarket radio in the dashboard housing and
test all the functionalities.
Reassemble the dashboard carefully.
OEM BLUETOOTH SETUP
Only one Bluetooth system can be set for hands free calling.
This must be determined before installation. Both the
factory and aftermarket systems can be used for Bluetooth
audio streaming. If the aftermarket Bluetooth is chosen for
hands free calling, the aftermarket microphone must be
installed in the vehicle and the factory Bluetooth module
must be unplugged. In most vehicles, it is located under the
passenger seat. If the vehicle is equipped with Bluetooth
but there is no Bluetooth module under the passenger’s
seat then the Bluetooth system is built into the MDI module.
Unplugging the MDI module will disable both factory
systems.
2013 Kenwood Radios:
For these radio models, the OEM Bluetooth is turned OFF
by default. To turn ON the OEM Bluetooth, insert the key
into the ignition and turn it to the ACC position. The Radio
will turn on and the setup screen will appear. Scroll to the
bottom and select the vehicle set up menu by pressing SET.
Go to the option OEM Bluetooth and select ON. Press the
return arrow then scroll to the bottom of the page select
FINISH.
2014 Kenwood Radios:
For these radio models, the OEM Bluetooth is turned ON
by default. To turn OFF the OEM Bluetooth, insert the key
into the ignition and turn it to the ACC position. The radio
will turn ON and the setup screen will appear. Scroll to the
bottom and select the vehicle set up menu by pressing SET.
Go to the option OEM Bluetooth and select OFF.
2014 Alpine Radios:
For these radio models, the OEM Bluetooth is turned ON by
default. To turn OFF the OEM Bluetooth, insert the key into
the ignition and turn it to the ACC position. The radio will
turn ON and the main screen will appear. Select the settings
button, in the top right corner, then select GENERAL.
Select INTEGRATION SETUP then select HANDS FREE
CONNECTION. Two options will be available ON or OFF,
select OFF.
1
ADS-RR(SR)-AUD01-DS maestro.idatalink.com
auDi r8 2009-2015
Automotive Data Solutions Inc. © 2017 4
INSTALLATION INSTRUCTIONS
AIRBAG WARNING LIGHT
If an airbag warning light turns ON after starting the vehicle
without having the airbag light plugged in, select Clear Airbag
Warning to turn OFF that warning light.
Kenwood Radios:
Main Menu>>Setup>>Sources>>Volkswagen Setup>>Vehicle
Features>>Clear Airbag Warning
Alpine Radios:
Settings>>General>>Idatalink Setup>> Maestro
Module>>Volkswagen Setup>>Vehicle Features>>Clear Airbag
Warning
TROUBLESHOOTING TIPS:
• To reset the module back to its factory settings, turn the
key to the OFF position then disconnect all connectors
from the module. Press and hold the module’s
programming button and connect all the connectors
back to the module. Wait, the module’s LED will flash
RED rapidly (this may take up to 10 seconds). Release the
programming button. Wait, the LED will turn solid GREEN
for 2 seconds.
• For technical assistance call 1-866-427-2999 or e-mail
“[email protected]”. Visit us at “maestro.idatalink.
com/support” and “www.12voltdata.com/forum/”
1
ADS-RR(SR)-AUD01-DS maestro.idatalink.com
auDi r8 2009-2015
Automotive Data Solutions Inc. © 2017 5
C
A
H
F
G
D
C
A
G
F
H D
1
WIRING DIAGRAM
STEP 1
STEP 2
STEP 3
STEP 4
STEP 5
MAESTRO RR MODULE
WHITE - LF SPEAKER (+)
WHITE/BLACK - LF SPEAKER (-)
GRAY - RF SPEAKER (+)
GRAY/BLACK - RF SPEAKER (-)
GREEN - LR SPEAKER (+)
GREEN/BLACK - LR SPEAKER (-)
PURPLE/BLACK - RR SPEAKER (-)
YELLOW - 12V (+)
BLACK - GROUND
RED - ACCESSORY (+)
BROWN (NOT CONNECTED)
(NOT CONNECTED)
(NOT CONNECTED)
(NOT CONNECTED)
(NOT CONNECTED)
(NOT CONNECTED)
ORANGE - ILLUMINATION (+)
PURPLE/WHITE - REVERSE LIGHT (+)
LTGREEN - E-BRAKE (-)
BLUE/WHITE - AMP. TURN ON (+)
MAIN
HARNESS
DATA
CABLE
AUDIO
CABLE
PURPLE - RR SPEAKER (+)
CONNECT TO
AFTERMARKET RADIO
VW1 T-HARNESS
FACTORY RADIO
HARNESS
OBDII CONNECTOR
WIRES FROM
VEHICLE
YELLOW/BLACK - FOOT BRAKE
PINK - VEHICLE SPEED
SEE CHART ON
NEXT PAGE FOR
RADIO WIRE
COLORS
WHITEWHITE
ADS-RR(SR)-AUD01-DS maestro.idatalink.com
auDi r8 2009-2015
Automotive Data Solutions Inc. © 2017 6
RADIO WIRE REFERENCE CHART
Wire
Description Polarity Wire Color on Maestro
T-Harness Wire Color on Alpine cable Wire Color on Kenwood cable Wire Color on Pioneer cable
Illumination (+) Orange N/A Orange/White Orange/White
Reverse Light (+) Purple/White Orange/White Purple/White Purple/White
E-Brake (-) Lt Green Yellow/Blue Lt Green Lt Green
Foot Brake (+) Yellow/Black Yellow/Black N/A N/A
VSS (vehicle speed sensor) (DATA) Pink Green/White N/A Pink
OPTIONAL ACCESSORIES
None
PROGRAMMED FIRMWARE
ADS-RR(SR)-AUD01-DS
PRODUCTS REQUIRED
iDatalink Maestro RR Radio Replacement Interface
iDatalink Maestro VW1 Installation Harness
INSTALL GUIDE
AUDI TT
20082015
retains steering wheel controls, MFD anD More!
NOTICE: Automotive Data Solutions Inc. (ADS) recommends having this installation performed by a certified technician. Logos and trademarks used here
in are the properties of their respective owners.

Other manuals for maestro Rr

48

Other iDataLink Automobile Accessories manuals

iDataLink maestro Rr User manual

iDataLink

iDataLink maestro Rr User manual

iDataLink ADS-ALCA User manual

iDataLink

iDataLink ADS-ALCA User manual

iDataLink maestro Rr User manual

iDataLink

iDataLink maestro Rr User manual

iDataLink Maestro HRR-HO1 User manual

iDataLink

iDataLink Maestro HRR-HO1 User manual

iDataLink BLADE-AL(TB)-TL2 User manual

iDataLink

iDataLink BLADE-AL(TB)-TL2 User manual

iDataLink maestro Rr User manual

iDataLink

iDataLink maestro Rr User manual

iDataLink maestro Rr User manual

iDataLink

iDataLink maestro Rr User manual

iDataLink Maestro RR User manual

iDataLink

iDataLink Maestro RR User manual

iDataLink ADS-TBSL-C1 User manual

iDataLink

iDataLink ADS-TBSL-C1 User manual

iDataLink maestro Rr User manual

iDataLink

iDataLink maestro Rr User manual

iDataLink Maestro RR User manual

iDataLink

iDataLink Maestro RR User manual

iDataLink maestro mus1 User manual

iDataLink

iDataLink maestro mus1 User manual

iDataLink Maestro AR User manual

iDataLink

iDataLink Maestro AR User manual

iDataLink Maestro RR User manual

iDataLink

iDataLink Maestro RR User manual

iDataLink maestro Rr User manual

iDataLink

iDataLink maestro Rr User manual

iDataLink maestro Rr User manual

iDataLink

iDataLink maestro Rr User manual

iDataLink Maestro RR User manual

iDataLink

iDataLink Maestro RR User manual

iDataLink maestro Rr User manual

iDataLink

iDataLink maestro Rr User manual

iDataLink maestro Rr User manual

iDataLink

iDataLink maestro Rr User manual

iDataLink maestro Rr User manual

iDataLink

iDataLink maestro Rr User manual

iDataLink Maestro K150 User manual

iDataLink

iDataLink Maestro K150 User manual

iDataLink Maestro RR User manual

iDataLink

iDataLink Maestro RR User manual

iDataLink Maestro RR User manual

iDataLink

iDataLink Maestro RR User manual

iDataLink maestro Rr User manual

iDataLink

iDataLink maestro Rr User manual

Popular Automobile Accessories manuals by other brands

bosal 034101 FITTING INSTRUCTION

bosal

bosal 034101 FITTING INSTRUCTION

Truma Mover S Installation & operation instructions

Truma

Truma Mover S Installation & operation instructions

Zoombak Advanced GPS Car Locator installation guide

Zoombak

Zoombak Advanced GPS Car Locator installation guide

Eldi c.LOGiC lite cC1-C20 manual

Eldi

Eldi c.LOGiC lite cC1-C20 manual

HAUL MASTER 94564 Assembly and operating instructions

HAUL MASTER

HAUL MASTER 94564 Assembly and operating instructions

enphase HCS-40 user manual

enphase

enphase HCS-40 user manual

walser Perma Protect User instructions

walser

walser Perma Protect User instructions

Brink 5041 Fitting instructions

Brink

Brink 5041 Fitting instructions

Xpresskit RFLMIT3 quick start guide

Xpresskit

Xpresskit RFLMIT3 quick start guide

Directed Directechs DB3 installation guide

Directed

Directed Directechs DB3 installation guide

Connects2 CAM-MB2-AD instruction manual

Connects2

Connects2 CAM-MB2-AD instruction manual

HKS EVC EZ-II Installation and setup instructions

HKS

HKS EVC EZ-II Installation and setup instructions

Whispbar K1002W Fitting Instructions for Basic Carrier

Whispbar

Whispbar K1002W Fitting Instructions for Basic Carrier

Gilis BebeStars MACAN 920 user manual

Gilis

Gilis BebeStars MACAN 920 user manual

Ecco Reflex 5500 Series Installation and operation instructions

Ecco

Ecco Reflex 5500 Series Installation and operation instructions

Thule Rapid System 1550 instructions

Thule

Thule Rapid System 1550 instructions

Sena 50S user guide

Sena

Sena 50S user guide

Advent UBTSW2 owner's manual

Advent

Advent UBTSW2 owner's manual

manuals.online logo
manuals.online logoBrands
  • About & Mission
  • Contact us
  • Privacy Policy
  • Terms and Conditions

Copyright 2025 Manuals.Online. All Rights Reserved.