ADS-HRR(SR)-CAM1-DS-IG-EN maestro.idatalink.com
CHEVROLET CAMARO 20102015
Automotive Data Solutions Inc. © 2023 4
Fig. 2.1
Fig. 2.2
Fig. 2.4
Fig. 2.3
RADIO INSTALLATION/MAKE CONNECTIONS
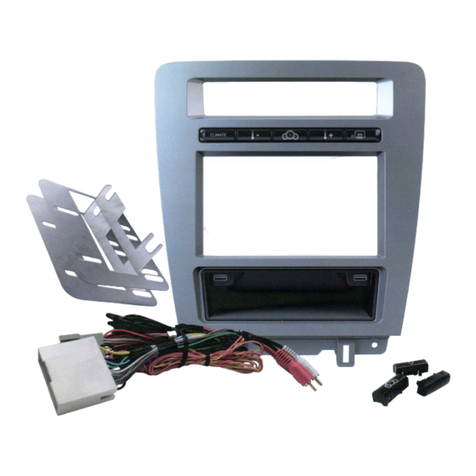
Unbox the aftermarket radio. Install the metal brackets
provided with the CAM1 kit to the aftermarket radio using
the screws supplied with the aftermarket radio. (Fig. 2.3)
(refer to wiring diagram)
1. If using head unit adapter (sold separately), connect HRR-
CAM1 harness to adapter and skip to step 2.
Locate aftermarket radio’s main harness.
Cut and remove the black 20 pin connector from the HRR-
CAM1 T-harness and connect the wires, shown in the
wiring diagram, from aftermarket radio main harness to
the HRR-CAM1 T-harness and match the wire functions.
DASH DISASSEMBLY (Radio removal)
1. Remove (2) 7mm screws securing the bottom of the radio
bezel. (Fig. 2.1)
2. Using a panel tool, gently release the clips securing the
radio bezel to the dash. Disconnect the wiring harness on
the back of the OEM panel. (Fig. 2.1)
3. Remove (4) 7mm screws holding the OEM radio in the dash.
Unclip the radio and remove it. (Fig. 2.2)
1
Note: only connect purple/white wire to radio reverse input
or module damage will occur.
2. Plug the backup camera cable into the factory harness (if
applicable).
3. With factory amplifier: Connect the HRR-CAM1 8 pin
WHITE connectors to the AMP adapter (PAD1 circuit).
Without factory amplifier: Leave the 8-pin white
connectors on harness connected to each other.
4. Connect the CAM1 T-harness to the factory radio harness.
5. Plug the OBD2 connector into the OBD2 port of the vehicle,
located under the driver side dash.
6. Plug the harnesses into the aftermarket radio.
Plug the data cable to the data port of the aftermarket
radio.
Insert the audio cable into the iDatalink 3.5mm audio jack
of the aftermarket radio (labeled iDatalink. If there is no
iDatalink audio input, connect to AUX).
Plug the backup camera RCA into the aftermarket radio (if
applicable).
Note: When using a Pioneer radio, please ensure that there
is nothing plugged into the W/R port of the radio.
7. Connect all harnesses to the Maestro RR module.
8. Insert the radio into the dash and secure the metal
brackets with (4) 7mm screws removed during disassembly.
9. Connect the white 6-pin harness to the button bar of the
dash kit.
10. Press the CAM1 bezel into place and secure it with the (2)
7mm screws. Test your installation before completely re-
assembling the vehicle. (Fig. 2.4)
INSTALLATION INSTRUCTIONS P2 /2


