manuals.online logo
Brands
  1. Home
  2. •
  3. Brands
  4. •
  5. iDataLink
  6. •
  7. Automobile Accessories
  8. •
  9. iDataLink Maestro RR User manual

iDataLink Maestro RR User manual

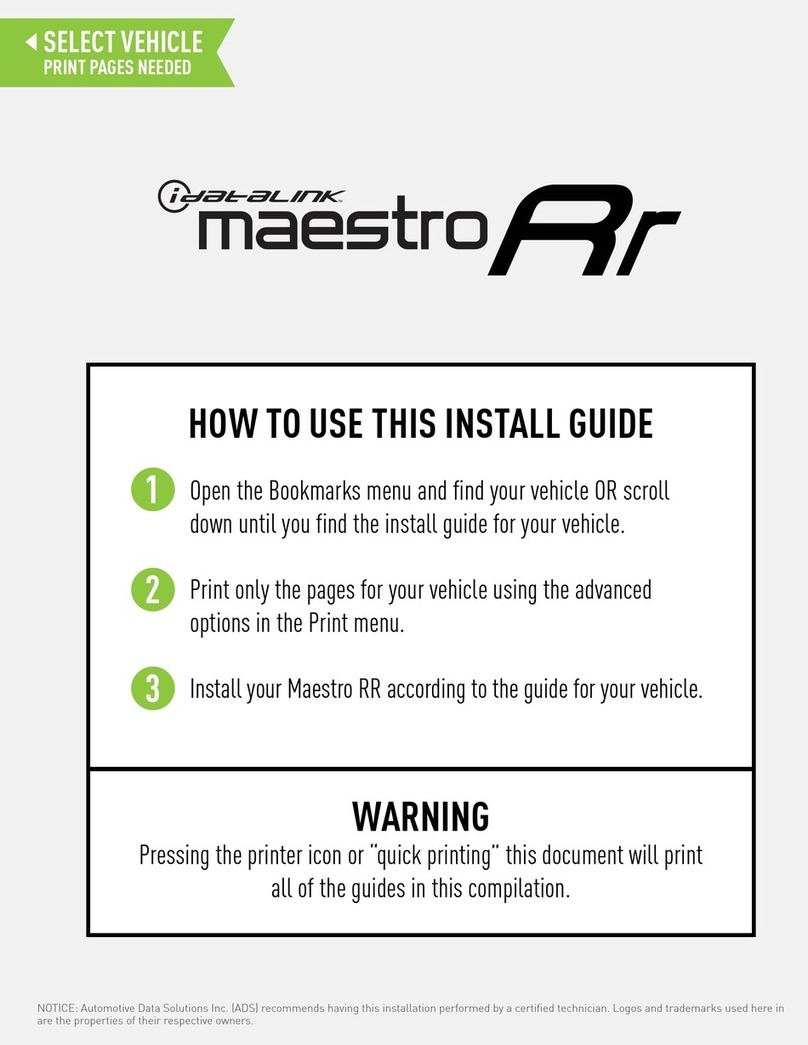
NOTICE: Automotive Data Solutions Inc. (ADS) recommends having this installation performed by a certified technician. Logos and trademarks used here in
are the properties of their respective owners.
WARNING
Pressing the printer icon or “quick printing” this document will print
all of the guides in this compilation.
Open the Bookmarks menu and find your vehicle OR scroll
down until you find the install guide for your vehicle.
Print only the pages for your vehicle using the advanced
options in the Print menu.
Install your Maestro RR according to the guide for your vehicle.
HOW TO USE THIS INSTALL GUIDE
1
2
3
SELECT VEHICLE
PRINT PAGES NEEDED
2020
ToyoTa 4 RunneR
WiTh JBL
INSTALL GUIDE
RETAINS STEERING WHEEL CONTROLS, BACKUP CAMERA, AND MORE!
NOTICE: Automotive Data Solutions Inc. (ADS) recommends having this installation performed by a certified technician. Logos and trademarks used here
in are the properties of their respective owners.
PRODUCTS REQUIRED
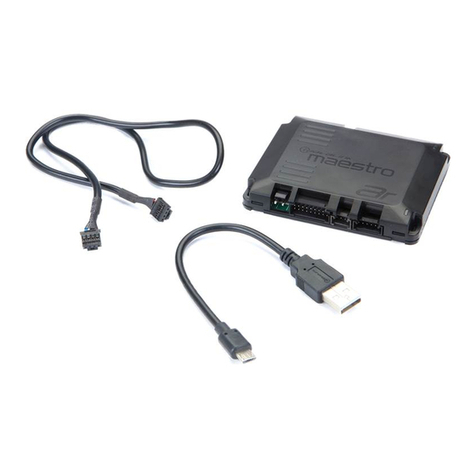
iDatalink Maestro RR or RR2 Radio Replacement Interface
iDatalink Maestro HRN-RR-TO3 Installation Harness
PROGRAMMED FIRMWARE
ADS-RR(SR)-TOY03-AS
ADDITIONAL RESOURCES
Maestro RR2 Programmable Outputs Guide
OR
OPTIONAL ACCESSORIES
ADS-RR(SR)-TOY03-AS-IG-EN maestro.idatalink.com
ToyoTa 4 RunneR WiTh JBL 2020
Automotive Data Solutions Inc. © 2020 2
NEED HELP?
TABLE OF CONTENTS
Installation Instructions 3
Wiring Diagram 4
Troubleshooting Table 5
WELCOME
Congratulations on the purchase
of your iDatalink Maestro RR Radio
replacement solution. You are
now a few simple steps away from
enjoying your new car radio with
enhanced features.
Before starting your installation,
please ensure that your iDatalink
Maestro module is programmed
with the correct firmware for your
vehicle and that you carefully review
the install guide.
Please note that Maestro RR will
only retain functionalities that
were originally available in the
vehicle.
1 866 427-2999
maestro.idatalink.com/support
www.12voltdata.com/forum
[email protected]
ADS-RR(SR)-TOY03-AS-IG-EN maestro.idatalink.com
ToyoTa 4 RunneR WiTh JBL 2020
Automotive Data Solutions Inc. © 2020 3
INSTALLATION INSTRUCTIONS
STEP 1
• Unbox the aftermarket radio and locate its main harness.
• Connect the wires shown on the next page from
aftermarket radio main harness to the TO3 T-harness
and match the wire functions (Note: Rear speaker wire
connections are not required).
• Remove the factory radio.
STEP 2
• Connect the factory harness to the TO3 T-harness.
STEP 3
• Plug the aftermarket radio harnesses into the aftermarket
radio.
• Connect the backup camera RCA cable into the
aftermarket radio (if equipped).
• Connect the auxiliary cables into the aftermarket radio (if
equipped).
• Plug the steering wheel control cable into the aftermarket
radio.
STEP 4
• Connect all the harnesses to the Maestro RR module then
test your installation.
1
ADS-RR(SR)-TOY03-AS-IG-EN maestro.idatalink.com
ToyoTa 4 RunneR WiTh JBL 2020
Automotive Data Solutions Inc. © 2020 4
AUXAUX
2
BACKUP CAMBACKUP CAM
YELLOW - 12V (+)
BLACK - GROUND
RED - ACCESSORY (+)
ORANGE - ILLUMINATION (+)
PURPLE/WHITE - REVERSE LIGHT (+)
PINK - VEHICLE SPEED
LTGREEN - E-BRAKE (-)
BLUE/WHITE - AMP. TURN ON (+)
MAIN
HARNESS
FACTORY RADIO HARNESS
TO3 T-HARNESS
STEP 1
STEP 2
STEP 3
WIRES FROM
VEHICLE
GREEN - LR SPEAKER (+)
GREEN/BLACK - LR SPEAKER (-)
PURPLE/BLACK - RR SPEAKER (-)
PURPLE - RR SPEAKER (+)
STEP 4
NOT REQUIRED
N.C.
MAESTRO RR MODULE
RCA CABLES
WHITE
WHITE/BLACK
GRAY
GRAY/BLACK
LF RCA INPUT
RF RCA INPUT
CONNECTIONS
NOT
REQUIRED
WITH AMP
AUDIO
CABLE
DATA
CABLE
STEERING WHEEL
CONTROL CABLE
CONNECT TO
AFTERMARKET RADIO
WIRING DIAGRAM with JBL
CONNECT
IF
THERE IS
A MATCH
ADS-RR(SR)-TOY03-AS-IG-EN maestro.idatalink.com
ToyoTa 4 RunneR WiTh JBL 2020
Automotive Data Solutions Inc. © 2020 5
TROUBLESHOOTING TABLE
PROBLEM SOLUTION
When a button on the steering wheel is pressed, the light on the Maestro
module blinks but the radio does not respond.
Ensure the blue 4-pin steering wheel control cable is connected between the
maestro and the radio (the radio will use either the 3.5mm jack or the Blue/
Yellow wire, not both).
Refer to radio’s owners manual to verifie if the radio has this function:
Steering Wheel Control (ON/OFF) : choose ON.
or
Steering Wheel Control (Custom/Preset): choose Preset
The light on the Maestro is flashing RED ONCE. There is no firmware on the module; flash the RR module.
MAESTRO RR RESET PROCEDURE:
Turn the key to the OFF position, then disconnect all connectors from the module.
Press and hold the module’s programming button and connect all the connectors back to the module. Wait, the module’s LED will flash RED rapidly (this may
take up to 10 seconds).
Release the programming button. Wait, the LED will turn solid GREEN for 2 seconds to show the reset was successful.
TECHNICAL ASSISTANCE
Phone: 1-866-427-2999
Email: maestr[email protected]
Web: maestro.idatalink.com/support add www.12voltdata.com/forum/
IMPORTANT: To ensure proper operation, the aftermarket radio needs to have the latest firmware from the manufacturer. Please visit the radio
manufacturer’s website and look for any updates pertaining to your radio.
2020
ToyoTa 4 RunneR
WiThouT JBL
INSTALL GUIDE
RETAINS STEERING WHEEL CONTROLS, BACKUP CAMERA, AND MORE!
NOTICE: Automotive Data Solutions Inc. (ADS) recommends having this installation performed by a certified technician. Logos and trademarks used here
in are the properties of their respective owners.
PRODUCTS REQUIRED
iDatalink Maestro RR or RR2 Radio Replacement Interface
iDatalink Maestro HRN-RR-TO3 Installation Harness
PROGRAMMED FIRMWARE
ADS-RR(SR)-TOY03-AS
ADDITIONAL RESOURCES
Maestro RR2 Programmable Outputs Guide
OR
OPTIONAL ACCESSORIES
ADS-RR(SR)-TOY03-AS-IG-EN maestro.idatalink.com
ToyoTa 4 RunneR WiThouT JBL 2020
Automotive Data Solutions Inc. © 2020 2
NEED HELP?
TABLE OF CONTENTS
Installation Instructions 3
Wiring Diagram 4
Troubleshooting Table 5
WELCOME
Congratulations on the purchase
of your iDatalink Maestro RR Radio
replacement solution. You are
now a few simple steps away from
enjoying your new car radio with
enhanced features.
Before starting your installation,
please ensure that your iDatalink
Maestro module is programmed
with the correct firmware for your
vehicle and that you carefully review
the install guide.
Please note that Maestro RR will
only retain functionalities that
were originally available in the
vehicle.
1 866 427-2999
maestro.idatalink.com/support
www.12voltdata.com/forum
[email protected]
ADS-RR(SR)-TOY03-AS-IG-EN maestro.idatalink.com
ToyoTa 4 RunneR WiThouT JBL 2020
Automotive Data Solutions Inc. © 2020 3
INSTALLATION INSTRUCTIONS
STEP 1
• Unbox the aftermarket radio and locate its main harness.
• Cut and remove the front speaker wire junction connectors.
• Connect the wires shown on the next page from
aftermarket radio main harness to the TO3 T-harness
and match the wire functions (Note: Rear speaker wire
connections are not required).
• Remove the factory radio.
STEP 2
• Connect the factory harness to the TO3 T-harness.
STEP 3
• Plug the aftermarket radio harnesses into the aftermarket
radio.
• Connect the backup camera RCA cable into the
aftermarket radio (if equipped).
• Connect the auxiliary cables into the aftermarket radio (if
equipped).
• Plug the steering wheel control cable into the aftermarket
radio.
STEP 4
• Connect all the harnesses to the Maestro RR module then
test your installation.
2
ADS-RR(SR)-TOY03-AS-IG-EN maestro.idatalink.com
ToyoTa 4 RunneR WiThouT JBL 2020
Automotive Data Solutions Inc. © 2020 4
AUXAUX
2
BACKUP CAMBACKUP CAM
YELLOW - 12V (+)
BLACK - GROUND
RED - ACCESSORY (+)
ORANGE - ILLUMINATION (+)
PURPLE/WHITE - REVERSE LIGHT (+)
PINK - VEHICLE SPEED
LTGREEN - E-BRAKE (-)
BLUE/WHITE - AMP. TURN ON (+)
MAIN
HARNESS
FACTORY RADIO HARNESS
TO3 T-HARNESS
STEP 1
STEP 2
STEP 3
WIRES FROM
VEHICLE
CONNECT
IF
THERE IS
A MATCH
GREEN - LR SPEAKER (+)
GREEN/BLACK - LR SPEAKER (-)
PURPLE/BLACK - RR SPEAKER (-)
PURPLE - RR SPEAKER (+)
STEP 4
CUT AND REMOVE
THE SPEAKER WIRE
JUNCTION CONNECTORS
WHITE - LF SPEAKER (+)
WHITE/BLACK - LF SPEAKER (-)
GRAY - RF SPEAKER (+)
GRAY/BLACK - RF SPEAKER (-)
N.C.
MAESTRO RR MODULE
WIRING DIAGRAM without JBL
NOT REQUIRED
AUDIO
CABLE
DATA
CABLE
STEERING WHEEL
CONTROL CABLE
CONNECT TO
AFTERMARKET RADIO
ADS-RR(SR)-TOY03-AS-IG-EN maestro.idatalink.com
ToyoTa 4 RunneR WiThouT JBL 2020
Automotive Data Solutions Inc. © 2020 5
TROUBLESHOOTING TABLE
PROBLEM SOLUTION
When a button on the steering wheel is pressed, the light on the Maestro
module blinks but the radio does not respond.
Ensure the blue 4-pin steering wheel control cable is connected between the
maestro and the radio (the radio will use either the 3.5mm jack or the Blue/
Yellow wire, not both).
Refer to radio’s owners manual to verifie if the radio has this function:
Steering Wheel Control (ON/OFF) : choose ON.
or
Steering Wheel Control (Custom/Preset): choose Preset
The light on the Maestro is flashing RED ONCE. There is no firmware on the module; flash the RR module.
MAESTRO RR RESET PROCEDURE:
Turn the key to the OFF position, then disconnect all connectors from the module.
Press and hold the module’s programming button and connect all the connectors back to the module. Wait, the module’s LED will flash RED rapidly (this may
take up to 10 seconds).
Release the programming button. Wait, the LED will turn solid GREEN for 2 seconds to show the reset was successful.
TECHNICAL ASSISTANCE
Phone: 1-866-427-2999
Email: maestr[email protected]
Web: maestro.idatalink.com/support add www.12voltdata.com/forum/
IMPORTANT: To ensure proper operation, the aftermarket radio needs to have the latest firmware from the manufacturer. Please visit the radio
manufacturer’s website and look for any updates pertaining to your radio.
2019-2020
ToyoTa avaLon
WiTh JBL
INSTALL GUIDE
RETAINS STEERING WHEEL CONTROLS, BACKUP CAMERA, AND MORE!
NOTICE: Automotive Data Solutions Inc. (ADS) recommends having this installation performed by a certified technician. Logos and trademarks used here
in are the properties of their respective owners.
PRODUCTS REQUIRED
iDatalink Maestro RR or RR2 Radio Replacement Interface
iDatalink Maestro HRN-RR-TO3 Installation Harness
PROGRAMMED FIRMWARE
ADS-RR(SR)-TOY03-AS
ADDITIONAL RESOURCES
Maestro RR2 Programmable Outputs Guide
OR
OPTIONAL ACCESSORIES
ADS-RR(SR)-TOY03-AS-IG-EN maestro.idatalink.com
ToyoTa avaLon WiTh JBL 2019-2020
Automotive Data Solutions Inc. © 2020 2
NEED HELP?
TABLE OF CONTENTS
Installation Instructions 3
Wiring Diagram 4
Troubleshooting Table 5
WELCOME
Congratulations on the purchase
of your iDatalink Maestro RR Radio
replacement solution. You are
now a few simple steps away from
enjoying your new car radio with
enhanced features.
Before starting your installation,
please ensure that your iDatalink
Maestro module is programmed
with the correct firmware for your
vehicle and that you carefully review
the install guide.
Please note that Maestro RR will
only retain functionalities that
were originally available in the
vehicle.
1 866 427-2999
maestro.idatalink.com/support
www.12voltdata.com/forum
[email protected]
ADS-RR(SR)-TOY03-AS-IG-EN maestro.idatalink.com
ToyoTa avaLon WiTh JBL 2019-2020
Automotive Data Solutions Inc. © 2020 3
INSTALLATION INSTRUCTIONS
STEP 1
• Unbox the aftermarket radio and locate its main harness.
• Connect the wires shown on the next page from
aftermarket radio main harness to the TO3 T-harness
and match the wire functions (Note: Rear speaker wire
connections are not required).
• Remove the factory radio.
STEP 2
• Connect the factory harness to the TO3 T-harness.
STEP 3
• Plug the aftermarket radio harnesses into the aftermarket
radio.
• Connect the backup camera RCA cable into the
aftermarket radio (if equipped).
• Connect the auxiliary cables into the aftermarket radio (if
equipped).
• Plug the steering wheel control cable into the aftermarket
radio.
STEP 4
• Connect all the harnesses to the Maestro RR module then
test your installation.
1
ADS-RR(SR)-TOY03-AS-IG-EN maestro.idatalink.com
ToyoTa avaLon WiTh JBL 2019-2020
Automotive Data Solutions Inc. © 2020 4
AUXAUX
2
BACKUP CAMBACKUP CAM
YELLOW - 12V (+)
BLACK - GROUND
RED - ACCESSORY (+)
ORANGE - ILLUMINATION (+)
PURPLE/WHITE - REVERSE LIGHT (+)
PINK - VEHICLE SPEED
LTGREEN - E-BRAKE (-)
BLUE/WHITE - AMP. TURN ON (+)
MAIN
HARNESS
FACTORY RADIO HARNESS
TO3 T-HARNESS
STEP 1
STEP 2
STEP 3
WIRES FROM
VEHICLE
GREEN - LR SPEAKER (+)
GREEN/BLACK - LR SPEAKER (-)
PURPLE/BLACK - RR SPEAKER (-)
PURPLE - RR SPEAKER (+)
STEP 4
NOT REQUIRED
N.C.
MAESTRO RR MODULE
RCA CABLES
WHITE
WHITE/BLACK
GRAY
GRAY/BLACK
LF RCA INPUT
RF RCA INPUT
CONNECTIONS
NOT
REQUIRED
WITH AMP
AUDIO
CABLE
DATA
CABLE
STEERING WHEEL
CONTROL CABLE
CONNECT TO
AFTERMARKET RADIO
WIRING DIAGRAM with JBL
CONNECT
IF
THERE IS
A MATCH
ADS-RR(SR)-TOY03-AS-IG-EN maestro.idatalink.com
ToyoTa avaLon WiTh JBL 2019-2020
Automotive Data Solutions Inc. © 2020 5
TROUBLESHOOTING TABLE
PROBLEM SOLUTION
When a button on the steering wheel is pressed, the light on the Maestro
module blinks but the radio does not respond.
Ensure the blue 4-pin steering wheel control cable is connected between the
maestro and the radio (the radio will use either the 3.5mm jack or the Blue/
Yellow wire, not both).
Refer to radio’s owners manual to verifie if the radio has this function:
Steering Wheel Control (ON/OFF) : choose ON.
or
Steering Wheel Control (Custom/Preset): choose Preset
The light on the Maestro is flashing RED ONCE. There is no firmware on the module; flash the RR module.
MAESTRO RR RESET PROCEDURE:
Turn the key to the OFF position, then disconnect all connectors from the module.
Press and hold the module’s programming button and connect all the connectors back to the module. Wait, the module’s LED will flash RED rapidly (this may
take up to 10 seconds).
Release the programming button. Wait, the LED will turn solid GREEN for 2 seconds to show the reset was successful.
TECHNICAL ASSISTANCE
Phone: 1-866-427-2999
Email: maestr[email protected]
Web: maestro.idatalink.com/support add www.12voltdata.com/forum/
IMPORTANT: To ensure proper operation, the aftermarket radio needs to have the latest firmware from the manufacturer. Please visit the radio
manufacturer’s website and look for any updates pertaining to your radio.
2019-2020
ToyoTa avaLon
WiThouT JBL
INSTALL GUIDE
RETAINS STEERING WHEEL CONTROLS, BACKUP CAMERA, AND MORE!
NOTICE: Automotive Data Solutions Inc. (ADS) recommends having this installation performed by a certified technician. Logos and trademarks used here
in are the properties of their respective owners.
PRODUCTS REQUIRED
iDatalink Maestro RR or RR2 Radio Replacement Interface
iDatalink Maestro HRN-RR-TO3 Installation Harness
PROGRAMMED FIRMWARE
ADS-RR(SR)-TOY03-AS
ADDITIONAL RESOURCES
Maestro RR2 Programmable Outputs Guide
OR
OPTIONAL ACCESSORIES
ADS-RR(SR)-TOY03-AS-IG-EN maestro.idatalink.com
ToyoTa avaLon WiThouT JBL 2019-2020
Automotive Data Solutions Inc. © 2020 2
NEED HELP?
TABLE OF CONTENTS
Installation Instructions 3
Wiring Diagram 4
Troubleshooting Table 5
WELCOME
Congratulations on the purchase
of your iDatalink Maestro RR Radio
replacement solution. You are
now a few simple steps away from
enjoying your new car radio with
enhanced features.
Before starting your installation,
please ensure that your iDatalink
Maestro module is programmed
with the correct firmware for your
vehicle and that you carefully review
the install guide.
Please note that Maestro RR will
only retain functionalities that
were originally available in the
vehicle.
1 866 427-2999
maestro.idatalink.com/support
www.12voltdata.com/forum
[email protected]
ADS-RR(SR)-TOY03-AS-IG-EN maestro.idatalink.com
ToyoTa avaLon WiThouT JBL 2019-2020
Automotive Data Solutions Inc. © 2020 3
INSTALLATION INSTRUCTIONS
STEP 1
• Unbox the aftermarket radio and locate its main harness.
• Cut and remove the front speaker wire junction connectors.
• Connect the wires shown on the next page from
aftermarket radio main harness to the TO3 T-harness
and match the wire functions (Note: Rear speaker wire
connections are not required).
• Remove the factory radio.
STEP 2
• Connect the factory harness to the TO3 T-harness.
STEP 3
• Plug the aftermarket radio harnesses into the aftermarket
radio.
• Connect the backup camera RCA cable into the
aftermarket radio (if equipped).
• Connect the auxiliary cables into the aftermarket radio (if
equipped).
• Plug the steering wheel control cable into the aftermarket
radio.
STEP 4
• Connect all the harnesses to the Maestro RR module then
test your installation.
2
ADS-RR(SR)-TOY03-AS-IG-EN maestro.idatalink.com
ToyoTa avaLon WiThouT JBL 2019-2020
Automotive Data Solutions Inc. © 2020 4
AUXAUX
2
BACKUP CAMBACKUP CAM
YELLOW - 12V (+)
BLACK - GROUND
RED - ACCESSORY (+)
ORANGE - ILLUMINATION (+)
PURPLE/WHITE - REVERSE LIGHT (+)
PINK - VEHICLE SPEED
LTGREEN - E-BRAKE (-)
BLUE/WHITE - AMP. TURN ON (+)
MAIN
HARNESS
FACTORY RADIO HARNESS
TO3 T-HARNESS
STEP 1
STEP 2
STEP 3
WIRES FROM
VEHICLE
CONNECT
IF
THERE IS
A MATCH
GREEN - LR SPEAKER (+)
GREEN/BLACK - LR SPEAKER (-)
PURPLE/BLACK - RR SPEAKER (-)
PURPLE - RR SPEAKER (+)
STEP 4
CUT AND REMOVE
THE SPEAKER WIRE
JUNCTION CONNECTORS
WHITE - LF SPEAKER (+)
WHITE/BLACK - LF SPEAKER (-)
GRAY - RF SPEAKER (+)
GRAY/BLACK - RF SPEAKER (-)
N.C.
MAESTRO RR MODULE
WIRING DIAGRAM without JBL
NOT REQUIRED
AUDIO
CABLE
DATA
CABLE
STEERING WHEEL
CONTROL CABLE
CONNECT TO
AFTERMARKET RADIO

Other manuals for Maestro RR

12

Other iDataLink Automobile Accessories manuals

iDataLink Maestro RR User manual

iDataLink

iDataLink Maestro RR User manual

iDataLink Maestro RR User manual

iDataLink

iDataLink Maestro RR User manual

iDataLink BLADE Series User manual

iDataLink

iDataLink BLADE Series User manual

iDataLink BLADE-AL(TB)-TL2 User manual

iDataLink

iDataLink BLADE-AL(TB)-TL2 User manual

iDataLink Maestro RR User manual

iDataLink

iDataLink Maestro RR User manual

iDataLink maestro Rr User manual

iDataLink

iDataLink maestro Rr User manual
iDataLink maestro Rr User manual

iDataLink

iDataLink maestro Rr User manual

iDataLink ADS-AL-CH4 User manual

iDataLink

iDataLink ADS-AL-CH4 User manual

iDataLink Maestro RR User manual

iDataLink

iDataLink Maestro RR User manual

iDataLink maestro Rr User manual

iDataLink

iDataLink maestro Rr User manual

iDataLink Maestro RR User manual

iDataLink

iDataLink Maestro RR User manual

iDataLink Maestro K150 User manual

iDataLink

iDataLink Maestro K150 User manual

iDataLink maestro Rr User manual

iDataLink

iDataLink maestro Rr User manual

iDataLink maestro Rr User manual

iDataLink

iDataLink maestro Rr User manual

iDataLink maestro Rr User manual

iDataLink

iDataLink maestro Rr User manual

iDataLink Maestro AR User manual

iDataLink

iDataLink Maestro AR User manual

iDataLink Maestro HRR-HO1 User manual

iDataLink

iDataLink Maestro HRR-HO1 User manual

iDataLink Maestro RR User manual

iDataLink

iDataLink Maestro RR User manual

iDataLink maestro Rr User manual

iDataLink

iDataLink maestro Rr User manual

iDataLink maestro Rr User manual

iDataLink

iDataLink maestro Rr User manual

iDataLink maestro Rr User manual

iDataLink

iDataLink maestro Rr User manual

iDataLink SUB9 User manual

iDataLink

iDataLink SUB9 User manual

iDataLink maestro mus1 User manual

iDataLink

iDataLink maestro mus1 User manual

iDataLink maestro Rr User manual

iDataLink

iDataLink maestro Rr User manual

Popular Automobile Accessories manuals by other brands

injen technology PF2057 installation guide

injen technology

injen technology PF2057 installation guide

Fortin EVO-KEY Regular Installation

Fortin

Fortin EVO-KEY Regular Installation

Orlaco Wiegel BT Reflex RRE Series System manual

Orlaco

Orlaco Wiegel BT Reflex RRE Series System manual

ZZ2 ZZAIR-CP quick start guide

ZZ2

ZZ2 ZZAIR-CP quick start guide

Lippert Components 432223 installation manual

Lippert Components

Lippert Components 432223 installation manual

Anycom HCC-250 user manual

Anycom

Anycom HCC-250 user manual

Shark PW026752 installation instructions

Shark

Shark PW026752 installation instructions

Lexus RX 350 2010 owner's guide

Lexus

Lexus RX 350 2010 owner's guide

TS Performance Re-Speed F-150 installation manual

TS Performance

TS Performance Re-Speed F-150 installation manual

Schaudt CSV 416 operating instructions

Schaudt

Schaudt CSV 416 operating instructions

Cruz Alu-Rack L13-100 Assembly instructions

Cruz

Cruz Alu-Rack L13-100 Assembly instructions

Yutrax TX108 owner's manual

Yutrax

Yutrax TX108 owner's manual

MayPole BC2000 quick start guide

MayPole

MayPole BC2000 quick start guide

VESTEL EVC04-AC Series INSTALLATION GUIDELINE

VESTEL

VESTEL EVC04-AC Series INSTALLATION GUIDELINE

Cruz Evo Rack Alu A30-158 Assembly instructions

Cruz

Cruz Evo Rack Alu A30-158 Assembly instructions

Bad Dawg eNVy 593-0014-00 manual

Bad Dawg

Bad Dawg eNVy 593-0014-00 manual

bosal 034191 Fitting instructions

bosal

bosal 034191 Fitting instructions

Venturi mini user guide

Venturi

Venturi mini user guide

manuals.online logo
manuals.online logoBrands
  • About & Mission
  • Contact us
  • Privacy Policy
  • Terms and Conditions

Copyright 2025 Manuals.Online. All Rights Reserved.