IKEA GRILLSKÄR User manual

GRILLSKÄR

13
5
6
7
8
9
10
11
3
4
1
2
12
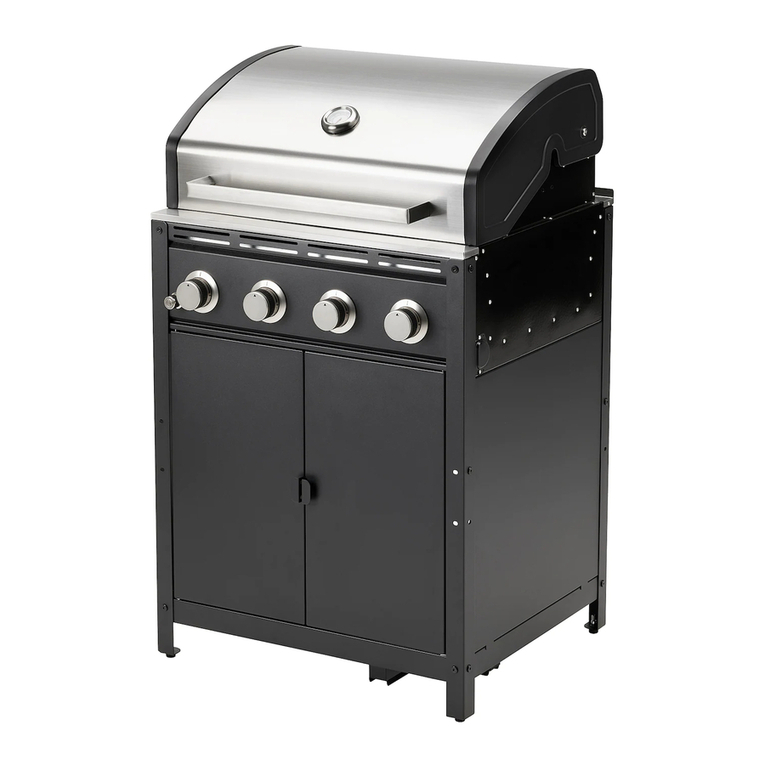
GRILLSKÄR gas barbecue
LIST OF FEATURES
The numbering of the product features shown
refers to the illustration of the barbecue on the
graphic page.
1. Handle
2. Hood
3. Warming rack
4. Cooking grill
5. Vaporizer bars
6. Burners
7. Control knobs
8. Ignition button
9. Barbecue body
10. Grease tray
11. Grease Cup
12. Door
13. Griddle plate

English 4

4English
WARNING
Use outdoors only.
Read the instructions before using the appliance. Failure to follow these instructions and safety
warnings may result in serious bodily injury or death, and/or property loss.
Warning: accessible parts may be very hot. Keep young children away.
Do not move the appliance during use.
Turnothegassupplyatthegascylinderafteruse.
Do not modify the appliance.
Anymodicationofthebarbecuemaybedangerous.
Leaktestthebarbecuebeforerstuse,annually,whendismantled,whenpartsarereplaced,orif
the gas cylinder is removed or replaced.
Retain these instructions for future reference.
DANGER
If you smell gas:
1.Shutogastothebarbecue.
2.Extinguishanyopename.
3. Open lid.
4. If the odour continues, keep away from the barbecue and immediately call your gas supplier or
theredepartment.
WARNING
Donotstoreorusepetrolorotherammableliquidsorvapoursinthevicinityofthisorany
other appliance.
An LP cylinder not connected for use shall not be stored in the vicinity of this or any other
appliance.

5
SAFETY SYMBOLS
The safety symbols and their meanings are
explained below. Read and follow the instructions
in this manual carefully.
DANGER
DANGER: Indicates an imminently hazardous
situation which, if not avoided, will result in
death or serious injury.
WARNING
WARNING: Indicates a potentially hazardous
situation which, if not avoided, could result in
death or serious injury.
CAUTION
CAUTION: Indicates a potentially hazardous
situation or unsafe practice which, if not
avoided, may result in minor or moderate injury.
WARNING
Failure to read and follow these instructions
could result in serious injury or damage to
property.
Installation must conform to local codes.
This product is for OUTDOOR USE ONLY.
NEVER use in an enclosed space such as a
carport, garage, veranda, covered patio, or
under an overhead structure of any kind.
Important – LEAK TEST THE BARBECUE WHEN
FULLY ASSEMBLED BEFORE FIRST USE.
IN ADDITION always leak test the barbecue
annually, when dismantled, when parts are
replaced, or if the gas cylinder is removed
or replaced. FAILURE TO DO THIS COULD
CAUSE SERIOUS INJURY, OR DAMAGE TO THE
BARBECUE.
Always keep the cylinder vertical.
Important – Ensure the barbecue is positioned
onat,levelgroundtoaidwithfat/greaserun
o.
GRILLSKÄR gas barbecue is designed for use
withliquidpropane(LP)gas.Donotusewith
natural(pipedincity)gas.Thevalves,orices,
hose and regulator are for LP gas only.
This barbecue has been supplied with a
propaneregulator(onlyusewithpropane
gas).
Should you need to change the gas cylinder,
makesurethebarbecueisswitchedo,
and that there are no sources of ignition
(cigarettes,opename,sparks,etc.)nearby
before proceeding.
Never use indoors, in an enclosed area or
below ground level.
This barbecue shall only be used above
ground in an open-air situation with natural
ventilation, without enclosed areas, where
gas leakage and products of combustion
are rapidly dispersed by wind and natural
convection.
This barbecue is not intended to be used in or
on boats or in or on recreational vehicles.
This barbecue should not be used under
overhead combustible construction.
Never use an adjustable regulator with this
barbecue.
This barbecue will become very hot when in
use - take care when touching.
Keep children and pets at a safe distance from
this barbecue when in use.
Do not attempt to move this barbecue when
in use.
Alwaysturnogassupplyatthegascylinder
when not in use.
Anymodicationofthisbarbecuemaybe
dangerous.
Do not leave this barbecue unattended when
in use.
Any parts sealed by the manufacturer or his
agent must not be altered by the user.
When igniting, always have the lid open.
Onlyusethebarbecueonaat,levelnon-
ammablesurfaceorground.
When positioning, ensure the barbecue is a
minimumof1metrefromammableitemsor
structure from side and back of the appliance.
This barbecue is not intended for use with
charcoal or other similar fuel.
Donotusepetrol,whitespirit,lighteruid,
alcohol or other similar chemicals to ignite a
barbecue.
When storing the barbecue or gas cylinder,
ensuretheyareawayfromammable
materialsorliquids.

6
The gas cylinder must not be stored next to
this or any other appliance.
Always follow care and maintenance
instructions – regularly maintain your
barbecue.
Do not allow grease, fat or food residue to
build up in or on the barbecue – RISK OF FIRE.
Always replace worn parts – do not use the
barbecue if a leak, wear or damage is found.
Never overload the grill with food – evenly
space over the cooking grill surface, ensuring
sucientaircirculationtotheburners.
Do not store or cover the barbecue until fully
cooled.
This product is not suitable for lava rocks.
Donotobstructtheowofcombustionand
ventilation air.
Keep the ventilation opening of the cylinder
enclosure free and clear from debris.
This appliance must be kept away from
ammablematerialsduringuse.
Pressure regulator and hose assembly
supplied with this barbecue must be used,
propane regulator which complies to EN16129
and LPG hose compliant EN16436-1 no longer
than 1.5m in length.
Replacement pressure regulators and hose
assemblies must be the same as those
supplied originally with the barbecue.
Never use an adjustable regulator with this
barbecue.
Do not hang any combustible materials from
the hand rails of this barbecue.
Always wear protective gloves or a barbecue
mitt when handling hot components or items
such as pots.
Before each use inspect the gas hose to
ensure it is free of any twisting or tension.
Note:TheexibleLPGhosemustbereplaced
priortotheexpirydateasspeciedbythe
hose manufacturer.
LEAK TESTS
IMPORTANT – PERFORM LEAK TESTS BEFORE USE
Always leak test the unit – annually, when
dismantled, when parts are replaced, or if the gas
cylinder is removed or replaced.
• Neveruseanopenametocheckforleaksat
any time. DO NOT IGNITE THE BARBECUE
DURING LEAK TESTING.
• To be performed in a well-ventilated area.
• Be sure all control knobs are in the ‘OFF’
position.
• Check for leaks by brushing a solution of 1/2
water and 1/2 soap over all the gas system joints,
including all valve connections, hose connections
and regulator connections.
• Ensure the soap solution has been applied to all
connections – connect the regulator to the gas
cylinder, open the gas control valve on the
regulatorallowinggastoow.
• OBSERVE – if bubbles form over any part of the
joints there is a leak.
• Turnothegasandtightenalljoints.
• Repeat test. If bubbles form again, do not use
the barbecue. Please contact your local dealer
for assistance.
GAS AND REGULATOR INSTRUCTIONS
• This barbecue can use either propane or butane
LPG bottled gas. If using butane you must
change the regulator.
• Propane cylinders will supply gas all year round,
even on cold winter days.
• Butanecylinderswillsupplysucientgasin
summer. Butane gas must not be used in colder
temperatures. Contact your local gas supplier
for advice.
• The cylinder should be positioned underneath
the main barbecue body and stored upright.
• Gas cylinders should never be stored or laid on
their side.
User instructions
Before assembling your barbecue, remove all
protective packaging from each part.
The gas cylinder must have a connection
compatible with the regulator supplied with the
barbecue and have a minimum capacity of 4kg /
9lbs, with a maximum dimensions of 32cmx58cm.
See assembly instructions for cylinder position.
Do not store a spare LP gas cylinder under or near
this appliance.
Neverllthecylinderbeyond80%full.Failureto
followtheseinstructionsexactlymayresultinre
causing serious injury or death.
Place dust cap on cylinder valve outlet whenever
the cylinder is not in use. Only install the type
of dust cap on the cylinder valve outlet that is
provided with the cylinder valve. Other types of
caps or plugs may result in leakage of propane.

7
Connecting to the Cylinder
• Conrmallbarbecuecontrolknobsareinthe
‘OFF’ position.
OFF
• Connect the regulator to the gas cylinder
according to the instructions below and the
instructions from the gas cylinder supplier.
Read carefully before use
Table (A)
COUNTRY INLET OUTLET
GB/IE Quick-on 27 HOSE NOZZLE
Ø8mm
Fig 1
4
13
2
Fig 2
Fig 3
OFF
ON
Fig 4
OFF
Operating and installation conditions
• The pressure regulator & hose kit is designed for
appliances with a service pressure of 37 mbar, as
indicatedonthepressureregulator(1),with
powerbelowthatindicatedontheregulator(1)
1.5kg/h of propane.
• The pressure regulator must be protected from
the rain in order to prevent water penetrating
throughthevent(3).
• To ensure correct system operation, make sure
thevent(3)isnotblockedbyobjectsor
materials.
• Do not move the cylinder during operation.
Fitting the regulator & hose kit
A) Fitting the operating appliance.
• Make sure all the taps of the operating appliance
are closed. Verify that hose inlet is correctly
connectedtobarbecueinlet(4).
B) Assembly on the gas cylinder
Make sure that:
• All taps of the consuming appliance are closed.
• The connecting pipe to the consuming appliance
iscorrectlytted.
• The “Compact Quick-on” regulator handle is in
the“o”position(Fig2).Removethesealcap
from the cylinder valve, place the “Compact
Quick-on”ontothevalveandpushdownrmly
and vertically. You should hear a “click” sound
which means the regulator is securely latched.
Notes: The “Compact Quick-on” is so designed
astopreventitfrombeingttedtothevalve,
unlesstheregulatorhandleisinthe“o”position;
therefore, never attempt to mount or to dismount
it, when the handle is not in that position.
C) Operation
OPEN (ON): Afterttingtheregulatorcorrectly
ontothevalve,gasowcanbeopenedbyturning
the regulator handle an anticlockwise half turn
tillthestopandtondtheoppositehorizontal
ONposition.InONpositionaredameandthe
marking “ON” is visible. In this position the valve is
openandthegascanow.
CLOSED(OFF): Thegasowcanbestoppedby
turning the knob clockwise half turn until the stop
and to reach the opposite horizontal OFF position.
In OFF position the valve is closed. No gas is
owing.
Caution: If you are unable to turn the regulator
handle to the “on” position, this means that
your “Compact Quick-on” is not correctly
connected to the valve. Do not force the handle
to open, and restart the operations described
under B) above.

8
D) Replacement of a cylinder
Make sure that:
• all taps on the gas consuming appliance are in
the“o”position.
• the“CompactQuick-on”regulatorhandle(2)isin
the“o”position.Then,dismountthe“Compact
Quick-on” by pressing horizontally on the handle
(2)andpullingupwardsatthesametime.(Fig4).
Do not move the cylinder during operation.
System maintenance
• In extended periods of non-use the regulator
should be disconnected from the cylinder.
Regulator should be protected from debris and
dust during storage.
• In normal conditions of use, to ensure correct
system operation, it is best to replace the
pressure regulator within 10 years from the date
of startup. The pressure regulator must conform
to EN16129 standard.
• When replacing the pressure regulator or the
hose, it may be necessary to replace the clamps.
In this case, use clamps dimensions 15/17.
• After performing any maintenance operations,
always check for leaks before starting again.
• Thepressureregulatordoesnotrequireany
special maintenance jobs, but always make sure
thevent(3)isnotblocked.Ifitisblocked,itcan
be freed by means of a needle.
User instructions
Before proceeding, make certain that you
understand the WARNING statements in this
manual.
• Preparation before cooking – To prevent foods
from sticking to the cooking grill, please use a
long handled brush to apply a light coat of
cooking or vegetable oil before each barbecuing
session.
• Note: When cooking with your barbecue for the
rsttime,thepaintontheoutsideofthe
barbecue may change colour slightly as a result
of high temperatures. This is normal and should
be expected.
Lighting the barbecue
• Openthebarbecuehood(2).
• Ensureallknobsareinthe‘OFF’position(7).
OFF
LOHIOFF
• Unscrewignitionbutton(8)andinsertAA
battery, positive end facing outwards. Screw
ignitionbutton(8)backintoplace.Openthe
barbecuehood(2)andturnongassupplyatgas
cylinder.
• Turnburnercontrolknob(7)toposition .
HI
• Pressandholdignitionbutton(8)toignitethe
burnerames.Ifignitiondoesnotoccurin5
seconds,turnburnercontrolknob(7)toOFF ,
wait 5 minutes, and repeat the lighting
procedure.
• In windy conditions, shield from wind to ensure
easy lighting.
• Onceignitionhasoccurred,turncontrolknob(7)
tolowerorraiseheatasrequired.
• After ignition, the burners should be burned at
the high position for 3-5 minutes in order to
preheat the barbecue. This process should be
done before every cooking session.
IMPORTANT - The hood should be open during
preheating.
• After completion of preheating, turn burners to
low position and cook with the hood in the down
position for best cooking results.
LO
Manual lighting instructions
• Removethecookinggrill(4),griddleplate(13)
andvapourbar(5)frombarbecue.
• Placealitmatchbesidetheburner(6)(atthe
samelocationasthesparkershield).
• Pushandturntherightmostcontrolknob(7)
anti-clockwise to the high position.
• After successful lighting, light each burner from
left to right as desired.
Grill Cooking
Thevapourbarevenlydistributestheburnerame
across the cooking grill area. The natural food
juices produced during cooking fall onto the hot
vapour bar below and vaporise.
Even cooking of food will be achieved by using the
barbecue with the hood down. This should only be
done with the burner on low.
Flare-Up Control
IMPORTANT – FLARE UPS CAN OCCUR FROM
RESIDUE FAT AND JUICES DRIPPING ONTO THE
BURNERS AND HOT VAPOUR BAR. To reduce this,
regularly clean the burners and vapour bar. To
controlare-up,itisadvisabletotrimawayexcess

9
fat from meat and poultry before grilling. The
burners should always be placed on the low setting
during cooking. Always protect your hands when
handling anything near cooking surface of the
barbecue.
Covered cooking
Keep the hood closed when you grill to ensure the
heat circulates evenly. With the hood closed, the gas
barbequecooksmuchlikeaconvectionoven.The
thermometer in the hood shows what the cooking
temperature is inside the barbecue so you don’t
have to lift the hood. Avoid lifting the hood to look
inside during the cooking process – heat will be lost.
End of Cooking Session
After each cooking session, turn the barbecue
burners to the ‘HIGH’ position and burn for 5
minutes.Thisprocedurewillburnocooking
residue, thus making cleaning easier.
Turning O Your Barbecue
Pushthecontrolknob(7)inandturntothe‘OFF’
position.
Turnthegasoanddisconnectatthecylinder
when not in use.
The regulator must be disconnected when the
barbecue is not in use. Wait until the barbecue is
sucientlycoolbeforeclosingthehood.
At the end of every cooking session ensure grease
cup is cleaned thoroughly.
FOOD SAFETY
Please read and follow this advice when cooking on
your barbecue:
• Always wash your hands before and after
handling uncooked meat and before eating.
• Always keep raw meat away from cooked meat
and other foods.
• Before cooking, ensure barbecue grill surfaces
and tools are clean and free of old food residue.
• Do not use the same utensils to handle cooked
and uncooked foods.
• Ensure all meat is cooked thoroughly before
eating.
CAUTION – eating raw or undercooked meat
cancausefoodpoisoning(e.gbacteriastrains
suchasE.coli)
• To reduce the risk of undercooked meat, cut
open to ensure it is cooked all the way through
internally.
CAUTION – if meat has been cooked
sucientlythemeatjuicesshouldbeclearin
colour and there should be no traces of pink/
red juice or meat colouring.
• After cooking on your barbecue always clean the
grill cooking surfaces and utensils.
CARE AND MAINTENANCE
• Regularly clean your barbecue between uses
and especially after extended periods of storage.
• Ensure the barbecue and its components are
sucientlycoolbeforecleaning.
• Do not leave the barbecue exposed to outside
weather conditions or stored in damp, moist
areas.
• Never douse the barbecue with water when its
surfaces are hot.
• Never handle hot parts with unprotected hands.
• In order to extend the life and maintain the
condition of your barbecue, we strongly
recommend that the unit is covered when left
outside for any length of time, especially during
the winter months.
• IMPORTANT – We recommend that servicing of
this barbecue should be performed either after
every 100 hours of use or annually, whichever is
achieved soonest.
• Changetheexibletubewhenthenational
conditionsrequireit.
CAUTION
Ifyousmellgas–turnothebarbecue,
extinguishallames,openthebarbecue
hood. If the odour continues, immediately
contact your gas supplier.
Intheeventofanuncontrollablere,
immediately disconnect the gas cylinder
movingitawayfromreandcontactthere
services. DO NOT PUT YOURSELF AT RISK!
Ensure aerosols are not used near this
barbecue when in use.
Ensure all packaging and plastic bags are
disposed of safely.
Cooking Grill (4)
• Clean with hot soapy water.
• To remove any food residue, use a mild cream
cleaner on a non-abrasive pad.
• Rinse well and dry thoroughly.
Burner (6) Maintenance
• Innormalusage,burningotheresidueafter
cooking will keep the burners clean.
• The burners should be cleaned annually, or
whenever heavy build-up is found, to ensure
thattherearenosignsofblockage(debris,
insects)ineithertheburnerportholesorthe
venturitubesoftheburnersttedoverthevalve
outlets.Ablockedburnercanleadtoare
beneath the grill.

10
• Visually inspect the operation of the burners.
Seegurebelowshowingcorrectburning.There
shouldbeamefromallportholes.
Vapour Bar (5)
• Clean the vapour bar with soap and warm water
using a low abrasive cleaning cloth or sponge!
Grease cup (11)
• IMPORTANT – Check and clean the grease tray
regularly before every use and replace if
necessary. Do not allow the fat residue to build
up in the tray.
• NEVER use without grease cup in position.
Barbecue Body (9)
• Regularly remove excess grease or fat from the
barbecue body with a soft plastic or wooden
scraper.
• It is not necessary to remove all the grease from
the body. If you need to clean fully, use hot
soapy water and a cloth, or nylon-bristled brush
only.
• Remove cooking surfaces and burners before
full cleaning.
• Do not immerse the gas controls or manifold in
water.
• Checkburneroperationaftercarefullyretting
into body.
Fixings
• All screws and bolts, etc. should be checked and
tightened on a regular basis.
STORAGE
Do not leave your barbecue uncovered when not
in use. Store your barbecue in a cool dry place
like a shed or garage when not in use to protect
againsttheeectsofextremeweatherconditions,
particularly if you live near coastal areas.
Prolonged exposure to sunlight, standing water,
sea air/saltwater can all cause damage to your
appliance.(Acovermaynotbesucienttoprotect
yourapplianceinsomeofthesesituations).
• Cover the burners with aluminium foil in order
to prevent insects or other debris from collecting
in burner holes.
• If the barbecue is to be stored indoors, the gas
cylinder must be disconnected and left outside.
The gas cylinder should always be stored
outside, in a dry, well-ventilated area, away from
any sources of heat or ignition. Do not let
children tamper with the cylinder.
• Always inspect the hose for cuts, cracks or
excessive wear before use.
• If the hose is damaged or there is excessive
abrasion or wear or the hose is cut, it must be
replaced with a hose suitable for use with LPG
and meet the national standards for the country
ofuseandmustbeasspeciedbythe
manufacturer. The length of the hose shall not
exceed 1.5m.
TECHNICAL INFORMATION
This barbecue is designed for outdoor use only
using propane gas. Please read all accompanying
documentation carefully.
Great Britain / Ireland (GB/IE)
Gas category:I3+(28-30/37)
Gas type and pressure: Propane/37mbar
Maximum gas consumption: 1029gm/h
Total heat input: 14.4kW
Main burners injector size: 0.95mm
Countries intended for: GB/IE
HOW TO REACH US IF YOU NEED OUR SERVICE
ContactyourlocalIKEAstore.Youwillndthe
address and phone number in the IKEA catalogue
or at www.IKEA.com.
To ensure that we provide you with the best
assistance, please read carefully the Assembly
Instructions and/or the User Instruction section of
this manual before contacting us.

11
Max
320 mm
(1219/32")
Max
580 mm
(2253/64")

12
TROUBLESHOOTING
Problem Possible Cause Solution
Burner will not light using the
ignition system
LP gas cylinder is empty Replace with full cylinder
Faulty regulator Have regulator checked or
replace
Obstructions in burner Clean burner
Obstructions in gas jets or gas
hose
Clean jets and gas hose
Electrode wire is loose Reconnect wire
Electrode or wire is damaged Change electrode and wire
Low ame or ashback (re
in burner tube - a hissing or
roaring noise may be heard)
LP gas cylinder too small Use larger cylinder
Obstructions in burner Clean burner
Obstructions in gas jets or gas Clean jets and gas hose
Windy conditions Use BBQ in a more sheltered
position
Gas valve knob dicult
to turn
Gas valve jammed Replace gas valve
© Inter IKEA Systems B.V. 2020 AA-2260757-2
Other manuals for GRILLSKÄR
8
This manual suits for next models
1
Table of contents
Other IKEA Grill manuals
Popular Grill manuals by other brands

Char-Broil
Char-Broil 19659160 Product guide
The Flying Culinary Circus
The Flying Culinary Circus PERFORMANCE 4.1 Instruction manual and maintenance

Taylor
Taylor The Biggest Loser AG-1350-BL instruction manual
Perfect Flame
Perfect Flame 274676 owner's manual
Vermont Castings
Vermont Castings Signature VCS501 Series user manual

Char-Broil
Char-Broil TRU-Infrared Grill2Go X200 Product guide


