- 4 - 40246462
Even Feed Foot
Generally, this presser foot is used for hard-to-feed or for dicult-to-feed materials such as velvet, jersey, vinyl, cloth articial leather,
leather, etc. This smoothly feeds the material and prevents the material from slipping.
Install the even feed foot.
Fit forked portion of the actuating lever
to the needle clamp, insert the installing
portion into the presser bar, and securely
tighten the screw in the presser foot.
1Turn the presser foot pressure regulator to set
the presser foot pressure to “low”.
2
Set the pressure to “lowest” when sewing the velvet
material.
Use the sewing machine at medium speed.
Needle clamp
screw
Actuating
lever
Screw in the
presser foot Turn to to
decrease the
presser foot
pressure.
Increase Decrease
Accessory bag
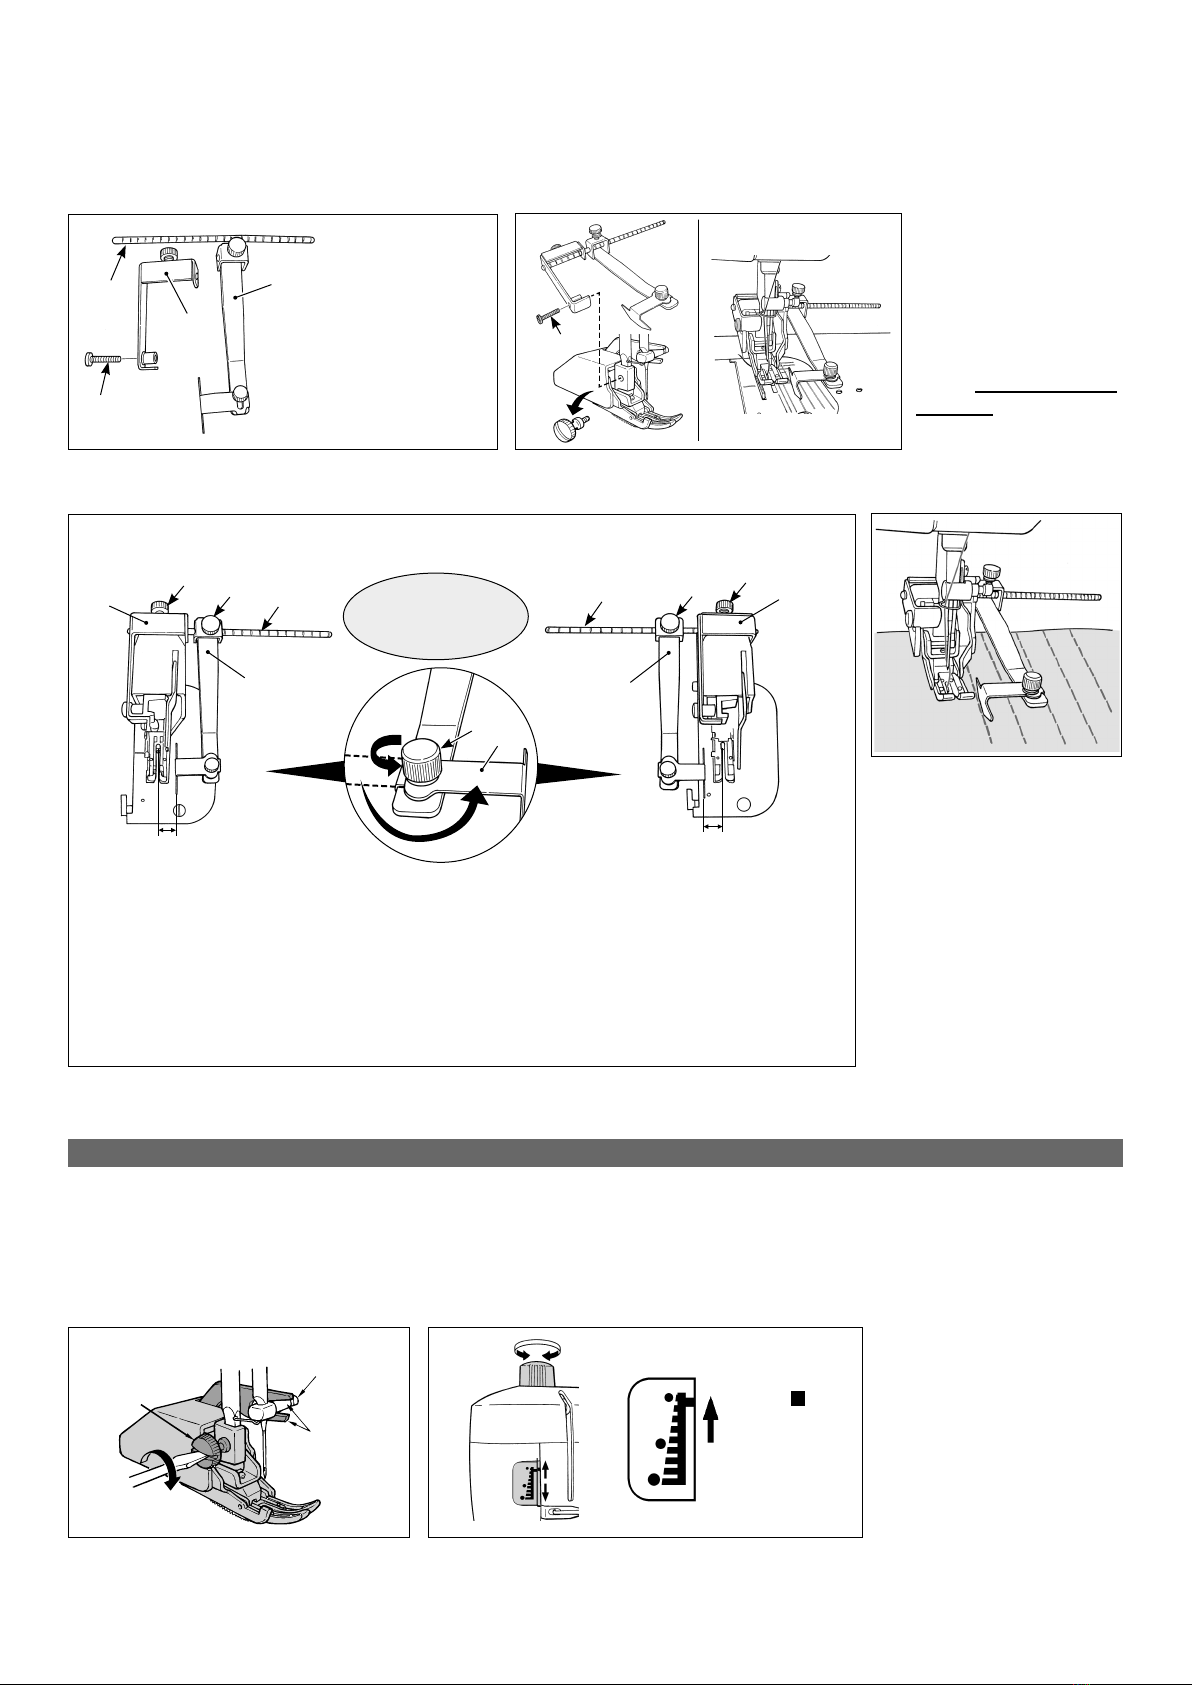
Quilt Guide for Even Feed Foot
Stitches can be sewn at regular intervals using the walking foot.
* Use the sewing machine at medium speed.
Remove walking foot
setscrew which xes the
walking foot.
Aligning the mounting
sections of the stitch
ruler and walking foot
with each other, securely
tighten the walking foot
setscrew D.
A
D
B
C
D
3
①Aligning the leftmost scale mark
on guide bar Awith the left edge
of guide base B, tighten setscrew
❸.
②Aligning guide C with the rst
scale mark from the right edge of
guide base B, tighten setscrew
❹. The distance from the needle
position to the guide is 1 cm.
Carry our sewing using
the guide as reference.
4
Stitches can be sewn while
keeping the regular stitch
intervals.
Adjusting the guide position.
In the case of setting the guide on
the right side of needle
In the case of setting the guide on
the left side of needle
①Aligning the rightmost scale mark
on guide bar Awith the right edge
of guide base B, tighten setscrew
❸.
②Aligning guide Cwith the second
scale mark from the left edge of
guide base B, tighten setscrew ❹.
The distance from the needle posi-
tion to the guide is 1 cm.
Adjust the guide position referring to the needle position and positional relation between the bar
scale and guide. Securely tighten the setscrew.
The interval of
scale marks on the
guide bar is 5 mm.
(Example: In the case of guiding the material so that it is kept
1 cm away from the needle position)
Remove setscrew ❶.
The stitch ruler can
be used on both the
right and left sides by
changing the mounting
position of guide sec-
tion ❷from right to left
or left to right.
B
C
A
1 cm
❸❹❸
❹
A
C
B
1 cm
❶❷
1Check the relevant parts. 2
Assembling and installing the stitch ruler.
AStitch guide bar ×1
BStitch guide base ×1
CStitch guide ×1
DScrew ×1