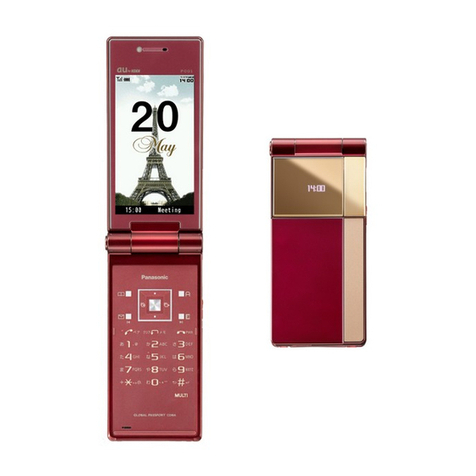
KDDI REGZA IS11T Installation guide

BasicManual Contents
GettingReady
Basicoperation
Characterinput
Initialsettings
GoogleTalk
Mail
Phone
Overseasusage
Application
Datamanagement
WirelessLAN
Functionsettings
RemoteLock
Appendix/Index
Internet/

ii
Preface
ThankyouforpurchasingtheREGZAPhoneIS11T.
BeforeusingyourIS11T,besuretoreadtheIS11TBasic
Manual (this PDF manual) to ensure correct usage. After you
have finished reading this manual, store this PDF manual and
the printed manualsinsafeplacessoyoucanretrievethem
wheneveryouneedthem.
BasicManual(thisPDFmanual)describesbasicoperationsof
majorfunctionsoftheIS11T.
Fordetaileddescriptionsonvariousfunctions,refertotheIS11T
fullInstructionManual(Japanese),whichisavailableontheau
homepage.
DownloadingManuals
YoucandownloadtheBasicManual(thisPDFmanual)andthe
fullInstructionManual(Japanese)fromtheauhomepage.
FromaPC:http://www.au.kddi.com/torisetsu/index.html
OnlineManual
Onlinemanualsarealsoprovidedontheauhomepage,which
contentsarefromthefullInstructionManual(Japanese)andare
reorganizedinasearchableformat.
FromaPC:http://www.au.kddi.com/torisetsu/index.html
SafetyPrecautions
BesuretoreadtheSafetyPrecautions"安全上のご注意"inthe
fullInstructionManual(Japanese)toensureproperusageof
theIS11T.
Fortroubleshooting,checkthesymptomofyourIS11Tinau
お客さまサポート(auCustomerSupport)ontheauhomepage.
•FromaPC:http://www.kddi.com/customer/service/
au/trouble/kosho/index.html
BeforeUsingIS11T
•Youcannotreceiveormakecallsinalocationwherethe
signalcannotbereceived,evenwithintheservicearea.
Callingmaynotbeavailableinalocationwherethesignal
isweak.Ifyoumovetoalocationwherethesignalisweak
duringacall,thecallmaybeinterrupted.
•TheIS11Tisadigitalcellphoneandcanmaintainahigh
callqualityuntilthesignalweaknessreachesitslimit.
Therefore,oncethelimithasbeenreached,thecallmay
bedisconnectedsuddenly.
•
NotethattheIS11Tusessignalswhichmaybeintercepted
byathirdparty.(However,theCDMA/GSMsystemenables
highlyconfidentialcallcommunications.)
•TheIS11Tisawirelessstationwhichiscompliant
withtheRadioAct,andmaybesubjecttoinspections
regulatedbytheRadioAct.
•WhenyouinserttheauIC-Card,theproductnumber
informationofyourIS11Tissenttotheauserverforthe
securityandoperationstatusnotificationoftheIS11T.
•
Alwaysbeconsiderateofothersaroundyouwhenusingyour
IS11Tinpublicplaces.
•
Forachild'suse,readtheIS11TBasicManualandgive
yourchildinstructionsonproperuse.
•TheIS11Tisacellphonecompatiblewiththeinternational
roamingservice.Eachnetworkservicewhichisdescribed
intheBasicManualvariesdependingontheareaor
service.Fordetails,refertothesuppliedGlobalPassport
Owner'sGuide(Japanese).

1
CellPhoneEtiquette
Cellphonesalwaysemitweakradiowaveswhenpowerison.
Usecellphonesinanenjoyableandsafemannerwithout
forgettingtobeconsiderateofothersaroundyou.
■
Useofcellphonesisnotallowedinsomeplaces.
•
Usingacellphonewhiledrivingisdangerousandprohibited
bylaw.
•Usingacellphoneinanaircraftisprohibitedbylaw.
Someairlinesadmittheusageofmobilephonesinan
aircraft.Fortheinformation,contactyourairline.
■Beconsiderateofwhereyouusethecell
phoneandhowloudlyyoutalk.
•
Donotmakecallsintheaters,museums,libraries,andother
similarplaces.TurnpowerofforturnonMannermodesoas
nottodisturbothersaroundyoubyringtones.
•
Donotusethecellphoneonastreetwhereyoumightinterrupt
theflowofpedestrians.
•Movetoareaswhereyouwillnotinconvenienceotherson
trainsorinhotellobbies.
•Refrainfromtalkinginaloudvoice.
•
Obtainthepermissionofotherpeoplebeforeyoutaketheir
photoswiththecellphone'scamera.
■Beconsiderateofpeoplearoundyou.
•
Somepeopleclosetoyouincrowdedplacessuchaspacked
trainsmaybeusingacardiacpacemaker.Turnthecellphone
offinsuchplaces.
•
Abidebytherulesofhospitalsandothermedicalinstitutions
whereitisforbiddentouseorcarrycellphones.
Basicpackageandmainperipheral
equipment
■IS11T ■Accessories
・Batterypack
・IS11TSetupGuide(Japanese)
・User'sManual(Japanese)
・GlobalPassportOwner'sGuide
(Japanese)
・auInternationalCallGuide
(Japanese)
・warranty(Japanese)
■Sample
・ microSDmemorycard ・ElectronicdictionarydataDVD
Thefollowingitemsarenotincludedinthepackage.
・ACadapter
・Earphone
・microUSBcable
・Pleasepurchasethespecifiedcharger(soldseparately).

2
Illustrationsanddescriptionsinthis
Manual
■Noteonkeyillustrations
Inthismanual,thekeyillustrationsaresimplifiedasshown
below.
MAR
E
F
D
C
■Descriptionofoperationsforselecting
item/icon/key,etc.
Inthismanual,operationstepsaredescribedasfollows.
Tappingislightlytouchingthekeyoricondisplayedonthe
screenwithyourfinger.
Despcription Explanation
Inthehomescreen,
(Phone)→"1""4"
"1"→"SEND"
Tap atthebottomofthehome
screen.Thentap , , andtap
.
Inthehomescreen,
→"Settings"
Tap atthebottomofthehome
screenandtap fromthedisplayed
menu.
M→
"Createnew"
PressMtotap"Createnew"
iconfromthedisplayedoptionmenu.
※Theprocedurestartsfromthehomescreenunlessotherwisementioned.
■NoteonScreenshots
Thescreenshotsinthismanualaresimplifiedandmaylook
differentfromtheactualscreens.
Iconsatthetopof
thescreenare
omitted.
Actualscreen Samplescreen
SecuritycodeandPINcode
SecuritycodeandPasswords
TheIS11Thasvarioussecuritycodesthatyoucanuse.
Theavailablesecuritycodesareasfollows.Donotforgetthe
varioussecuritycodesthataresetastheyarenecessaryfor
variousoperationsandcontracts.
●Securitycode
Exampleof
usage
①
Todoremoteoperationofvoicemailandcallforwarding
servicesfromalandlinephone
②
TouseCustomerServiceCenterandtodovarious
inquiries,applications,andmodificationsontheau
homepage
Initialvalue Afourdigitnumberchosenbythecustomerandnoted
ontheapplicationform

3
●Securitycodetounlockyourterminal
Exampleof
usage
Tosetandreleasethescreenlockandremotelock
Initialvalue 1234
●PINcode
Exampleof
usage
TopreventunauthorizeduseoftheauICcardbythird
parties
Initialvalue 1234
●Password
Exampleof
usage
Tousethe"Osaifu-Keitailocksetting"
Initialvalue None
PINCode
IfthePINcodeisincorrectlyenteredthreetimes
consecutively,thePINcodewillbelocked.UsethePUK
codetounlockthePINcode.
■PINCode
YoucansettheIS11TtorequirePINcodeentryeverytime
thepoweristurnedon,topreventunauthorizeduseofthe
auIC-Cardbyathirdparty.
•Atthetimeofpurchase,thePINcodeisnottoberequired
tousephone.YoucanselectLockUIMcardandsetthe
PINcodetoberequired.
ItisalsorequiredwhensettingLockUIMcard.
■PUKCode
EnterthePUKcodewhenthePINcodeislocked.
•PUKcodeisaneight-digitnumbergivenatthetimeof
purchase,andisprintedonthebacksideoftheplastic
cardwhereyourauIC-Cardisattached.
•WhenyouenterthePUKcode,setthenewPINcodeby
selectingChangeUIMPIN.
•IfthePUKcodeisincorrectlyenteredtentimes
consecutively,contactanaushop,PiPitortheCustomer
ServiceCenter.
•WhenthePINcodeislocked,theIS11Tmayberestartedforthe
securityreasons.

4
Contents
Contents
Preface......................................................................................................ii
SafetyPrecautions...............................................................................ii
BeforeUsingIS11T.............................................................................ii
CellPhoneEtiquette........................................................................... 1
Basicpackageandmainperipheralequipment........................1
IllustrationsanddescriptionsinthisManual.............................2
SecuritycodeandPINcode............................................................ 2
SecuritycodeandPasswords......................................................................... 2
PINCode................................................................................................................. 3
Contents..................................................................................4
GettingReady........................................................................7
Namesofpartsandtheirfunctions.............................................................. 7
Keyboard................................................................................................................. 9
OpeningtheIS11T........................................................................................... 10
Attaching/removingthebatterypackandRearcover..................... 10
Attachingthebatterypack........................................................................... 10
Removingthebatterypack........................................................................... 11
Attaching/removingtheauICcard.......................................................... 11
AttachingtheauICcard................................................................................ 11
RemovingtheauICcard................................................................................ 12
Charging............................................................................................................... 12
ChargingusingtheACadapter(soldseparately)................................. 13
Turningtheterminalon/off........................................................................... 14
Turningtheterminalon................................................................................... 14
Turningtheterminaloff.................................................................................. 14
SwitchingthedisplaylanguagetoEnglish............................................. 14
Basicoperation.................................................................. 15
Usingthetouchpanel..................................................................................... 15
Tapping................................................................................................................. 15
Touchandhold.................................................................................................. 15
Flicking.................................................................................................................. 15
Dragging............................................................................................................... 15
Sliding.................................................................................................................... 16
Pinching................................................................................................................ 16
Switchingtheportrait/landscapedisplaymode................................... 16
Aboutthescreen.............................................................................................. 17
Understandingicons........................................................................................ 17
Usingthehomescreen.................................................................................. 18
Startinganapplicationorfunctionfromthehomescreen................ 19
Checkingyourphonenumber...................................................................... 21
Edittheowner'sinformation........................................................................ 21
Switchingphoneandtransmissionfunctionsonandoff
(Airplanemode)................................................................................................. 22
SettingMannermode...................................................................................... 22
ChangingMannermodesettings................................................................23
Setting/cancelingscreenlock.................................................................... 23
Turningonthescreenlockauthentication............................................. 23
Characterinput.................................................................. 24
Entertext............................................................................................................ 24
Softwarekeyboard........................................................................................... 24
UsingATOKtoentertext............................................................................. 24
InputtingtextwiththeQWERTYkeyboard.............................................. 25
Enteringtextonthenumberkeyboard...................................................... 25
Inputtingfromthesmiley/emoticon/symbolpanel............................... 28
Inputtingfromthetextcode/commonphrasepanel........................... 28
InputtingtextfromtheAndroidkeyboard.............................................. 28

5
Contents
Initialsettings..................................................................... 29
Initialsettings.................................................................................................... 29
SettingupaGoogleaccountforyourIS11T........................................ 29
Creatingauone-ID........................................................................................... 30
Configuringinitiale-mailsettings............................................................... 30
Internet/GoogleTalk........................................................31
Usingabrowser................................................................................ 31
Displayingawebpage.................................................................................... 31
Basicbrowseroperations............................................................................. 31
Displayingawebpagefromhistory.......................................................... 31
Usingbookmarks.............................................................................................. 31
Registeringabookmark.................................................................................. 31
Settingsecurity................................................................................................ 32
UsingGoogleTalk............................................................................. 33
Startchatting.................................................................................................... 33
Menuoperationsonthechatscreen........................................................ 33
Mail..........................................................................................34
Aboutmail............................................................................................ 34
Usinge-mail......................................................................................... 34
StartingupE-mail............................................................................................. 35
Creatingandsendingmail............................................................................ 35
Receivingmail.................................................................................................... 35
Viewingsentandreceivedmail.................................................................. 35
Replyingtomail................................................................................................. 36
Deletingmail....................................................................................................... 36
Registeringaddressofreceivedmailtothecontacts...................... 36
Changingaddressormakingothersettings......................................... 36
Settingmailfilters............................................................................................ 38
UsingGmail......................................................................................... 40
Displayingtheinbox........................................................................................ 40
Checkingsentmailormessagessavedasdrafts.............................. 40
Creatingandsendingamail......................................................................... 40
Receivingmail.................................................................................................... 41
Requestingdeliveryofnewmail.................................................................. 41
Replyingto/forwardingmail......................................................................... 41
Operatingthreads............................................................................................ 41
Settingtheoperationforincomingmail.................................................. 42
UsingC-mail........................................................................................ 42
CreatingandsendingaC-mail.................................................................... 42
ReceivingC-mail................................................................................................ 43
Usingemergencyearthquakeinformation............................................. 44
Receivingemergencyearthquakeinformation....................................... 44
C-mailsafetyblocksetting........................................................................... 45
SettingC-mail.................................................................................................... 45
Phone.....................................................................................47
Makingcalls........................................................................................................ 47
Usinghistorytomakeacall......................................................................... 48
Callingoverseasfromauphones
(001internationalcallservice)................................................................... 48
Receivingcalls................................................................................................... 49
Overseasusage.................................................................50
Settingsrelatedtooverseasusage......................................................... 50
AcquiringaPRL(preferredroaminglist).................................................. 50
AreaSettings..................................................................................................... 51
Internationalcalling......................................................................................... 51
Makingacalloutsidethecountryyouarevisiting
(includingJapan)(GLOBALPASSPORT)................................................. 51
Application...........................................................................52
UsingContacts.................................................................................. 52
Registeringacontact..................................................................................... 52
Checkingcontactdetails.............................................................................. 52
Watchingandrecording1Seg..................................................... 53
Watching1Seg.................................................................................................. 53
1Segwatchingscreen.................................................................................... 54
6
Contents
Reservingwatching/recording1Seg....................................................... 55
Recording1Seg................................................................................................ 55
PlayingbackrecordedTVprograms.......................................................... 56
Shootingwiththecamera.............................................................. 56
Beforeusingthecamera............................................................................... 56
Imagerecordingprecautions........................................................................ 56
Understandingthetouchpanel................................................................... 57
Shootingstillpictures..................................................................................... 58
Stillpictureshootingoptionmenu............................................................. 58
Shootingvideo................................................................................................... 59
Videorecordingoptionmenu........................................................................ 60
Viewingstillpicturesandvideos................................................ 60
Viewingastillpictureorvideo.................................................................... 60
Datamanagement............................................................. 62
UsingamicroSDmemorycard................................................................... 62
InstallingandremovingamicroSDmemorycard.................................. 62
FormattingamicroSDmemorycard.......................................................... 62
WirelessLAN.......................................................................63
UsingthewirelessLANfunction................................................ 63
ConnectingWi-Finetwork............................................................................. 63
ManuallyaddingandconnectingtoaWi-Finetwork............................ 64
Enablingnotificationaboutopennetworks............................................ 64
AdvancedwirelessLANfunctionsettings............................................. 64
Functionsettings.............................................................. 65
Settingmenu...................................................................................... 65
DisplayingtheSettingmenu........................................................................ 65
RemoteLock....................................................................... 68
Locking/unlockingtheremotelock........................................................... 68
Activatingremotelockfromaregisteredphone................................... 69
Locking/unlockingremotelockusingtheSecurityLockService... 69
Appendix/Index.................................................................. 70
Appendix............................................................................................... 70
Troubleshooting................................................................................................ 70
RebootingyourIS11T.................................................................................... 72
Trademarks......................................................................................................... 73
Index....................................................................................................... 75

7
GettingReady
GettingReady
Namesofpartsandtheirfunctions
⑬
⑭
⑧
⑩
⑪
⑨
⑦
⑫
①②
⑤
③
⑥
④
⑲
⑰
⑱
㉗
㉒
㉑
⑳
㉑
㉓㉔
㉕
㉖
⑮
⑯
auICcard
Name Explanation
① Stereo
earphonejack
Connectscommerciallyavailable
stereoearphones.
② Powerkey
C
Pressandholdtoturnthepoweron.
Whilethepowerison,pressandhold
toactivate/deactivateMannermode,
Airplanemodeandturnthepoweroff.
Pressbrieflytoactivate/deactivate
Sleepmode.
③ Keyboard Convenientforenteringanumberof
characterssuchasmailormemo.
④ Menukey
M
Displaysoptionsmenuavailableon
thecurrentscreen.Whenentering
characters,pressandholdforone
secondormoretoshow/hidethe
softwarekeyboard.
⑤ Proximity
sensor
Asensorwhichpreventsthetouch
panelfromerroneousoperationduring
acall.Attachingprotectivesheetor
sealneartheproximitysensormay
causemalfunctionofthesensor.
⑥ Earspeaker
(Receiver)
Theotherparty'svoicecanbeheard
fromhere.
⑦ LEDindicator • Lightsinred:Charging(Depending
onthesettingforthenotification
settingofsomeapplications,itmay
notlightevenwhilecharging).
• Flashesingreen:Anincomingcall
isreceived,uncheckedmissedcall
ornew/unreadmailisnotified(when
activatingnotificationsetting).
• Lightsingreenonce:Turnthepower
on.

8
GettingReady
Name Explanation
⑧ Lightsensor Detectstheambientbrightnessto
automaticallyadjustthebrightness
ofthedisplay'sbacklight
⑨ Display
(Touchpanel)
Tracewiththefingertoscrollthe
screenorlightlytapanitemtoselect.
⑩ Backkey
R
Returnstothepreviousscreen.
⑪ Homekey
A
Returnstothehomescreen.Press
andholdforonesecondormoreto
displayrecentlyusedapplications.
⑫ Volumekey
E/F
Adjuststheotherparty'svoiceor
speakervolume.Pressandhold
Fforonesecondormoreto
activate/deactivateMannermode.
⑬ Camerakey
D
Pressandholdforonesecondor
moretoactivateCamera.Useasa
shutterkeyontheshootingscreenor
start/endshootingavideo.
PressbrieflytostartSTARMEMO.
Pressbrieflyonthelockscreento
show/hidetotalnumberofsteps.
⑭ External
connectionjack
ConnectcommonACadapter03(sold
separately)ormicroUSBcable01
(soldseparately).
⑮ 1Segantenna Extendwhenwatching1Seg
programs.
⑯ Bluetooth®/
Wi-Fiantenna
TheBluetooth®/Wi-Fiantennaisbuilt
in.
⑰ Speaker Ringtone,musicplaybacksoundor
otherparty'svoicewhilespeaker
phoneisactivatedcanbeheardfrom
here.
⑱ Camera Shootstillpicturesorvideos.
Name Explanation
⑲ Photolight Lightswhileshootingaphoto.
⑳ GPSantenna TheGPSantennaisbuiltin.
㉑ Built-inantenna Theantennaisbuiltin.
㉒ FeliCamark Holditovercardreader/writerwhen
usingOsaifu-Keitai.
㉓ Infrareddata
port
Useforinfraredcommunications.
㉔ microSDcard
slot
InsertmicroSDcard.
㉕ Batterypack
cover
Donotremovetheinnersheetofthe
batterycover.Removingthesheet
maydisabletoread/writeFelica.
㉖ Straphole ―
㉗ Microphone Sendsyourvoicefromhere.Useto
recordvoice.
◎Iftheproximitysensororlightsensoriscoveredduringacall,
thescreenturnsoff.
◎Coveringortouchingaroundthebuilt-inantennawhenholding
theIS11Twiththefingersormetalsubstancemayreduce
signalreception.

9
GettingReady
Keyboard
①⑬
②⑭
③⑮
④
⑤⑥⑦ ⑧
④
⑨ ⑩ ⑪ ⑫
Name Explanation
① Backkey Returnstothepreviousscreen.
② Homekey Returnstothehomescreen.Press
andholdforonesecondormoreto
displayrecentlyusedapplications.
Pressandhold + toactivate
Taskmanager.
③ Menukey Displaysoptionsmenuavailableon
thecurrentscreen.
Pressandhold + toopenthe
Notificationpanel.
④ ALTkey Useincombinationwithotherkeys.
⑤ Copykey Copiesselectedcharacters.
Press + topasteselected
characters.
⑥ Shiftkey Temporarilyswitchesuppercaseand
lowercaseofalphabets.
⑦ Mailkey ActivatesE-mail.
Press + todisplaypictogram/
emoticonpanel.
⑧ Characterkey Switchesinputmode.
Press + todisplaysymbol/
fixedphrase/charactercodepanel.
Name Explanation
⑨ Alphabetkey
- ,
,
Presskeytoentercharacter
displayedontheleftinlowercase.
Press +alphabetkeytoenter
characterdisplayedontheleftin
uppercase(exceptfor
, ) .
Press +alphabetkeytoenter
characterdisplayedatthelowerright.
⑩ Space/
Conversionkey
EntersaspaceorconverttoKanji.
⑪ Cursorkey
/
/ /
Movesthecursorup/down/left/right.
Press +
/toscrollpages.
Holddown andpress / to
selectenteredcharacters.
Press + / toenter
characterdisplayedatthelowerright.
⑫ Searchkey Activatessearchfunction.
Press + toactivate/
deactivateMannermode.
⑬ BSkey Deletesthecharacterbeforethe
cursorwhileenteringcharacters.
⑭ Delkey Deletesthecharacternexttothe
cursorwhileenteringcharacters.
Press + toentercharacter
displayedatthelowerright.
⑮Enterkey Fixesenteredcharactersorinsertline
feed.

10
GettingReady
Attachingthebatterypack
Opentheexternalconnectionjackcap,put
thefingeronthebatterycoverremovingpart
andliftitvertically
• Liftthebatterycoveruntiltheinferiortabs(3locations)
areremoved.
• Afterremovingthebatterycover,closetheexternal
connectionjackcap.
Batterycoverremovingpart Tabs
Attachthebattery
pack
• With onthebattery
packfacingup,alignthe
contactsofthebattery
packwiththoseofthe
IS11T,insertinthe
directionofthearrow.
• Checktheshapeforthe
correctorientationtoinsert
it.
Checktheorientationofthebatterypack
coverandfitittheterminal
Contacts
OpeningtheIS11T
ToopentheIS11T,slidethefrontpartofthebodyonwhich
thedisplayislocatedtothedirectionofthearrow.
◎Donotputsticker,etc.onthebacksideofdisplay.Sticker,etc.
maybehookedwhenopening/closingtheterminal.
Attaching/removingthebattery
packandRearcover
•
Beforeattaching/removingthebatterypackandcover,turn
thepoweroff.
•
Holdtheterminalinyourhandwhenattachingorremoving
theRearcovertopreventdamagetothedisplayorother
partsoftheIS11T.
•UseonlythebatterypackspecifiedfortheIS11T.

11
GettingReady
Slidethefingeras
indicatedbythe
arrow,pressfirmlyto
close
Removingthebatterypack
Opentheexternalconnectionjackcap,put
thefingeronthebatterycoverremovingpart
andliftitvertically
• Liftthebatterycoveruntiltheinferiortabs(3locations)
areremoved.
• Afterremovingthebatterycover,closetheexternal
connectionjackcap.
Batterycoverremovingpart Tabs
Removethebattery
pack
• Usethecatchonthe
batterypacktoliftitinthe
directionofthearrow.
• Liftingthebatterypack
fromthedirectionother
thanthecatchmay
damagetheterminalbody
orthebatteryterminals.
Tabs
Catch
Attaching/removingtheauICcard
•Beforeattaching/removingtheauICcard,firstturnthe
IS11Toff,andremovethebatterypack.
AttachingtheauICcard
InserttheauICcardintotheguidewithitsIC
surfacefacedown
• Notetheorientationofthenotch.
auICcard
compartment
Guide
IC
Notch

12
GettingReady
RemovingtheauICcard
Pressthelockwith
thefinger(①)and
pulltheauICcard
out2-3mminthe
directionofthe
arrow②
Liftyourfingerfrom
thelockandpress
theauICcardlightly
toslideouttothe
directionorarrow②
• Donotpresstheau
ICcarddownwardwith
excessiveforce.
◎Notethefollowingpoints,whichmaycausemalfunctionor
damage,whenhandlingtheauICcard.
• DonottouchtheIC(metal)partoftheauICcardortheIC
cardterminalinsidetheIS11T.
• InserttheICcardinthecorrectdirection.
• DonotuseforcetoattachorremovetheICcard.
◎AnerrormessageisdisplayediftheauICcardisnotattached
correctlyorifthereisaproblemwiththeauICcard.
◎DonotlosetheauICcardafterithasbeenremoved.
Lock
②
①
Charging
Whenyoupurchaseyourterminal,thebatterypackisnotfully
charged.Besuretochargethebatterypackbeforeuse.
■Chargingtimes(approximate)
Thesetimesaretofullyrechargethebatterypackwhile
theIS11Tisturnedoff.Thechargingtimesincreaseifthe
powerisonorthetemperatureislowduringcharging.
CommonACadapter03
(soldseparately) Approximately140minutes
CommonDCadapter03
(soldseparately) Approximately200minutes
■Adapterforcharging
Inaddition,thespecifiedACadapter(soldseparately)orDC
adapter(soldseparately)isneeded.
◎ThecommonACadapter01(soldseparately)uses100VAC
usedforhouseholdsinJapan.Donotusesingle-phase200V
currentorvoltageconvertersusedoverseas.
◎ThecommonACadapter02/03(soldseparately)supports100
to240VAC.UseonlythecommonACadapter02/03(sold
separately)forchargingoverseas.

13
GettingReady
ChargingusingtheACadapter(soldseparately)
Thefollowingdescribeshowtochargethebatterypack
usingthecommonACadapter03(soldseparately).(Note
thatyourACadaptermaybedifferentfromthisillustration.)
LEDindicator
CommonAcadapter
03(soldseparately)
To100VAC
poweroutlet
microUSBplug
Externalconnection
jackside
microUSBplugside
-2 -1
Opentheexternalconnectionjackcapof
theIS11T(-1)andinsertmicroUSBplug
(-2)oftheCommonACadapter03(sold
separately)
• Checktheshapeofthetipoftheconnectorandinsertit
horizontallyintotheconnectorterminal.
InsertthecommonACadapter03(sold
separately)powerplugintothepoweroutlet
• TheLEDindicatorlightsinredwhilecharging(Depending
onthesettingforthenotificationsettingofsome
applications,LEDmaynotlightinredevenwhilecharging.).
Itturnsoffwhenchargingiscomplete.
Whenchargingends,graspthemicroUSB
plugandpullitstraightout,andclosethe
externalconnectorterminalcap
DisconnecttheCommonACadapter03(sold
separately)powerplugfromthepoweroutlet
◎Becarefulnottopulltheexternalconnectionjackcapwith
excessiveforce.Especiallyifyoupulltheexternalconnection
jackcapwiththeconnectedcabletoremove,itmaybesubject
tostrongerforce.
◎Tuggingtheexternalconnectionjackcapmaydeformthecap,
comeawayfromthebodyorcasedamage.

14
GettingReady
Turningtheterminalon/off
Turningtheterminalon
PressandholdCuntiltheIS11Tvibrates
onceandtheLEDindicatorlights(green)
Afterawhile,thelockscreenisdisplayed.
Placeyourfingeronthebottomedgeofthe
screenanddragitupward
Thescreenisunlockedandthehomescreenappears.
Turningtheterminaloff
PressandholdCuntilthemobilephone
optionmenuisdisplayed
"Poweroff"→"OK"
SwitchingthedisplaylanguagetoEnglish
Youcanswitchthedisplaylanguageforfunctionnamesand
otheritemstoEnglish.
Inthehomescreen, →"設定(Settings)"
→"言語とキーボード(Language&keyboard)"
"言語(Language)を選択(言語選択(Locale))"→
"English"

15
Basicoperation
Basicoperation
Usingthetouchpanel
ThedisplayontheIS11Tisatouchpaneloperatedby
touchingitwithyourfinger.
Tapping
Lightlytapanitemoricononscreentoselectit.
Touchandhold
Touchandholdyourfingeronanitemoricononscreen.
Usedwhenpopupmenusorotherthingsappear.
Flicking
Quicklyslideyourfingerup,down,leftorrightonthescreen
tochangescreenswhentherearemultiplepagesordata,
suchasinthehomescreenorinmediafolders.
Dragging
Moveyourfingerwithittouchinganitemoricononscreen.

16
Basicoperation
Sliding
Dragthescreenitselftodisplaypartsyouwanttoviewifthe
entirescreenisnotvisible,suchaswhenviewingsettingmenus,
webpages,Officefiles,orenlargedstillpictures.
Pinching
Spreadtwofingers(pinchout)onscreentozoominandbring
yourtwofingerstogether(pinchin)tozoomoutwhenaweb
pageorstillpicture,forexample,isdisplayed.
Switchingtheportrait/landscape
displaymode
Amotionsensordetectstheorientationandmovementof
theIS11Tsothatthescreenswitchesdependingonifthe
IS11Tisheldverticallyorhorizontally.
◎OperatetheIS11Tintheverticalorientation.WhentheIS11T
isinthehorizontalorientation,itcannotdetectchangesin
orientationandmovementcorrectlyandthescreenmaynot
switch.
◎
Ifthe"Auto-rotatescreen"
※
checkboxisunselected,thescreen
cannot
switch.Dependingonthescreen,somescreensmay
notswitchevenifthecheckboxismarked.
※Inthehomescreen, →"Settings"→"Display"→"Auto-rotatescreen"
◎WhentheIS11Tisopened,thescreenisfixedtothelandscape
view.

17
Basicoperation
Aboutthescreen
Understandingicons
IconsindicatingthestatusoftheIS11Tappearinthe
statusbaratthetopofthescreen.
Mainnotificationicons
NewGmail
NewPC-mail
NewC-Mail・Emergencyearthquakereport・Voicemail
messagenotification・Incomingnotification
NewE-mail
Newinstantmessage
Calendarschedule
Snoozealarm
Musicplaying
Synchronizationtrouble
StatusiconsNotificationicons
Statusbar
OpenwirelessLANaccessible
FilereceivedbyBluetoothtransmission
USBconnected
Callinprogress
Missedcall
Callonhold
InstallationofapplicationfromAndroidmarket,etc.
completed
Androidmarketapplicationupdateavailable
InstallationofapplicationfromtheauoneMarketis
completed
auoneMarketapplicationupdateavailable
Hiddennotification
microSDcardnotinserted
microSDcardunmounted
Earphonesconnected(audioinputfromIS11Tmic)
Earphonesconnected(audioinputfromearphonemic)
ReceivingTV(1Seg)
DiXiMserveractivated
Mainstatusicons
ATOKkanainputmode
ATOKAlphanumericinputmode
ATOKnumberinputmode
ATOKsmiley/emoticon/symbol,commonphrases,
textcodeinputmode
Osaifu-Keitailockset
Synchronizingdata
GPSpositioning
Bluetooth®functionon

18
Basicoperation
ConnectedtoBluetooth®device
ConnectedtoBluetooth®devicethatdoesnot
supportSCMS-T
ConnectedtowirelessLAN※
Speakerphoneon
Mannermode(normal)
Mannermode(silent)
Mannermode(alarm)
Originalmanner
Incomingvibratoron
Ringervolumeoff(silent)
Micmute
Possibletoreceiveroamingpackettransmission
CallavailableduringGSMroaming
CallavailableduringCDMAroaming
auICcardnotinserted
/ Packettransmissionpossible※
/ Transmittingpackets※
Airplanemode
Outofservicearea
Receptionstatus
Batterylevel
level6/ level5/ level4/ level3/
level2/ level1/ level0
Charging
Alarmset
※IndicatedingreenwhenyouloggedintoaGoogleaccount.
Usingthehomescreen
Thehomescreenisthestartingpointforalloperationsonthe
IS11T
andissimilartothestandbyscreenofconventional
mobilephones.PressAatanytimetodisplayit.
Thehomescreenisconfiguredofmultipledesktops(upto
10screens)thatcanbeswitchedbyflickingleftorright.
⑤
③④②
①①①
①Desktop
Youcanlayoutoftenusedshortcuts,widgetstodisplay
news,andotherthings.
Youcanstartapplicationsbytappingicons.
②Mainmenubutton
Displaysthemainmenu.
③Quickmenu
Youcanstartapplicationsandfunctionsbytappingicons.
④Activatedapplicationhistorykey
Displayshistoryofactivatedapplications.
⑤Searchwidget(Quicksearchbox)
TapittosearchIS11Tapplicationsandwebpage
information.
Table of contents
Other KDDI Cell Phone manuals

KDDI
KDDI A1402S Installation guide

KDDI
KDDI au K003 User manual

KDDI
KDDI au K008 Installation guide

KDDI
KDDI Au TS003 Installation guide

KDDI
KDDI IIDA G9 User manual

KDDI
KDDI AQUOS SHOT SH008 User manual

KDDI
KDDI cyber-shot S006 User manual

KDDI
KDDI CA004 User manual

KDDI
KDDI ARROWS ES IS12F Installation guide

KDDI
KDDI K009 User manual