KDDI A1402S Installation guide

Basic Manual/A1402S
A-BWH-100-11(1)
March 2004, 1st Edition
Sales
:
KDDI Corporation
Okinawa Cellular Telephone Company
Manufacturer
:
Sony Ericsson Mobile Communications Japan, Inc.
From regular phones:
0077-7-111
(toll free)
From au cellphones:
157 area code not required
(toll free)
For inquiries, call:
au Customer Service Center (General Information)
Cellphone and PHS operators collect and recycle unused
telephones, batteries and battery chargers at stores bearing the
logo regardless of brand and manufacturer to protect the
environment and reuse valuable resources.
Pressing"zero"willconnectyou
toanoperator,aftercalling"157"
onyouraucellphone.
Before use
How to use
the phone
How to use the
phone book
How to use
mail
How to use
the camera
How to use the
infrared data
exchange feature
Inputting
text
Troubleshooting
Other features
How to use
EZweb

基本操作ガイド/A1402S
ご利用の
準備
電話の
使いかた
アドレ ス 帳 の
使いかた
メールの
使いかた
カメラの
使いかた
赤外線通信の
使いかた
文字を
入力する
困ったときは
その他の機能
EZwebの
使いかた
取扱説明書
/A1402S
目 次
ご利用の準備
A1402Sで
できること
主な
機能リスト
付 録
文字入力
auのネットワーク
サービス
機能メニュー
の使いかた
メニュー一覧
マイセレクト
電 話
ツール
設 定
赤外線通信
データフォルダ
アドレ ス 帳
メール
EZweb
カメラ
EZアプリ
(BREWTM)
電話の
基本操作
Welcome
Thank you for buying the A1402S.
Before using your A1402S, be sure to read the A1402S Basic Manual (PDF manual) to
ensure correct use of your A1402S. After you have finished reading this manual, store this
PDF manual and the printed manuals in a safe place so you can retrieve them whenever you
need them.
If you lose any of these manuals, contact our service representative.
Printed manuals for A1402S (Japanese)
The A1402S comes with the Basic Manual and the Manual.
This Basic Manual and the Manual can be downloaded also from the au website.
au website: http://www.au.kddi.com/
A1402S Basic Manual
Equivalent to this PDF manual.
A1402S Manual
English version is not available.
In some of the displays used for descriptions in this manual, the icon display area at the
top of the display and the soft key option display area at the bottom of the display may
be omitted. Also, the typeface and shape of fonts used in displays may differ from those
used in actual displays or may be omitted.
01JP02BAS-E.p65 04.2.12, 9:49 AM1

1
●
Radio waves from cellphones may
adversely influence medical
apparatus and equipment.
•
Some people close to you in busy
places such as crowded trains may
be using pacemakers.
Turn your cellphone off in such
places.
•
Abide by the instructions of hospitals
and other medical institutions where it
is forbidden to use or carry
cellphones.
Reception
●
Consider where to use your
cellphone and be careful of how
loudly you talk.
•
Do not make calls from cinemas,
theaters, museums, libraries and
other similar places. Turn your
cellphone off or set it to the manner
mode to prevent others around you
from being inconvenienced by the
incoming ring.
•
Use your cellphone in places where
you do not prevent others from
passing through.
•
Move to areas where you do not
cause others inconvenience on trains
or in hotel lobbies.
•
Take care not to talk too loudly during
conversations.
•
Get other people's permission before
you start taking photos with the
cellphone's camera.
●
Some places forbid the use of
cellphones.
•
Do not use cellphones while you are
driving. Doing so is dangerous and
forbidden by law.
•
Radio waves may interfere with
airplane operation. Be sure to turn
your cellphone off before you board
airplanes.
Etiquette
Cellphone etiquette
■
Cellphones emit weak radio waves at all times even if you just turn the power on.
■
Enjoy and safely use your cellphone without forgetting those around you.
01JP03BAS-E.p65 04.2.12, 9:50 AM1

2
What A1402S offers
Basics of the cellphone
○○○○○○○○○○
Mail
You can send mail
to other cellphones
or PCs.
Read
from
page 34
○○○
○○○○○○○○○○○○○
Camera
You can easily take photos
and send them by e-mail.
Read
from
page 54
○○○
○○○○○○○○○○○
Phone calls
Your cellphone is full of
handy functions like a
phone book, call list, and
manner mode.
○○○
○○○○○○○○○○○
EZweb (Internet)
You can view news, or
download incoming
melodies or wallpaper.
Read
from
page 64
○○○
Read
from
page 72
○○○
○○○○○○○○○○○○○
Infrared data exchange
You can send and receive
data, like phone book entries
and profiles, to and from
other A1402Ss.
Read
from
page 18
01JP03BAS-E.p65 04.2.12, 9:50 AM2

3
Manner mode, record message, and keypad lock
○○○○○○○○○○○○○○○○○○○○○○○○○○○○○○○○○○○○○○○○
Manner mode – For turning sound off
You can use the manner mode to turn
incoming rings and other tones off to
prevent others from being
inconvenienced.
Hold down
m
for at least one second in
the idle display.
See
page 25
○○○○
○○○○○○○○○○○○○○○○○○○○○○○○○○○○○○○○○○○○○○○○
Record message – When you cannot answer a phone call
You can play answer messages and
record messages from other parties
when you cannot answer a phone call.
Hold down
MM
for at least one second in
the idle display.
I can't answer
your call right
now.
(Japanese)
○○○○
See
page 26
○○○○○○○○○○○○○○○○○○○○○○○○○○○○○○○○○○○○○○○○
Keypad lock – For preventing keypad misoperation
You can lock the keypad to prevent keypad misoperation, for
example, when carrying your cellphone with the power turned on.
This can prevent mistaken calls even if a small child plays with
your cellphone.
Hold down
p
for at least one second in the idle display. To unlock
the keypad, hold down
p
for at least one second in the idle display.
You can lock or unlock the keypad by pressing
Q
(shutter key) for
at least one second with the main unit folded in when the main display
is in the idle display.
01JP03BAS-E.p65 04.2.12, 9:50 AM3

4
Check the power, radio waves, and battery!
○○○○○○○○○○○○○○○○○○○○○○○○○○○○○○○○○○○○○○○○
Usually, keep the cellphone's power on.
To make or receive calls, turn the power
on.
Hold down
t
for at least one second.
○○○○○○○○○○○○○○○○○○○○○○○○○○○○○○○○○○○○○○○○
Pay attention to the remaining "battery" power.
Sometimes the cellphone does not
function properly if the remaining
battery power is low.
indicates the remaining battery power.
page
11
○○○○
See
page 11
○○○○
○○○○
○○○○○○○○○○○○○○○○○○○○○○○○○○○○○○○○○○○○○○○○
You cannot talk if you are not receiving "radio waves."
It is sometimes difficult to receive radio
waves in some places even in service
areas.
indicates the reception state.
See
page 11
See
page 11
01JP03BAS-E.p65 04.2.12, 9:50 AM4

5
Watch out for spam and one-ring calls!
○○○○○○○○○○○○○○○○○○○○○○○○○○○○○○○○○○○○○○○○
If you get incoming spam…
You can use the mail filter function to
disable reception of just mail you specify
or block mail indicated as "
未承諾広告※
"
that contains lots of spam.
E-mail
The following mail functions are available for
preventing arrival of spam:
•
"
未承諾広告フィルター
": To block spam
•
"
アドレスフィルター
": To filter various
addresses
"
指定拒否設定
":
To reject specified mail
"
指定受信設定
": To receive only specified mail
"
なりすまし規制
": To block mail from a spammer who
pretends to be using a cellphone or PHS
C-mail
•
Receive filter
○○○○○○○○○○○○○○○○○○○○○○○○○○○○○○○○○○○○○○○○
If you have an incoming call from an unknown number…
Such calls may be an invitation to you to
return a call to services with very high
charges. (This is a "one-ring call.")
The red icon is displayed in
the Received display when you
receive a one-ring call.
See
page 48
○○○○
See
page 21
○○○○
Feb,22 10:00
Feb,22 9:00
DialedReceived
030004XXXX
Carol Adams
Feb,23 12:35
030003XXXX
Feb,21 22:00
John Smith
01JP03BAS-E.p65 04.2.13, 1:14 PM5

6
Contents
Etiquette 1
Cellphone etiquette ........................................................................................................................ 1
Basics of the cellphone 2
What A1402S offers ....................................................................................................................... 2
Manner mode, record message, and keypad lock ........................................................................ 3
Check the power, radio waves, and battery! ................................................................................. 4
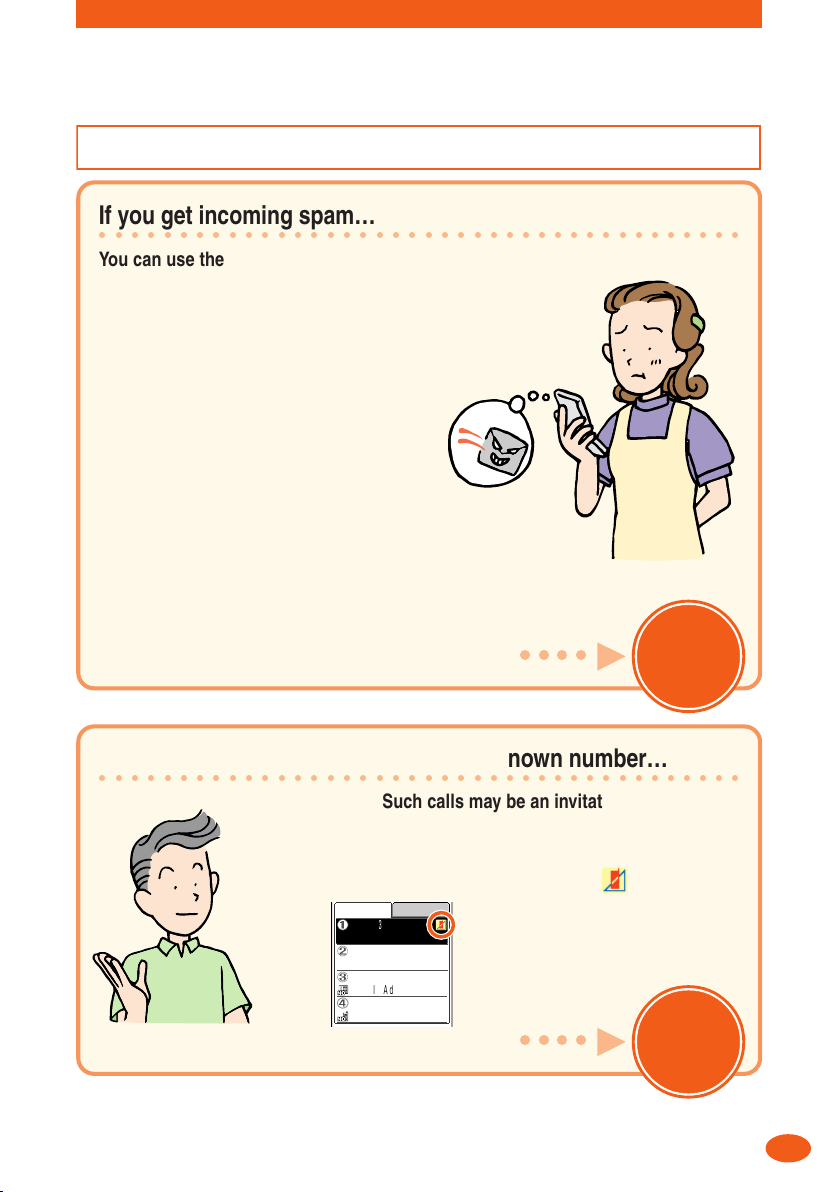
Watch out for spam and one-ring calls! ......................................................................................... 5
Contents 6
Before use 8
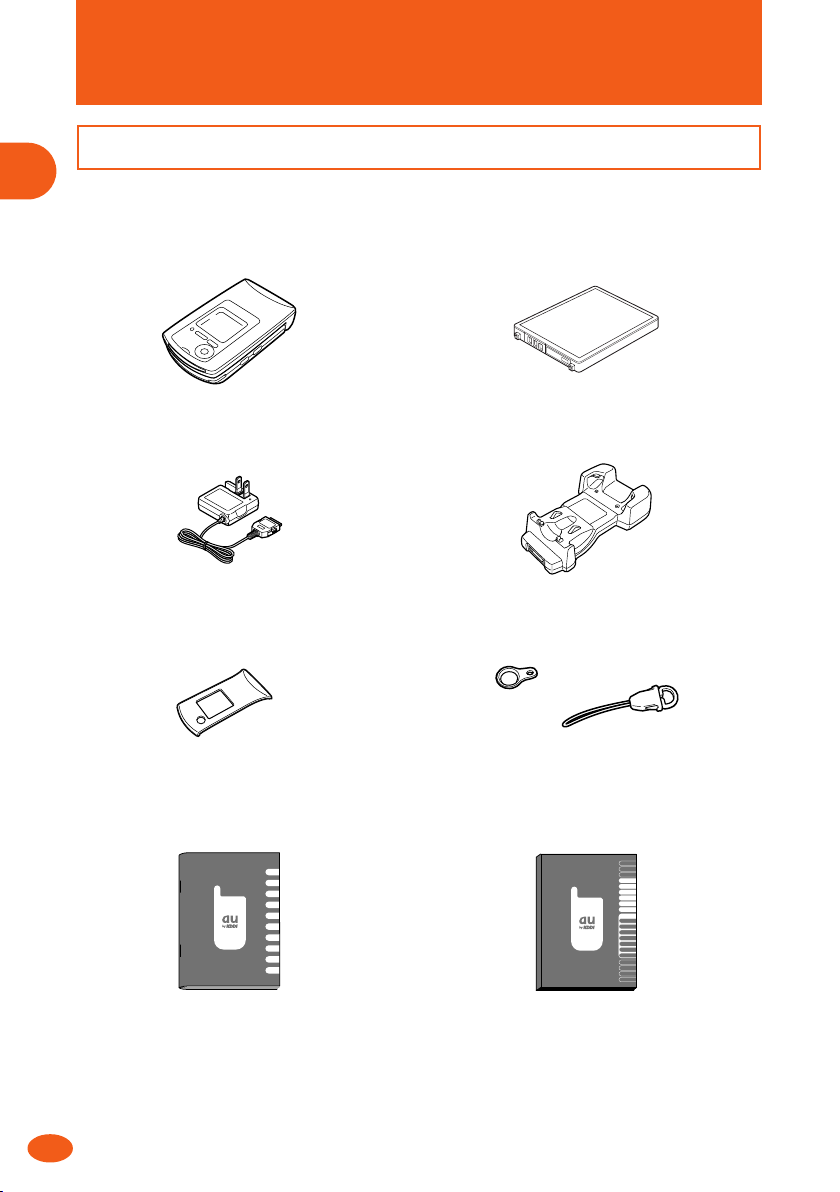
Checking the package ................................................................................................................... 8
Names of parts .............................................................................................................................. 9
Charging the battery pack ........................................................................................................... 10
Tur ning the power on ................................................................................................................... 11
Tur ning the power off ................................................................................................................... 11
Before using the English display ................................................................................................. 12
Learning the basics ..................................................................................................................... 12
Viewing the display ...................................................................................................................... 15
Initial settings for e-mail and EZweb ...........................................................................................16
Confirming your cellphone number/e-mail address .................................................................... 17
How to use the phone 18
Making a call ................................................................................................................................ 18
Receiving a call ............................................................................................................................ 19
Redialing the number you called (Dialed) ................................................................................... 20
Redialing the number you received (Received) .......................................................................... 20
Filtering one-ring calls ................................................................................................................. 21
Changing the volume and tone of the incoming ring .................................................................. 22
Changing the volume during a call .............................................................................................. 24
Setting the manner mode ............................................................................................................ 25
Recording a message when you cannot answer a call ............................................................... 26
Playing back recorded messages ............................................................................................... 27
How to use the phone book 28
Saving new data .......................................................................................................................... 28
Editing saved data ....................................................................................................................... 30
Making a call from the phone book ............................................................................................. 32
Saving a received call .................................................................................................................. 33
How to use mail 34
Using e-mail ................................................................................................................................. 34
01JP03BAS-E.p65 04.2.12, 9:50 AM6

7
Changing your e-mail address ....................................................................................................35
Creating and sending e-mail ....................................................................................................... 38
Opening a received e-mail ........................................................................................................... 41
Replying to a received e-mail ...................................................................................................... 44
Opening a received e-mail with a photo or movie attached ....................................................... 47
Filtering spam .............................................................................................................................. 48
Using C-mail ................................................................................................................................ 49
Creating and sending C-mail ....................................................................................................... 50
Opening a received C-mail .......................................................................................................... 52
How to use the camera 54
What you can do with this camera .............................................................................................. 54
How to hold the camera ............................................................................................................... 55
Taking photos ............................................................................................................................... 56
Recording movies ........................................................................................................................ 58
Viewing photos you have taken ...................................................................................................60
Viewing movies you have recorded ............................................................................................. 61
Attaching a photo or movie to e-mail .......................................................................................... 62
Photo-mail .................................................................................................................................... 63
How to use EZweb 64
EZweb (Internet) .......................................................................................................................... 64
Viewing information sites ............................................................................................................. 65
Saving your favorite sites ............................................................................................................. 67
Viewing a site saved to the Favorite list ...................................................................................... 68
Confirming your call costs ........................................................................................................... 69
Downloading an incoming melody .............................................................................................. 70
How to use the infrared data exchange feature 72
Using the infrared data exchange feature ................................................................................... 72
Using the infrared data exchange feature to send data .............................................................. 74
Using the infrared data exchange feature to receive data .......................................................... 75
Inputting text 76
Changing the character mode .....................................................................................................76
Inputting text ................................................................................................................................ 77
Troubleshooting 80
Other features 81
Index 82
01JP03BAS-E.p65 04.2.12, 9:50 AM7

8
Before use
Before use
Checking the package
The package contains the main unit and accessories.
•
Main unit
•
Battery pack (inside the main unit)
•
Sony Ericsson AC adaptor 02
•
Desktop holder
•
Style-UpTM Panel (1 piece)
•
Detachable Macro Lens, Petit Buckle
※
Attach the Petit Buckle to the Detachable Macro Lens so
you do not lose it.
•
Basic Manual (Japanese)
•
Manual (Japanese)
基本操作ガイド
/A1402S
ご利用の
準備
電話の
使いかた
アドレ ス 帳 の
使いかた
メールの
使いかた
カメラの
使いかた
赤外線通信の
使いかた
文字を
入力する
困ったときは
その他の機能
EZwebの
使いかた
取扱説明書
/A1402S
目 次
ご利用の準備
A1402Sで
できること
主な
機能リスト
付 録
文字入力
auのネットワーク
サービス
機能メニュー
の使いかた
メニュー一覧
マイセレクト
電 話
ツール
設 定
赤外線通信
データフォルダ
アドレ ス 帳
メール
EZweb
カメラ
EZアプリ
(BREWTM)
電話の
基本操作
•
Warranty (Japanese)
•
Safety Precautions (Japanese)
•
Introduction to EZ application (BREWTM) (Japanese)
01JP03BAS-E.p65 04.2.12, 9:50 AM8

9
Before use
Names of parts
Number keys
# key
Camera key
Clear key
Shutter key
Incoming indicator/
camera start indicator
Power/End key
Quick display
Manner key
key
Send/Receive key
Mail key
Received/Left key
Main display
Earpiece
Microphone
Center jog
Incoming
indicator/camera
start indicator
Battery pack
(built-in)
Charge indicator
Application key
Dialed/Right key
EZ key
Photo light
Infrared port
Memo key
Lens
Antenna (built-in)
01JP04BAS-E.p65 04.2.12, 4:07 PM9

10
Before use
Charging the battery pack
Before you use your cellphone, charge the battery pack (built-in).
You can also
charge the battery
pack by directly
connecting the
Sony Ericsson AC
adaptor 02 to the
A1402S.
Connector
External connecting terminal
•The charge indicator lights red: The battery pack is being charged.
•The charge indicator turns off: Charging is finished.
w
q
r
e
Sony Ericsson
AC adaptor 02
Power plug
100 VAC power outlet
Connecting
terminal
Desktop holder
Connector
Locking tab
Protrusions
Charge indicator
Notches
SectionA
1
1
Connect the Sony Ericsson AC adaptor 02 to the desktop holder.
2
2
Fold out the power plug of the Sony Ericsson AC adaptor 02, and
plug it into a 100 VAC power outlet.
3
3
Align the notches of the A1402S, with the battery pack attached,
to the protrusions of the desktop holder.
4
4
Insert the A1402S into the locking tab of the desktop holder until
it clicks into place.
When removing the A1402S, hold the desktop holder firmly and lift section
A
on the
A1402S.
01JP04BAS-E.p65 04.2.12, 4:07 PM10

11
Before use
Turning the power on
The idle display appears when you turn the A1402S on.
You can operate the A1402S functions, e.g. phone and mail, from the idle display. When you
have finished an operation, the display returns to the idle display.
1
1
Hold down
t
for at least one
second.
⇒
When the power is turned on, the idle display appears.
Check the remaining battery power.
Check the reception state.
Fully dischargedLowMediumFully charged
Very weak Out of service areaStrong Medium Weak
• Charge the battery pack when the power is low.
•You cannot receive or make calls if "
圏外
" (Out of service area) is
displayed.
• Sometimes you cannot receive or make calls if "
" (Very weak) is
displayed.
(idle display)
menu EZmail
Turning the power off
1
1
Hold down
t
for at least two
seconds.
To receive calls, leave the power on.
01JP04BAS-E.p65 04.2.12, 4:07 PM11

12
Before use
Before using the English display
1
1
Press
p
(
メニュー
) in the idle display, and use
j
and
p
to select (
設定
)
→
"
画面設定
."
2
2
In the
画面設定
display, use
j
and
p
to select "Set
Language"
→
"English."
Learning the basics
Key operation
Start with how to use
p
and
j
.
p
Press the center jog.
j
Tu r n t he center jog up or down.
Soft key functions appear at the bottom of the display.
You can use the displayed function by pressing one of the soft keys.
menu EZmail
Soft key 1
Soft key 2
(Center jog)
Soft key 3
If you are unsure of an operation or you have made a mistake, return to the previous
display by pressing
c
, or return to the idle display by pressing
t
.
01JP04BAS-E.p65 04.2.12, 4:07 PM12

13
Before use
: Opens the Received
display and moves
the cursor to the left
: Opens the E-mail menu/
C-mail menu
: Deletes characters and
cancels operations
: Inputs phone
numbers or
characters
: Sets or cancels the
manner mode
: Opens the Dialed display and
moves the cursor to the right
: Accesses EZweb (Internet)
: Tu r ns the power on/off and
ends a call
: Sets or cancels record
message
: Operates the camera
: Opens the phone book and
moves the cursor up or down
j
: Selects or confirms each item
p
<
q
c
0〜9
*
,
#
m
>
e
t
C
M
: Starts the EZ application
(BREW™)
A
: Takes photos or records
movies
Q
: Makes or receives a call
T
How to view the Index menu
You can operate the Index menu by using
p
and
j
. Each A1402S function can be
called up from the Index menu.
Camera
Schedule
Alarm settings
Rcv Ir data
PhotoMixer
EZappli
Charge detail
1
1
Press
p
(menu) in the idle
display.
Press the center jog with the cellphone turned on.
⇒
The Index menu appears.
Default settings
Chg lockcode (change lockcode) 1234 Font size
Caller ID ON
Ordinary font: Large font
EZweb font: Small font
E-mail font: Large font
01JP04BAS-E.p65 04.2.23, 3:14 PM13

14
Before use
Learning the basics (continued)
2
2
Turn
j
to select the desired
Index menu, and press
p
(select).
⇒
You can set each item in the Index menu you have selected.
Phone book
Call list
Voice memo
Quick msg
Profile
Schedule
Memo
Calculator
Clock
JPdictionary
Task list
Guide
Ringer
Display
Manner
Privacy
Call data
User support
M68
Camera
Schedule
Alarm settings
Rcv Ir data
PhotoMixer
EZappli
Charge detail
If you have made a mistake, press
c
. You can cancel the operation or return
to the previous display.
The Index menu contains the following functions.
(MySelection) You can save any combination of menu items to suit your preferences.
(Phone) This menu allows you to use the phone book, call list or voice memo when
making calls.
(Tool) This menu provides you with a schedule, memo, calculator and other handy
features for making the most of your A1402S.
(Settings) This menu allows you to set Ringer, Display, and other settings.
(DataFolder) This menu allows you to save various data by category for later use.
Other than the above, various functions are available in the Index menu.
01JP04BAS-E.p65 04.2.12, 4:07 PM14

15
Before use
Viewing the display
You can check arrival of mail, function settings and other information by icons (pictures that
represent functions or states). Remembering the main icons comes in handy during
operation.
Main icons
Displayed during a call
Displayed while you are using EZweb
Displayed when mail has been received
or when mail has not yet been read
Displayed while the manner mode is set
Displayed if you were not able to answer a call
Displayed when the ring volume is set to "OFF"
Displayed when the vibrator is set to "ON"
Indicates the number of recorded messages
Displayed while record message is set
Displayed while the keypad is locked
How to view the quick display
Displayed while you are using EZweb
Displayed if you received C-mail
Displayed if you received e-mail
Indicates the number of received C-mails and
e-mails
Displayed if you were not able to answer a call
Displayed if there is a recorded message that you
have not listened to
Displayed when mail has been received or when
mail has not yet been read
Displayed while the manner mode is set
Displayed while the keypad is locked
01JP04BAS-E.p65 04.2.23, 3:14 PM15

16
Before use
Initial settings for e-mail and EZweb
You need to subscribe to the EZweb (Internet) service to use the e-mail and EZweb (Internet) service.
Contact an au Customer Service Center or an au shop if you did not subscribe to the service at
the time of purchase.
Be sure to do initial settings before using the e-mail and EZweb services.
Initial settings automatically determine your e-mail address.
To change that e-mail address to your preferred address, see page 35.
Skip this section if you are not going to use either e-mail or EZweb.
Format EZweb
Press OK,
please wait
1
1
Press
q
(mail),
e
(EZ) or
A
in the idle display.
Welcome to EZweb.
Your e−mail address is:
△△△@ezweb.ne.jp
−Hint−
Initializing subscriber
account.
Please be patient...
2
2
Press
p
(ok).
Wait a short while until the display on the right appears.
The initial settings are finished when the display on the
right appears.
3
3
Press
p
(ok).
⇒
If you started the initial settings by pressing
q
(mail), the E-mail menu appears.
If you started the initial settings by pressing
e
(EZ), the EZ menu appears.
E−mail menu M71
Inbox
Outbox
Check new mail
Data folder
Settings
Create new
Start by
q
Favorite list
Input to URL
Disp preview
Data folder
Screen memo
Reset
EZ setting
Top menu
EZ menu M91
Start by
e
TV
リモコン
Start by
A
01JP04BAS-E.p65 04.2.13, 1:15 PM16

17
Before use
Confirming your cellphone number/e-mail address
You can confirm your cellphone number and e-mail address.
Camera
Schedule
Alarm settings
Rcv Ir data
PhotoMixer
EZappli
Charge detail
1
1
Press
p
(menu) in the idle
display.
⇒
The Index menu appears.
Phone book
Call list
Voice memo
Quick msg
Profile
M661
2
2
Turn
j
to select (Phone),
and press
p
(select).
⇒
The Phone menu appears.
DetailBasic
Phone no.
My address
△△△△@ezweb.ne.jp
XXXX
3
3
Turn
j
to select "Profile," and
press
p
(select).
⇒
The profile display appears so that you can confirm your
cellphone number and e-mail address.
You can also confirm your cellphone number and e-mail address by pressing
p
(menu) and
0
in the idle display.
Your e-mail address is automatically determined when you make the initial settings. You
can also change to an e-mail address you like (see page 35).
01JP04BAS-E.p65 04.2.12, 4:07 PM17

18
How to use the phone
Learn how to do basic phone operations.
Making a call
Dial a phone number to make a call.
XXXX
1
1
Press
0
to
9
to input the
other party's phone number.
To call a regular phone
Input the phone number starting with
the area code.
To call a cellphone, carphone or PHS
Input all 11 of the digits in the phone number.
To notify the other party of your cellphone number
Input "186" before your cellphone number.
Not to notify the other party of your cellphone number
Input "184" before your cellphone number.
2
2
Press
T
.
Wait a short while until you hear the
tone.
When you have finished the call, press
t
.
Hello
How to use the phone
01JP05BAS-E.p65 04.2.12, 4:08 PM18
Table of contents
Other KDDI Cell Phone manuals

KDDI
KDDI CA001 User manual

KDDI
KDDI t008 User manual

KDDI
KDDI IS12T Installation guide

KDDI
KDDI au IS11S Installation guide

KDDI
KDDI A1407PT User manual

KDDI
KDDI aquos shot SH003 User manual

KDDI
KDDI au K003 Specification sheet

KDDI
KDDI Qua Phone PX Quick start guide

KDDI
KDDI SH001 User manual

KDDI
KDDI Au TSX04 Installation guide

KDDI
KDDI W62SA User manual

KDDI
KDDI SH011 User manual

KDDI
KDDI HI-VISION CAM WOOO User manual

KDDI
KDDI au BRAVIA S004 Installation guide

KDDI
KDDI sportio water beat User manual

KDDI
KDDI AQUOS SHOT SH006 User manual

KDDI
KDDI AQUOS User manual

KDDI
KDDI au EIS01PT Specification sheet

KDDI
KDDI K007 User manual

KDDI
KDDI infobar 2 User manual