manuals.online logo
Brands
  1. Home
  2. •
  3. Brands
  4. •
  5. KI
  6. •
  7. Indoor Furnishing
  8. •
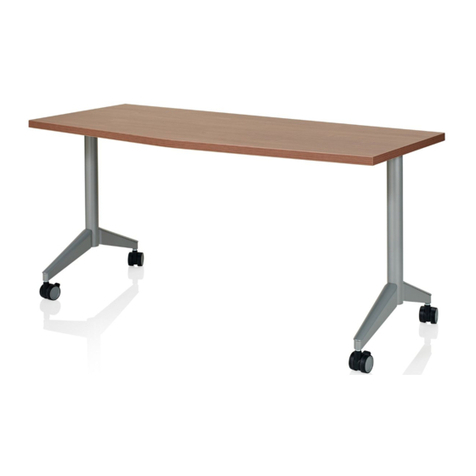
  9. KI Trek User manual

KI Trek User manual

AssemblyInstructions
Trek™& DataLink®Multipurpose Tables with PowerUp
#14 x 1" wood screw
leg
base
module hole
vertical leg wireway
table top
#10 x 5/8" screw
cord
management
troughs module
cord
#10 x 5/8"
screw
power & data
module
through clip
Figure 1
Figure 2
Fixed and Folding Base Installation
Tools Required:
Phillips screwdriver
Hardware Included:
(8) #14 x 1" screws
1. Place the table top upside down onto a
soft protective surface.
2. Locate the four pre-drilled pilot holes
at each end of the table for each base.
Orient the mounting holes of each
base with the pre-drilled holes in the
table (Figure 1).
Note: The vertical leg wireways must
face the side of the table with the
module hole. The folding legs of the
table bases must be positioned to fold
toward the center of the table.
3. Secure each base to the table with four
#14 x 1" screws provided (Figure 1).
Power and Data/Cord Management
Installation
Tools Required:
Phillips screwdriver
Hardware Included:
(6) #10 x 5/8" screws
1. Position the table top upside down on
a soft protective surface. For tables
with the Folding Base, fold out the
table legs by unsnapping each leg
from the leg holder on the base. Then
lift the table leg up 90°, making sure
that the base locks securely into place
by pressing down on the leg such that
it engages the leg lock (Figure 2).
2. Carefully tip table up on edge.
Position the power & data module
over the topside as shown in Figure 2.
From the topside, route the module
cord through the module hole and
snap the power & data module into
place. Be sure that the module is
closed (by pressing in on the “stars”
in the module) and carefully set the
table upside down again onto a soft
protective surface.
March, 2002
KI
1330 Bellevue Street
P.O. Box 8100
Green Bay, Wisconsin 54308-8100
TEL (920) 468-8100
FAX (920) 468-0280
modesty panel
L-hanger
#10 x 5/8" screw
hanger
bracket
#10 x 5/8" screw
release tab
© KI 2002 Litho in USA Code KI-61266/KP302
Trek™& DataLink®Multipurpose Tables with PowerUp - Assembly Instructions
Assemble units as described herein only. To do otherwise
may result in instability. All screws, nuts and bolts must
be tightened securely and must be checked periodically after
assembly. Failure to assemble properly, or to secure
parts may result in assembly failure and injury.
6"
module cord
power & data
module
3. Position trough clips over the
pre-drilled holes in the table top and
secure with two #10 x 5/8" screws
per clip (Figure 2).
4. Position the mounting holes of both
cord management troughs over the
pre-drilled holes in the table top.
Secure the troughs to the table top
with #10 x 5/8" screws (Figure 2).
Do not over tighten screws.
5. Route the module cord and/or optional
data lines through either end of the
cord management trough (Figure 2).
If the cord is to be routed the opposite
direction that it comes out of the
module, make a 6" loop with the cord
to change direction (Detail A).
6. Slide the flange of the cord
management trough under the trough
clips to secure the trough to the table
(Figure 2).
7. If the table has fixed legs instead of
folding legs, skip to step 8.
8. The module cord and/or optional data
lines must be attached to the lower
portion of the base on the folding plate
using a cord clamp (factory installed).
Loosen the screw that holds the clamp
and press cord in under one side and
data lines (optional) under the other
side (Detail B).
Note: Cord and/or data lines must
be pulled tight through cord clamp
and into vertical channel(s). Tighten
the screws to secure cord and/or
data lines.
9. Press the module cord into one of the
vertical channels of the leg wireway
(Detail B).
Note: The other vertical channel of
the same leg wireway is for routing
data lines.
Quick Release Modesty Panel
Installation
Note: The Quick Release Modesty
Panel should only be installed after
the power & data module and cord
management components are
installed.
Tools Required:
Phillips screwdriver
Hardware Included:
(8) #10 x 1" screws
(4) #10 x 5/8" screws
1. Place table top upside down on a soft
protective surface. Orient hanger
brackets as shown over pre-drilled
holes and mount to underside of table
top with four #10 x 1" screws
(Figure 3). Carefully turn table to
upright position.
2. Lay modesty panel on a soft
protective surface with pre-drilled
holes facing up. Fasten L-hangers to
the modesty panel with two #10 x 5/8"
screws each (Figure 3).
3. To install the modesty panel under the
table, slide the L-hangers of the
modesty panel into the hanger
brackets on the underside of the table
top. When the mechanisms engage,
a “click” will sound at each bracket.
4. To remove the modesty panel, the
release tab on each hanger bracket
must be pulled down while the
modesty panels’ L-brackets are pulled
out.
Figure 3
module cord
folding
plate
vertical leg wireway
cord clamp (factory installed)
screw
Detail A
Detail B
folding plate

This manual suits for next models

1

Other KI Indoor Furnishing manuals

KI Aristotle Casegoods Wall-Mounted Overhead... User manual

KI

KI Aristotle Casegoods Wall-Mounted Overhead... User manual

KI Soltice Metal User manual

KI

KI Soltice Metal User manual

KI Intellect Wave Chair Guide

KI

KI Intellect Wave Chair Guide

KI CafeWay ECRCP User manual

KI

KI CafeWay ECRCP User manual

KI Tattoo Low Cupboard User manual

KI

KI Tattoo Low Cupboard User manual

KI Jubilee Lounge Seating Guide

KI

KI Jubilee Lounge Seating Guide

KI RT User manual

KI

KI RT User manual

KI HF User manual

KI

KI HF User manual

KI CafeWay ECELP User manual

KI

KI CafeWay ECELP User manual

KI U Series User manual

KI

KI U Series User manual

KI Enlite Nesting Table User manual

KI

KI Enlite Nesting Table User manual

KI 700 Series User manual

KI

KI 700 Series User manual

KI USPF2324 User manual

KI

KI USPF2324 User manual

KI Pirouette User manual

KI

KI Pirouette User manual

KI Engage Task Chair Installation instructions

KI

KI Engage Task Chair Installation instructions

KI KI 700 Series User manual

KI

KI KI 700 Series User manual

KI Uniframe Convertible Bench User manual
KI

KI Uniframe Convertible Bench User manual

KI 700 Series User manual

KI

KI 700 Series User manual
KI Doni User manual

KI

KI Doni User manual

KI Barron Table User manual

KI

KI Barron Table User manual

KI Impress Ultra Installation guide

KI

KI Impress Ultra Installation guide

KI Pirouette User manual

KI

KI Pirouette User manual

KI 700 Series User manual

KI

KI 700 Series User manual

KI Pirouette User manual

KI

KI Pirouette User manual

Popular Indoor Furnishing manuals by other brands

BRW L20-KOM6S/12/6 Assembly instructions

BRW

BRW L20-KOM6S/12/6 Assembly instructions

atmosphera NEITH 194640 manual

atmosphera

atmosphera NEITH 194640 manual

Forte ERBB351 Assembling Instruction

Forte

Forte ERBB351 Assembling Instruction

Studio Designs HOME CAMBER 71003 Assembly instructions

Studio Designs

Studio Designs HOME CAMBER 71003 Assembly instructions

Vivo DESK-EP40TB instruction manual

Vivo

Vivo DESK-EP40TB instruction manual

YOTRIO FRS62227R Assembly instructions

YOTRIO

YOTRIO FRS62227R Assembly instructions

Kenroy Home CORVUS WALL SHELF 65120 Use and care guide

Kenroy Home

Kenroy Home CORVUS WALL SHELF 65120 Use and care guide

Safavieh Furniture Raveena NST9002A quick start guide

Safavieh Furniture

Safavieh Furniture Raveena NST9002A quick start guide

Bell'O AVSC2131 Assembly instructions

Bell'O

Bell'O AVSC2131 Assembly instructions

ERGOMART Corner Shaper and Keyboard Arm installation instructions

ERGOMART

ERGOMART Corner Shaper and Keyboard Arm installation instructions

Next U01043 Assembly instructions

Next

Next U01043 Assembly instructions

AOKE AK2YJYT-YZB3-BM user manual

AOKE

AOKE AK2YJYT-YZB3-BM user manual

Tennsco Standard Combination Cabinet CVD7214 Assembly Instructions/Parts Manual

Tennsco

Tennsco Standard Combination Cabinet CVD7214 Assembly Instructions/Parts Manual

LIVING ELEMENTS Clever Cube 468968 Assembly instructions

LIVING ELEMENTS

LIVING ELEMENTS Clever Cube 468968 Assembly instructions

Songmics Vasagle LET23 manual

Songmics

Songmics Vasagle LET23 manual

Furniture Pipeline Ames quick start guide

Furniture Pipeline

Furniture Pipeline Ames quick start guide

pakoworld 182-000068 Assembly manual

pakoworld

pakoworld 182-000068 Assembly manual

HOMCOM 836-385 Assembly & instruction manual

HOMCOM

HOMCOM 836-385 Assembly & instruction manual

manuals.online logo
manuals.online logoBrands
  • About & Mission
  • Contact us
  • Privacy Policy
  • Terms and Conditions

Copyright 2025 Manuals.Online. All Rights Reserved.