manuals.online logo
Brands
  1. Home
  2. •
  3. Brands
  4. •
  5. KI
  6. •
  7. Indoor Furnishing
  8. •
  9. KI U Series User manual

KI U Series User manual

Assemble units as described herein only. To do otherwise
may result in instability. All screws, nuts and bolts must be
tightened securely and must be checked periodically after
assembly. Failure to assemble properly, or to secure parts
may result in assembly failure and personal injury.
Assembly Instructions
U-Series® Pedestal
Worksurface Supporting Pedestal with Panel Supporting Bracket
January 2016
Removing Drawers
Note: To ease the assembly of
support brackets to cabinets and
cabinets to worksurfaces, all file
drawers should be removed.
1. Empty the contents of file drawers
and open drawer until suspension
is fully extended (Figure 1).
2. Using a slot screwdriver, place
tip between the drawer body and
the suspension, near the slip
connection (Detail A).
3. Rotate the screw driver to pry the
glide away from the drawer body,
while pressing up on the bottom of
the drawer (Detail A).
4. The drawer will now slip free from
the rear connections by pulling
the drawer evenly at a slight angle
upwards (Figure 1).
drawer
suspension
slip
connection
drawer
bottom
drawers
pedestal
Detail A
Figure 1
2
Assemble units as described herein only. To do otherwise
may result in instability. All screws, nuts and bolts must be
tightened securely and must be checked periodically after
assembly. Failure to assemble properly, or to secure parts
may result in assembly failure and personal injury.
U-Series®Pedestal - Panel Supporting Bracket
Assembly Instructions
U-Series Pedestal, Panel
Supporting Bracket without
Spacer
1. Position the panel supporting
bracket along the top and side edge
of the pedestal as shown. Be sure
the teeth are facing up (Figure 2).
Note: If a spacer-type panel
supporting bracket is required, go
to page 3.
Important: Care should be taken
to ensure that the supporting
bracket is aligned well with the top
and side of the cabinet for cosmetic
integrity and safe installation of the
worksurfaces. Using a small piece
of double-sided tape at the top and
bottom of the bracket to hold it in
place can aid in alignment of the
supporting bracket.
2. Using the four #10-16 x 1/2”
self-drilling sheet metal screws
provided, carefully secure the panel
supporting bracket to the cabinet
(Figure 2 or 3).
Note: For right-hand installations,
align the supporting bracket with
the right side of the cabinet
(Figure 2). For left-hand
installations align the supporting
bracket with the left side of the
cabinet (Figure 3).
3. To install pedestal to worksurface,
go now to page 4.
Tip: A small piece of double-sided tape
will help hold the bracket in alignment to
the pedestal while driving the self-drilling
and tapping screws into place.
Figure 3
panel supporting bracket
(left-hand installed)
Figure 2
panel supporting bracket
(right-hand shown)
#10-16 x /
1
2
"
self-drilling
sheet metal screws
U-Series®Pedestal - Panel Supporting Bracket
Assembly Instructions
Assemble units as described herein only. To do otherwise
may result in instability. All screws, nuts and bolts must be
tightened securely and must be checked periodically after
assembly. Failure to assemble properly, or to secure parts
may result in assembly failure and personal injury.
3
#10-16 x /
1
2
"
self-drilling
sheet metal screw
panel supporting
bracket
1/ -20 KEPS nuts
4
spacer attachment
(right-hand shown)
pedestal
Figure 4
Figure 5
panel supporting bracket
(left-hand installed)
U-Series®Pedestal - Panel Supporting Bracket
Assembly Instructions
U-Series Pedestal, Panel
Supporting Bracket with Spacer
1. Locate the spacer attachment
along the top and side edge of the
pedestal as shown (Figure 4).
Note: For right-hand
installations, align the spacer with
the right side of the cabinet with
the studs facing left (Figure 4).
For left-hand installations flip the
spacer over and align the bracket
on the left side of the cabinet with
the studs pointed right (Figure 5).
Important: Care should be
taken to ensure that the spacer
is aligned well with the top and
side of the cabinet for cosmetic
integrity and safe installation of
the worksurfaces. Using a small
piece of double-sided tape at the
top and bottom of the bracket
to hold it in place can aid in
alignment of the spacer.
2. Using the four #10-16 x 1/2”
self-drilling sheet metal screws
provided, carefully secure the
spacer to the cabinet (Figure 4).
3. Attach the panel supporting
bracket to the spacer. Secure to
the threaded studs on the spacer
with the four ¼-20 KEPS nuts
provided (Figure 4).
4. To install pedestal to worksurface,
go now to page 4.
Tip: A small piece of double-sided tape
will help hold the bracket in alignment to
the pedestal while driving the self-drilling
and tapping screws into place.
Assemble units as described herein only. To do otherwise
may result in instability. All screws, nuts and bolts must be
tightened securely and must be checked periodically after
assembly. Failure to assemble properly, or to secure parts
may result in assembly failure and personal injury.
4
1330 Bellevue Street • P.O. Box 8100 • Green Bay, WI 54308-8100 • Tel 1-800-424-2432 • www.ki.com
© 2016 KI All Rights Reserved • Litho in USA • Code KI-62529R1/KI/PDF/0116
U-Series®Pedestal - Panel Supporting Bracket
Assembly Instructions
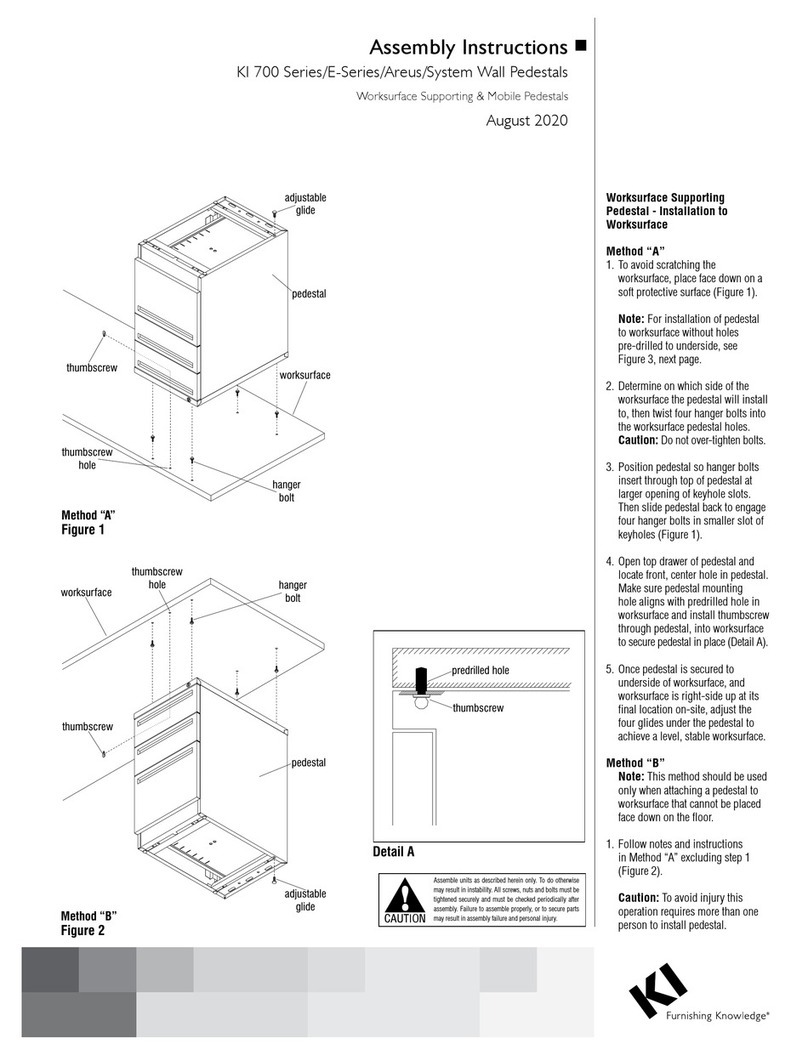
Pedestal to Panel Installation
Note: All pedestals mount to
the panel in the same manner,
regardless of bracket style.
1. At the location for pedestal
installation, move the pedestal
to the panel and insert the
upward facing teeth of the panel
supporting bracket into the
notches in the panel frame.
2. Twist and extend the four glides to
raise the pedestal and allow the
upward facing teeth of pedestal
bracket to engage the panel. This
will firmly lock the teeth of the
bracket to secure the pedestal to
the panel.
Worksurface to Pedestal
Installation
3. Carefully place worksurface onto
the installed cantilever bracket,
(if used) and the pedestal. Align
mounting holes of the installed
bracket to pre-drilled holes in
underside of worksurface. Secure
using two screws appropriate for
the bracket. Take care to not
over-tighten screws (Figure 6).
Figure
6
pedestal
adjustable
glides
panel
supporting
bracket
panel
glide
cantilever
bracket
worksurface
Unite
panel
hanger
bolt
thumb
screw
Note: If installing a double
pedestal (not shown), no holes
have been pre-drilled into the
underside of the worksurface
for installation. Once the double
pedestal is aligned square, use
the pedestal mounting holes as
a template, and pre-drill using
1/8” drill bit, to depth of 1/2” into
underside of worksurface. Take
care to not drill too deep.
4. To install pedestal to underside
of worksurface, align pre-drilled
holes in the worksurface with
mounting holes of the pedestal.
Take care to assure that the front
and side of the pedestal is flush
with the edges of the worksurface
as illustrated (Figure 6).
Note: If a Knife Edge worksurface
is being installed, the pedestal
will be set back from the front
edge of worksurface.
5. Once mounting holes are aligned
and cabinet is square, secure
pedestal to worksurface using
four hanger bolts and one thumb
screw (Figure 6).
6. Re-install pedestal drawers by
first extending suspensions out
of cabinet. Slide the rear slip
connection together by aligning
the tab of the suspension with
the corresponding slot in the
drawer body. Hold suspension
firmly while pushing the drawer,
making sure the slip connection
is together properly.
7. With the rear slip connection
in place correctly, the front
connection tabs will align and the
drawer can be pushed down and
snapped securely into place.
2.56350
Other KI Indoor Furnishing manuals

KI Doni User manual

KI

KI Doni User manual

KI All Terrain ATSW45 User manual

KI

KI All Terrain ATSW45 User manual

KI HF User manual

KI

KI HF User manual

KI Ruckus Tote Storage User manual

KI

KI Ruckus Tote Storage User manual

KI Piretti Torsion Installation instructions

KI

KI Piretti Torsion Installation instructions

KI WorkUp FX User manual

KI

KI WorkUp FX User manual

KI Pirouette User manual

KI

KI Pirouette User manual

KI Genesis User manual

KI

KI Genesis User manual

KI Engage Task Chair Installation instructions

KI

KI Engage Task Chair Installation instructions

KI Concerto Installation instructions

KI

KI Concerto Installation instructions

KI Rapture Stack Chair Guide

KI

KI Rapture Stack Chair Guide

KI Grazie Installation guide

KI

KI Grazie Installation guide

KI Trek User manual

KI

KI Trek User manual

KI WorkZone Series Installation instructions

KI

KI WorkZone Series Installation instructions

KI InTandem User manual

KI

KI InTandem User manual

KI KI 700 Series User manual

KI

KI KI 700 Series User manual

KI 700 Series User manual

KI

KI 700 Series User manual

KI 700 Series User manual

KI

KI 700 Series User manual

KI Lancaster Auditorium Seating User manual

KI

KI Lancaster Auditorium Seating User manual

KI Oath Installation instructions

KI

KI Oath Installation instructions

KI WorkUp CR User manual

KI

KI WorkUp CR User manual

KI Trek User manual

KI

KI Trek User manual

KI Rapture Stack Chair User manual

KI

KI Rapture Stack Chair User manual

KI Concerto User manual

KI

KI Concerto User manual

Popular Indoor Furnishing manuals by other brands

Whalen WS-NIR-722484-5S instruction manual

Whalen

Whalen WS-NIR-722484-5S instruction manual

SAFAVIEH COUTURE Fitz SFV4109-K quick start guide

SAFAVIEH COUTURE

SAFAVIEH COUTURE Fitz SFV4109-K quick start guide

Salvatori INTARSI QUADRO S1 manual

Salvatori

Salvatori INTARSI QUADRO S1 manual

Ameriwood HOME 3533339COM Instruction booklet

Ameriwood HOME

Ameriwood HOME 3533339COM Instruction booklet

Inside Weather HAVEN BED manual

Inside Weather

Inside Weather HAVEN BED manual

Multimo 711 Assembly instructions

Multimo

Multimo 711 Assembly instructions

Next 744389 Assembly instructions

Next

Next 744389 Assembly instructions

Global 695631 Assembly instructions

Global

Global 695631 Assembly instructions

Sauder Carson Forge 415117 Instruction booklet

Sauder

Sauder Carson Forge 415117 Instruction booklet

Songmics VASAGLE LCT88 Instruction

Songmics

Songmics VASAGLE LCT88 Instruction

Furniture of America CM7415N Assembly instructions

Furniture of America

Furniture of America CM7415N Assembly instructions

FLOS D'E-light manual

FLOS

FLOS D'E-light manual

fantastic furniture MADISON Bar stool 1 STR manual

fantastic furniture

fantastic furniture MADISON Bar stool 1 STR manual

Furniture of America YNJ-16901C17-ET Assembly instructions

Furniture of America

Furniture of America YNJ-16901C17-ET Assembly instructions

Sauder Barrister Lane 414723 manual

Sauder

Sauder Barrister Lane 414723 manual

GPM Siena BSDSIE2WT Assembly instructions

GPM

GPM Siena BSDSIE2WT Assembly instructions

BCP SKY763 instruction manual

BCP

BCP SKY763 instruction manual

RUDNICK Home Master Instruction of Assembly

RUDNICK

RUDNICK Home Master Instruction of Assembly

manuals.online logo
manuals.online logoBrands
  • About & Mission
  • Contact us
  • Privacy Policy
  • Terms and Conditions

Copyright 2025 Manuals.Online. All Rights Reserved.