manuals.online logo
Brands
  1. Home
  2. •
  3. Brands
  4. •
  5. KI
  6. •
  7. Indoor Furnishing
  8. •
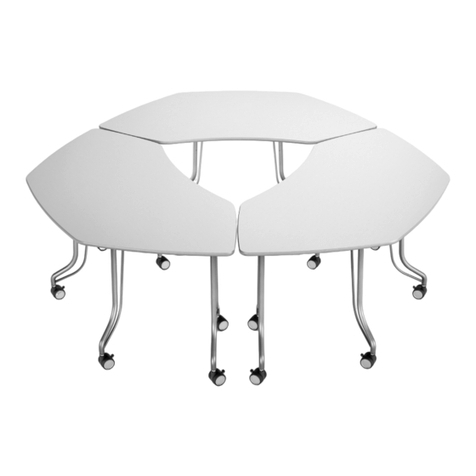
  9. KI Design Itoki DD User manual

KI Design Itoki DD User manual

Assembly Instructions
Design Collection
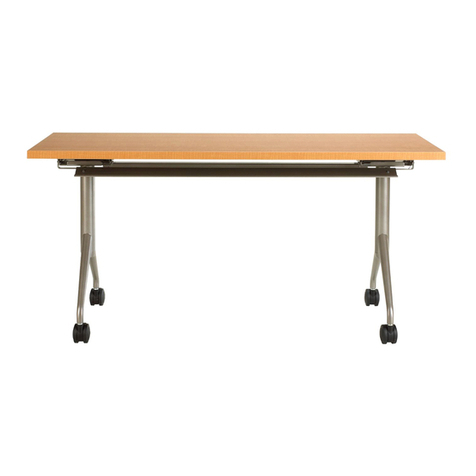
Itoki Table
March 2013
Assemble units as described herein only. To do otherwise
may result in instability. All screws, nuts and bolts must be
tightened securely and must be checked periodically after
assembly. Failure to assemble properly, or to secure parts
may result in assembly failure and personal injury.
Leg
connector
castings (Qty.4)
Table leg
(Qty.4)
Worksurface
(Qty.1)
Leveling
glide (Qty 4)
Leg
mounting
plate (Qty 4)
Table Leg
cross brace
(Qty 4)
M8x25mm Flat Hd.
cap screw w/patch (Qty.4)
1/4-20x1” Flat Hd.
cap screw w/patch (Qty.8)
M8x35mm Button Hd.
cap screw w/patch (Qty.4)
M8x16mm Button Hd.
cap screw w/patch (Qty.8)
M6x20mm Socket Hd.
cap screw w/patch (Qty.4)
Recommended tools
• Safety Glasses
• Level
• English and Metric Hex Head
wrenches
• Electric Screwdriver
• Phillips head drive bits (#2)
• Masking tape or similar
Overview
This installation manual is organized
in the recommended installation order.
42 x 42 Table
1. Unpack the worksurface and lay it
face down on a smooth protective
surface (carpet). Unpack the leg
and mounting plate sets. Identify
all of the parts.
2. Unwrap the hardware pack and
identify all of the parts.
2
Design Collection - Itoki Table
Assembly Instructions
Assemble units as described herein only. To do otherwise
may result in instability. All screws, nuts and bolts must be
tightened securely and must be checked periodically after
assembly. Failure to assemble properly, or to secure parts
may result in assembly failure and personal injury.
Figure 1
Figure 2
M8x25mm
button Hd
w/ Patch
M8x16mm
button Hd
glide
M8x25mm
Flat Hd
w/ Patch
3. Loosely assemble one leg con-
nector casting to one leg using
two bolts as shown in Figure 1.
Leave the hardware loose at this
time. Repeat for the other three
legs.
4. Thread glides onto the bottom of
each leg; turn the glides in about
half way. Attach the leg mounting
plates to the top of each leg using
the screws shown (Figure 2).
Repeat for the other three legs.
Design Collection - Itoki Table
Assembly Instructions
Assemble units as described herein only. To do otherwise
may result in instability. All screws, nuts and bolts must be
tightened securely and must be checked periodically after
assembly. Failure to assemble properly, or to secure parts
may result in assembly failure and personal injury.
3
Figure 3
1/4-20x1
”
Flat Hd
M6x20mm
Socket Hd
Figure 4
5. Position one of the leg assemblies
over the threaded inserts in the
top and loosely attach the leg
to the surface with the provided
hardware (Figure 3).
6. Attach one end of the cross
brace to the connector casting/
leg assembly using the hardware
provided. After all three of these
bolts are started, tighten the
hardware (Figure 4).
4
Design Collection - Itoki Table
Assembly Instructions
Assemble units as described herein only. To do otherwise
may result in instability. All screws, nuts and bolts must be
tightened securely and must be checked periodically after
assembly. Failure to assemble properly, or to secure parts
may result in assembly failure and personal injury.
Figure 5
7. Proceed in this manner with the
other three legs and connector cast-
ings, attaching each assembly to the
cross brace and to the worksurface
(Figure 5).
After completing all four legs the
assembly should look like the image
here (bottom of Figure 5).
8. Tighten all of the hardware at this
time. Turn the table over and move
it to the desired position. Level
the table by turning the glides as
necessary.
Design Collection - Itoki Table
Assembly Instructions
Assemble units as described herein only. To do otherwise
may result in instability. All screws, nuts and bolts must be
tightened securely and must be checked periodically after
assembly. Failure to assemble properly, or to secure parts
may result in assembly failure and personal injury.
5
Table leg
(Qty.4)
Oval worksurface
(Qty.1)
Table leg
stringer tube
(Qty.1)
Worksurface
stringer bar
(Qty.2)
Table leg
“Y” connector
(Qty.2)
Leveling
glide (Qty 4)
M8x25mm Flat Hd.
cap screw (Qty.2)
1/4-20x1½” Flat Hd.
cap screw w/patch (Qty.4)
1/4-20x1” Button Hd.
cap screw (Qty. 12)
M8x35mm Button Hd.
cap screw w/patch (Qty.4)
M8x25mm Flat Hd.
cap screw w/patch (Qty.4)
M8x16mm Button Hd.
cap screw w/patch (Qty.8)
42 x 70, 42 x 82, 42 x 94 Tables
1. Unpack the worksurface and lay it
face down on a smooth protective
surface (carpet). Unpack the leg
and stringer sets, identify all of
the parts.
2. Unwrap the hardware pack and
identify all of the parts.
6
Design Collection - Itoki Table
Assembly Instructions
Assemble units as described herein only. To do otherwise
may result in instability. All screws, nuts and bolts must be
tightened securely and must be checked periodically after
assembly. Failure to assemble properly, or to secure parts
may result in assembly failure and personal injury.
M8x25mm
Flat Hd. w/patch
Glides
M8x25mm
Flat Hd.
M8x35mm
Button Hd.
Figure 6
Figure 7
3. Attach each “Y” shaped connector
casting to two legs. The
connector should be secured
to each leg with two screws per
leg (four screws per connector).
Tighten all of the screws (Figure
6). M8x35mm Button Hd.
4. Secure the stringer tube to the
open end of each “Y” shaped
connector using flat screws as
shown (Figure 7).
5. Install glides in the four leg ends.
Turn about halfway in (Figure 7).
Design Collection - Itoki Table
Assembly Instructions
Assemble units as described herein only. To do otherwise
may result in instability. All screws, nuts and bolts must be
tightened securely and must be checked periodically after
assembly. Failure to assemble properly, or to secure parts
may result in assembly failure and personal injury.
7
M8x16mm
Button Hd.
6. Turn the assembly over so the
glides are resting on the floor.
Place the two worksurface
stringers across the top of the leg
castings as shown and secure
with the screws provided (Figure
8) Tighten all hardware.
Figure 8
1330 Bellevue Street • P.O. Box 8100 • Green Bay, WI 54308-8100 • Tel 1-800-424-2432 • www.ki.com
© 2013 KI All Rights Reserved • Litho in USA • Code KI-62365/KI/PDF/0313
Design Collection - Itoki Table
Assembly Instructions
Assemble units as described herein only. To do otherwise
may result in instability. All screws, nuts and bolts must be
tightened securely and must be checked periodically after
assembly. Failure to assemble properly, or to secure parts
may result in assembly failure and personal injury.
1/4-20x1-1/2”
Flat Hd.
1/4-20x1-1/2”
Button Hd.
Figure 9
7. Turn the base over and align the
mounting pads with the threaded
inserts in the top. Secure the base
to the top using the provided
hardware. Check to ensure all
hardware is tight (Figure 9).
8. Carefully flip the table over onto
the glides . Position the table as
desired and level the table by
turning the glides, as necessary.

Other KI Indoor Furnishing manuals

KI Pirouette User manual

KI

KI Pirouette User manual

KI Balance User manual

KI

KI Balance User manual

KI Toggle EL User manual

KI

KI Toggle EL User manual

KI WireWorks Tech Panel User manual

KI

KI WireWorks Tech Panel User manual

KI InTandem Leg-Mounted CPU Holder User manual

KI

KI InTandem Leg-Mounted CPU Holder User manual

KI Enlite ENRC Series User manual

KI

KI Enlite ENRC Series User manual
KI Trek User manual

KI

KI Trek User manual

KI 700 Series User manual

KI

KI 700 Series User manual

KI 700 Series User manual

KI

KI 700 Series User manual

KI WireWorks User manual

KI

KI WireWorks User manual

KI Impress Guide

KI

KI Impress Guide

KI Intellect Chair Guide

KI

KI Intellect Chair Guide

KI Engage Task Chair Installation instructions

KI

KI Engage Task Chair Installation instructions

KI Genesis Desking User manual

KI

KI Genesis Desking User manual

KI WorkUp HF User manual

KI

KI WorkUp HF User manual

KI All Terrain ATSW45 User manual

KI

KI All Terrain ATSW45 User manual

KI Rapture Stack Chair User manual

KI

KI Rapture Stack Chair User manual

KI CR User manual

KI

KI CR User manual

KI Grazie Installation guide

KI

KI Grazie Installation guide

KI Doni User manual

KI

KI Doni User manual

KI Tattoo Chest User manual

KI

KI Tattoo Chest User manual

KI Trek User manual

KI

KI Trek User manual

KI InTandem User manual

KI

KI InTandem User manual

KI Intellect Wave Chair Guide

KI

KI Intellect Wave Chair Guide

Popular Indoor Furnishing manuals by other brands

Madetec RACK LENON 390 Assembly instructions

Madetec

Madetec RACK LENON 390 Assembly instructions

Alice's Home LARS ICHRSCAMX4 Series manual

Alice's Home

Alice's Home LARS ICHRSCAMX4 Series manual

Hoppekids 37-0021-01-09A Assembly instruction

Hoppekids

Hoppekids 37-0021-01-09A Assembly instruction

The Land of Nod Hampshire Desk Assembly instructions

The Land of Nod

The Land of Nod Hampshire Desk Assembly instructions

Gami 173 Assembly instructions

Gami

Gami 173 Assembly instructions

Somopar HOME CELTIC 1.6 PLUS instruction manual

Somopar

Somopar HOME CELTIC 1.6 PLUS instruction manual

Rauch Miro M2766 Assembly instructions

Rauch

Rauch Miro M2766 Assembly instructions

SEI Narita MS987100TX Assembly instructions

SEI

SEI Narita MS987100TX Assembly instructions

Cabinet Bed Stanley Assembly instructions

Cabinet Bed

Cabinet Bed Stanley Assembly instructions

Next MALVERN 190699 Assembly instructions

Next

Next MALVERN 190699 Assembly instructions

Next SELBY 186550 Assembly instructions

Next

Next SELBY 186550 Assembly instructions

Naterial PARIS 2024R09P01-0338 instruction manual

Naterial

Naterial PARIS 2024R09P01-0338 instruction manual

Safavieh Tate ACC5714 quick start guide

Safavieh

Safavieh Tate ACC5714 quick start guide

comfortel bob 2438 owner's manual

comfortel

comfortel bob 2438 owner's manual

Big Lots SW-RK970 Assembly instructions

Big Lots

Big Lots SW-RK970 Assembly instructions

CS Cleo 45 10 Series manual

CS

CS Cleo 45 10 Series manual

Babyletto Hudson 3-Drawer Changer Dresser Assembly instructions

Babyletto

Babyletto Hudson 3-Drawer Changer Dresser Assembly instructions

DeVorm Mino Sofa Series installation guide

DeVorm

DeVorm Mino Sofa Series installation guide

manuals.online logo
manuals.online logoBrands
  • About & Mission
  • Contact us
  • Privacy Policy
  • Terms and Conditions

Copyright 2025 Manuals.Online. All Rights Reserved.