í
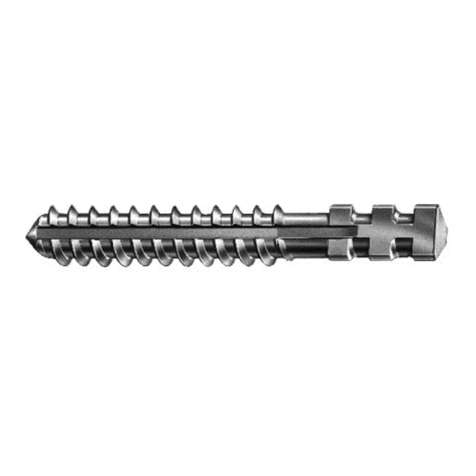
Pernos ER con cabeza para la reconstrucción con materiales plásticos
1. Sumario de productos
ver tabla 1
2. Indicaciones
- para la restauración protética de coronasdestruidas de dientes anteriores, caninos y premolares en el maxilar
superior e inferior
- condiciones generales:
- el perno puede adaptarse perfectamente ala pared del conducto en toda su longitud
- el elemento retentivo inferior de la cabezade retención puede integrarse en la sección transversal de la raíz
- el diente ha sido tratado endodónticamente
3. Contraindicaciones
- lumen cervical con forma de embudo donde no haya la posibilidad de adaptar el perno a la pared del conducto
en toda su longitud
- el elemento retentivo inferior de la cabeza de retención no puede integrarse en la raíz
- caries subgingival
- destrucción isogingival circular
- muñón que no esté rodeado circunferencialmente por sustancia sana del diente
4. Secuencia clínica/uso apropiado
4.1 Pasos generales preparatorios
4.1.1 El diente y la raíz han sido tratados endodónticamente y preparados según la indicación
- tratamiento endodóntico
- sellado del tercio apical
- en dientes con corona severamente destruida, preparar la superficie del muñón hasta la sustancia sana del
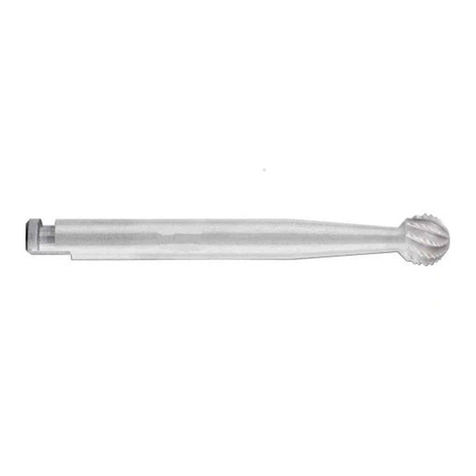
diente utilizando un instrumento diamantado esférico 801 para crear una forma cóncava (Fig. 1)
- reducir la corona clínica hasta aprox. 2 mm por sobre la unión amelocementaria
4.1.2 Seleccionar el perno adecuado
- considerando la situación anatómica del diente
- determinar el diámetro y la longitud del perno usando la radiografía y el calibre 9751
- longitud del perno hasta aprox. 3 - 5 mm antes del ápice
- por razones de estabilidad, el perno debe estar insertado en el conducto radicular lo más profundamente
posible (por lo menos ⅔ de la profundidad total del conducto) y con óptima adaptación a la pared
4.1.3 Remover la obturación radicular hasta aprox. 3 - 5 mm antes del ápice con la fresa piloto 183LB del mismo
diámetro que el perno 050, 090 ó 110
- marcar la longitud de la preparación sobre la fresa piloto con el tope 9114 (Fig. 2)
- velocidad 1.000 - 5.000 rpm
4.1.4 Preparar la cavidad central para inlay (profundidad máxima 1 - 2 mm)
- prepara una cavidad oval y cónica en forma de cajita (Fig. 3) para lograr mayor estabilidad
- inclinando el instrumento para aplanar
- con el instrumento para aplanar 120D.204.030
- velocidad: 2.000 rpm
- preparar una cavidad con una ranura para proteger contra torsión (Fig. 4)
- con instrumentos diamantados cilíndricos,p.ej. 835KR
4.1.5 Ensanchar el conducto radicular adaptándolo al tamaño del perno elegido
- con el ensanchador 196 (Fig. 5)
- colocar el calibre de profundidad apropiado 45L9, 45L12 o 45L15 sobre el perno
- velocidad 1.000 - 2.000 rpmal ensanchar, hacerlo en forma intermitente y con poca presión hasta llegar a la
profundidad deseada. De vez en cuando debe irrigarse el conducto y limpiarse el ensanchador con el cepillo
9791
- es preferible ensanchar manualmente
- irrigar y secar el conducto radicular
4.1.6 Controlar el buen ajuste del conducto preparado
- insertando el perno elegido
- de ser necesario, eliminar las interferencias con el ensanchador 196
4.1.7 Acondicionamiento mecánico de la pared del conducto con el instrumento para asperezar 196D
- rotar el instrumento manualmente en el conducto sin aplicar presión (3 - 5 rotaciones)(Fig. 6)
4.1.8 Irrigar el conducto y la cavidad de inlay y secar
- irrigar el conducto radicular (p.ej. con H2O2) y secar con puntas de papel
4.1.9 Limpiar el perno radicular
- desengrasar con alcohol medicinal
4.2 Cementar el perno radicular
- mezclar un agente de fijación apropiado (p.ej. cemento de fosfato de zinc, cemento de vidrio ionómero,
composite autopolimerizante) hasta lograr una consistencia de masilla suave
- recubrir el vástago del perno con agente de fijación
- insertar lentamente la reconstrucción a perno en el conducto radicular y/o cavidad auxiliar para que los
excedentes de cemento puedan escapar; fijarlo con presión leve del pulgar
4.2.1 Eliminar los excedentes del cemento después del fraguado
5. Tratamiento posterior
5.1 Reconstruir el muñón con composite o cemento de vidrio ionómero (Fig. 7)
- tener cuidado que haya material suficiente en la cavidad auxiliar y en los elementos de la cabeza de retención
5.1.1 Preparar el muñón según la corona deseada
- la corona debe cubrir el muñón circunferencialmente
- para coronas totalmente cerámicas usar la preparación de hombros
- en caso de coronas metalocerámicas respetar un límite de preparación de 2 - 3 mm (Fig. 8)
- el perno sirve para estabilizar la raíz. La corona debe cubrir la raíz reforzada por un perno en una zona paralela
de un ancho de 2 mm para que las fuerzas sean distribuidas al diente entero
5.1.2 impresión y restauración provisional de manera habitual
5.1.3 fabricar e insertar la corona
6. Recomendaciones de mantenimiento
Todos los componentes del sistema se entregan sin esterilizar. Por esta razón, los pernos y los instrumentos
deben desinfectarse, limpiarse y esterilizarse antes de cada uso. Los instrumentos se desinfectan con agentes y
detergentes con protección anticorrosiva para instrumentos rotatorios. Las recomendaciones de empleo (tiempo
de inmersión, concentración, propiedades) de los agentes de desinfección o limpieza se encuentran en las
instrucciones del fabricante de estos agentes. Enjuagar bien los agentes de desinfección o detergentes con agua
y secar (p.ej. con chorro de aire). No almacenar los instrumentos húmedos. Durante la limpieza en el baño
ultrasónico los instrumentos no deben tocarse unos con otros. Efectuar un control visual de los instrumentos
limpios. No deben utilizarse instrumentos dañados o sin filo. La esterilización se efectúa por los procedimientos
conocidos en el autoclave según las disposiciones para la esterilización de productos médicos específicos de su
país. Deben observarse las recomendaciones del fabricante de cada aparato. Después de la esterilización,
controlar si la superficie de los instrumentos muestra corrosión. Los instrumentos corroídos deben descartarse.
El operador de productos médicos es el responsable de ver que el tratamiento sea efectuado por el personal
calificado usando los materiales apropiados y el equipo correspondiente.
7. Seguridad y responsabilidad
Por favor, véase también las instrucciones para el empleo y las recomendaciones de seguridad en el catálogo
actual de KOMET USA LLC así como las informaciones relevantes en www.kometusa.com. El operador tiene la
obligación de examinar los instrumentos. Es el responsable de comprobar - antes de utilizarlos - que su estado
sea el apropiado para el uso previsto. Los pernos ER forman parte del sistema de reconstrucción con pernos
ER y sólo deben usarse en combinación con los instrumentos originales según estas instrucciones. La utilización
de instrumentos que no forman parte de este sistema puede perjudicar la función y exonera al fabricante de
cualquier responsabilidad frente a compensaciones.
8. Exención de garantías
Todas las Garantías, ya sean expresas o implícitas, incluyendo, sin limitación, las garantías implícitas de la
comerciabilidad y aptitud para un propósito en particular, son expresamente denegadas. Todos los daños
incidentales o consecuenciales, incluyendo, pero no limitados a, pérdida de utilidades, daños a otro material,
pérdida de uso u otras pérdidas comerciales, son denegadas explícitamente. Si, no obstante la frase antes
mencionada, los daños consecuenciales e incidentales, no pudieran ser excluidos debido a leyes vigentes, el
valor de tales daños se limita expresamente al precio de compra o al valor de cualquier productos defectuosos.
Mantener fuera del alcance de los ninos.
Sólo para uso odontológico.
ê
Tenons ER avec tête pour reconstitutions avec de matériaux plastiques
1. Aperçu du système
voir tableau 1
2. Indication
- reconstitution prothétique des dents antérieures, canines, prémolaires maxillaires et mandibulaires dont la
couronne est détruite
- conditions préalables :
- l’adaptation du tenon sur la longueur totale des parois du canal radiculaire doit être possible
- l’élément de rétention inférieur de la tête de rétention peut être immergé dans la racine
- traitement du canal radiculaire a été complété avec succès
3. Contre-indications
- l’adaptation du tenon aux parois du canal n’est pas possible en raison du lumencanalaire en forme d’entonnoir
cervical
- l’élément de rétention inférieur de la tête de rétention ne peut pas être inséré dans la racine
- carie sub-gingivale
- délabrement circulaire iso-gingival
- l’entourage circulaire du moignon dans lasubstance dentaire saine n’est pas possible
4. Déroulement du traitement/utilisation appropriée
4.1 Phases de traitement générales préparatoires
4.1.1 La dent et la racine ont subi un traitement endo–dontique initial et ont été préparés conformément à
l’indication
- traitement endodontique
- remplissage/fermeture du tiers apical
- dans le cas de dents fortement détruites, préparer le moignon jusqu’à la substance dentaire saine et donner
une forme concave à la surface avec l’instrument diamanté 801 (fig. 1)
- réduction de la couronne clinique jusqu’environ 2mm de la jonction émail-cément proximale
4.1.2 Choisir le tenon radiculaire approprié à la dent
- selon les données cliniques
- a l’aide de la radiographie et du papier calibré 9791 choisir le diamètre et la longueur du tenon selon
l’anatomie de la dent
- longueur du tenon jusqu‘environ 3 - 5 mmde l’apex
- par souci de stabilité, le tenon doit être adapté aux parois du canal et ancré le plus profondément possible
dans le canal radiculaire (au moins ⅔ de la longueur de la racine)
4.1.3 Retirer l’obturation radiculaire jusqu‘environ 3 - 5 mm de l’apex avec le foret pilote 183LB de la taille du
tenon choisi 050, 070, 090 ou 110
- marquer avec la butée 9114 la longueur nécessaire de la préparation sur le foret pilote (fig. 2)
- vitesse de rotation : 1.000 – 5.000 t/min.
4.1.4 Préparation de la cavité inlay centrale(profondeur maximale 1 - 2 mm)
- pour empêcher la rotation et pour stabiliser la reconstitution préparer une cavité ovale, conique (fig. 3)
- par une légère inclination de la fraise à surfacer
- a l’aide de la fraise à surfacer 120D.204.030
- vitesse de rotation : 2.000 t/min.
- préparer la cavité inlay avec une rainure pour empêcher la rotation (fig. 4)
- avec des instruments diamantés cylindriques, p.ex. 835KR
4.1.5 Elargir le canal radiculaire conformément à la taille choisie du tenon
- a l’aide de l’élargisseur approprié 196 (fig. 5)
- monter un calibre de profondeur 45L9, 45L12 ou 45L15 approprié au tenon radiculaire sur l’élargisseur
- vitesse de rotation : 1.000 – 2.000 t/min.
- elargir le canal avec peu de pression de man–ière intermittente jusqu’à la profondeur désirée. Rincer le canal et
nettoyer l’élargisseur avec la brosse 9791 de temps en temps.
- elargir manuellement de préférence
- nettoyer et sécher le canal radiculaire
4.1.6 Contrôler la bonne position du canal préparé
- insérant le tenon choisi dans la racine pour contrôler la bonne position
- si nécessaire, éliminer des inexactitudes avec l’élargisseur 196
4.1.7 Rugosification mécanique de la paroi canalaire avec l’instrument 196D
- tourner l’instrument dans le canal radiculaire 3 - 5 fois sans pression (fig. 6)
4.1.8 Rincer et sécher le canal et la cavité inlay
- rincer le canal radiculaire (p.ex. avec H2O2)et sécher avec des pointes de papier
4.1.9 Nettoyer le tenon radiculaire
- dégraisser par immersion dans alcool médical
4.2 Cémenter le tenon radiculaire
- mélanger un agent adhésif approprié (p.ex. oxyphosphate de cinc, ciment verre ionomère ou composite auto-
polymérisant)
- enrober la tige du tenon avec du ciment
- insérer lentement le tenon dans le canal radiculaire ou la cavité auxiliaire avec peu de pression et le fixer en
pressant le pouce pour que les excédents du ciment puissent s’échapper
4.2.1 Eliminer les excédents de l’agent adhésif après durcissement.
5. Traitement ultérieur
5.1 Reconstruire le moignon avec composite ou ciment verre ionomère (fig. 7)
- veiller à ce que une quantité suffisante de matériau soit insérée dans la cavité inlay et dans les espaces
intermédiaires de la tête de rétention
5.1.1 Préparer le moignon selon la couronne désirée
- veiller à ce que la couronne couvre le moignon circulairement dans la substance dentaire saine
- dans le cas de couronnes en céramique, réaliser la préparation d’épaulement
- dans le cas de couronnes en métal/céramique respecter une limite de 2–3 mm (fig. 8)
- le tenon sert à la stabilisation de la racine. La couronne doit entourer la racine renforcée par le tenon par une
zone d’au moins 2 mm pour que les forces agissant sur la dent soient bien reparties
5.1.2 Prise d’empreinte et traitement provisoire habituels
5.1.3 Usiner la couronne et la placer.
6. Recommandation de maintenance
Tous les éléments du système sont livrés non stériles. Pour cette raison les tenons et les instruments doivent
être désinfectés, nettoyés et stérilisés avant chaque utilisation. La désinfection des instruments se fait avec des
agents de désinfection et de nettoyage anticorrosifs pour des instruments rotatifs. Respecter les indications du
fabricant de produits de désinfection et de stérilisation concernant les temps de trempage, les dosages et la
compatibilité du matériau. Bien rincer les agents de désinfection et de nettoyage résiduels et sécher les
instruments (p.ex. par jet d‘air). Ne pas stocker les instruments à l‘état humide. Veiller à ce que les instruments
ne se touchent pas pendant le nettoyage dans le bain à ultrasons! Effectuer un contrôle visuel des instruments
nettoyés. Ne pas utiliser les instruments endommagés ou émoussés.La stérilisation des tenons et des
instruments s’effectue dans l’autoclave selon la réglementation pour la stérilisation des produits médicaux en
vigueur dans le pays respectif. Observer les conseils d‘utilisation du fabricant des appareils respectifs. Après la
stérilisation, veiller au parfait état de surface (corrosion). Ne plus utiliser les instruments corrodés. L’opérateur
des produits médicaux est le responsable de veiller à ce que le traitement des produits s’effectue par le
personnel qualifié, avec les matériaux appropriés et l’équipe correspondant.
7. Sécurité et responsabilité
Voir aussi les «conseils d’utilisation et de sécurité» dans le catalogue de KOMET USA LLC et sur notre site www.
kometusa.com. L’utilisateur est responsable de vérifier avant chaque utilisation que les produits sont adaptés à
l’application spécifique. Les tenons ER font partie du système radiculaire ER et doivent être uniquement utilisés
avec les instruments d’origine de ce système, et ce conformément aux instructions. L’utilisation d’instruments
qui ne font pas partie de ce système peut être préjudiciable au bon fonctionnement et exclut toute
responsabilité du fabricant concernant la prestation à titre de compensations.
8. Exclusion de garantie
Toute garantie, expresse ou implicite, y compris, sans limitation, toute garantie implicite de commercialisation et
d’adéquation à un usage particulier, est expressément exclue. Toute responsabilité pour dommages indirects ou
fortuits, y compris de façon non limitative dommages pour perte de profit, dégradation de matériel, perte
d’utilisation ou toute autre perte commerciale est expressément exclue. Dans le cas où, nonobstant les faits
précités en vertu de la loi, les dommages INDIRECTS ou fortuits ne peuvent pas être exclus, de tels dommages
seront expressément limités au prix d’acquisition du/des produits défectueux.
Ne pas laisser à la portée des enfants !
Réservé à l’usage exclusif du Chirurgien-Dentiste.
