manuals.online logo
Brands
  1. Home
  2. •
  3. Brands
  4. •
  5. Lamp
  6. •
  7. Door Opening System
  8. •
  9. Lamp FD30-F User manual

Lamp FD30-F User manual

1

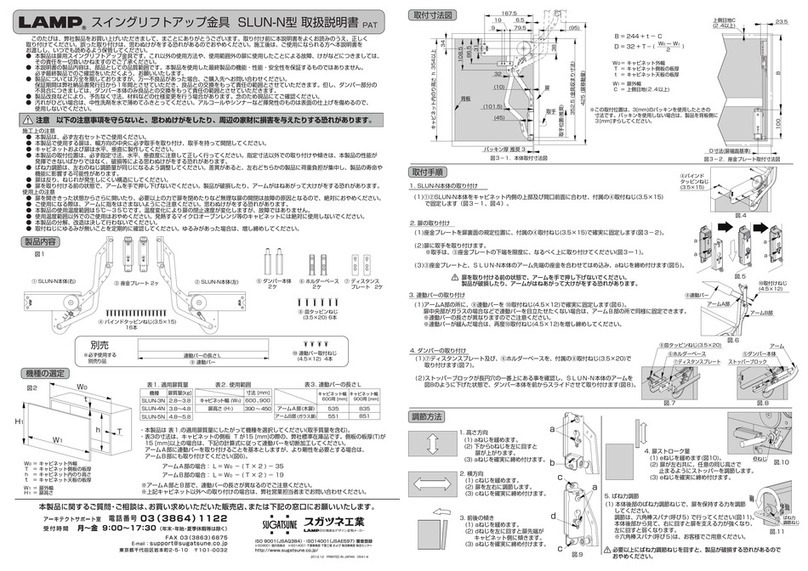
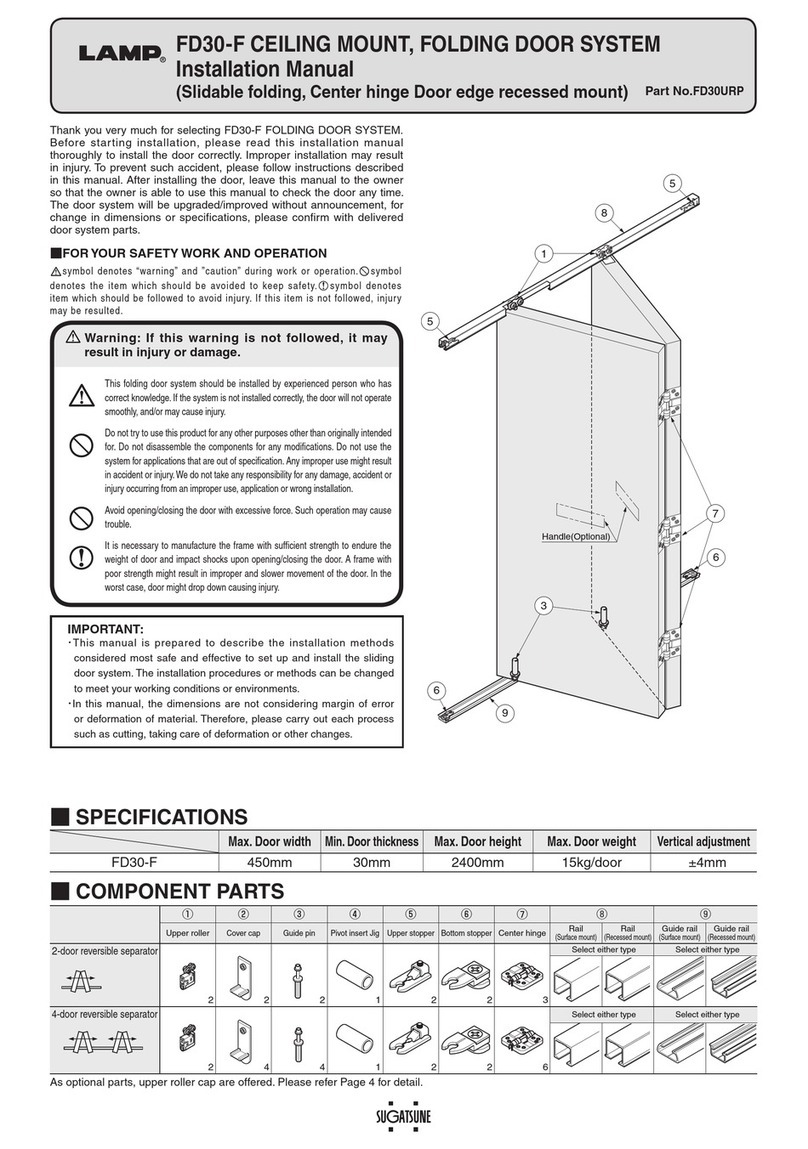
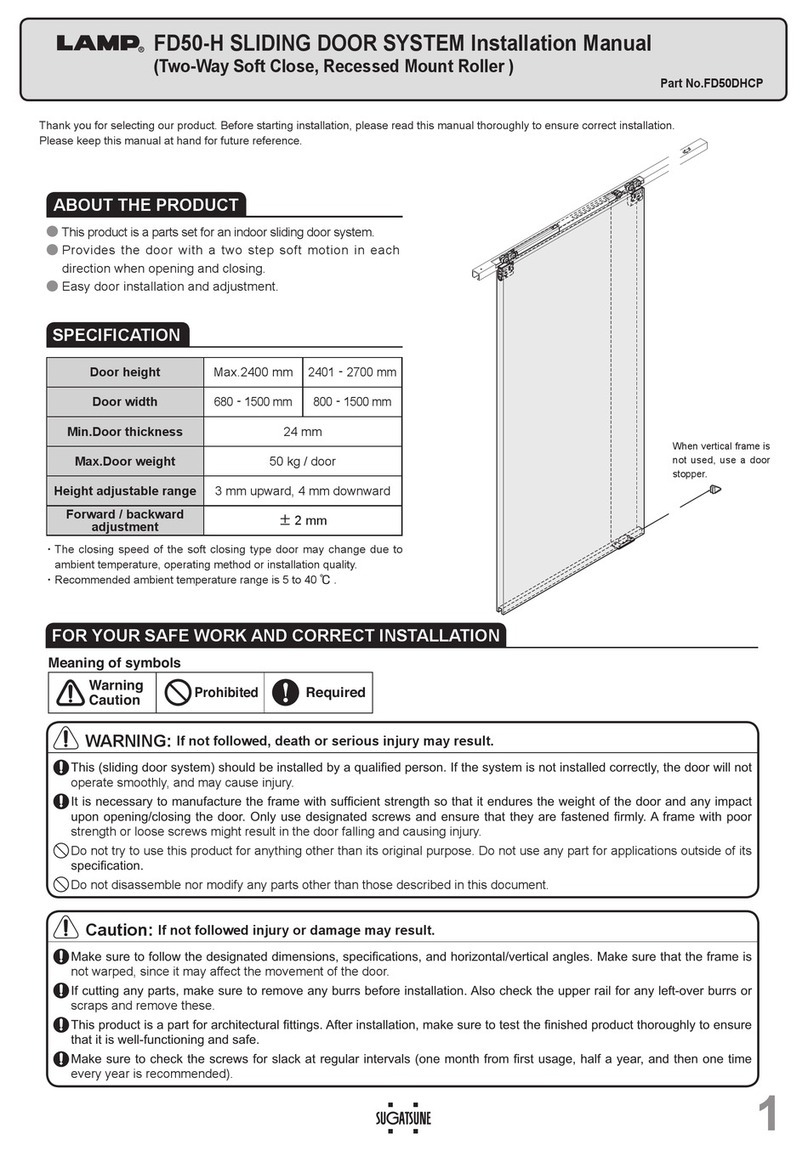
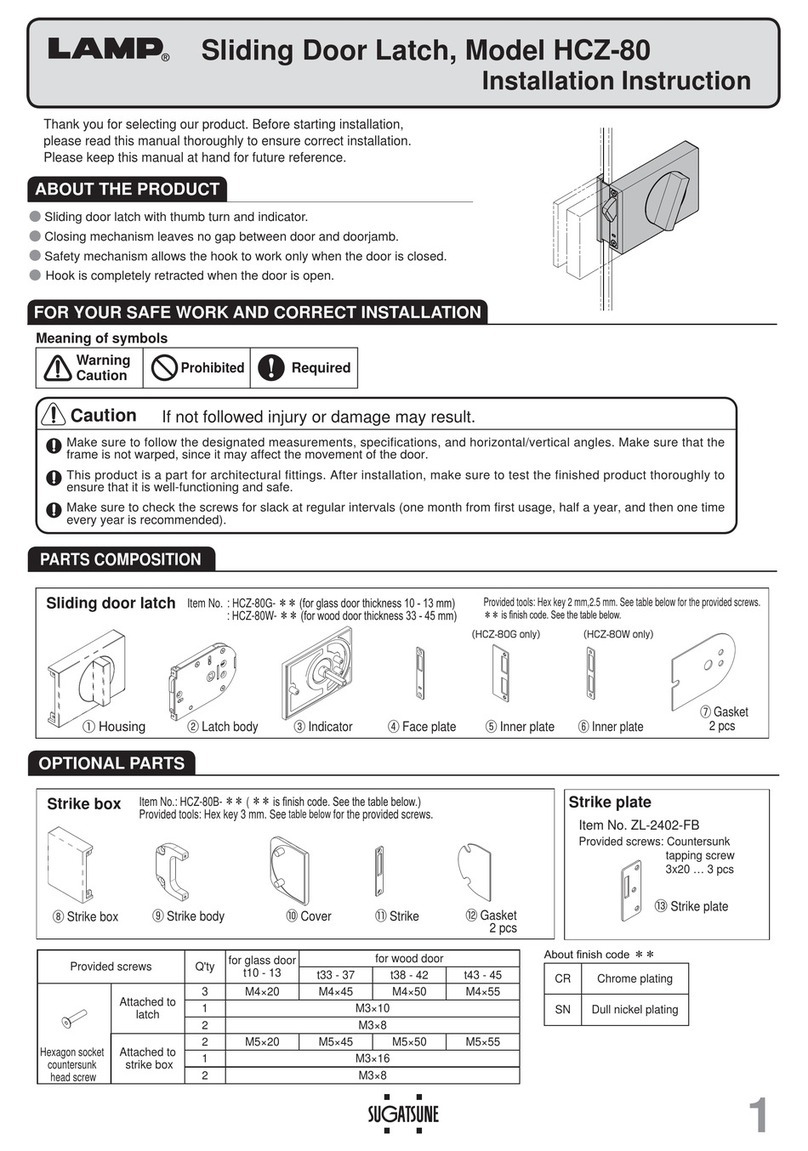
FD30-F FOLDING DOOR SYSTEM
Installation Manual
(Pivoted folding, Center hinge surface mount)
Thank you for selecting our product. Before starting installation, please read this manual thoroughly to ensure correct installation.
Please keep this manual at hand for future reference.
●This product is a parts set for folding door system for indoor use.
●Easy door installation and adjustment.
Max .Door width 450 mm
Max .Door height 2400 mm
Min .Door thickness 28 mm
Max .Door weight 15 kg / door
Height adjustable range ±3mm
FOR YOUR SAFE WORK AND CORRECT INSTALLATION
ABOUT THE PRODUCT
SPECIFICATION
WARNING:If not followed, death or serious injury may result.

Caution: If not followed, injury or damage may result.

This (sliding door system) should be installed by a qualified person. If the system is not installed correctly, the door will not
operate smoothly, and may cause injury.
It is necessary to manufacture the frame with sufficient strength so that it endures the weight of the door and any impact
upon opening/closing the door. Only use designated screws and ensure that they are fastened firmly. A frame with poor
strength or loose screws might result in the door falling and causing injury. Do not try to use this product for anything other
than its original purpose.
Do not use any part for applications outside of its specification.
Do not disassemble nor modify any parts other than those described in this document.
This product is a part for architectural fittings. After installation, make sure to test the finished product thoroughly to ensure
that it is well-functioning and safe. Please inform the end user about general precautions and safety to prevent improper use.
Make sure to follow the designated dimensions, specifications, and horizontal/vertical angles. Make sure that the frame is
not warped, since it may affect the movement of the door.
If cutting any parts, make sure to remove any burrs before installation. Also check the upper track for any left-over burrs or
scraps and remove these.
Do not open / close the door with excessive force as this may result in damage.
Make sure to check the screws for slack at regular intervals (one month from first usage, half a year, and then one time
every year is recommended).
Prohibited
Warning
Caution Required
Meaning of symbols
Part No.FD30FAP
2
№ ①②③④⑤⑥⑦
Name Upper pivot Bottom pin Guide roller Guide pin Pivot insert Jig Spanner Pivot bracket
(upper)
Item No. FD30-FTP FD30-FBP FD30-FGRU FD30-FGR FD30-FSJ FD30-FSP
FD30-FSKU
Item
Attached screw Pan head tapping
screw
3.5×30
・・・
3――――――
2 door Lower track
¿[HGKDQJLQJVHFWLRQ
1111111
4 door Lower track
¿[HGKDQJLQJVHFWLRQ
2222112
№⑧⑨ ⑩ ⑪
Name Pivot bracket
(bottom)
Center hinge
(surface mount)
Upper track
(surface mount)
Upper track
(recessed mount)
Guide track
(surface mount)
Guide track
(recessed mount)
Item No. FD30-FSK FD30-CHM
FD30-TRM FD30-TRH
Item
Attached screw
Truss head tapping screw
4
×
16
Countersunk head
Tapping screw
3.5
×
16
Recommended screw:
counter sunk head tapping screw3.5×20
Recommended screw:
counter sunk head tapping screw3.5×16
2 door Lower track
¿[HGKDQJLQJVHFWLRQ
13
Use1(surface mount or recessed) Use1(surface mount or recessed)
4 door Lower track
¿[HGKDQJLQJVHFWLRQ
26
Use1(surface mount or recessed) Use1(surface mount or recessed)
Roller part : Black
COMPONENT PARTS
Roller part : Natural
■INSTALLATION DRAWING(EXAMPLE)
18.5+0
-0.5
1.2
1.4
10.5
10
14
2
2
10 19.5
11
20
2
(150)
(150)
25〜35
25〜35
1
3
9
EC
21
D=25〜35
710
11
82
Door A Door B
(Pivot side)
Upper track
(Surface mount)
Upper track
(Recessed)
When operating door:
Approx.116
25〜35
25〜35
4
0
20 (Height adjustment range)
+3
0
10 (Height adjustment range)
+3
φ12
φ22
338
Back door
φ12
φ22
338
φ12φ12
φ22φ22
538
38
Back door
Door A Dimension Door B Dimension
3
■
Door processing dimension
■
Minimum Dimension between Frame and Door
Door opening (when 40mm door thickness, 450mm door width)
Door
thickness
C = Gap
E = Gap
Door
width
300
Door
width
350
Door
width
400
Door
width
450
30 4.0 3.5 3.0 2.7 2.4
35 5.2 4.3 3.7 3.3 3.0
40 6.5 5.2 4.5 4.0 3.6
3
Mount pivot bracket ensuring the correct
position, and install of the guide track.
Then, fasten the pivot bracket in the correct
position.
〔Door B〕
Upper pivot
Bottom pin
〔Door A〕
Guide roller
Guide pin
)L[DOO&HQWHUKLQJHVLQWKHVDPHGLUHFWLRQ
【1】Bottom
Place the end of the lower pivot shaft to the hole of the pivot bracket(Door B),
as shown, and, insert guide pin(Door A) into the guide track groove.
【2】Top  
Pressing the pin of the Upper pivot on Door B
insert it into the hole of the Pivot bracket. Fit the
guide roller on Door A into the track.
⑨Center hinge
Screw
3.5×16
Cut the track applying a reinforcer to
prevent deformation of cut section.
ASSEMBLY
1Cutting Track 2Preparing Pivot Brackets 3Assembly of Upper Track
Remove any dirt or chips
from the tracks.

4Assembling Parts on Door 5Installing Center Hinge 6Installing Pivot Bracket
Be carful not to damage
the plastic parts.

⑤Pivot insert jig
Door B
Door A
③Guide roller
①Upper pivot
④Guide pin
Door B
②Bottom pin
⑦Pivot bracket
 (bottom)
④Pivot bracket
(bottom)
③Pivot bracket
(Upper)
❶Insert
❷Fix Pivot bracket temporarily.
❸Fix Upper track. 
⑥Pivot bracket
(Upper)
Pivot side
⑪Guide track
⑧Pivot bracket
 (bottom)
Guide pin
Roller unit(Natural)
Guide roller
Roller unit(Black)
7Installing Door
4
【1】Adjusting inclination of door
⑥Spanner
②Bottom pin
⑥Spanner
⑦Pivot bracket
)LQDOFRQ¿UPDWLRQ&RQ¿UPWKDWDOOVFUHZVDUHVHFXUHO\WLJKWHQHG$QGFRQ¿UPWKDWDOOVFUHZVDUHXVHG
without mistake.
PERIODICAL INSPECTION
・Clean inside of track.
・Check upper space and lower space of the door. If necessary, correct the space.
【3】Adjustment of door angle .
Turn the adjustment screw on center hinge .
【2】Verticaladjustment
Turn the nut on Bottom pin with provided
spanner.
Door Adjustment
8
⑧Pivot bracket
178˚
179˚
Adjustment screw
Turn the screw
counterclockwise (max. 1˚)
Turn the screw
clockwise (max: 2˚)
Check if the red line on the pivot is hidden or not.
If it is visible, rotate the pivot on the bottom pin to
raise the door.
Red line
①Upper pivot
Adjustmentguideline
SUGATSUNE KOGYO CO.,LTD  
Tokyo, JAPAN
Phone: +81 (0)3 3866 2260 E-mail:[email protected]
SUGATSUNE KOGYO (UK) LTD  
Reading, UK
Phone: +44 118 9272 955
 
E-mail:[email protected]
SUGATSUNE EUROPE GmbH  
Dusseldorf, GERMANY
Phone: +49 211 53812900
 
E-mail:[email protected]
SUGATSUNE SHANGHAI Co., LTD  
Shanghai, CHINA
Phone: +86 21 3632 1858  E-mail:[email protected]
Guangzhou, CHINA  
Phone: +86 20 6639 3552  E-mail:[email protected]
SUGATSUNE KOGYO INDIA PRIVATE LIMITED  
Mumbai, INDIA
Phone: +91 22 28314490/91 E-mail:[email protected]
SUGATSUNE AMERICA, INC  
California, USA
Phone: +1 310 329 6373 E-mail:[email protected]
Chicago, USA  
Phone: +1 312 461 1081
E-mail:[email protected].
SUGATSUNE CANADA, INC.  
Phone: +1 514 312 5267
E-mail:[email protected]
2018.12 0769-3
■TROUBLESHOOTING
Trouble Check Solution
Abnormal noise during
operation
Check if door touches adjacent parts. Provide necessary space between door and adjacent objects.
Check inside of upper track for foreign matter or
aluminum dust.
Remove dust or foreign matter.
Check for loose screws retaining the upper track. Tighten the screw.
Heavy door operation &KHFNLIGRRUERWWRPFRQWDFWVWKHÀRRU 9HULI\WKDWWKHWUDFN¿[LQJVFUHZVDUHQRWORRVHQHG7KHQDGMXVWWKHGRRUKHLJKW
Check if door touches adjacent parts. Correct door position to avoid contact to other objects.
Door does not move. Check the track retaining screws for looseness. Retighten screws to free the roller.
Door starts to move. Check if the upper track is set horizontally. Using a level gauge, reset upper track horizontally.

This manual suits for next models

1

Other Lamp Door Opening System manuals

Lamp XL-GC07D-CR User manual

Lamp

Lamp XL-GC07D-CR User manual

Lamp KF28 User manual

Lamp

Lamp KF28 User manual

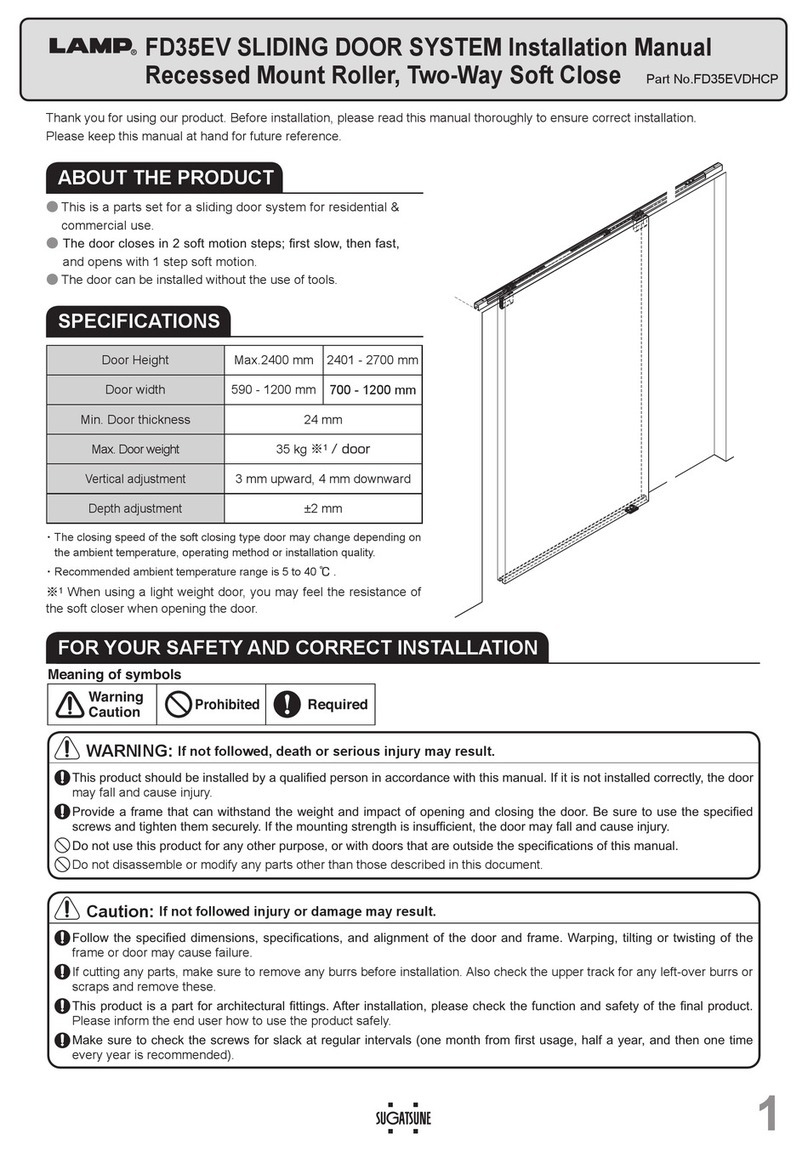
Lamp FD35EV User manual

Lamp

Lamp FD35EV User manual

Lamp FD50-H User manual

Lamp

Lamp FD50-H User manual

Lamp FD35EV User manual

Lamp

Lamp FD35EV User manual

Lamp FD50-H User manual

Lamp

Lamp FD50-H User manual

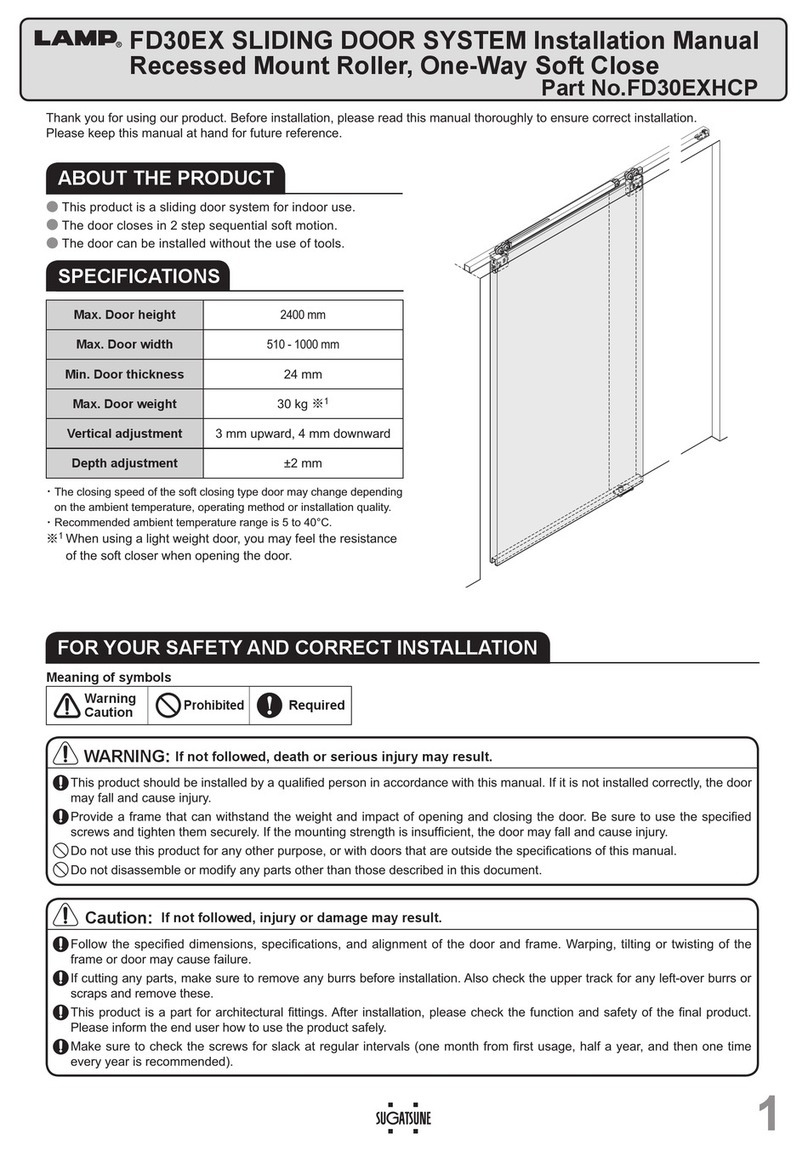
Lamp FD30EX User manual

Lamp

Lamp FD30EX User manual

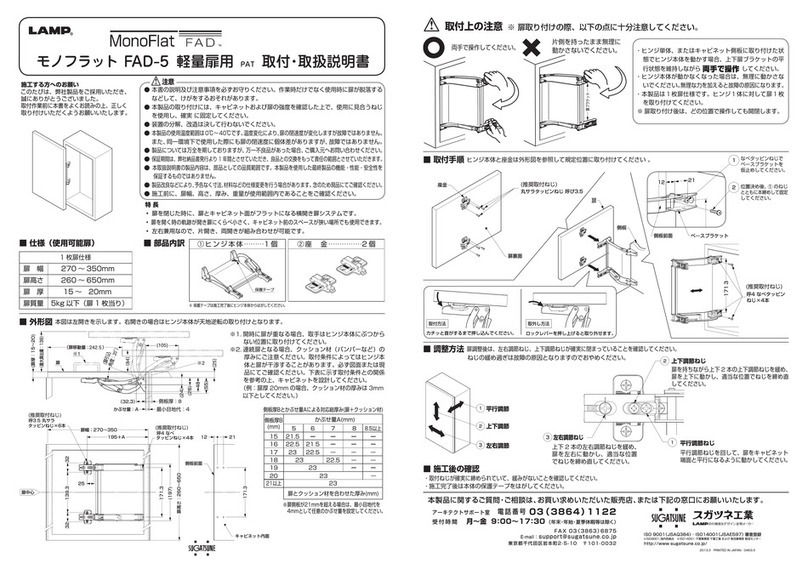
Lamp MonoFlat FAD-5 User manual

Lamp

Lamp MonoFlat FAD-5 User manual

Lamp AZ-GD231 User manual

Lamp

Lamp AZ-GD231 User manual

Lamp FD35EV User manual

Lamp

Lamp FD35EV User manual

Lamp LDD-S User manual

Lamp

Lamp LDD-S User manual

Lamp FD30-F User manual

Lamp

Lamp FD30-F User manual

Lamp FD80-H User manual

Lamp

Lamp FD80-H User manual

Lamp HC-70 User manual

Lamp

Lamp HC-70 User manual

Lamp FM150PRO User manual

Lamp

Lamp FM150PRO User manual

Lamp HCZ-80 User manual

Lamp

Lamp HCZ-80 User manual

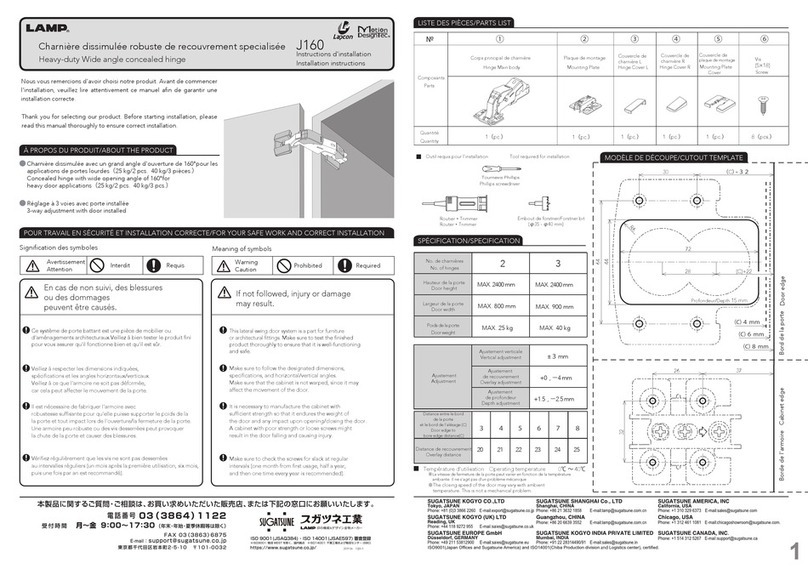
Lamp Lapcon J160 User manual

Lamp

Lamp Lapcon J160 User manual

Lamp FD50-H User manual

Lamp

Lamp FD50-H User manual

Lamp FD35EV User manual

Lamp

Lamp FD35EV User manual

Lamp FD50-H User manual

Lamp

Lamp FD50-H User manual

Lamp FD80-AFH User manual

Lamp

Lamp FD80-AFH User manual

Lamp KF111-H User manual

Lamp

Lamp KF111-H User manual

Lamp HDSN-30K User manual

Lamp

Lamp HDSN-30K User manual

Lamp AZ-AT230-HL Instruction Manual

Lamp

Lamp AZ-AT230-HL Instruction Manual

Popular Door Opening System manuals by other brands

Real Carriage Door & Sliding Hardware Fremont Opener installation manual

Real Carriage Door & Sliding Hardware

Real Carriage Door & Sliding Hardware Fremont Opener installation manual

Dormakaba ED900 installation instructions

Dormakaba

Dormakaba ED900 installation instructions

Synergy Hardware S4036 instructions

Synergy Hardware

Synergy Hardware S4036 instructions

Bandini Industrie GI.BI.DI. FLOOR Series Instructions for installations

Bandini Industrie

Bandini Industrie GI.BI.DI. FLOOR Series Instructions for installations

Assa Abloy Norton 78-B/FHA Hold Open Series installation instructions

Assa Abloy

Assa Abloy Norton 78-B/FHA Hold Open Series installation instructions

FAAC APN manual

FAAC

FAAC APN manual

BEA IXIO-DT3 user guide

BEA

BEA IXIO-DT3 user guide

Beninca KMB24 manual

Beninca

Beninca KMB24 manual

Assa Abloy Norton 5500 Series installation instructions

Assa Abloy

Assa Abloy Norton 5500 Series installation instructions

Dormakaba SVI 2 Series Commissioning instructions

Dormakaba

Dormakaba SVI 2 Series Commissioning instructions

GEZE Powerturn Wiring diagram

GEZE

GEZE Powerturn Wiring diagram

SUGATSUNE Lapcon SDS-C301N-BLK installation guide

SUGATSUNE

SUGATSUNE Lapcon SDS-C301N-BLK installation guide

Beninca ZED24 manual

Beninca

Beninca ZED24 manual

SAINT-GOBAIN Vetrotech LUNAX Conditions of Use

SAINT-GOBAIN

SAINT-GOBAIN Vetrotech LUNAX Conditions of Use

Woelm HELM GT-L 50 installation instructions

Woelm

Woelm HELM GT-L 50 installation instructions

CAME FLY Series manual

CAME

CAME FLY Series manual

Scrigno antamatic OPEN 2.0 installation manual

Scrigno

Scrigno antamatic OPEN 2.0 installation manual

D+H VCD 204 Original instructions

D+H

D+H VCD 204 Original instructions

manuals.online logo
manuals.online logoBrands
  • About & Mission
  • Contact us
  • Privacy Policy
  • Terms and Conditions

Copyright 2025 Manuals.Online. All Rights Reserved.