manuals.online logo
Brands
  1. Home
  2. •
  3. Brands
  4. •
  5. LEGRAND
  6. •
  7. Security System
  8. •
  9. LEGRAND 4073 User manual

LEGRAND 4073 User manual

1
1
2
3
4073
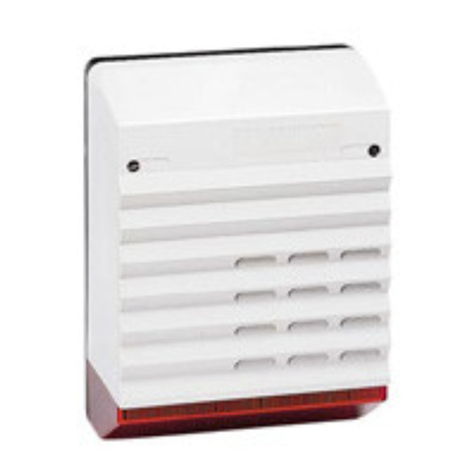
Description
External siren designed for easy installation, sabotage prevention and weather
resistance.
The siren was designed to work both with E46ADCN or E49 power supply and with
buered E47ADCN power supply; the siren is tamper-proof against breaking/opening.
The siren is also protected by an anti-foaming device installed on the electronic board.
It is equipped with a patented anti-tampering anchorage system.
Technical data
- Input clamps maximum absorption:
normal operation 20 mA
alarm 20 mA
battery recharge with E47ADCN 50 mA
battery recharge with E46ADCN/E49 250 mA
- Input / output and power supply: Two-wire
- Battery slot: 12V 2.0 – 7.2Ah
- Alarm operating time: 15 min
- Alarm sound intensity: 105 dB(A) at 1 m
- Frequency: 1500Hz
- Flashing: ash
- Flashes per minute: 60
- Weight (without battery): 2.1Kg
- IP protection index: IP44
- Operating ambient temperature: (-25) – (+55) °C
- Self-protected against removal and opening
- Strength degree IK IK08 - Protection degree: IP34
- Self-protected against removal and opening
- Maximum system consumption for 1 or 2 sirens 300 mA
(the buer time increases with 2 sirens)
Legend
1 - External plastic cover
2 - Acoustic indicator
3 - Light indicator
Dimensions
Siren without external cover
Outdoor siren
MQ01017-a-EN 16/03/2015
2
1
1
1
2
1
8
9
1
1
1
1
10
4
3
5
5
6
7
11
4073
- Insert the plastic dowels in the holes.
- Break the pre-drilled hole (11) to insert the anti-tampering system screw .
- Partially tighten the two top screws and attach the siren to them (8).
- Tighten the two bottom screws (9). Fully tighten the four fastening screws and the
anti-tampering system screw.
- Tighten the tamper screws (10), without forcing it in case of installation on uneven
surfaces.
- Place the battery in the appropriate slot without connecting the Faston clamps. See
table below for battery type:
(**) If a second siren is installed to have additional signaling and it is not necessary to extend the
la system operating time in buer mode (mains power failure) a 2Ah battery can be installed.
- On the internal board, connect the power supply pair (BUS) to the appropriate clamp
(see next page).
- Position the cover and tighten the four xing screws (1) on the wall base.
Before working on the siren, put the system in maintenance mode.
The ashing of the siren LED, when exiting maintenance mode, indicates the BUS
polarity inversion.
If the red BUS led turns on, reverse the BUS polarity.
Not compatible with 4072A/4072L sirens.
In case of a second siren on the system, install another 4073.
Installation of the outdoor siren
- Remove the four screws (1) and take o the external cover (2).
- Use a drilling template (3) to position the hole (4) in correspondence of the wire
outlet pipe and trace the 4 holes for the fastening screws (5), the hole for the tamper
screw (6) and the hole for the anti-tampering anchorage (7) (Patent Pending).
NOTE: use a Ø 6mm bit for drilling the holes (*).
Outdoor siren
MQ01017-a-EN 16/03/2015
Power supply Main battery Secondary battery
E49 7Ah 2 Ah (**)
E46ADCN 7Ah 2 Ah (**)
E47ADCN 2Ah 2Ah
Siren LED ash
Wall
Slot
battery
LED indications
LED ON OFF
Green power supply LED Power supply enabled Power supply disabled
Red LED BUS BUS reversed polarity BUS correct polarity
Red LED battery Battery reversed polarity Battery correct polarity
(*) It is recommended to use screws with a diameter of 3.5 to 4.5 mm depending on the type of
dowel used, countersunk.
3
SW1
1 2
SW2
34
4073
Conguration switch and LED
Outdoor siren
MQ01017-a-EN 16/03/2015
Main siren Secondary siren
System with
power supply
E46ADCN or E49
SW1 SW2
1234
S
W
2
3
4
SW1 SW2
1234
S
W2
3
4
SW1 SW2
1234
S
W
2
3
4
SW1 SW2
1234
S
W2
3
4
SW1 SW2
1234
S
W
1
1
2
SW1 SW2
1234
S
W
2
3
4
SW1 SW2
1234
S
W2
3
4
SW1 SW2
1234
S
W
2
3
4
SW1 SW2
1234
S
W2
3
4
SW1 SW2
1234
S
W
1
1
2
If there is a primary network power failure, operation is guaranteed
for the system by the battery installed inside the siren.
This solution allows using only one battery instead of the two used by traditional systems, thus
reducing maintenance and increasing system reliability by maintaining security.
Configure the siren as shown above.
If you want to guarantee a longer operating time for the system, a
second siren can be installed for the system, configuring it as shown
above.
System with
power supply
E47ADCN
SW1 SW2
1234
S
W
2
3
4
SW1 SW2
1234
S
W2
3
4
SW1 SW2
12
34
S
W
2
3
4
SW1 SW2
1234
S
W2
3
4
SW1 SW2
1234
S
W
1
1
2
SW1 SW2
1234
S
W
2
3
4
SW1 SW2
1234
S
W2
3
4
SW1 SW2
1234
S
W
2
3
4
SW1 SW2
1234
S
W2
3
4
SW1 SW2
1234
S
W
1
1
2
Its presence is useful as a signaling device, but it is not required because the system buffer
battery will be connected to the power supply. The internal siren slot is used to accommodate
the siren self-supply battery and, therefore, a 2Ah battery will be sufficient.
Configure this siren as shown above.
If you want to install a second siren in order to have two signaling
points, you can install a second siren on the same system,
configuring it as shown above.
To change the conguration, put the control unit in maintenance mode and disconnect the batteries and the SCS bus
Protection
anti-foaming
SW1 SW2
1234
S
W
2
3
4
SW1 SW2
1234
S
W2
3
4
SW1 SW2
1234
S
W
2
3
4
SW1 SW2
1234
S
W2
3
4
SW1 SW2
1234
S
W
1
1
2
You can activate the anti-foaming protection using the SW2 configuration switch.
SW2 = ON (Anti-foaming protection activated)
Power supply type
Second siren
Enabling the anti-foaming device
Anti-foaming sensors
LED BUS
Power supply LED
Battery LED
Connector
battery
BUS connection plug-in clamp

Other LEGRAND Security System manuals

LEGRAND tynetec Reach IP User manual

LEGRAND

LEGRAND tynetec Reach IP User manual
LEGRAND 766 21 Setup guide

LEGRAND

LEGRAND 766 21 Setup guide

LEGRAND 3486 MyHome User manual

LEGRAND

LEGRAND 3486 MyHome User manual

LEGRAND neat SMILE FALL User manual

LEGRAND

LEGRAND neat SMILE FALL User manual

LEGRAND Tynetec REACH User manual

LEGRAND

LEGRAND Tynetec REACH User manual

LEGRAND Unity System User manual

LEGRAND

LEGRAND Unity System User manual

LEGRAND E47ADCN User manual

LEGRAND

LEGRAND E47ADCN User manual

LEGRAND tynetec ZXT830 User manual

LEGRAND

LEGRAND tynetec ZXT830 User manual

LEGRAND 84424 User manual

LEGRAND

LEGRAND 84424 User manual

LEGRAND tynetec ZXT821 User manual

LEGRAND

LEGRAND tynetec ZXT821 User manual

LEGRAND 43260 User manual

LEGRAND

LEGRAND 43260 User manual

LEGRAND 625 30 User manual

LEGRAND

LEGRAND 625 30 User manual

LEGRAND tynetec ZXT823 User manual

LEGRAND

LEGRAND tynetec ZXT823 User manual

LEGRAND 5739 35 User manual

LEGRAND

LEGRAND 5739 35 User manual
LEGRAND tynetec Aidcall ZXT434 User manual

LEGRAND

LEGRAND tynetec Aidcall ZXT434 User manual

LEGRAND tynetec ZXT832 User manual

LEGRAND

LEGRAND tynetec ZXT832 User manual

LEGRAND tynetec ZXT833 User manual

LEGRAND

LEGRAND tynetec ZXT833 User manual
LEGRAND Tynetec ZXT813 User manual

LEGRAND

LEGRAND Tynetec ZXT813 User manual

LEGRAND Tynetec REACH User manual

LEGRAND

LEGRAND Tynetec REACH User manual

LEGRAND tynetec Advent XT User manual

LEGRAND

LEGRAND tynetec Advent XT User manual

LEGRAND 675 20 Quick start guide

LEGRAND

LEGRAND 675 20 Quick start guide

LEGRAND tynetec ZXT832 User manual

LEGRAND

LEGRAND tynetec ZXT832 User manual

LEGRAND Tynetec ZXT817 User manual

LEGRAND

LEGRAND Tynetec ZXT817 User manual

LEGRAND tynetec FM0823 User manual

LEGRAND

LEGRAND tynetec FM0823 User manual

Popular Security System manuals by other brands

Mobotix Mx-S-NAS2A-8 quick guide

Mobotix

Mobotix Mx-S-NAS2A-8 quick guide

E2S BExBG21D-P instruction manual

E2S

E2S BExBG21D-P instruction manual

Risco Agility 3 user manual

Risco

Risco Agility 3 user manual

Optex Genesys 824 R owner's manual

Optex

Optex Genesys 824 R owner's manual

Eaton XB10 Technical manual

Eaton

Eaton XB10 Technical manual

HAI SECURITY SYSTEM owner's manual

HAI

HAI SECURITY SYSTEM owner's manual

Honeywell Code Encryptor II installation manual

Honeywell

Honeywell Code Encryptor II installation manual

ADVANCED Network Devices Smart IP Strobe Installations

ADVANCED Network Devices

ADVANCED Network Devices Smart IP Strobe Installations

Kidde Fire Protection SIRIUS manual

Kidde Fire Protection

Kidde Fire Protection SIRIUS manual

Valcom VIP-998-SA quick start guide

Valcom

Valcom VIP-998-SA quick start guide

GKD SENSORZONE installation manual

GKD

GKD SENSORZONE installation manual

Eaton Menvier 20 Administrator's and user guide

Eaton

Eaton Menvier 20 Administrator's and user guide

ring Smoke/CO Listener quick start guide

ring

ring Smoke/CO Listener quick start guide

stabo multifon security II user manual

stabo

stabo multifon security II user manual

AuthenTrend ATKey.Pro user guide

AuthenTrend

AuthenTrend ATKey.Pro user guide

Pisector GSM-01 instruction manual

Pisector

Pisector GSM-01 instruction manual

Edwards AdaptaBeacon 58-N5-100WH  Catalog Series installation instructions

Edwards

Edwards AdaptaBeacon 58-N5-100WH Catalog Series installation instructions

Polon-Alfa POLON 4000 Series Installation and maintenance manual

Polon-Alfa

Polon-Alfa POLON 4000 Series Installation and maintenance manual

manuals.online logo
manuals.online logoBrands
  • About & Mission
  • Contact us
  • Privacy Policy
  • Terms and Conditions

Copyright 2025 Manuals.Online. All Rights Reserved.