manuals.online logo
Brands
  1. Home
  2. •
  3. Brands
  4. •
  5. LEGRAND
  6. •
  7. Security System
  8. •
  9. LEGRAND tynetec ZXT832 User manual

LEGRAND tynetec ZXT832 User manual

Tynetec, a business unit of Legrand Electric Ltd
Cowley Road, Blyth Riverside Business Park, Blyth, Northumberland, NE24 5TF.
Tel: +44 (0) 1670 352371 www.tynetec.co.uk
Trusted Technology
Caring for People
Door Alarm & Keyswitch
869MHz
Caring for People
_________________________________________________________________________
________________________________________________________________
Doc No. FM0836 V1.01 Page 1
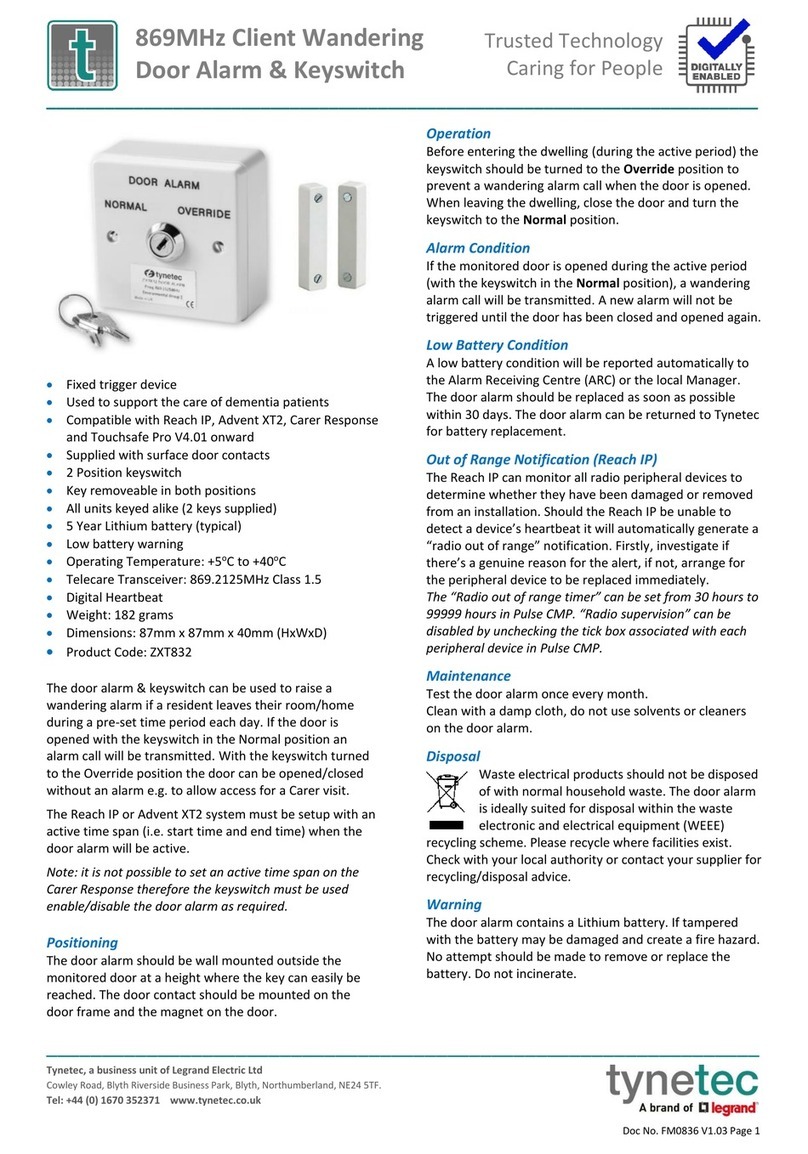
•Fixed trigger device
•Used to support the care of dementia patients
•Compatible with Reach IP, Advent XT2 & Carer Response
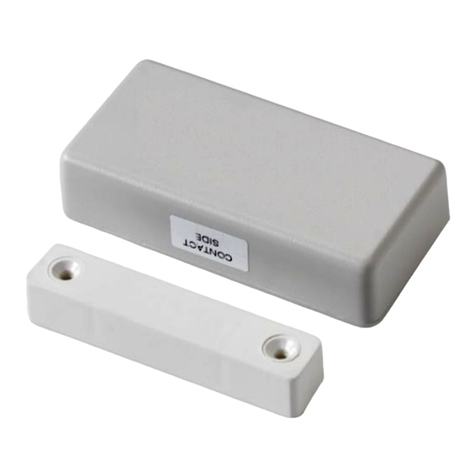
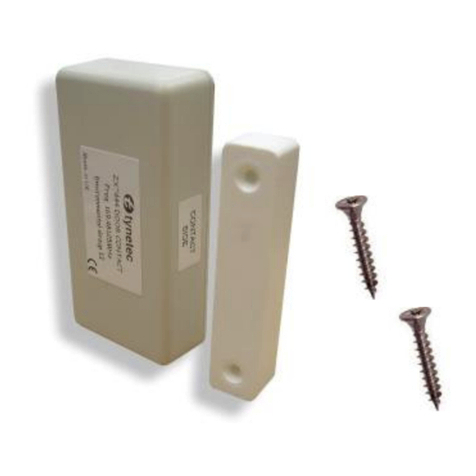
•Supplied with surface door contacts
•2 Position keyswitch
•Key removeable in both positions
•All units keyed alike (2 keys supplied)
•5 Year Lithium battery (typical)
•Low battery warning
•Operating Temperature: +5oC to +40oC
•Telecare Transceiver: 869.2125MHz Class 1.5
•Digital Heartbeat
•Weight: 182 grams
•Dimensions: 87mm x 87mm x 40mm (HxWxD)
•Product Code: ZXT832
The door alarm is used to activate an alarm call when a
door is opened. If the door is opened with the keyswitch
in the Normal position an alarm call will be transmitted.
With the keyswitch turned to the Override position the
door can be opened/closed without an alarm e.g. to allow
access for a Carer visit.
Positioning
The door alarm should be wall mounted outside the
monitored door at a height where the key can easily be
reached. The door contact should be mounted on the
door frame and the magnet on the door.
Operation
For dementia care applications, before entering the
dwelling the keyswitch should be turned to the Override
position to prevent an alarm call when the door is opened.
When leaving the dwelling, close the door and turn the
keyswitch to the Normal position.
Alarm Condition
If the monitored door is opened (with the keyswitch in the
Normal position), an alarm call will be transmitted. A new
alarm will not be triggered until the door has been closed
and opened again.
Low Battery Condition
A low battery condition will be reported automatically to
the Alarm Receiving Centre (ARC) or the local Manager.
The door alarm should be replaced as soon as possible
within 30 days. The door alarm can be returned to Tynetec
for battery replacement.
Out of Range Notification (Reach IP)
The Reach IP can monitor all radio peripheral devices to
determine whether they have been damaged or removed
from an installation. Should the Reach IP be unable to
detect a device’s heartbeat it will automatically generate a
“radio out of range” notification. Firstly, investigate if
there’s a genuine reason for the alert, if not, arrange for
the peripheral device to be replaced immediately.
The “Radio out of range timer” can be set from 30 hours to
99999 hours in Pulse CMP. “Radio supervision” can be
disabled by unchecking the tick box associated with each
peripheral device in Pulse CMP.
Maintenance
Test the door alarm once every month.
Clean with a damp cloth, do not use solvents or cleaners
on the door alarm.
Disposal
Waste electrical products should not be disposed of with
normal household waste. The door alarm is ideally suited
for disposal within the waste electronic and electrical
equipment (WEEE) recycling scheme.
Please recycle where facilities exist.
Check with your local authority or contact your supplier for
recycling/disposal advice.
Warning
The door alarm contains a Lithium battery. If tampered
with the battery may be damaged and create a fire hazard.
No attempt should be made to remove or replace the
battery. Do not incinerate.
Tynetec, a business unit of Legrand Electric Ltd
Cowley Road, Blyth Riverside Business Park, Blyth, Northumberland, NE24 5TF.
Tel: +44 (0) 1670 352371 www.tynetec.co.uk
Trusted Technology
Caring for People
Door Alarm & Keyswitch
869MHz
Caring for People
_________________________________________________________________________
________________________________________________________________
Doc No. FM0836 V1.01 Page 2
Mount the backbox
using 2 screws
through the rear
fixing holes “A”.
“A”
“A”


Magnet on
the door
Contact
on the
door
frame
10mm Max
Fix the contact to the door frame and route the
wire with the self-adhesive clips.
ZXT832
S:081923668
Iss-1
1093089F09
19W8
How to install the Door Alarm
The door alarm is designed for internal use only, it is not
suitable for external applications. Undo the 2 screws and
remove the door alarm backbox.
Note: maximum 10mm gap between the magnet and the
contact when the door is closed.
Telecare Radio ID
The door alarm includes a radio transceiver to
communicate with the Reach IP, Advent XT2
or Carer Response.
The Radio ID is a 10-digit
code printed on the
door alarm label...
Registering the Door Alarm onto a Reach IP
Login to Pulse CMP (www.tynetecpulse.com) and enter the
Reach IP Serial No. in the ALARM UNIT view. Press the
Accessories button and enter the Radio ID code, Location
and Equipment type. Press Save then Synchronize.
IMPORTANT: when the door alarm is installed a test call
must be made to check operation and start the digital
heartbeat.
Alternatively, with the Reach IP in normal operating mode
undo the fixing screw and remove the stand or connector
cover to access the ⚫Power button.
Press the ⚫Power button to enter Control Mode, then
press and hold the button until the unit announces
“add radio device” then release.
Press the ⚫button to confirm then activate the door
alarm by opening the door.
The Reach IP unit will sound a high beep if it’s a new
device and announce “range test mode”.
Press ⚫to confirm, or press to step to the next
function, or press to exit the mode.
Registering the Door Alarm onto an Advent XT2
Radio device programming can only be performed from
the Advent XT2 Manager’s Panel designated as the
Controller. Login using the Manager or Engineer password
and touch the Programming button.
Select the Program Radio Devices option from the
Program Setting drop-down list.
Enter the Radio ID: this is the 10-digit code taken from the
label on the door alarm.
Enter the Flat ID: this is the flat number the door alarm is
being installed in. Enter 4-digits e.g. 0014.
Enter the Location: select where the door alarm is located
from the drop-down list e.g. Front Door.
Press the Send button to update the XT2 system.
Activate the door alarm to check operation.
⚫Power Button
Connect the door contact to
the door alarm with the
cable provided.
Tynetec, a business unit of Legrand Electric Ltd
Cowley Road, Blyth Riverside Business Park, Blyth, Northumberland, NE24 5TF.
Tel: +44 (0) 1670 352371 www.tynetec.co.uk
Trusted Technology
Caring for People
Door Alarm & Keyswitch
869MHz
Caring for People
_________________________________________________________________________
________________________________________________________________
Doc No. FM0836 V1.01 Page 3
Registering the Door Alarm onto a Carer Response
Refer to the Carer Response
user manual for full details
of the button functions
and how to navigate the
menus.
From the Main menu select Programming.
From the Programming menu select Add transmitter.
The display will prompt you to Activate the transmitter…
Open the door to activate an alarm.
The Carer Response will beep and the display will change to
the Add transmitter menu with a box showing No ID.
Press then to select Room, then press 
Press to select the room number box 0000.
Press to select the first digit, press to move between
the digits and press or to change each digit.
Press when the correct room number is displayed.
Press to select the alarm type box None.
Press thento select Door Alarm then press 
Press the button to select Save then press 
The display will show Radio ID saved to memory…
Return back to the Main menu and select Quit
Activate the door alarm to check operation.

Other LEGRAND Security System manuals

LEGRAND tynetec FM0823 User manual

LEGRAND

LEGRAND tynetec FM0823 User manual

LEGRAND neat SMILE FALL User manual

LEGRAND

LEGRAND neat SMILE FALL User manual

LEGRAND Tynetec ZXT813 User manual

LEGRAND

LEGRAND Tynetec ZXT813 User manual

LEGRAND tynetec Aidcall ZXT434 User manual

LEGRAND

LEGRAND tynetec Aidcall ZXT434 User manual

LEGRAND 43260 User manual

LEGRAND

LEGRAND 43260 User manual

LEGRAND tynetec Reach IP User manual

LEGRAND

LEGRAND tynetec Reach IP User manual

LEGRAND tynetec ZXT823 User manual

LEGRAND

LEGRAND tynetec ZXT823 User manual

LEGRAND 766 21 Setup guide

LEGRAND

LEGRAND 766 21 Setup guide

LEGRAND E47ADCN User manual

LEGRAND

LEGRAND E47ADCN User manual

LEGRAND tynetec ZXT821 User manual

LEGRAND

LEGRAND tynetec ZXT821 User manual

LEGRAND 625 30 User manual

LEGRAND

LEGRAND 625 30 User manual

LEGRAND Unity System User manual

LEGRAND

LEGRAND Unity System User manual

LEGRAND 5739 35 User manual

LEGRAND

LEGRAND 5739 35 User manual

LEGRAND 675 20 Quick start guide

LEGRAND

LEGRAND 675 20 Quick start guide

LEGRAND 3486 MyHome User manual

LEGRAND

LEGRAND 3486 MyHome User manual

LEGRAND L4601 User manual

LEGRAND

LEGRAND L4601 User manual

LEGRAND 5739 34 User manual

LEGRAND

LEGRAND 5739 34 User manual

LEGRAND Tynetec ZXT817 User manual

LEGRAND

LEGRAND Tynetec ZXT817 User manual

LEGRAND tynetec ZXT833 User manual

LEGRAND

LEGRAND tynetec ZXT833 User manual

LEGRAND Tynetec REACH User manual

LEGRAND

LEGRAND Tynetec REACH User manual

LEGRAND tynetec ZXT832 User manual

LEGRAND

LEGRAND tynetec ZXT832 User manual

LEGRAND tynetec Advent XT User manual

LEGRAND

LEGRAND tynetec Advent XT User manual

LEGRAND 4073 User manual

LEGRAND

LEGRAND 4073 User manual

LEGRAND Tynetec REACH User manual

LEGRAND

LEGRAND Tynetec REACH User manual

Popular Security System manuals by other brands

HIK VISION DS-PWA32-HR quick start guide

HIK VISION

HIK VISION DS-PWA32-HR quick start guide

8 Level ALRM-KIT-BASE quick start guide

8 Level

8 Level ALRM-KIT-BASE quick start guide

Innohome SGK510 Stove Guard Reference manual

Innohome

Innohome SGK510 Stove Guard Reference manual

Checkpoint Neo NP10 user manual

Checkpoint

Checkpoint Neo NP10 user manual

Axesstel AX240 user manual

Axesstel

Axesstel AX240 user manual

MH Corbin Connect:ITS user manual

MH Corbin

MH Corbin Connect:ITS user manual

Alarmcom ADC-IS-100-LP installation guide

Alarmcom

Alarmcom ADC-IS-100-LP installation guide

Scantronic i-on Security System user guide

Scantronic

Scantronic i-on Security System user guide

Scantronic KEY-RAS user guide

Scantronic

Scantronic KEY-RAS user guide

IR-Tec HomeKeeper Installation & operation manual

IR-Tec

IR-Tec HomeKeeper Installation & operation manual

Paradox SR150 quick start guide

Paradox

Paradox SR150 quick start guide

Abus Security-Center EcoLine TV7000 installation guide

Abus

Abus Security-Center EcoLine TV7000 installation guide

Abus SG1800 installation instructions

Abus

Abus SG1800 installation instructions

FOR-A MV-1600 Operation manual

FOR-A

FOR-A MV-1600 Operation manual

Security Command XR20 Executive Series user guide

Security Command

Security Command XR20 Executive Series user guide

Entrematic Ditec VALABC installation manual

Entrematic

Entrematic Ditec VALABC installation manual

foc.us FC-7564 user manual

foc.us

foc.us FC-7564 user manual

HIK VISION DS-TCG405-E user manual

HIK VISION

HIK VISION DS-TCG405-E user manual

manuals.online logo
manuals.online logoBrands
  • About & Mission
  • Contact us
  • Privacy Policy
  • Terms and Conditions

Copyright 2025 Manuals.Online. All Rights Reserved.