MADAS
© 2004 MADAS s.r.l.
pag. 6
M16/RM N.C. - M16/RMO N.C.
Capitolo 5 /
Chapter 5
MADAS - Manuale Tecnico 2004 - Edizione 1
MADAS - 2004 Technical Manual - Ediction 1
®ELETTROVALVOLE A RIARMO MANUALE NORMALMENTE
CHIUSE TIPO M16/RM N.C. - M16/RMO N.C.
NORMALLY-CLOSED MANUAL RESET SOLENOID VALVES
TYPE M16/RM N.C. - M16/RMO N.C.
ESEMPIO DI INSTALLAZIONE
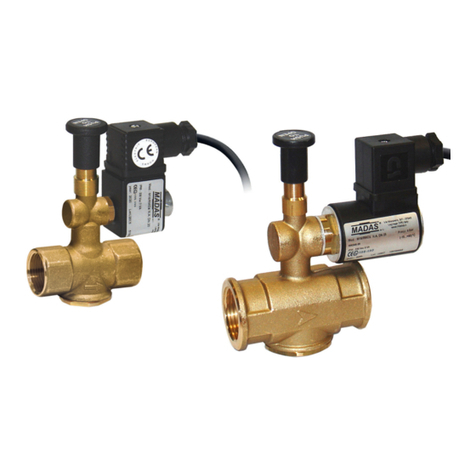
1. Elettrovalvola a riarmo manuale M16/RM N.C.
2. Valvola a strappo SM
3. Filtroregolatore FRG/2MC
4. Manometro
5. Rivelatore gas
6. Leva comando a distanza valvola a strappo SM
rete
pipe
utenza
user
EXAMPLE OF INSTALLATION
1. M16/RM N.C. manual reset solenoid valve
2. SM series jerk handle ON/OFF valve
3. FRG/2MC series filter pressure regulator
4. Manometer
5. Gas detector
6. Lever for remote SM ON/OFF valve control
INSTALLATION
The solenoid valve is in conformity with the Directive 94/9/CE (said Directive
ATEX 100 a) as device of group II, category 3G and as device of group II, cat-
egory 3D; for this reason it is suitable to be installed in the zones 2 and 22 as
classified in the attachment I to the Directive 99/92/EC.
The solenoid valve is not suitable to be used in zones 1 and 21 and, all the more
so, in zones 0 and 20 as classified in the already said Directive 99/92/EC.
To determine the qualification and the extension of the dangerous zones, see
the norm EN 60079-10.
The device, if installed and serviced respecting all the conditions and the techni-
cal instructions of this document, is not source of specific dangers: in particular,
during the normal working, is not forecast, by the solenoid valve, the emission
in the atmosphere of inflammable substance in way to cause an explosive at-
mosphere.
It is usually installed upstream the regulation organs and it must be installed
with the arrow (shown on the valve body) towards the user.
They can be installed in vertical position without compromising the correct
working. It must not be installed overturned.
INSTALLAZIONE
L’elettrovalvola è conforme alla Direttiva 94/9/CE (denominata Direttiva ATEX
100 a) come apparecchio del gruppo II, categoria 3G e come apparecchio II,
categoria 3D; come tale è idonea per essere installata nelle zone 2 e 22 come
classificate nell’allegato I alla Direttiva 99/92/CE.
L’elettrovalvola non è idonea per l’utilizzo nelle zone 1 e 21 e, a maggior ragione,
nelle zone 0 e 20 come definite nella già citata Direttiva 99/92/CE.
Per determinare la qualifica e l’estensione delle zone pericolose si veda la norma
EN 60079-10.
L’apparecchio, se installato e sottoposto a manutenzione nel pieno rispetto di
tutte le condizioni e istruzioni tecniche riportate nel presente documento, non
costituisce fonte di pericoli specifici: in particolare, in condizioni di normale fun-
zionamento, non è prevista, da parte dell’elettrovalvola, l’emissione in atmosfera
di sostanza infiammabile con modalità tali da originare un’atmosfera esplosiva.
Normalmente vengono installate a monte degli organi di regolazione e devono
essere installate con la freccia (indicata sul corpo delle elettrovalvole) rivolta
verso l’utenza. Possono essere installate anche in posizione verticale senza che
nevengapregiudicatoilcorretto funzionamento.Non possonoessereposizionate
capovolte.
Si raccomanda di leggere attentamente il foglio di
istruzioni a corredo di ogni prodotto.
It is always important to read carefully the instruction
sheet of each product.
RIARMO MANUALE
Perriarmare l'elettrovalvola,assicurarsidiessere in presenza ditensioneesvitare
completamente l'eventuale coperchietto di protezione.
- con attacchi DN 15 ÷ DN 50: (vedi fig. 1) premere a fondo il perno di riarmo
(6) e attendere qualche istante che si verifichi l'equilibrio di pressione tra monte
e valle della valvola fino ad avvenuto aggancio*
- con attacchi DN 65 ÷ DN 100: (vedi fig. 2) avvitare la manopola di riarmo
(17) tramite il foro filettato "A" sul perno di riarmo (1) e tirare la manopola (17)
verso l'alto fino ad avvenuto aggancio *
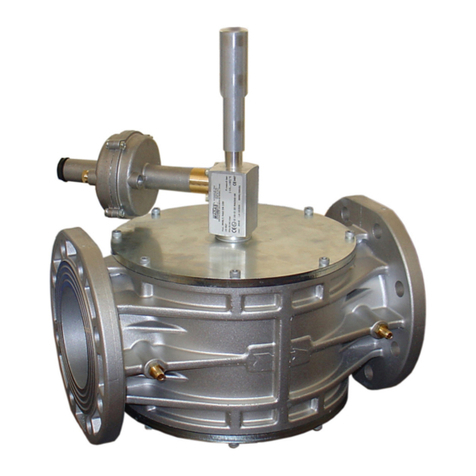
- con attacchi DN 125 ÷ DN 200: (vedi fig. 3 e 4) ruotare leggermente in
senso orario, con una chiave commerciale da 32 mm, la manopola di riarmo (3)
e attendere qualche istante che si verifichi l'equilibrio di pressione tra monte e
valle della valvola. Successivamente ruotare fino a fine corsa, sempre in senso
orario, la manopola di riarmo (3) fino ad avvenuto aggancio *
* riavvitare nella posizione originale il coperchietto di protezione ed eventual-
mente sigillarlo in quella posizione.
MANUAL RESET
Toresetthe solenoid valve,payattentionthereistensionandunscrewcompletely
the possible protective small cap.
- with connections DN 15 ÷ DN 50: (see fig. 1) push the reset handgrip (6)
and wait for an istant the balance between the inlet and outlet pressure of the
valve up to the hooking *
- with connections DN 65 ÷ DN 100: (see fig. 2) screw the reset handgrip
by the threaded hole “ A“ on the reset pin (1) and pull up the reset handgrip
(17) up to the hooking *
- with connections DN 125 ÷ DN 200: (see fig. 3 and 4) by a 32 mm com-
mercial key turn slightly clockwise the reset handgrip (3) and wait for an istant
the balance between the inlet and outlet pressure of the valve. Then turn to the
end clockwise the reset handgrip (3) up to the hooking *
* rescrew in the original position the protective small cap and possibly seal it
in that position.

