manuals.online logo
Brands
  1. Home
  2. •
  3. Brands
  4. •
  5. Malmbergs
  6. •
  7. Accessories
  8. •
  9. Malmbergs 99 190 22 Quick guide

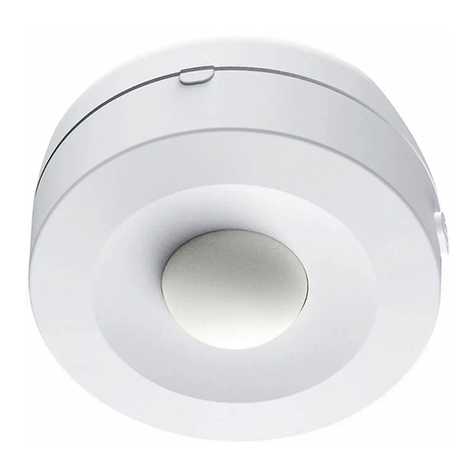
Malmbergs 99 190 22 Quick guide

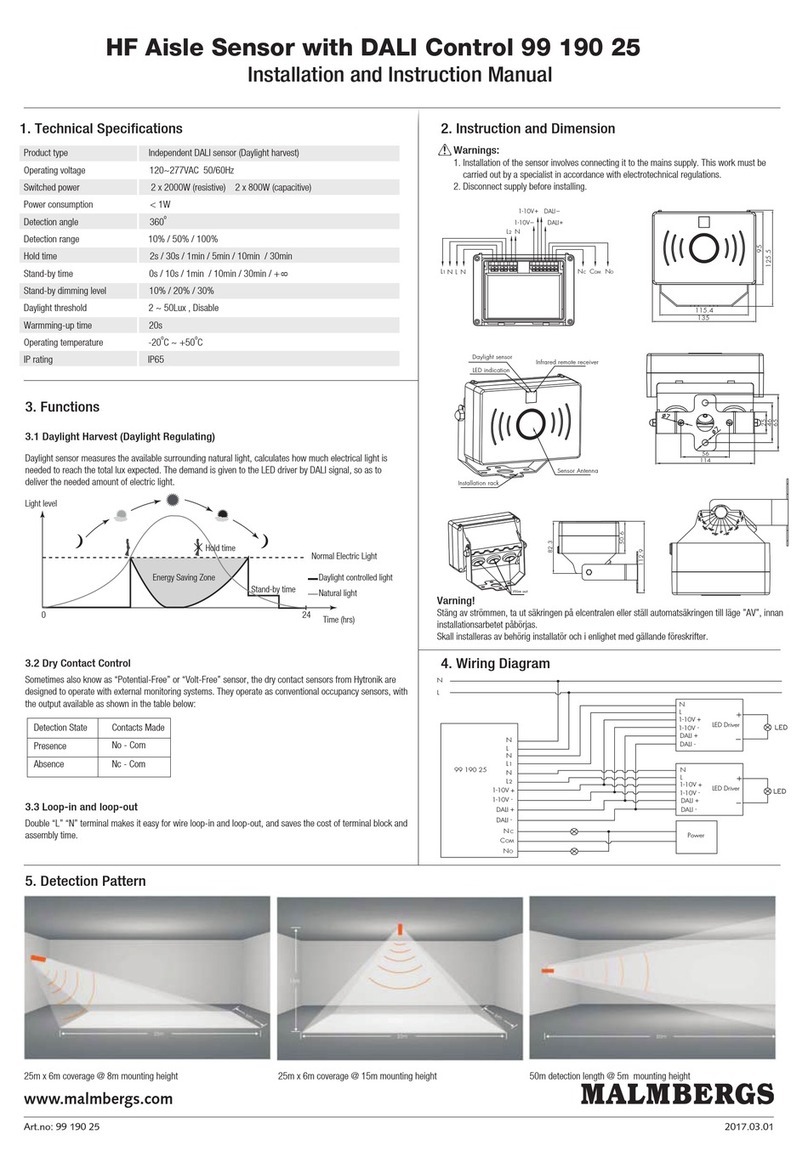
1. Technical Specifications
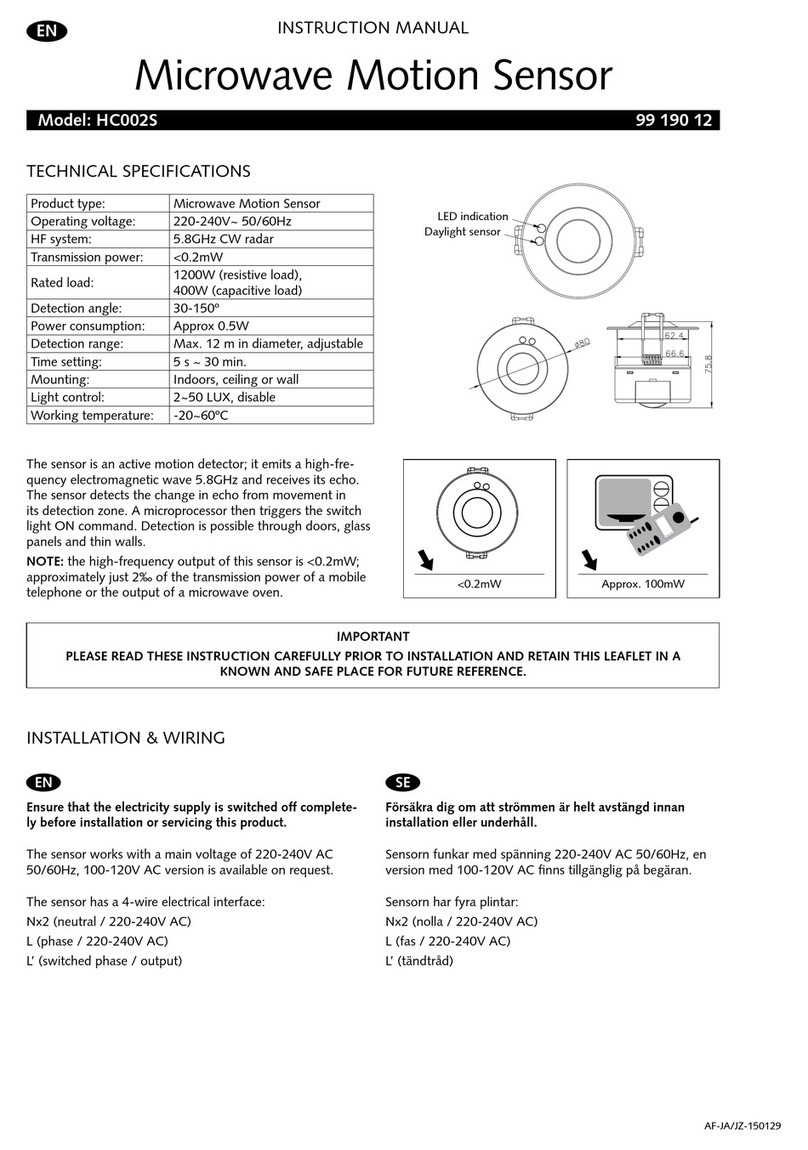
Product type Independent microwave DALI sensor (Daylight harvest)
Operating voltage 220~240VAC 50/60Hz
Switched power Maximum 20pcs devices Maximum 40mA
Power consumption < 0.5W
Detection angle 360o
Detection area (DxH) 12 x 6m (Maximum)
Detection range 10% / 50% / 75% / 100%
Hold time 2s / 30s / 1min / 5min / 10min / 15min / 20min / 30min
Stand-by time 0s / 10s / 1min / 5min / 10min / 30min / 1h / +
Stand-by dimming level 10% / 20% / 30% / 50%
Daylight threshold 50 ~ 500Lux , Disable
Warmming-up time 20s
Operating temperature -20oC ~ +60oC
3. Rotary Switch Settings
Detection
range
Channel
0
1
2
3
4
5
6
7
8
9
A
B
C
D
E
F
100%
100%
100%
100%
100%
100%
100%
100%
100%
100%
100%
100%
100%
100%
100%
100%
5s
1min
5min
5min
5min
5min
10min
10min
10min
10min
20min
20min
30min
30min
30min
5s
10s
5min
10min
+∞
+∞
+∞
30min
+∞
+∞
+∞
1h
+∞
+∞
+∞
+∞
10s
10%
10%
10%
10%
10%
30%
10%
10%
10%
30%
10%
30%
10%
30%
50%
10%
Disable
50Lux
50Lux
75Lux
100Lux
200Lux
50Lux
75Lux
100Lux
200Lux
100Lux
200Lux
100Lux
200Lux
400Lux
100Lux
Hold
time
Stand-by
time
Stand-by
dimming level
Daylight
threshold
A rotary switch is built inside the sensor for
scene selection / fast programming. Total
16 channels available:
Note: settings can also be changed by remote control 99 190 27. The last action controls.
8
4. Functions
Daylight sensor measures the available surrounding natural light, calculates how much electrical light is
needed to reach the total lux expected. The demand is given to the LED driver by DALI signal, so as to
deliver the needed amount of electric light.
4.1 Daylight Harvest (Daylight Regulating)
The built-in daylight sensor can read ambient natural light and switch off the fixture automatically whenever
artificial light is not required (natural light lux level exceeds daylight threshold).
Note: if the stand-by time is preset at "+∞", the fixture never switches off even when natural light is
sufficient.
4.2 Lux Off Function
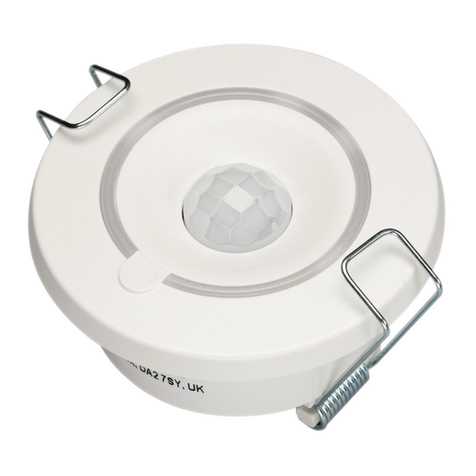
FLUSH MOUNT MICROWAVE DALI SENSOR 99 190 22
Installation and Instruction Manual
Rotary switch preset (Please
see the location in 2. Installation)
Switch the power supply to the sensor two times within 2 seconds, the ambient lux level is
sampled and set as the new daylight threshold. Both the settings on rotary switch and the
ambient lux level sampled can overwrite each other. This feature enables the daylight sensor
to be commissioned to the environment in which it is installed. The last adjustment remains in
memory.
4.4 Ambient Daylight Threshold
By connecting the “SYNC” terminals in parallel (see wiring diagram), no matter which sensor
detects motion, all 99 190 22 in the group will turn on the lights when surrounding natural light
is below the daylight threshold. The sensor module is shared and the detection area could be
widely enlarged in this way.
4.7 Synchronization Function
2. Installation
Warnings:
1. Installation of the sensor involves connecting it to the mains supply. This work must be
carried out by a specialist in accordance with electrotechnical regulations.
2. Disconnect supply before installing.
Infrared receiver
Photocell
LED indicator
Rotary switch preset
Lens
1
3
4
2
(1) Sensor inset
(2) Lens pluggable
(3) Protection cover (covers the
high-voltage terminals, and leaves
the DALI terminals exposed).
(4) Ceiling (drill hole O 70mm).
Turn off/on the power supply three times within 3 seconds, the light will be turned on for 8
hours, even there is no motion detected, then go back to sensor mode automatically.
Note: this 8H manual on mode can be cancelled by turning off/on the power supply one time
within 1 second.
4.5 8H Manual ON Mode For LED Lamp
With the help of push-switch, this sensor maybe over-ridden by the end-users to switch on/off
the lights manually, or adjust the light brightness during motion hold-time. This makes the
product more user-friendly and offers more options to fit for extra-ordinary demands.
* Short push (<1s): on/off function;
ON → OFF: the light turns off immediately and cannot be lighten for a certain time (equals
to hold time preset) even there is movement is detected. After this period, the sensor goes
back to auto sensor mode.
OFF → ON: the light turns on 100% and goes to auto sensor mode, even when ambient
Lux level exceeds the daylight threshold.
* Long push (>1s): adjust the target lux level by turning the light up or down. Both the
adjustment on remote control and push switch can overwrite each other,
the last adjustment remains in memory.
* If no end-user adjustment is desired, simply leave this terminal disconnected.
4.6 Manual Override
420
Light level
Time (hrs)
Normal Electric Light
Daylight controlled light
Energy Saving Zone
Natural light
Hold time
Stand-by time
The motion sensor is employed, but only activated on the manual press of the push switch,
light keeps on in the presence, and dims down in the absence, and eventually switches off
automatically in the long absence.
4.3 Semi-auto Function (Absence Detection)
70mm 64.7
o85
65
56
16
9
Varning!
Stäng av strömmen, ta ut säkringen på elcentralen eller ställ automatsäkringen till läge ”AV”, innan
installationsarbetet påbörjas.
Skall installeras av behörig installatör och i enlighet med gällande föreskrifter.
www.malmbergs.com
2017.03.01Art.no: 99 190 22
5. Wiring Diagram
Ceiling mounted detection pattern (m)
Ceiling mounted height(m)
6
0
6
10%
10%
30%
30%
75%
75%
50%
50%
Detection Pattern6.
L
N
SY
NC
SY
NC
P
DALI
L
N
DALI+
LED+
LED Driver
LED-
DALI-
L
N
DALI+
LED+
LED Driver
LED-
DALI-
+
-
N L SY
NC
SY
NC
P
DALI
+
-
N L
8. Trouble Shooting
Description of the
Button Functions
(remote control 99 190 27)
YDEMERESUACYDEMER ESUAC NOITCNUFLAM
The fixture does not light up
The fixture is always on
Check detection area setting
The fixture is on when it should not
Incorrect daylight threshold setting
Continued movement in the detection zone
Sudden change in temperature due to weather (wind, rain, snow) or air
expelled from fans, open windows
Detection zone not targeted
Faulty fixture
No power supply
Adjust daylight threshold setting
Replace fixture
Check power to sensor
Check detection area setting
Adjust zone, change installation site
7.
99 190 27
6
8
10
11
12
13
14
2
4
1
3
7
9
5
Permanent ON/OFF [ ]
Press button ,to select permanent ON or permanent OFF mode.
* Press button / to resume automatic operation.
Semi-auto Mode [ button & ]
Power output [ button ]
Press button , the light output shifts between 80% and 100%.
Note: the function of “Sensor off” and “Twilight” are disabled.
Ambient daylight threshold [ button ]
Detection range [ zone ]
Press buttons in zone to set detection range at 100% / 75% /
50% / 10%.
Stand-by time [ zone ]
Press buttons in zone to set the stand-by period at 0s / 10s /
1min / 5min / 10min / 30min / 1h / +∞.
Note: “0s” means on/off control; “+∞” means bi-level control, 100%
on when motion detected, and remains at the stand-by dimming
level when no presence after hold-time.
Daylight threshold [ zone ]
Press buttons in zone to set the daylight sensor at 50Lux / 100Lux
/ 300Lux / 500Lux or Disable as threshold / target Lux level.
Note: 2Lux / 10Lux are disabled.
To set daylight sensor at 100Lux / 300 Lux / 500Lux, press
button Shift at first.
button
Auto Mode [ button ]
Brightness +/- [ button ]
Press button to adjust the light brightness to rest the target lux level.
Scene prog. [ zone ] (One-key-commissioning)
1. Press button Shift, the red LED is on for indication.
2. Press button , the ambient lux level is sampled and set as
daylight threshold / target Lux level.
Hold time [ zone ]
Press buttons in zone to set the hold time at 2s / 30s / 1min /
5min / 10min / 15min / 20min / 30min.
Note: 1.To set hold-time at 30s / 5min / 15min / 30min, press button
Shift at first.
2. 2s is for test purpose only, stand-by period and daylight
sensor settings are disabled in this mode.
*To exit from Test mode, press button or any button in zone .
Stand-by dimming level [ zone ]
Press buttons in zone to set the stand-by dimming level at 10% /
20% / 30% / 50%.
Dual tech & RF mode [ zone ]
All buttons in zone are disabled.
Shift [ button ]
RESET[ button ]
Press button , all settings go back to the rotary switch settings.
Press button to initiate automatic mode.The sensor starts working
and all settings remain as before the light was switched ON/OFF.
1. Press button “Start” to program.
2. Select the buttons in “Detection range”, / “Daylight threshold”,
“Hold time”, “Stand-by time”, “Stand-by dimming level” to
set all parameters.
3. Press button “Memory” to save all the settings programmed in the
remote control.
4. Press button “Apply” to set the settings to each sensor unit(s).
For example, to pre-set detection range 100%, daylight threshold
Disable, hold time 5min, stand-by time +∞, stand-by dimming level
30%, steps should be:
Press button Start, button 100%, Disable, Shift, 5min,
Shift, +∞, 30%, Memory. By pointing to the sensor unit(s)
and pressing Apply, all settings are passed on the sensor(s).
Press button , the LED on the top left corner is on for indication.
All values / settings in RED are in valid for 20 seconds.
1. Press button Shift (the red LED is on for indication).
2. Press button to initiate semi-auto mode. The fixture is manually
on by push-switch and automatically off in semi-auto mode.
18
3
3
9
10
11
12
13
14
14
13
12
11
11
10
9
8
2
2
3
3
3
3
4
4
4
5
6
7
7
7
7
3
3
8
8 9
10
10 11
1312
11 12 13
6
5
4
1
2 4
3
2
99 190 2299 190 22
Malmbergs Elektriska AB
|
PO Box 144, SE-692 23 Kumla, SWEDEN
| Phone: +46 19 58 77 00 |
Fax: +46 19 57 11 77
| [email protected] | www.malmbergs.com
www.malmbergs.com
Other Malmbergs Accessories manuals

Malmbergs HC009S User manual

Malmbergs

Malmbergs HC009S User manual

Malmbergs B620 User manual

Malmbergs

Malmbergs B620 User manual

Malmbergs PAM21 User manual

Malmbergs

Malmbergs PAM21 User manual

Malmbergs 99 190 25 Quick guide

Malmbergs

Malmbergs 99 190 25 Quick guide

Malmbergs E-2026 User manual

Malmbergs

Malmbergs E-2026 User manual

Malmbergs io-TH-BLE User manual

Malmbergs

Malmbergs io-TH-BLE User manual

Malmbergs Vinga User manual

Malmbergs

Malmbergs Vinga User manual

Malmbergs Primo ST-1005B User manual

Malmbergs

Malmbergs Primo ST-1005B User manual

Malmbergs Dual sense DALI 99 190 23 Quick guide

Malmbergs

Malmbergs Dual sense DALI 99 190 23 Quick guide

Malmbergs io-DS-BLE User manual

Malmbergs

Malmbergs io-DS-BLE User manual

Malmbergs ST-1002G User manual

Malmbergs

Malmbergs ST-1002G User manual

Malmbergs HC407VDS User manual

Malmbergs

Malmbergs HC407VDS User manual

Malmbergs io-PIR-BLE User manual

Malmbergs

Malmbergs io-PIR-BLE User manual

Malmbergs TM001-ZA User manual

Malmbergs

Malmbergs TM001-ZA User manual

Malmbergs HC0025 User manual

Malmbergs

Malmbergs HC0025 User manual

Malmbergs 99 751 42 User manual

Malmbergs

Malmbergs 99 751 42 User manual

Malmbergs Neso LED User manual

Malmbergs

Malmbergs Neso LED User manual

Malmbergs 70000(K) User manual

Malmbergs

Malmbergs 70000(K) User manual

Malmbergs TP001-ZA User manual

Malmbergs

Malmbergs TP001-ZA User manual

Malmbergs B612Q User manual

Malmbergs

Malmbergs B612Q User manual

Malmbergs 99 190 21 Quick guide

Malmbergs

Malmbergs 99 190 21 Quick guide

Malmbergs 9974125 User manual

Malmbergs

Malmbergs 9974125 User manual

Malmbergs Sense User manual

Malmbergs

Malmbergs Sense User manual

Malmbergs 99 190 17-18 User manual

Malmbergs

Malmbergs 99 190 17-18 User manual

Popular Accessories manuals by other brands

Quark-Elec AS06 user manual

Quark-Elec

Quark-Elec AS06 user manual

LEGRAND Wattstopper FD-301 installation instructions

LEGRAND

LEGRAND Wattstopper FD-301 installation instructions

CONCORD Slider Instruction for attachment and use

CONCORD

CONCORD Slider Instruction for attachment and use

Xsens DOT user manual

Xsens

Xsens DOT user manual

Masimo M-LNCS Series Instructions for use

Masimo

Masimo M-LNCS Series Instructions for use

Burster 86-2800 Operation manual

Burster

Burster 86-2800 Operation manual

Black Nova ARIA user manual

Black Nova

Black Nova ARIA user manual

INNOBIZ Elia Instructions for use

INNOBIZ

INNOBIZ Elia Instructions for use

Isimet FGS-22X2 installation instructions

Isimet

Isimet FGS-22X2 installation instructions

MICRO-EPSILON optoNCDT ILR 1191 instruction manual

MICRO-EPSILON

MICRO-EPSILON optoNCDT ILR 1191 instruction manual

MOB MO6814 user manual

MOB

MOB MO6814 user manual

Jet JLH Series Operating instructions and parts manual

Jet

Jet JLH Series Operating instructions and parts manual

American Standard Acrylux Shower Base 4834Y1.ST Product features

American Standard

American Standard Acrylux Shower Base 4834Y1.ST Product features

nedis KAPC030SS quick start guide

nedis

nedis KAPC030SS quick start guide

Omron E3X-HD0 instruction sheet

Omron

Omron E3X-HD0 instruction sheet

Swisher PowerBlade PBP-3640 Assembly instructions

Swisher

Swisher PowerBlade PBP-3640 Assembly instructions

ipf electronic OTQ80576 manual

ipf electronic

ipf electronic OTQ80576 manual

IFM PL205 Series operating instructions

IFM

IFM PL205 Series operating instructions

manuals.online logo
manuals.online logoBrands
  • About & Mission
  • Contact us
  • Privacy Policy
  • Terms and Conditions

Copyright 2025 Manuals.Online. All Rights Reserved.