manuals.online logo
Brands
  1. Home
  2. •
  3. Brands
  4. •
  5. Malmbergs
  6. •
  7. Accessories
  8. •
  9. Malmbergs 99 751 42 User manual

Malmbergs 99 751 42 User manual

EN
www.malmbergs.com
AF-JA/JZ-170105
SPECIFICATIONS
Input/output voltage: DC 24V
Load: Max. 36W
Operating temp: -20°C to +40°C
Detection area: 120°, 2 m
Time setting: 30 seconds
LIGHT SENSITIVE CONTROL
When the ambient light is more than 10 lux, the
light will not illuminate.
DRAWING
See Fig. 1.
INSTALLATION
2 pcs M3.0x10 screws make it easy to install, see
Fig. 2
Install position see Fig. 3.
Note: the picture shows that the detection area
vary depending on mounting position. Choose
the correct mounting position according to your
purpose.
CONNECTION GUIDE
See Fig. 4.
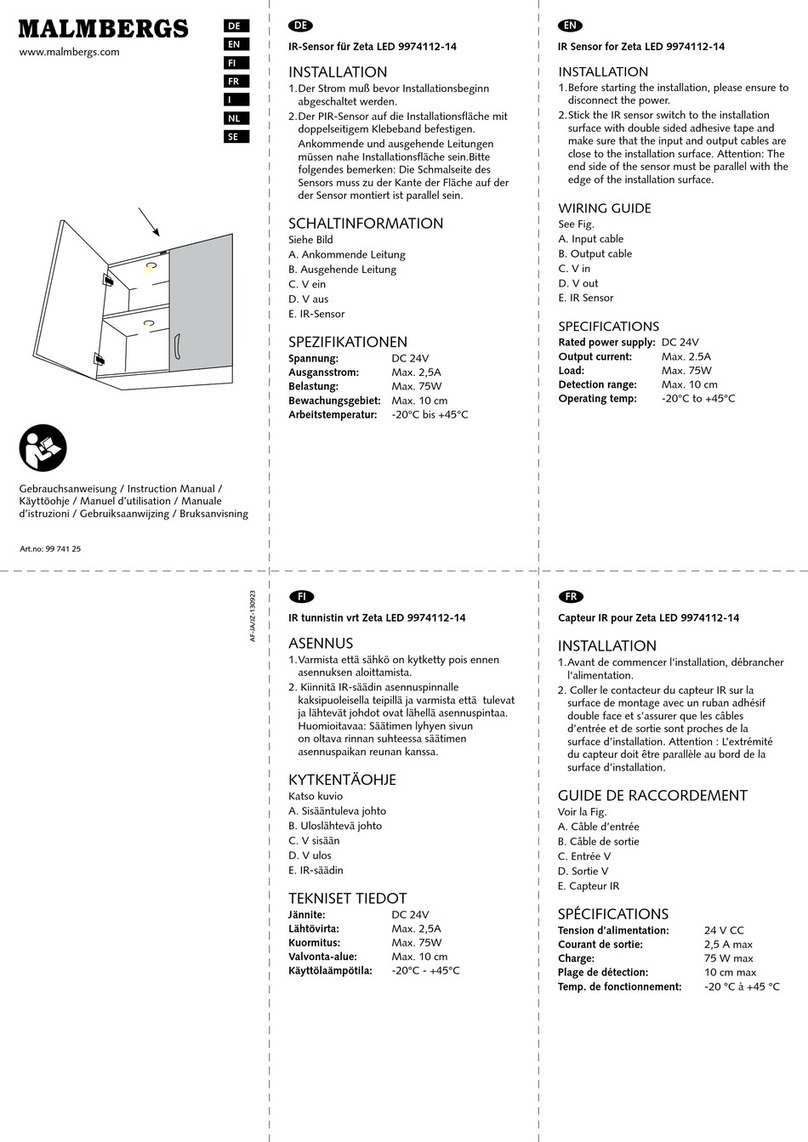
A. PIR sensor
B. LED rail
C. Next LED rail
D. Driver
SPEZIFIKATIONEN
Spannung: DC 24V
Belastung: Max. 36W
Arbeitstemperatur: -20°C bis +40°C
Bewachungsgebiet: 120°, 2 m
Abschaltverzögerung: 30 sek.
LICHTEINSTELLUNG
Wenn das umgebende Licht mehr als 10 Lux ist, wird
das Licht nicht angezündet.
MASSKIZZE
Siehe Bild 1.
INSTALLATION
2 Stück M3,0x10 Schrauben bei Installation
verwenden, siehe Bild 2.
Montageposition, siehe Bild 3.
Bitte folgendes beachten: Das Bild zeigt daß das
Bewachungsgebiet abhängig von Montageposition
variiert. Bitte die passende Installationsalternative
wählen.
SCHALTSCHEMA
Siehe Bild 4.
A. PIR-Sensor
B. LED-Schiene
C. Nächste LED-Schiene
D. Treiber
DE
SE
DE
EN
FI
FR
I
NL
Art.no: 99 751 42
PIR-Sensor für Medusa LED 9975131-33 PIR Sensor for Medusa LED 9975131-33
120o
3 m
1
2
4
3
B
C
D
A
B
Gebrauchsanweisung / Instruction Manual /
Käyttöohje / Manuel d’utilisation / Manuale
d’istruzioni / Gebruiksaanwijzing / Bruksanvisning
SPECIFIKATIONER
Spänning: DC 24V
Belastning: Max. 36W
Arbetstemperatur: -20°C till +40°C
Bevakningsområde: 120°, 2 m
Frånslagsfördröjning: 30 sek
LJUSINSTÄLLNING
När det omgivande ljuset är mer 10 lux, kommer
ljuset inte att tändas.
MÅTTSKISS
Se Fig. 1.
INSTALLATION
Använd 2 st M3,0x10 skruvar vid installation, se
Fig. 2.
Monteringsposition, seFig. 3.
Observera: bilden visar att bevakningsområdet
varierar beroende på monteringspositionen. Välj
det installationsalternativ som passar ditt syfte.
KOPPLINGSSCHEMA
Se Fig. 4.
A. PIR-sensor
B. LED-skena
C. Nästa LED-skena
D. Drivdon
SPECIFICHE
Tensione in entrata/in uscita: DC 24 V
Carico: max 36 W
Temperatura di funzionamento:da -20°C a +40°C
Area di copertura: 120°, 2 m
Tempo impostato: 30 secondi
CONTROLLO DELLA LUCE
Quando la luce ambiente è più di 10 lux, la lampada non
illuminerà.
DISEGNI
Vedere fig. 1.
INSTALLAZIONE
2 viti M 3,0x10 facilitano l’installazione, vedere fig. 2
Posizione d’installazione vedere fig. 3.
Nota: l’immagine mostra che l’area di copertura cambia
a seconda della posizione del montaggio. Pertanto
bisogna scegliere la posizione di montaggio corretta a
seconda dello scopo.
GUIDA AL COLLEGAMENTO
Vedere fig. 4.
A. Sensore PIR
B. Binario LED
C. Binario LED ulteriore
D. Driver
SPECIFICATIES
Ingang-/uitgangspanning: DC 24 V
Belasting: Max. 36 W
Bedrijfstemperatuur: -20 °C tot +40 °C
Detectiegebied: 120°, 2 m
Tijdinstelling: 30 seconden
LICHTGEVOELIGE REGELING
Wanneer het omgevingslicht meer dan 10 lux is, zal de
lamp niet branden.
TEKENING
Zie Afbeelding 1.
INSTALLATIE
2 stuks M3.0x10 schroeven maken de installatie
eenvoudig, zie Afb. 2
Installatiepositie zie Afb. 3.
Opmerking: op de afbeelding ziet u dat het
detectiebereik afhankelijk is van de bouwvorm. Kies de
montagepositie volgens uw doel.
AANSLUITING
Zie Afbeelding 4.
A. PIR-sensor
B. LED-rail
c. Volgende LED-rail
D. Stuurschakeling
SENL
I
SPÉCIFICATIONS
Tension d’entrée/sortie: 24 V CC
Charge: 36 W max
Temp. de fonctionnement: -20 °C à +40 °C
Zone de détection: 120°, 2 m
Réglage du temps: 30 secondes
SENSIBLE À LA LUMIÈRE
Lorsque l’éclairage est supérieur à 10 lux, la lumière
n'est pas activée.
PLAN
Voir la Fig. 1
INSTALLATION
2 Vis M3.0x10 facilitent l’installation, voir la Fig. 2.
Position d’installation voir la Fig. 3.
Remarque : L’image montre que la zone de détection
varie en fonction de la position de montage. Choisir la
position en fonction de vos besoins spécifiques.
GUIDE DE RACCORDEMENT
Voir la Fig. 4.
A. Capteur PIR
B. Rampe DEL
C. Rampe DEL suivante
D. Pilote
FR
PIR-sensor till Medusa LED 9975131-33
Capteur PIR pour Medusa LED 9975131-33 Sensore PIR per Medusa LED 9975131-33
PIR-sensor voor Medusa LED 9975131-33
FI
TEKNISET TIEDOT
Tuleva/lähtevä jännite: DC 24V
Kuormitus: Max. 36W
Käyttölämpö: -20°C - +40°C
Valvonta-alue: 120°, 2 m
Poiskytkentäviive: 30 sek.
HÄMÄRÄKYTKINASETUS
Kun ympäristön valomäärä ylittää 10 luxia, valo
ei syty.
MITTAPIIRROS
Katso, kuvio 1.
ASENNUS
Käytä kiinnitykseen 2 kpl ruuveja, katso, kuvio 2.
Asennuskohta, katso, kuvio 3.
Huomioi: kuvassa näytetään miten valvonta-alue
riippuu asennuspaikasta. Valitse itsellesi sopivin
asennuskohta
KYTKENTÄKAAVIO
Katso, kuvio 4.
A. PIR-tunnistin
B. LED-kisko
C. Seuraava LED-kisko
D. Liitäntälaite
PIR tunnistin vrt Medusa LED 9975131-33
Other Malmbergs Accessories manuals

Malmbergs 99 190 21 Quick guide

Malmbergs

Malmbergs 99 190 21 Quick guide

Malmbergs E-2026 User manual

Malmbergs

Malmbergs E-2026 User manual

Malmbergs Primo ST-1005B User manual

Malmbergs

Malmbergs Primo ST-1005B User manual

Malmbergs TP001-ZA User manual

Malmbergs

Malmbergs TP001-ZA User manual

Malmbergs 70000(K) User manual

Malmbergs

Malmbergs 70000(K) User manual

Malmbergs HC407VDS User manual

Malmbergs

Malmbergs HC407VDS User manual

Malmbergs Sense User manual

Malmbergs

Malmbergs Sense User manual

Malmbergs io-DS-BLE User manual

Malmbergs

Malmbergs io-DS-BLE User manual

Malmbergs 99 190 25 Quick guide

Malmbergs

Malmbergs 99 190 25 Quick guide

Malmbergs ST-1002G User manual

Malmbergs

Malmbergs ST-1002G User manual

Malmbergs HC009S User manual

Malmbergs

Malmbergs HC009S User manual

Malmbergs B620 User manual

Malmbergs

Malmbergs B620 User manual

Malmbergs Dual sense DALI 99 190 23 Quick guide

Malmbergs

Malmbergs Dual sense DALI 99 190 23 Quick guide

Malmbergs 99 190 22 Quick guide

Malmbergs

Malmbergs 99 190 22 Quick guide

Malmbergs TM001-ZA User manual

Malmbergs

Malmbergs TM001-ZA User manual

Malmbergs HC0025 User manual

Malmbergs

Malmbergs HC0025 User manual

Malmbergs PAM21 User manual

Malmbergs

Malmbergs PAM21 User manual

Malmbergs io-PIR-BLE User manual

Malmbergs

Malmbergs io-PIR-BLE User manual

Malmbergs B612Q User manual

Malmbergs

Malmbergs B612Q User manual

Malmbergs 9974125 User manual

Malmbergs

Malmbergs 9974125 User manual

Malmbergs Vinga User manual

Malmbergs

Malmbergs Vinga User manual

Malmbergs Neso LED User manual

Malmbergs

Malmbergs Neso LED User manual

Malmbergs io-TH-BLE User manual

Malmbergs

Malmbergs io-TH-BLE User manual

Malmbergs 99 190 17-18 User manual

Malmbergs

Malmbergs 99 190 17-18 User manual

Popular Accessories manuals by other brands

Dini Argeo 3590EKR Series user manual

Dini Argeo

Dini Argeo 3590EKR Series user manual

Beurer IL 35 Instructions for use

Beurer

Beurer IL 35 Instructions for use

Jula 951-010 Assembly instructions

Jula

Jula 951-010 Assembly instructions

NeuLog NUL-216 Guide

NeuLog

NeuLog NUL-216 Guide

Byron SX-15 manual

Byron

Byron SX-15 manual

INNOBIZ Kemila manual

INNOBIZ

INNOBIZ Kemila manual

SICK VISIC100SF operating instructions

SICK

SICK VISIC100SF operating instructions

Razor Jetts Mini instruction manual

Razor

Razor Jetts Mini instruction manual

Venture Measurement Genuine Bindicator VRF-2000 Series quick start guide

Venture Measurement

Venture Measurement Genuine Bindicator VRF-2000 Series quick start guide

Acer SP100 user guide

Acer

Acer SP100 user guide

Thermo Neslab CryoCool Series Instruction and operation manual

Thermo Neslab

Thermo Neslab CryoCool Series Instruction and operation manual

3B SCIENTIFIC 1000568 instruction sheet

3B SCIENTIFIC

3B SCIENTIFIC 1000568 instruction sheet

Lifegoods LG930 user manual

Lifegoods

Lifegoods LG930 user manual

Young Living Duet operating manual

Young Living

Young Living Duet operating manual

Schwaiger ZHS19 manual

Schwaiger

Schwaiger ZHS19 manual

Tait TB7100 installation guide

Tait

Tait TB7100 installation guide

brennenstuhl GS 2 DE User handbook

brennenstuhl

brennenstuhl GS 2 DE User handbook

boAt ENERGYSHROOM PB09 manual

boAt

boAt ENERGYSHROOM PB09 manual

manuals.online logo
manuals.online logoBrands
  • About & Mission
  • Contact us
  • Privacy Policy
  • Terms and Conditions

Copyright 2025 Manuals.Online. All Rights Reserved.