manuals.online logo
Brands
  1. Home
  2. •
  3. Brands
  4. •
  5. marklin
  6. •
  7. Toy
  8. •
  9. marklin hilfswagen User manual

marklin hilfswagen User manual

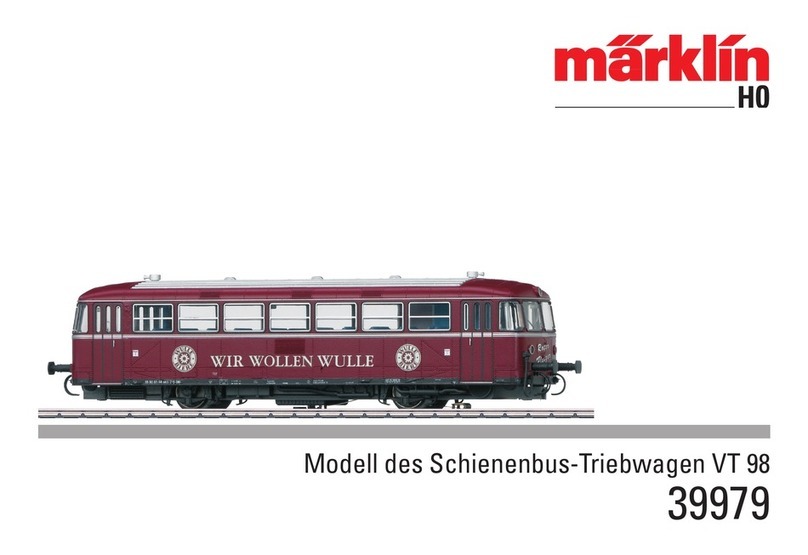
Set mit Modellen von
Hilfswagen
2
Informationen zum Vorbild:
Der 150 t-Kranwagen „Goliath“ wird bei der Deutschen
Bundesbahn neben dem Gegengewichts- und dem
Auslegerschutzwagen auch durch einen weiteren Hilfszug
ergänzt. Dabei handelt es sich um einen Werkstattwagen,
einem Wohn- / Schlafwagen sowie um einen Seil- /
Gerätewagen. Von dem Werkstattwagen gibt es einen
direkten Zugang zu dem Wohn- / Schlafwagen. Der
Gerätewagen besitzt keine Übergänge. Diese geschlos-
senen Wagen sind durch Umbau aus früheren Post- oder
Personenwagen entstanden, deren Innenaufteilung und
damit auch die Position von Fenstern, Jalousien und
Türen den jeweiligen Aufgaben angepasst wurde.
Information about the Prototype:
In addition to the counterweight car and boom tender car,
the German Federal Railroad supplements the 150 metric
ton “Goliath” crane with an additional wrecking train. The
latter comprises a work car, a crew quarters car and a
cable / equipment car. There is direct access from the
work car to the crew quarters car. The equipment car
does not have a passageway at the ends to the other
cars. These cars came about through the conversion
of former mail or passenger cars, whose interior space
and the locations of windows, jalousie doors and regular
doors were adapted to the individual uses for each car.
Informations concernant la locomotive réele:
La grue ferroviaire de 150 tonnes «Goliath» de la Deutsche
Bundesbahn est accompagnée non seulement par un
wagon porte-flèche et un wagon portecontrepoids mais
aussi par un train de secours. Il s‘agit en l‘occurrence d‘un
wagon-atelier, d‘une voiture de cantonnement et d‘un
wagon contenant de l‘appareillage et des câbles. Le
wagon-atelier et la voiture de cantonnement sont
reliés par une passerelle d‘intercirculation. Le wagon à
appareillage ne possède quant à lui aucun accès direct.
Ces wagons fermés proviennent de la transformation
d‘anciennes voitures postales ou de voitures voyageurs
dont les compartiments, et donc les fenêtres, les volets
roulants et les portières, ont été adaptés aux nouvelles
exigences.
Informatie van het voorbeeld:
In het groot bedrijf bij de Deutschen Bundesbahn wordt
de 150t kraan „Goliath”, naast de gebruikelijke tegen-
gewichtenwagen en de gieksteunwagen, aangevuld met
een hulptrein. Deze bestaat uit een werkplaatswagen, een
woon/slaapwagen alsmede een kabel-/apparatenwagen.
Vanuit de werkplaatswagen is er een directe doorgang
naar de woon/slaapwagen. De apparatenwagen heeft
geen doorgang. Deze gesloten wagens zijn ontstaan door
het ombouwen van vroegere post- of personenrijtuigen,
die ontdaan van de inrichting en daarmee ook gewijzigde
posities van ramen, jaloezieën, en deuren aan de huidige-
toepassingen werden aangepast.
3
Funktion
• Wagen-Set bestehend aus 3 vierachsigen Wagenmodel-
len mit digital schaltbaren Funktionen.
• Funktionsdecoder im Werkstattwagen. Für die Nutzung
aller Schaltfunktionen ist eine feste Reihenfolge der drei
Wagen notwendig:
Wohn-/ Schlafwagen – Wohn-/Gerätewagen –
Seil-/Gerätewagen.
• Mögliche Betriebssysteme:
Märklin Digital, Märklin Systems.
• Erkennung der Betriebsart: automatisch.
• Einstellbare Adresse (Control Unit): 01 – 80.
Adresse ab Werk: 78.
• Mfx-Technologie für Mobile Station / Central
Station.
• Einstellen der Parameter elektronisch über Control Unit,
Mobile Station oder Central Station.
• Die Arbeitsgeräusche nur bei einem stehenden Wagen-
verband einschalten.
Die bei normalem Betrieb anfallenden Wartungsarbeiten
sind nachfolgend beschrieben. Für Reparaturen oder
Ersatzteile wenden Sie sich bitte an Ihren Märklin-Fach-
händler.
Jegliche Garantie-, Gewährleistungs- und Schadensersatzan-
sprüche sind ausgeschlossen, wenn in Märklin-Produkten nicht
von Märklin freigegebene Fremdteile eingebaut werden und /
oder Märklin-Produkte umgebaut werden und die eingebauten
Fremdteile bzw. der Umbau für sodann aufgetretene Mängel und
/ oder Schäden ursächlich war. Die Darlegungs- und Beweislast
dafür, dass der Einbau von Fremdteilen oder der Umbau in bzw.
von Märklin-Produkten für aufgetretene Mängel und / oder Schäden
nicht ursächlich war, trägt die für den Ein- und / oder Umbau ver-
antwortliche Person und / oder Firma bzw. der Kunde.
Function
• This car set consists of 3 different car models with
digitally controlled functions. Function decoder in the
work car.
• The 3 cars must be coupled together in a particular,
fixed order in order for all of the controllable functions
to work:
Crew quarters car – Crew quarters-/ equipment car
– cable / equipment car.
• Possible operating systems:
Märklin Digital, Märklin Systems.
•
Recognition of the mode of operation: automatic.
•
Addresses that can be set (Control Unit): 01 – 80.
Address set at the factory: 78.
• Mfx technology for the Mobile Station / Central Station.
• Setting the Parameters electronically with the Control
Unit, Mobile Station or Central Station.
• The sound effects for the different types of work should
only be turned on the cars are stopped.
The maintenance work necessary with normal operation
of this locomotive is described below. Please see your
authorized Märklin dealer for repairs or spare parts.
4
• Réglage des paramètres électroniquement à l’aide de
la Control Unit, de la Mobile Station ou de la Central
Station.
• Il est conseillé d‘activer les bruitages uniquement lors
de l‘arrêt du convoi.
Les travaux d‘entretien occasionnels à effectueren
exploitation normale sont décrits plus loin. Pour toute
réparation ou remplacement de pièces, adressez-vous à
votre détaillant-spécialiste Märklin.
Tout recours à une garantie commerciale ou contractuelle ou à
une demande de dommages-intérêt est exclu si des pièces non
autorisées par Märklin sont intégrées dans les produits Märklin et /
ou si les produits Märklin sont transformés et que les pièces d’autres
fabricants montées ou la transformation constituent la cause des
défauts et / ou dommages apparus. C’est à la personne et / ou la
société responsable du montage / de la transformation ou au client
qu’incombe la charge de prouver que le montage des pièces d’autres
fabricants sur des produits Märklin ou la transformation des produits
Märklin n’est pas à l’origine des défauts et ou dommages apparus.
Werking
• De wagenset bestaat uit 3 vier-assige wagenmodellen-
met digitaal schakelbare functies.
• Functiedecoder in de werkplaatswagen. Voor het ge-
bruik van alle schakelfuncties is een vast gekoppelde rij
van 3 wagens noodzakelijk:
woon/slaapwagen – woon/apparatenwagen –
kabel-/ apparatenwagen.
No warranty or damage claims shall be accepted in those cases
where parts neither manufactured nor approved by Märklin have
been installed in Märklin products or where Märklin products have
been converted in such a way that the non-Märklin parts or the
conversion were causal to the defects and / or damage arising. The
burden of presenting evidence and the burden of proof thereof,
that the installation of non-Märklin parts or the conversion in or of
Märklin products was not causal to the defects and / or damage
arising, is borne by the person and / or company responsible for
the installation and / or conversion, or by the customer.
Fonction
• Coffret de wagons se composant de 3 modèles réduits
de wagons à 4 essieux avec fonctions digitales com-
mutables. Le décodeur de fonctions se trouve dans le
wagon-atelier.
• Pour pouvoir utiliser l‘ensemble des fonctions de com-
mutation, il est nécessaire de disposer des 3 wagons
suivants:
voiture de cantonnement – wagon de cantonnement/
appareillage – wagon à appareillage.
• Systèmes d’exploitation possibles:
Märklin Digital, Märklin Systems.
• Détection du mode d’exploitation: automatique.
• Adresses réglables (Control Unit): 01 – 80. Adresse
encodée en usine: 78.
• Technologie mfx pour Mobile Station / Central Station.
5
• Mogelijke bedrijfssystemen:
Märklin Digital, Märklin Systems.
•
Herkenning van het bedrijfssysteem: automatisch.
• Instelbaar adres (Control Unit): 01 – 80.
Vanaf de fabriek: 78.
• Mfx-technologie voor het Mobile Station /
Central Station.
• Elektronische instelling van de parameters via de
Control Unit, Mobile Station of Central Station.
• De geluiden van de werkzaamheden alleen inschakelen
als de trein stilstaat.
De in het normale bedrijf voorkomende onderhoudswerk-
zaamheden zijn verderop beschreven. Voor reparatie of
onderdelen kunt u zich tot uw Märklin winkelier wenden
Elke aanspraak op garantie en schadevergoeding is uitgesloten,
wanneer in Märklin-producten niet door Märklin vrijgegeven vreem-
de onderdelen ingebouwd en / of Märklin-producten omgebouwd
worden en de ingebouwde vreemde onderdelen resp. de ombouw
oorzaak van nadien opgetreden defecten en / of schade was. De
aantoonplicht en de bewijslijst daaromtrent, dat de inbouw van
vreemde onderdelen in Märklin-producten of de ombouw van
Märklin-producten niet de oorzaak van opgetreden defecten en /
of schade is geweest, berust bij de voor de inbouw en/of ombouw
verantwoordelijke persoon en / of firma danwel bij de klant.
6
Wagenverband kuppeln
• Position des Schleifers und der Faltenbälge beachten!
• Der Seil-/Gerätewagen kann auch gedreht werden.
• Ohne stromführenden Kurzkupplungen:
Keine Beleuchtungsfunktion in den äußeren Wagen.
• An den Wagenverbandsenden dürfen nie stromführende
Kurzkupplungen montiert werden.
Coupling the Cars Together
• Please note the position of the pickup shoe and the
diaphragms!
• The cable/ equipment car can also be turned
180 degrees in the train.
• Without current-conducting couplers:
no lights in the outer cars.
• Current-conducting couplers must never be installed on
the ends of the car consist.
7
Accouplement des wagons
• Attention au positionnement du frotteur et des soufflets
d‘intercirculation!
• Le wagon à appareillage peut être retourné.
• Sans attelages conducteurs de courant, aucune
fonction d‘éclairage ne peut être commandée dans les
autres wagons.
• Il ne faut jamais installer un attelage conducteur de
courant aux extrémités du convoi.
Wagencombinatie koppelen
• Let op de posities van de sleper en de harmonicaover-
gangen.
• De kabel-/apparatenwagen kan ook omgedraaid
worden.
• Zonder stroomvoerende koppelingen:
geen verlichtingsfunctie in de buitenste wagens.
• Aan het einde van de trein mogen nooit stroomvoerende
koppelingen gemonteerd worden.
8
Einsetzen der stromführenden Kupplungen.
Installing current-conducting couplers.
Mise en place des accouplements conducteurs.
Inzetten van de spanninggeleidende koppelingen.
Kupplungshilfe auf ein gerades Gleis stellen.
Place coupler jig on a staight section of track.
Placer l’aide à l’accouplement sur un rail rectiligne.
Koppelingshulpstuk op een stuk rechte rail zetten.
9
Spezialkupplung in Kupplungshilfe einschieben.
Push the special coupler into the coupler jig.
Glisser l’accouplement spécial dans l’aide à l’accouplement.
Speciale koppeling in het hulpstuk schuiven..
10
Wagen aufschieben, die Kupplung rastet ein.
Push the car forward and the coupler will snap into place.
Glisser le wagon en place, l’accouplement pred l’encoche.
Rijtuig opduwen, de koppeling klikt in.
11
Kupplung tauschen
Changing couplers
Remplacer les attelages
Koppeling verwisselen
701 630
NEM 362
12
Schaltbare Funktionen
Controllable functions 6647 6021
STOP mobile station
systems
60652 60212
Beleuchtung Seil-/Gerätewagen ein/aus
Turns the lighting for the cable/equipment
car on/off
Dauernd ein 1)
Always on 1) f1 Taste bei Symbol
Button by symbol
Taste/Symbol f1
Button/symbol f1
Die unter f4 gewählte Geräusch- und Effekt-
Kombination ein/aus
Turns the sound and effect combination
selected under f4 on/off
- f2 Taste bei Symbol
Button by symbol
Taste/Symbol f2
Button/symbol f2
Beleuchtung Wohn-/Schlafwagen ein/aus
Turns the lighting for the crew quarters car
on/off
Dauernd ein 1)
Always on 1) f3 Taste bei Symbol
Button by symbol
Taste/Symbol f3
Button/symbol f3
Auswahl der Geräusch- und Effekt-
Kombination. Voraussetzung: f2 = aus.
Kein Geräusch mehr hörbar.
Selects the sound and effect combination.
Prerequisite: f2 = off. No sounds can be heard
any more.
- f4 Taste bei Symbol
Button by symbol
Taste/Symbol f4
Button/symbol f4
1) => Intensität abhängig von der Höhe der Versorgungsspannung.
1) => Intensity dependent on the level of supply voltage.
13
Fonctions commutables
Schakelbare functies 6647 6021
STOP mobile station
systems
60652 60212
Commutation éclairage du wagon à
appareillage
Verlichting van kabel-apparatenwagen in/uit
Activé en
permanence 1)
Continu aan1) f1 Touche à côté symbole
Toets bij het symbool
Touche/symbole f1
Toets/symbool f1
Commutation de la combinaison bruitage/
effet optique sélectionnée avec la touche f4
De met f4 gekozen geluids- en effectencom-
binatie in/uit
- f2 Touche à côté symbole
Toets bij het symbool
Touche/symbole f2
Toets/symbool f2
Commutation éclairage voiture de
cantonnement
Verlichting slaap-/woonwagen in/uit
Activé en
permanence 1)
Continu aan1) f3 Touche à côté symbole
Toets bij het symbool
Touche/symbole f3
Toets/symbool f3
Sélection de la combinaison bruitage/effet
optique. Condition: f2 = désactivé. Aucun
bruitage n‘est plus audible.
Kiezen van de geluids- en effectencombinatie.
Voorwaarde: f2 = uit. Geen geluid meer te
horen.
- f4 Touche à côté symbole
Toets bij het symbool
Touche/symbole f4
Toets/symbool f4
1) => L’intensité est fonction de la tension d’alimentation.
1) => Intensiteit afhankelijk van de hoogte van de voedingsspanning.
14
Parameter einstellen mit der Control Unit
1. Voraussetzung: Aufbau wie Grafik S. 16.
2. „Stop“- und „Go“-Taste gleichzeitig drücken,
bis „99“ in der Anzeige aufblinkt.
3. „Stop“-Taste drücken.
4. Adresse „80“ eingeben.
5.
Umschaltbefehl am Fahrregler dauernd schalten.
Dabei die „Go“-Taste drücken.
6. Registernummer für den zu ändernden Para-
meter eingeben (=> Liste auf Seite 16).
8. Fahrtrichtungswechsel betätigen.
9. Neuen Wert eingeben (=> Liste auf Seite 16).
10. Fahrtrichtungswechsel betätigen.
11. Vorgang beenden mit Drücken der „Stop“-
Taste. Anschließend Drücken der „Go“-Taste.
Setting parameters with the Control Unit
1. Requirement: Setup as in diagram on page 16.
2. Press the “Stop” and “Go” at the same time
until “99” blinks in the display.
3. Press the “Stop” button.
4. Enter the address „80“.
5. Hold the speed control knob in the reverse
direction position constantly. Press the “Go”
button while you do this.
6. Enter the register number for the parameter to
be changed (=> List on page 16).
8. Activate the direction reversal.
9. Enter new value (=> List on page 16).
10. Activate the direction reversal.
11. End the procedure by pressing the “Stop”
button. Now press the “Go” button.
15
Réglage des paramètres avec la Control Unit
1. Condition: Montage comme sur illustration en
page 16.
2. Pressez simultanément les touches „Stop“ et
„Go“ jusqu’à ce que le nombre „99“ clignote sur
l’écran.
3. Pressez la touche „Stop“.
4. Introduisez l’adresse „80“.
5. Tout en procédant à l’inversion sur le régulateur,
pressez la touche „Go“.
7. Introduisez le numéro de registre pour le para-
mètre à modifier (=> liste en page 16).
8. Exécutez l’inversion du sens de marche.
9. Introduisez la nouvelle valeur (=> liste en page 16).
10. Exécutez l’inversion du sens de marche.
11. Terminez le processus en pressant la touche
„Stop“. Ensuite, pressez la touche „Go“.
Parameters instellen met de Control Unit
1. Voorwaarde:
opbouw zoals tekening op pagina 16.
2. ”Stop”- en ”Go”-toets gelijktijdig indrukken tot
”99” in het display oplicht.
3. ”Stop”-toets indrukken.
4. Het adres „80“ invoeren.
5. Omschakelcommando met de rijregelaar con-
tinu bedienen. Daarbij de ”Go”-toets indrukken.
7. Het registernummer van de te wijzigen parame-
ter invoeren (=> lijst op pag. 16).
8. Rijrichtingomschakeling bedienen.
9. Nieuwe waarde invoeren (=> lijst op pag. 16).
10. Rijrichtingomschakeling bedienen.
11. Programmering beëindigen door het indrukken
van de ”Stop”-toets. Aansluitend de ”Go”-toets
indrukken.
16
Parameter mit Control Unit ändern.
Changing parameters with the Control Unit.
Modification des paramètres avec la Control Unit.
Parameter met de Control Unit.
Parameter • Parameter • Paramètre • Parameter Wert • Value • Valeur •
Waarde
Register • Register •
Registre • Register
Adresse • Address • Adresse • Adres 01 - 8001
Rückstellen auf Serienwerte • Reset to series value • Remettre aux
valeurs de série • Terugzetten naar serie-instellingen
0808
Lautstärke • Volume • Volume haut-parleur • Volume 01 - 6363
17
Betrieb mit Mobile Station / Central Station
• Wagen aufgleisen. Der Wagen meldet sich selbsttätig in
der Lokliste an.
• Wagen abmelden:
1. Wagen vom Gleis entfernen.
2. Lokeintrag löschen.
Eine Adressänderung ist nicht notwendig.
Parameter mit der Mobile Station verändern
1. Wagen aus der Lokliste auswählen.
2. Zum Untermenü „LOKÄNDERN“ wechseln.
3. Zum Untermenü „VOL“ oder „RESET“ wechseln.
4. Neuen Wert eingeben und übernehmen.
Beachten Sie die Hinweise in der Anleitung zur Mobile
Station / Central Station.
Operation with the Mobile Station / Central Station
• Set the car on the track. The car automatically registers itself
in the locomotive list.
• Taking the car out of the locomotive list:
1. Remove the cars from the track.
2. Delete the locomotive entry.
It is not necessary to change the address.
Changing Locomotive Parameters with the Mobile
Station
1. Select the car from the locomotive list.
2. Change to the submenu “EDIT LOC”.
3. Change to the submenu “VOL” or “RESET”.
4. Enter the new value and accept it into the system.
Please note the information in the instructions for the Mobile
Station / Central Station.
Exploitation avec Mobile Station / Central Station
• Enrailler la voiture. La voiture signale automatiquement
sa présence dans la liste des locos.
• Appeler voiture:
1. Enlever voitures de la voie.
2. Effacer entrée loco.
Une modification de l’adresse n’est pas nécessaire.
Modification des paramètres avec la Mobile Station
1. Sélectionnez la voiture dans la liste.
2. Allez au sous-menu „MODIF LOC“.
3. Allez au sous-menu „VOL“ ou „RESET“.
4. Entrez la nouvelle valeur et acceptez.
Respectez les remarques mentionnées dans l’instruction
accompagnant la Mobile Station / Central Station.
Bedrijf met Mobile Station / Central Station
• Wagen op de rails plaatsen. De wagen meldt zichzelf
aan in de loclijst.
• Wagen afmelden:
1. Wagen van de rails nemen
2. loc invoer wissen.
Het wijzigen van het adres is niet nodig.
Parameter wijzigen met het Mobile Station
1. Wagen uit de loclijst kiezen.
2. Ga naar het nevenmenu ”WYZIG LOC”.
3. Ga naar het nevenmenu ”VOL” of „RESET”.
4. Nieuwe waarde invoeren en overnemen.
Lees ook de opmerkingen in de gebruiksaanwijzing van
het Mobile Station / Central Station.
18
Glühlampen auswechseln
Changing light bulbs
Changer les ampoules
Gloeilamp vervangen 610 080
19
Glühlampen auswechseln
Changing light bulbs
Changer les ampoules
Gloeilamp vervangen 610 080
Gebr. Märklin & Cie. GmbH
Postfach 8 60
D-73008 Göppingen
www.maerklin.com
Änderungen vorbehalten
© by Gebr. Märklin & Cie. GmbH
This device complies with Part 15 of the FCC Rules.
Operation is subject to the following two conditions:
(1) This device may not cause harmful interference, and
(2) this device must accept any interference received, including
interference that may cause undesired operation.
611 995 10 05 ma ef

Other marklin Toy manuals

marklin 7329 User manual

marklin

marklin 7329 User manual

marklin 20181 User manual

marklin

marklin 20181 User manual

marklin BAUART KOF II User manual

marklin

marklin BAUART KOF II User manual

marklin AE 6/6 Series User manual

marklin

marklin AE 6/6 Series User manual

marklin 39681 User manual

marklin

marklin 39681 User manual

marklin 37258 User manual

marklin

marklin 37258 User manual

marklin 55751 User manual

marklin

marklin 55751 User manual

marklin 26578 User manual

marklin

marklin 26578 User manual

marklin 78070 User manual

marklin

marklin 78070 User manual

marklin 59079 User manual

marklin

marklin 59079 User manual

marklin 30523 User manual

marklin

marklin 30523 User manual

marklin 22660 User manual

marklin

marklin 22660 User manual

marklin 59960 User manual

marklin

marklin 59960 User manual

marklin 37309 User manual

marklin

marklin 37309 User manual

marklin Alco PA-1 User manual

marklin

marklin Alco PA-1 User manual

marklin 55605 User manual

marklin

marklin 55605 User manual

marklin 37039 User manual

marklin

marklin 37039 User manual

marklin BR 89.0 User manual

marklin

marklin BR 89.0 User manual

marklin 37003 User manual

marklin

marklin 37003 User manual

marklin 37124 User manual

marklin

marklin 37124 User manual

marklin 28515 User manual

marklin

marklin 28515 User manual

marklin 89.70-75 User manual

marklin

marklin 89.70-75 User manual

marklin 5965 User manual

marklin

marklin 5965 User manual

marklin rhein User manual

marklin

marklin rhein User manual

Popular Toy manuals by other brands

Mattel JURASSIC WORLD GYC94 instructions

Mattel

Mattel JURASSIC WORLD GYC94 instructions

Nienhuis Flip Flop instructions

Nienhuis

Nienhuis Flip Flop instructions

Mega Construx Destiny Fallen Walker DPJ13 manual

Mega Construx

Mega Construx Destiny Fallen Walker DPJ13 manual

LEGO City 7288 Building instructions

LEGO

LEGO City 7288 Building instructions

Bole Laser Craft Grange Farm Tipper Wagon Assembly instructions

Bole Laser Craft

Bole Laser Craft Grange Farm Tipper Wagon Assembly instructions

Beyblade Ray Striker instructions

Beyblade

Beyblade Ray Striker instructions

Mega Construx WONDER BUILDERS POKEMON Raichu manual

Mega Construx

Mega Construx WONDER BUILDERS POKEMON Raichu manual

Fisher-Price GeoTrax K3116 manual

Fisher-Price

Fisher-Price GeoTrax K3116 manual

Radica Games Barbie 74001 instruction manual

Radica Games

Radica Games Barbie 74001 instruction manual

Mega Bloks DRAGONS UNIVERSE PREDAVORS 95203 quick start guide

Mega Bloks

Mega Bloks DRAGONS UNIVERSE PREDAVORS 95203 quick start guide

Horizon Hobby NIGHT VisionAire instruction manual

Horizon Hobby

Horizon Hobby NIGHT VisionAire instruction manual

WowWee RoboMe instruction manual

WowWee

WowWee RoboMe instruction manual

THUNDER TIGER mini Titan E325 manual

THUNDER TIGER

THUNDER TIGER mini Titan E325 manual

MTHTrains 2-8-2 L-1 Mikado Steam Locomotive Operator's manual

MTHTrains

MTHTrains 2-8-2 L-1 Mikado Steam Locomotive Operator's manual

MTHTrains Premier GP60 Operator's manual

MTHTrains

MTHTrains Premier GP60 Operator's manual

FREE AIR I-16 quick start guide

FREE AIR

FREE AIR I-16 quick start guide

V-tech My Busy Workbench Project guide

V-tech

V-tech My Busy Workbench Project guide

B.toys Wee MD2 manual

B.toys

B.toys Wee MD2 manual

manuals.online logo
manuals.online logoBrands
  • About & Mission
  • Contact us
  • Privacy Policy
  • Terms and Conditions

Copyright 2025 Manuals.Online. All Rights Reserved.