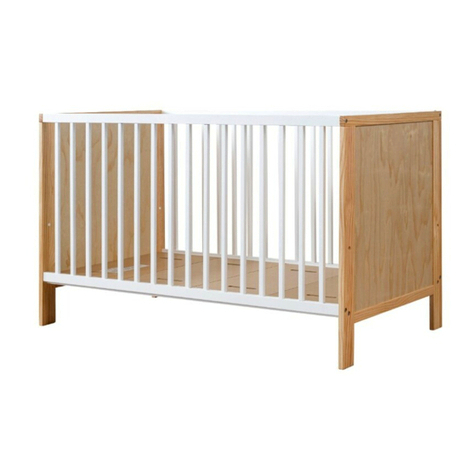
manuals.online logo
Brands
  1. Home
  2. •
  3. Brands
  4. •
  5. Mocka
  6. •
  7. Indoor Furnishing
  8. •
  9. Mocka Aspen User manual

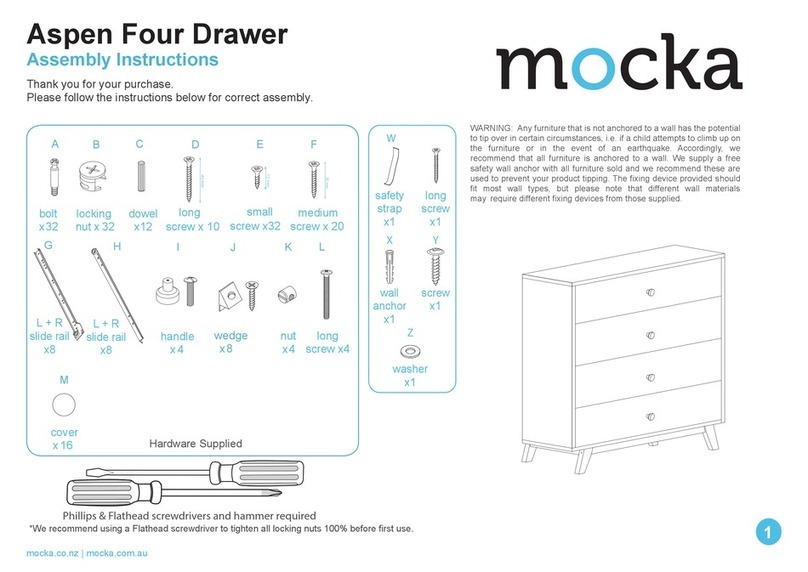
Mocka Aspen User manual

Phillips & Flathead screwdrivers and hammer required
X
Z
Y
W
safety
x1
strap
x1
screw
long
x1
screw
wall
x1
anchor
x1
washer
B
ACDEF
GH
12 mm
Hardware Supplied
bolt
x12
locking
nut x 12 x8
dowelsmall
I
screw x16
L + R
x4
slide rail
L + R
x4
slide rail
screw x 8
40 mm
long
handle
x 2
screw x 12
30 mm
medium
JK
cover
wedge
x 8
x 4
mocka.co.nz I mocka.com.au I PO BOX 18, Pinkenba QLD 4008
ASSEMBLY I N S TRUCTION S
Aspen
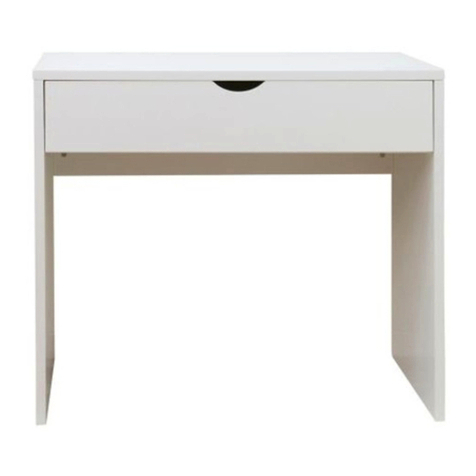
Bedside Table
Thank you for your purchase.
Please follow the instructions below for correct assembly
TO PREVENT FALLS, THE MATTRESS BASE OF THIS COT
SHOULD BE ADJUSTED TO THE LOWESTPOSITION BEFORE
THE CHILD CAN SIT UP.
WARNING: Any furniture that is not anchored to a wall has
the potential to tip over in certain circumstances, i.e. if a
child attempts to climb up on the furniture or in the event
of an earthquake. Accordingly, we recommend that all
furniture is anchored to a wall. We supply a free safety
wall anchor with all furniture sold and we recommend
these are used to prevent your product tipping. The fixing
device provided should fit most wall types, but please
note that dierent wall materials may require dierent
fixing devices from those supplied.
Aspen
mocka.co.nz I mocka.com.au I PO BOX 18, Pinkenba QLD 4008
ASSEMBLY I N S TRUCTION S
2
1
Bedside Table
2
Attach 2 x left slide rails (G) to panel [3] and secure with 4 x small screws (E).
Attach 2 x right slide rails (G) to panel [4] and secure with 4 x small screws (E).
Tighten with a screwdriver.
Attach 1 x wall strap (W) to panel [1] using 1x screw(Y).
Insert 4 x bolts (A) into panels [1]. Tighten with a screwdriver.
A
A
W
Y
1
A
A
A
E
EE
E
E
EEE
34
G
G
GG
G
G
Aspen
Bedside Table
mocka.co.nz I mocka.com.au I PO BOX 18, Pinkenba QLD 4008
ASSEMBLY I N S TRUCTION S
Attach panel [2] to panel [5] and secure with 8 x long screws (D).
Tighten with a screwdriver.
Insert 4 x dowels (C) into panels [3] and [4]. Attach panels [3] and [4] to panel
[2] and secure with 4 x long screws (D). Tighten with a screwdriver.
D
D
D
D
2
5
5
5
5
D
D
D
D
2
C
C
C
C
3
4
34
mocka.co.nz I mocka.com.au I PO BOX 18, Pinkenba QLD 4008
ASSEMBLY I N S TRUCTION S
Aspen
Bedside Table
56
Slide panel [6] between the grooves on panels [3] and [4] to
form the back of the unit as shown. Tighten with a screwdriver.
Insert 4 x dowels (C) into panels [3] and [4]. Attach panels [3] and [4] to panel
[1] and secure with 4 x locking nuts (B). Tighten with a screwdriver.
6
3
4
CC
CC
B
B
B
B
4
3
1
Aspen
Bedside Table
mocka.co.nz I mocka.com.au I PO BOX 18, Pinkenba QLD 4008
ASSEMBLY I N S TRUCTION S
Insert 8 x bolts (A) into panels [7]. Attach panels [9] and [10] to panels
[7] secure with 8 x locking nuts (B). Cover locking nuts (B) with 8 x covers (K).
Slide panels [8] between the grooves on panels [9] and [10] to form the base
of the drawer as shown. Tighten with a screwdriver.
Attach panels [11] to panels [9] and [10] Secure with 8 x medium screws (F).
Attach 4 x slide rails (H) to panels [9] and [10] and secure with 8 x small screws (E).
Insert 2 x handle (I) into panels [7].Tighten with a screwdriver.
78
B
BB
B
A
Drawers (x2)
AA
A
10
7
9
7
I
E
I
10
9
E
H
H
E
11
8
79
9
10
10
F
F
F
F
Drawers (x2)
I
II
K
Aspen
Bedside Table
mocka.co.nz I mocka.com.au I PO BOX 18, Pinkenba QLD 4008
ASSEMBLY I N S TRUCTION S
Attach 4 x wedges (J) to panel [6]. Tighten with a screwdriver
Once assembled lift furniture into place, do not drag. Use a drill to create
a small hole lining up with the top of the safety strap (W). Fasten to wall
using wall anchor (X), washer (Z) and screw. Ensure the unit is balaced
and steady before use. You’re done, enjoy!
910 X
Z
x1
wall
screw
wall
anchor
wall
screw
Washer
Strap
J
J
J
J
J
6

Other manuals for Aspen

10

Other Mocka Indoor Furnishing manuals

Mocka Bronte User manual

Mocka

Mocka Bronte User manual

Mocka Bronte Bedside Table User manual

Mocka

Mocka Bronte Bedside Table User manual

Mocka Armadale User manual

Mocka

Mocka Armadale User manual

Mocka Essentials 3 Cube User manual

Mocka

Mocka Essentials 3 Cube User manual

Mocka Aspen Classic Cot User manual

Mocka

Mocka Aspen Classic Cot User manual

Mocka Sonata User manual

Mocka

Mocka Sonata User manual

Mocka Replica Eames Lounge Chair & Ottoman User manual

Mocka

Mocka Replica Eames Lounge Chair & Ottoman User manual

Mocka Sadie User manual

Mocka

Mocka Sadie User manual

Mocka Hudson User manual

Mocka

Mocka Hudson User manual

Mocka Nava Buffet User manual

Mocka

Mocka Nava Buffet User manual
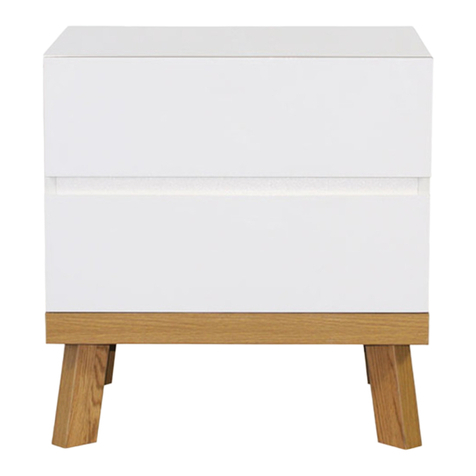
Mocka Mod User manual

Mocka

Mocka Mod User manual

Mocka Ida User manual

Mocka

Mocka Ida User manual

Mocka Blair User manual

Mocka

Mocka Blair User manual

Mocka Brooklyn Change Table User manual

Mocka

Mocka Brooklyn Change Table User manual

Mocka Maya Bookcase User manual

Mocka

Mocka Maya Bookcase User manual

Mocka Kai User manual

Mocka

Mocka Kai User manual

Mocka Blair User manual

Mocka

Mocka Blair User manual

Mocka Eclipse Buffet User manual

Mocka

Mocka Eclipse Buffet User manual

Mocka Livi Bench Seat User manual

Mocka

Mocka Livi Bench Seat User manual

Mocka Aspen User manual

Mocka

Mocka Aspen User manual

Mocka Edmond User manual

Mocka

Mocka Edmond User manual

Mocka Brooklyn Change Table and Drawer Set User manual

Mocka

Mocka Brooklyn Change Table and Drawer Set User manual

Mocka Jesse Tallboy User manual

Mocka

Mocka Jesse Tallboy User manual

Mocka Hudson User manual

Mocka

Mocka Hudson User manual

Popular Indoor Furnishing manuals by other brands

Rauch 47635.2280 Assembly instructions

Rauch

Rauch 47635.2280 Assembly instructions

Next PARIS 834809 Assembly instructions

Next

Next PARIS 834809 Assembly instructions

Reflexion Lift 2.0 owner's manual

Reflexion

Reflexion Lift 2.0 owner's manual

ecLife THKFBV004 installation instructions

ecLife

ecLife THKFBV004 installation instructions

Accora Configura Care instruction manual

Accora

Accora Configura Care instruction manual

Paroli Akron 8712685672 Assembly instructions

Paroli

Paroli Akron 8712685672 Assembly instructions

NewAge Products PRO 3.0 Series installation guide

NewAge Products

NewAge Products PRO 3.0 Series installation guide

Walker Edison W52C2DW Assembly instructions

Walker Edison

Walker Edison W52C2DW Assembly instructions

JSI Lok ZLKT2430-29TTT Assembly instruction

JSI

JSI Lok ZLKT2430-29TTT Assembly instruction

Furniture of America CM7683Q Assembly instructions

Furniture of America

Furniture of America CM7683Q Assembly instructions

Performance PL 156GG-A1 manual

Performance

Performance PL 156GG-A1 manual

Aprimatic ApriLUX Fitting instructions

Aprimatic

Aprimatic ApriLUX Fitting instructions

KI Pirouette Assembly instructions

KI

KI Pirouette Assembly instructions

VIBO Galaxy 041-VGSBO Series Assembling instructions

VIBO

VIBO Galaxy 041-VGSBO Series Assembling instructions

Ballard Designs Cossette MQ116 Assembly instructions

Ballard Designs

Ballard Designs Cossette MQ116 Assembly instructions

BuzziSpace BuzziPicNic Round installation manual

BuzziSpace

BuzziSpace BuzziPicNic Round installation manual

KMART 43036592 Assembly instructions

KMART

KMART 43036592 Assembly instructions

Baxton Studio LCF20182 Assembly instruction

Baxton Studio

Baxton Studio LCF20182 Assembly instruction

manuals.online logo
manuals.online logoBrands
  • About & Mission
  • Contact us
  • Privacy Policy
  • Terms and Conditions

Copyright 2025 Manuals.Online. All Rights Reserved.