manuals.online logo
Brands
  1. Home
  2. •
  3. Brands
  4. •
  5. Mocka
  6. •
  7. Indoor Furnishing
  8. •
  9. Mocka Nava Six Drawer User manual

Mocka Nava Six Drawer User manual

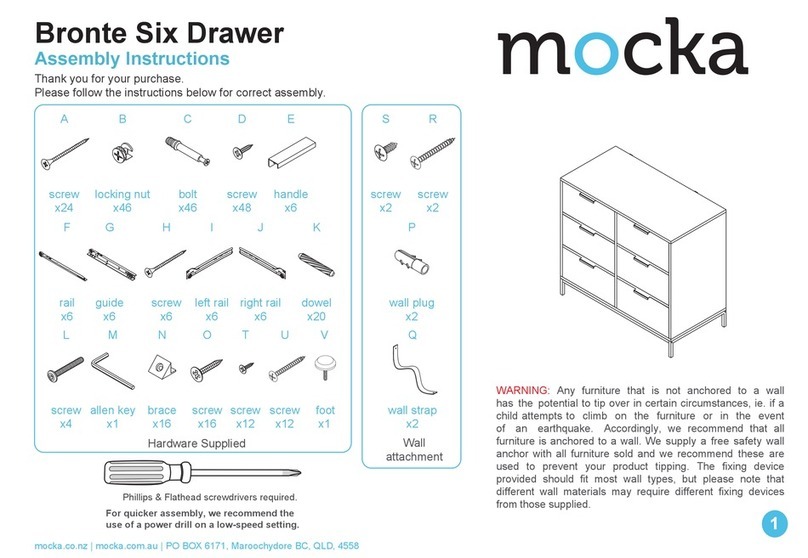
Nava Six Drawer
Assembly Instructions
Thank you for your purchase.
Please follow the instructions below for correct assembly.
mocka.co.nz | mocka.com.au | PO BOX 6171, Maroochydore, QLD, 4558
1
Wall Strap
x4
washer
Z
Y
wall
anchor
x2
X
safety
strap x2
WV
screw
x2
wall
screw
x2
WARNING: Any furniture that is not anchored to a wall has the potential to tip over in certain
circumstances, i.e. if a child attempts to climb up on the furniture or in the event of an earthquake.
Accordingly, we recommend that all furniture is anchored to a wall. We supply a free safety wall anchor
with all furniture sold and we recommend these are used to prevent your product tipping. The fixing device
provided should fit most wall types, but please note that different wall materials may require different fixing
devices from those supplied.
bolt
x16 x8
ABC D E F G HJ K L
M N
I
O
Hardware Supplied
P
dowel
x24
screw
x78
slide
rail x6
slide
rail x6
slide
rail x6
slide
rail x6
locking
nut x16
screw
x20 x8 x
bolt
x30
locking
nut x30
small small
Q
wedge
x4
screw
x6
bracket
cover
x6
bolt
4
washer
x52
R
screw seal
x6
ST
key x1
Allen plastic
glide x4
U
For quicker assembly, we recommend the
use of a power drill on a low-speed setting.
Phillips & Flathead screwdrivers
and hammer required
A1
long
dowel
x2
Nava Six Drawer
Assembly Instructions
mocka.co.nz | mocka.com.au | PO BOX 6171, Maroochydore, QLD, 4558
2
12
Attach 3x slide rails (F) and 3x slide rails (G) to panels [3] and [4] as shown
with 18x screws (E). Insert 6x bolts (C) into panels [3] and [4]. Tighten with
a screwdriver.
F
CL
E
Attach 3x slide rails (F) to the side of panel [5] and secure with 9x
small screws (E). Flip panel [5] over, attach 3x slide rails (G) and
secure with 9x small screws (E). Insert 4x bolts (C) into panel [5].
Tighten with a screwdriver.
G
CR CR
E
4
3
5
5
E
E
E
E
E
E
E
E
E
E
E
EE
E
E
G
G
G
G
G
G
F
F
F
F
F
F
E
E
E
E
E
E
E
E
E
E
E
E
EE
E
EE
E
E
E
E
C
C
C
C
C
C
G
E
F
CL
E
C
C
C
C
FLIP
Nava Six Drawer
Assembly Instructions
mocka.co.nz | mocka.com.au | PO BOX 6171, Maroochydore, QLD, 4558
3
3 4
Attach 6x brackets (M) to panels [2] and [6], secure with 12x
screws (E). Tighten with a screwdriver. Place 6x covers (N) over
the brackets (M) as shown.
Attach panels [6] to panel [4] with 2x dowels (A) and secure
with 2x locking nuts (D). Tighten with a screwdriver.
N
M
E
E
4
6
6
6
2
EE
M
x4
E
E
M
E
E
MA
D
A
D
D
Nava Six Drawer
Assembly Instructions
mocka.co.nz | mocka.com.au | PO BOX 6171, Maroochydore, QLD, 4558
4
65
Attach panel [5] to panels [6] with 2x long dowels (A1) and secure
with 2x locking nuts (D). Tighten with a screwdriver.
Attach panel [8] to panel [4] with 1x dowel (A) and secure with 1x
locking nut (D). Tighten with a screwdriver.
4
4
6
6
5
5
8
A1
D
D
AD
D
A1
Nava Six Drawer
Assembly Instructions
mocka.co.nz | mocka.com.au | PO BOX 6171, Maroochydore, QLD, 4558
5
7 8
Attach panel [3] to panels [6] and [8] with 3x dowels (A) and secure
with 3x locking nuts (D). Tighten with a screwdriver.
3
6
6
6
6
5
8
Attach panels [6] to panel [5] with 2x locking nuts (D).
Tighten with a screwdriver.
D
D
A
A
D
D
D
A
Nava Six Drawer
mocka.co.nz | mocka.com.au | PO BOX 6171, Maroochydore, QLD, 4558
6
910
Assembly Instructions
Attach panel [8] to panel [5] with 2x screws (B). Tighten with a screwdriver. Slide panel [9] down along the grooves between the panels [3] and [4].
4
4
3
3
BB
5
8
8
9
BB
8
Nava Six Drawer
Assembly Instructions
mocka.co.nz | mocka.com.au | PO BOX 6171, Maroochydore, QLD, 4558
7
1211
Attach panel [2] to the rest of the unit using 6x dowels (A) and secure
with 6x screws (B) as shown. Tighten with a screwdriver.
2
10
10
11
11
12
Attach panels [12] to panels [10] and [11] with 16x screws (R).
Tighten with a screwdriver.
B
B
A
B
B
B
A
B
A
A
RR
R
R
R
12
12
12
Nava Six Drawer
Assembly Instructions
mocka.co.nz | mocka.com.au | PO BOX 6171, Maroochydore, QLD, 4558
8
13 14
2 2
Attach panels [10] and [11] to panel [2] using 12x screws (B).
Tighten with a screwdriver.
Attach Legs [13] to panels [12] with 4x washers (L) and 4x bolts (Q).
Tighten with the Allen key (T). Attach 4x plastic glides (U) to the
legs using a hammer as shown.
B
B
B
B
B
B
B
B
B
B
B
B
L
Q
U
U
U
U
3
11
3
11
3
13
3
12
3
12
3
10
3
10
3
13
3
13
3
13
3
12
3
12
T
L
Q
Nava Six Drawer
Assembly Instructions
mocka.co.nz | mocka.com.au | PO BOX 6171, Maroochydore, QLD, 4558
9
15 16
Slide panel [9] down along the grooves between the panels [3] and [4]. Insert 6x bolts (C) into panel [1] and tighten with a screwdriver.
C
C
C
C
C
C
9
3
1
4
Nava Six Drawer
Assembly Instructions
mocka.co.nz | mocka.com.au | PO BOX 6171, Maroochydore, QLD, 4558
10
17 18 Drawers x6
Attach panel [1] to [3], [4] and [5] with 6x dowels (A) and secure
with 6x locking nuts (D). Tighten with a screwdriver.
A
A
A
D
D
D
D
A
OO
OO
O
E
S
P
P
PP
3
1
4
5
3
15
3
15
3
16
3
15
3
16
3
17
3
17
3
18
3
7
3
18
3
19
3
16
Insert 5x small bolts (O) to panel [15]/[16]. Attach 1x seal (S) using
1x screw (E) to panel [15]/[16]. Attach panels [17], [18] and [7] to panel
[15]/[16] with 1x dowel (A) and using 5x small locking nuts (P). Tighten
with a screwdriver. Slide panel [19] along the grooves between the
panels [17] and [18] to form the base of the drawer.
A
P
Nava Six Drawer
Assembly Instructions
mocka.co.nz | mocka.com.au | PO BOX 6171, Maroochydore, QLD, 4558
11
19 Drawers x6 20
Insert the assembled drawers into the corresponding compartments as
shown. Ensure the drawers slide easily along the rails. If the door is not
catching or sitting flush, twist the end of the cover (N) until it catches on
the seal (S).
RR
RR
H
E
E
E
EI
3
14
3
17
3
17
3
18
3
18
3
15
3
15
3
15
3
16
3
16
3
16
N
3
15 3
16
3
15
3
16
RR
Attach panels [14] to [17] and [18] as shown using 6x screws (R).
Tighten with a screwdriver. Attach slide rail (I) and slide rail (H) to the
underside of the side panels as shown. Secure with 4x screws (E) and
tighten with a screwdriver.
Nava Six Drawer
Assembly Instructions
mocka.co.nz | mocka.com.au | PO BOX 6171, Maroochydore, QLD, 4558
12
21 22
Attach 8x wedges (J) to the back of the unit as shown, and secure
with 8x screws (K). Now attach 2x safety straps (V) to the back edge
of panels [9] using 2x washers (Z) and 2x screws (W). Tighten with a
screwdriver.
Once assembled lift furniture into place, do not drag. Attach the other
end of the safety straps (V) to the wall using 2x washer (Z), 2x wall
anchors (X) and 2x screws (Y). Ensure unit is balanced and steady
before use. You’re done, enjoy!
J
K
K
J
V
W
Z
V
W
Z
screw
strap
washer
X
Y
Z
X
Y
Z
wall
anchor
screw
strap
washer
9
9
1
J
K

Other Mocka Indoor Furnishing manuals

Mocka Eclipse User manual

Mocka

Mocka Eclipse User manual

Mocka Tahoe User manual

Mocka

Mocka Tahoe User manual

Mocka Hudson Kids Stools User manual

Mocka

Mocka Hudson Kids Stools User manual

Mocka Asha Console Table User manual

Mocka

Mocka Asha Console Table User manual

Mocka Sadie Entertainment Unit - Large User manual

Mocka

Mocka Sadie Entertainment Unit - Large User manual

Mocka Elias Change Table User manual

Mocka

Mocka Elias Change Table User manual

Mocka Denham User manual

Mocka

Mocka Denham User manual

Mocka Eclipse Change Table User manual

Mocka

Mocka Eclipse Change Table User manual

Mocka Vibe Desk User manual

Mocka

Mocka Vibe Desk User manual

Mocka Jordi Drawers User manual

Mocka

Mocka Jordi Drawers User manual

Mocka Kids House Bookcase User manual

Mocka

Mocka Kids House Bookcase User manual

Mocka Rupert User manual

Mocka

Mocka Rupert User manual

Mocka Jack Four User manual

Mocka

Mocka Jack Four User manual

Mocka Olwyn User manual

Mocka

Mocka Olwyn User manual

Mocka Amalfi Cot User manual

Mocka

Mocka Amalfi Cot User manual

Mocka Zara User manual

Mocka

Mocka Zara User manual

Mocka Bronte Bedside Table User manual

Mocka

Mocka Bronte Bedside Table User manual

Mocka Tahoe User manual

Mocka

Mocka Tahoe User manual

Mocka Sadie Side User manual

Mocka

Mocka Sadie Side User manual

Mocka Dahlia User manual

Mocka

Mocka Dahlia User manual

Mocka Kris Chair User manual

Mocka

Mocka Kris Chair User manual

Mocka Porto User manual

Mocka

Mocka Porto User manual
Mocka Jimmy Change Table User manual

Mocka

Mocka Jimmy Change Table User manual

Mocka Oli Bookcase User manual

Mocka

Mocka Oli Bookcase User manual

Popular Indoor Furnishing manuals by other brands

Black Box ServShield RM470A manual

Black Box

Black Box ServShield RM470A manual

QU-AX HAI NO KI 76 16 HNK01JUNT Series manual

QU-AX

QU-AX HAI NO KI 76 16 HNK01JUNT Series manual

Home Styles 88 5804 22 Assembly instructions

Home Styles

Home Styles 88 5804 22 Assembly instructions

FLORABEST 53685 Instructions for use

FLORABEST

FLORABEST 53685 Instructions for use

Happy Beds Maine 3+2 Drawer Chest Assembly instructions

Happy Beds

Happy Beds Maine 3+2 Drawer Chest Assembly instructions

3-form SimpleSpec 200.37-Edge installation manual

3-form

3-form SimpleSpec 200.37-Edge installation manual

Simpli Home 3AXCCRL-11RNAB manual

Simpli Home

Simpli Home 3AXCCRL-11RNAB manual

Storkcraft 03663-10 AC Series quick start guide

Storkcraft

Storkcraft 03663-10 AC Series quick start guide

dreambaby LIBERTY instructions

dreambaby

dreambaby LIBERTY instructions

Twin Star Home 24BV477 manual

Twin Star Home

Twin Star Home 24BV477 manual

System Build 7360413COM manual

System Build

System Build 7360413COM manual

Fromm&Starck STAR-SEAT-31 user manual

Fromm&Starck

Fromm&Starck STAR-SEAT-31 user manual

Wesco PULLBOY VARIO 30er quick guide

Wesco

Wesco PULLBOY VARIO 30er quick guide

Room & Board Moda Changing Tray quick start guide

Room & Board

Room & Board Moda Changing Tray quick start guide

Bubble Wall 600FS02 Assembly instructions

Bubble Wall

Bubble Wall 600FS02 Assembly instructions

BABY DAN 5199 quick start guide

BABY DAN

BABY DAN 5199 quick start guide

Closet Maid ClosetMaid CO1 Assembly guide

Closet Maid

Closet Maid ClosetMaid CO1 Assembly guide

Herman Miller Eames Square Assembly manual

Herman Miller

Herman Miller Eames Square Assembly manual

manuals.online logo
manuals.online logoBrands
  • About & Mission
  • Contact us
  • Privacy Policy
  • Terms and Conditions

Copyright 2025 Manuals.Online. All Rights Reserved.