manuals.online logo
Brands
  1. Home
  2. •
  3. Brands
  4. •
  5. Monacor
  6. •
  7. Microphone
  8. •
  9. Monacor IMG STAGELINE ECM-950 User manual

Monacor IMG STAGELINE ECM-950 User manual

Frequenzgang
Frequency response
Richtcharakteristik
Pick-up pattern

NORMAL TELE
NORMAL TELE
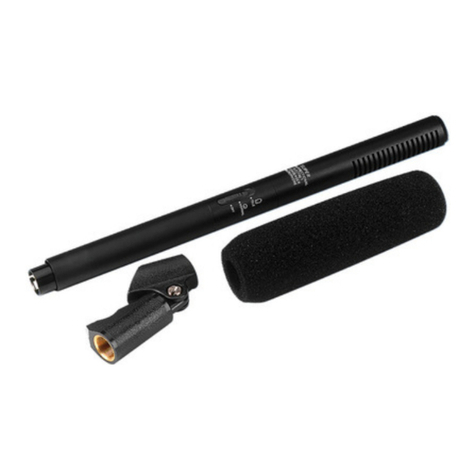
Elektret-Richtmikrofon
Bitte lesen Sie die Bedienungsanleitung vor dem
Betrieb gründlich durch und heben Sie sie für ein
späteres Nachlesen auf.
Einsatzmöglichkeiten
Das Elektret-Richtmikrofon ECM-950 mit umschalt-
barer Richtcharakteristik (Niere/Superniere) ist be-
sonders für Aufnahmen geeignet, bei denen wegen
störender Nebengeräusche eine starke Richtwir-
kung erforderlich ist, z. B. bei Außenaufnahmen für
Video- und Filmproduktionen. Zum Lieferumfang
gehören eine Kunststoffbox, ein Mikrofonhalter, ein
Windschutz sowie zwei Anschlusskabel.
Wichtige Hinweise für den Gebrauch
Das Mikrofon entspricht allen relevanten Richtlinien
der EU und ist deshalb mit gekennzeichnet.
GSchützen Sie das Mikrofon vor Feuchtigkeit und
Hitze (zulässiger Einsatztemperaturbereich 0 °C
bis 40 °C). Das Mikrofon ist nicht wetterfest. Ach-
ten Sie deshalb bei Außenaufnahmen auf Schutz
vor Regen und sonstigem Niederschlag.
GVerwenden Sie zum Reinigen nur ein trockenes,
weiches Tuch, niemals Chemikalien oder Wasser.
GWird das Mikrofon zweckentfremdet, falsch ange-
schlossen oder nicht fachgerecht repariert, kann
keine Haftung für daraus resultierende Sach-
oder Personenschäden und keine Garantie für
das Mikrofon übernommen werden.
Directional Electret Microphone
Please read these operating instructions carefully
prior to operating the unit and keep them for later
use.
Applications
The directional electret microphone ECM-950 with
selectable pick-up characteristic (cardioid/super-
cardioid) is ideally suited for recordings requiring a
high directivity due to interfering ambient noise, e. g.
in case of outdoor recordings for video and film pro-
ductions. The microphone is supplied with a plastic
case, a microphone holder, a windshield, and two
connection cables.
Important Notes
The microphone corresponds to all relevant direc-
tives of the EU and is therefore marked with .
GProtect the microphone against humidity and heat
(admissible ambient temperature range 0 °C to
40 °C). The microphone is not weatherproof; pro-
tect it against rain or other precipitation when
making outdoor recordings.
GFor cleaning only use a dry, soft cloth, by no
means chemicals or water.
GNo guarantee claims for the microphone or liabil-
ity for any resulting personal damage or material
damage will be accepted if the microphone is
used for other purposes than originally intended,
if it is not correctly connected, or not repaired in
an expert way.
Setting the Microphone into Operation
1) Unscrew the screw cap at the lower end of the
microphone. Insert a 1.5 V battery of size AA
according to the imprint in the battery compart-
ment.
If the microphone is not used for a longer
period (e. g. for more than a week), the battery
should be removed to prevent damage due to
battery leakage.
2) Via a 6.35 mm (1/4″) thread, the microphone
holder can e. g. be fastened directly to a cam-
corder. However, for screwing the microphone
onto a stand with 16 mm (5/8″) thread, unscrew
the thread adapter on the microphone holder.
Insert the microphone into the holder. Place the
windshield, if required.
3) Connect the microphone to the following unit via
its 3.5 mm jack; either use the 50 cm helix cable
(e. g. to a camcorder) or the 7.5 m cable (e. g. to
If the microphone is to be put out of opera-
tion definitively, take it to a local recycling
plant for a disposal which is not harmful to
the environment.
Exhausted batteries do not belong in the house-
hold rubbish, always take them to a special waste
disposal (e. g. collecting container at your retailer).
a tape recorder). Always connect the cable end
with the screw locking device to the jack on the
microphone and secure it. This will ensure that
the plug is not be pulled out during operation.
4) Use the sliding switch on the microphone to se-
lect the pick-up pattern:
NORMAL = cardioid, TELE = supercardioid
Thus, the microphone is switched on.
5) To switch off the microphone, set the sliding
switch to the lower position (OFF).
Specifications
Pick-up pattern: . . . . . . . . cardioid/supercardioid
Frequency range: . . . . . . . 50 – 16 000 Hz
Sensitivity, impedance
NORMAL (cardioid): . . . 3 mV/Pa at 1 kHz,
1kΩ
TELE (supercardioid): . . 22 mV/Pa at 1 kHz,
2.3 kΩ
Max. SPL: . . . . . . . . . . . . 115 dB
S/N ratio: . . . . . . . . . . . . . 60 dB
Power supply: . . . . . . . . . 1.5 V battery of size AA
(battery not supplied)
Ambient temperature: . . . 0 – 40 °C
Dimensions: . . . . . . . . . . . ∅22 mm × 280 mm
Weight: . . . . . . . . . . . . . . . 350 g
Microphone connection: . . 3.5 mm jack, mono
Subject to technical change.
GB
ECM-950
Best.-Nr. 23.3280
wwwwww..iimmggssttaaggeelliinnee..ccoomm
D A CH Mikrofon stecken und verschrauben, um ein
Herausziehen des Steckers während des
Betriebs zu verhindern.
4) Mit dem Schiebeschalter am Mikrofon die Richt-
charakteristik auswählen:
NORMAL = Niere, TELE = Superniere
Das Mikrofon ist damit eingeschaltet.
5) Zum Abschalten des Mikrofons den Schiebe-
schalter in die untere Position OFF stellen.
Technische Daten
Richtcharakteristik: . . . . . Niere/Superniere
Frequenzbereich: . . . . . . . 50 – 16 000 Hz
Empfindlichkeit, Impedanz
NORMAL (Niere): . . . . . . 3 mV/Pa bei 1 kHz,
1kΩ
TELE (Superniere): . . . . 22 mV/Pa bei 1 kHz,
2,3 kΩ
Max. Schalldruck: . . . . . . 115 dB
Signal-Rausch-Abstand: . 60 dB
Stromversorgung: . . . . . . 1,5-V-Batterie der
Größe Mignon (AA)
[nicht mitgeliefert]
Einsatztemperatur: . . . . . . 0 – 40 °C
Abmessungen: . . . . . . . . . ∅22 mm × 280 mm
Gewicht: . . . . . . . . . . . . . . 350 g
Mikrofonanschluss: . . . . . 3,5-mm-Klinke, mono
Änderungen vorbehalten.
Inbetriebnahme
1) Die Schraubhülse am unteren Mikrofonende ab-
schrauben. Eine 1,5-V-Mignonbatterie (AA) ge-
mäß dem Aufdruck im Batteriefach einsetzen.
Wird das Mikrofon länger nicht benutzt (z. B.
länger als eine Woche), sollte die Batterie heraus-
genommen werden, um Schäden durch ein even-
tuelles Auslaufen der Batterie zu vermeiden.
2) Der Mikrofonhalter lässt sich über ein Fotoge-
winde (6,35 mm/1/4″), z. B. direkt am Camcor-
der, befestigen. Soll das Mikrofon dagegen auf
ein Stativ mit 16-mm-Gewinde (5/8″) geschraubt
werden, den Fotogewinde-Adapter am Mikrofon-
halter abschrauben. Das Mikrofon in den Halter
stecken. Bei Bedarf den Windschutz überziehen.
3) Das Mikrofon über seine 3,5-mm-Klinkenbuchse
an das nachfolgende Gerät anschließen, entwe-
der mit dem 50-cm-Spiralkabel (z. B. an einen
Camcorder) oder mit dem 7,5-m-Kabel (z. B. an
ein Tonbandgerät). Dabei immer das Kabelende
mit der Schraubsicherung in die Buchse am
Soll das Mikrofon endgültig aus dem
Betrieb genommen werden, übergeben
Sie es zur umweltgerechten Entsorgung
einem örtlichen Recyclingbetrieb.
Werfen Sie verbrauchte Batterien nicht in den
Hausmüll, sondern geben Sie sie nur in den Son-
dermüll (z. B. Sammelbehälter bei Ihrem Einzel-
händler).
®
MONACOR INTERNATIONAL GmbH & Co. KG
•
Zum Falsch 36
•
28307 Bremen
•
Germany
Copyright
©
by MONACOR INTERNATIONAL. All rights reserved. A-0132.99.02.09.2011
Microphone électret
directionnel
Veuillez lire la présente notice avec attention avant
le fonctionnement et conservez-la pour pouvoir vous
y reporter ultérieurement.
Possibilités dʼutilisation
Le microphone électret directionnel ECM-950 avec
caractéristique commutable (cardioïde/supercar-
dioïde) est spécialement conçu pour des enregis-
trements nécessitant une directivité importante à
cause du bruit ambiant perturbateur, par exemple
en cas dʼenregistrements en extérieur pour des réa-
lisations de films ou de vidéos. Le micro est livré
avec un coffret de transport plastique, un support
micro, une bonnette de protection anti-vent et deux
cordons de liaison.
Conseils dʼutilisation importants
Le microphone répond à toutes les directives né-
cessaires de lʼUnion Européenne et porte donc le
symbole .
GProtégez le micro de lʼhumidité et de la chaleur
(plage de température de fonctionnement autori-
sée 0 – 40 °C). Le micro nʼest pas protégé contre
les intempéries. En cas dʼenregistrements en
extérieur, veillez à le protéger de la pluie ou au-
tres précipitations.
GPour le nettoyer, utilisez un chiffon sec et doux,
en aucun cas de produits chimiques ou dʼeau.
GNous déclinons toute responsabilité en cas de
dommages matériels ou corporels si le micro est
utilisé dans un but autre que celui pour lequel il a
été conçu, sʼil nʼest pas correctement branché ou
sʼil nʼest pas réparé par une personne habilitée ;
en outre, la garantie deviendrait caduque.
Fonctionnement
1) Dévissez à lʼextrémité inférieure du micro le ca-
pot à vis et insérez 1 batterie 1,5 V (type R6) selon
les inscriptions dans le compartiment batterie.
En cas de non-utilisation prolongée (p. ex.
supérieure à une semaine), retirez la batterie,
elle pourrait couler et endommager le micro.
2) Le support micro peut se fixer via un filetage
6,35 (1/4″), par exemple directement sur un
caméscope. En revanche si le micro doit être
vissé sur un pied avec un filetage 16 mm (5/8″),
dévissez lʼadaptateur fileté situé sur le support
micro. Placez le micro sur le support. Si besoin,
placez la bonnette de protection.
3) Connectez le micro via sa prise jack 3,5 à lʼappa-
reil suivant, soit avec le cordon spiralé de 50 cm
Lorsque le microphone est définitivement
retiré du service, vous devez le déposer
dans une usine de recyclage adaptée pour
contribuer à son élimination non polluante.
Ne jetez pas les batteries usagées dans la pou-
belle domestique ; apportez-les à votre revendeur
ou déposez-les dans un lieu de recyclage adapté.
(p. ex. à un caméscope) soit avec le cordon 7,5 m
(p. ex. à un magnétophone). Reliez toujours lʼex-
trémité du cordon avec le loquet de verrouillage
dans la prise sur le micro et vissez pour éviter que
la prise ne se défasse pendant le fonctionnement.
4) Avec lʼinterrupteur à glissière sur le micro, choi-
sissez la directivité :
NORMAL = cardioïde, TELE = supercardioïde
Le micro est ainsi allumé.
5) Pour éteindre le micro, mettez lʼinterrupteur sur la
position inférieure OFF.
Caractéristiques techniques
Type : . . . . . . . . . . . . . . . . cardioïde/
supercardioïde
Bande passante : . . . . . . . 50 – 16 000 Hz
Sensibilité, impédance
NORMAL (cardioïde) : . 3 mV/Pa à 1 kHz, 1 kΩ
TELE (supercardioïde) : 22 mV/Pa à 1 kHz,
2,3 kΩ
Pression sonore max. : . . 115 dB
Rapport signal sur bruit : . 60 dB
Alimentation : . . . . . . . . . . batterie 1,5 V de type
R6 (non livrée)
Temp. de fonctionnement: 0 – 40 °C
Dimensions : . . . . . . . . . . ∅22 mm × 280 mm
Poids : . . . . . . . . . . . . . . . 350 g
Branchement micro : . . . . jack 3,5 mono
Tout droit de modification réservé.
Microfono direzionale
allʼelettrete
Vi preghiamo di leggere attentamente le presenti
istruzioni prima della messa in funzione e di con-
servarle per un uso futuro.
Possibilità dʼimpiego
Il microfono allʼelettrete ECM-950 con possibilità
di selezionare la caratteristica direzionale (a car-
dioide/a super cardioide) è particolarmente indicato
per registrazioni che richiedono un forte effetto dire-
zionale a causa dei rumori di sottofondo, p. es. nelle
riprese allʼaperto per video e cinema. Sono in dota-
zione una custodia di plastica, un supporto per il
microfono, una spugna antivento nonché due cavi
di collegamento.
Avvertenze importanti per lʼuso
Il microfono è conforme a tutte le direttive rilevanti
dellʼUE e pertanto porta la sigla .
GProteggere il microfono dallʼumidità e dal calore
(temperatura dʼimpiego ammessa fra 0 e 40 °C).
Il microfono non è resistente alle intemperie. Nel
caso di riprese allʼesterno proteggerlo dalla piog-
gia e da altre precipitazioni.
GPer la pulizia usare solo un panno morbido,
asciutto; non impiegare in nessun caso prodotti
chimici o acqua.
GNel caso dʼuso improprio, di collegamenti sba-
gliati o di riparazione scorretta non si assume
nessuna responsabilità per eventuali danni con-
sequenziale a persone o a cose e cessa ogni
diritto di garanzia per il microfono.
Messa in funzione
1) Svitare la boccola dalla parte inferiore del mi-
crofono. Inserire una batteria 1,5 V mignon (AA)
come segnato sul vano batteria.
Nel caso di non utilizzo prolungato (p. es. più
di una settimana), conviene togliere la batteria
per evitare che perda danneggiando il microfono.
2) Per mezzo della filettatura 6,35 mm (1/4″), il sup-
porto del microfono può essere fissato p. es. di-
rettamente sul camcorder. Se il microfono deve
essere montato su uno stativo con filettatura
16 mm (5/8″) occorre svitare lʼadattatore dal sup-
porto. Inserire il microfono sul supporto. Se
necessario applicare la spugna antivento.
3) Collegare il microfono con lʼapparecchio a valle,
o con il cavo spiralato di 50 cm (p. es. nel caso di
un camcorder) o con il cavo di 7,5 m (p. es. nel
caso di un registratore audio). Inserire sempre il
terminale del cavo con la filettatura nella presa
Se si desidera eliminare il microfono defini-
tivamente, consegnarlo per lo smaltimento
ad unʼistituzione locale per il riciclaggio.
Non gettare le batterie scariche nei rifiuti di casa
bensì negli appositi raccoglitori.
del microfono ed avvitarlo per escludere che il
connettore si stacchi durante lʼuso.
4) Selezionare la caratteristica direzionale con lʼap-
posito commutatore:
NORMAL = cardioide, TELE = super cardioide.
Il microfono è così acceso.
5) Per spegnere il microfono, spostare il commuta-
tore nella posizione inferiore OFF.
Dati tecnici
Sistema: . . . . . . . . . . . . . . cardioide/
super cardioide
Banda passante: . . . . . . . 50 – 16 000 Hz
Sensibilità, impedenza
Normal (cardioide): . . . . 3 mV/Pa a 1 kHz, 1 kΩ
Tele (super cardioide): . 22 mV/Pa a 1 kHz,
2,3 kΩ
Pressione sonora max.: . . 115 dB
Rapporto S/R: . . . . . . . . . 60 dB
Alimentazione: . . . . . . . . . batteria 1,5 V, mignon
(AA) [non in dotazione]
Temperatura dʼesercizio: . 0 – 40 °C
Dimensioni: . . . . . . . . . . . ∅22 mm × 280 mm
Peso: . . . . . . . . . . . . . . . . 350 g
Collegamento microfono: . jack 3,5 mm, mono
Con riserva di modifiche tecniche.
ECM-950
Best.-Nr. 23.3280
wwwwww..iimmggssttaaggeelliinnee..ccoomm
Réponse en fréquence
Risposta di frequenza
Caractéristique
Caratteristica direzionale

NORMAL TELE
NORMAL TELE
®
MONACOR INTERNATIONAL GmbH & Co. KG
•
Zum Falsch 36
•
28307 Bremen
•
Germany
Copyright
©
by MONACOR INTERNATIONAL. All rights reserved. A-0132.99.02.09.2011
I
F B CH
Micrófono electret unidireccional
Por favor lea estas instrucciones de funcionamiento
antes de utilizar el aparato y guárdelas para su uti-
lización posterior.
Posibilidades de utilización
El micrófono electret unidireccional ECM-950 con
directividad conmutable (cardioide / supercardiode)
está particularmente adaptado para las reproduc-
ciones donde se require una importante directividad
a causa de ruido de parásitos, p. ej. en caso de
utilización en exterior para producciones video y
cinematográfica. Viene entregado con una bolsa de
plástico, un soporte micrófono, una espuma de pro-
tección anti-viento y dos cables de conexión.
Notas de importancia
El micrófono cumple con todas las directivas rele-
vantes de la UE y por lo tanto está marcado con el
símbolo .
GProteger el micrófono de la humedad y del calor
(temperatura de funcionamiento 0 – 40 °C). El mi-
crófono no es resistente a la intemperie. En caso
de utilización en exterior, prestar atención a la
protección contre la lluvia y otra precipitación.
GPara limpiarlo, utilizar un paño seco y suave, en
ningún caso productos químicos y agua.
GRechazamos toda responsabilidad en caso de
daños materiales o corporales si el micrófono se
utiliza en otro fin para en cual ha sido fabricado, si
no está correctamente conectado o reparado por
una persona habilitada y por todos estos mismos
motivos el micrófono carecería de garantía.
Funcionamiento
1) Desartonillar la tapa situada en la parte inferior del
micrófono. Insertar una batería 1,5 V del tipo AA
(R6) come se indica en el compartimiento batería.
En caso de no utilizar el micrófono durante un
largo periodo de tiempo (p. ej. superior a una
semana), no olvidarse de sacar la batería ya que
podría perder líquido y dañar el aparato.
2) El soporte micrófono puede fijarse via una toma
fileteada 6,35 mm
(
1/4″
)
, p. ej. directamente al
camcorder. Por otra parte, si el micrófono debe
atornillarse sobre un pie con rosca 16 mm (5/8″),
desatornillar el adaptador con la toma fileteada al
soporte micrófono. Poner el micrófono en el
soporte. Si es necesario, utilizar la espuma de
protección antiviento.
3) Conectar el micrófono via su toma 3,5 mm al apa-
rato siguiente, o con el cable helicoidal de 50 cm
(p. ej. a un camcorder) o con el cable de 7,5 m
Cuando el micrófono se retira definitiva-
mente del servicio, debe depositarse en
una fábrica de reciclaje adaptada para una
eliminación no contaminante.
No tirar nunca las baterías usadas en una basura
doméstica, tirarlas en un contenidor de reciclaje o
revolverlas al vendedor.
(p. ej. a un magnetófono). Siempre poner la extre-
midad del cable con el dispositivo de seguridad
en la toma al micrófono y atornillarla para preve-
nir de sacar la toma durante el funcionamiento.
4) Seleccionar la directividad mediante el interrup-
tor deslizante del micrófono:
NORMAL: cardioide, TELE: supercardioide
Así el micrófono está conectado.
5) Para parar el micrófono, poner el interruptor des-
lizante en la posición inferior OFF.
Características técnicas
Directividad: . . . . . . . . . . . cardioide/
supercardioide
Gama de frecuencias: . . . 50 – 16 000 Hz
Sensibilidad, impedancia
NORMAL (cardioide): . . 3 mV/PA a 1 kHz,
1kΩ
TELE (supercardioide): . 22 mV/Pa a 1 kHz,
2,3 kΩ
Presión sonora máxima: . 115 dB
Relación señal/ruido: . . . 60 dB
Alimentación: . . . . . . . . . . batería 1,5 V (R6)
[no entregada]
Temperatura de func.: . . . 0 – 40 °C
Dimensiones: . . . . . . . . . . ∅22 mm × 280 mm
Peso: . . . . . . . . . . . . . . . . 350 g
Conexión del micrófono: . conector 3,5 mm, mono
Reservado el derecho a cualquier modificación.
Kierunkowy Mikrofon
Elektretowy
Proszę zapoznać się z niniejszą instrukcją przed
rozpoczęciem pracy i zachować ją do wglądu.
Zastosowanie
Kierunkowy mikrofon elektretowy ECM-950 o regulo-
wanej charakterystyce (kierunkowej / superkierunko-
wej) idealnie nadaje się do nagrywania w warunkach
wymagających wąskiej kierunkowości, szczególnie
w hałaśliwym otoczeniu takim jak np. nagrywanie
video czy produkcja filmu w warunkach zewnętrz-
nych. Do mikrofonu dołączone jest plastikowe opa-
kowanie, uchwyt, osłona i dwa kable połączeniowe.
Ważne uwagi
Urządzenie spełnia wszystkie wymagania norm UE
dlatego zostało oznaczone symbolem .
GNależy chronić urządzenie przed wilgocią i
wysoką temperaturą (dopuszczalna temperatura
otoczenia pracy wynosi 0 – 40 °C). Mikrofon nie
jest wodoodporny; podczas pracy urządzenia w
warunkach zewnętrznych należy chronić je przed
deszczem i innymi opadami atmosferycznymi.
GDo czyszczenia urządzenia używać tylko suchej,
delikatnej ścierki – nie używać wody ani che-
micznych środków czystościowych.
GJeśli urządzenie jest wykorzystywane niezgodnie z
jego przeznaczeniem lub jeśli jest niewłaściwe
użytkowane lub podłączane lub gdy naprawy doko-
nywane są przez osoby nieupoważnione pełną
odpowiedzialność za szkody ponosi użytkownik.
Podłączanie mikrofonu
1) Należy odkręcić osłonę znajdującą się w dolnej
części mikrofonu. Włożyć baterie o mocy 1,5 V
rozmiaru AA zgodnie z oznaczeniami polaryzacji
na komorze baterii.
Jeżeli mikrofon nie jest używany przez dłuż-
szy czas (np. dłużej niż tydzień) należy wyjąć
baterie aby uniknąć wycieku elektrolitu.
2) Za pomocą gwintu 6,35 mm ( 1/4″ ) uchwyt mikro-
fonu może być przymocowany np. bezpośrednio
do kamery video. Aby przykręcić mikrofon do
uchwytu o gnieździe 16 mm ( 5/8″ ), należy odkrę-
cić przejściówkę znajdującą się na uchwycie
mikrofonu. Mikrofon zamocować w uchwycie. W
razie konieczności nałożyć wiatrochron.
3) Połączyć mikrofon ze współpracującym urządze-
niem za pomocą gniazda jack 3,5 mm; należy użyć
albo 50 cm przewodu spiralnego (np. podłączając
urządzenie do kamery video) albo 7,5 m przewodu
(np. podłączając mikrofon do magnetofonu). Koń-
Jeżeli urządzenie nie będzie już nigdy uży-
wane należy oddać je do miejsca utylizacji
odpadów, gdzie zostanie zniszczone bez
wyrządzania szkody dla środowiska.
Wyczerpanych baterii nie należy wyrzucać do
śmieci lecz należy umieścić je w specjalnych kon-
tenerach na zużyte baterie.
cówkę kabla wyposażoną w gwint należy zawsze
podłączać do gniazda mikrofonu. Zapobiegnie to,
wyciągnięciu wtyczki podczas pracy urządzenia.
4) Aby wybrać odpowiednią charakterystykę pracy
mikrofonu należy użyć przełącznika:
NORMAL = kierunkowa,
TELE = superkierunkowa
W ten sposób mikrofon zostanie włączony.
5) W celu wyłączenia mikrofonu należy przesunąć
przełącznik do dolnej pozycji OFF.
Dane techniczne
Charakterystyka: . . . . . . . kierunkowa /
superkierunkowa
Zakres częstotliwości: . . . 50 – 16 000 Hz
Czułość, impedancja
NORMAL (kierunkowa): . 3 mV/ Pa przy 1 kHz,
1kΩ
TELE (superkierunkowa): 22 mV/ Pa przy 1 kHz,
2,3 kΩ
Maksymalny SPL: . . . . . . 115 dB
Wskaźnik S / N: . . . . . . . . 60 dB
Zasilanie: . . . . . . . . . . . . . 1,5 V typ baterii AA
(baterie nie są dołą-
czone do zestawu)
Temp. otoczenia pracy: . . 0 – 40 °C
Rozmiary: . . . . . . . . . . . . . ∅22 mm × 280 mm
Waga: . . . . . . . . . . . . . . . . 350 g
Połączenia mikrofonu: . . . 3,5 mm jack, mono
Może ulec zmianie.
ECM-950
Best.-Nr. 23.3280
wwwwww..iimmggssttaaggeelliinnee..ccoomm
Directividad
Charakterystyka kołowa
Diagrama de circuito
Schemat obwodu

NORMAL TELE
NORMAL TELE
®
MONACOR INTERNATIONAL GmbH & Co. KG
•
Zum Falsch 36
•
28307 Bremen
•
Germany
Copyright
©
by MONACOR INTERNATIONAL. All rights reserved. A-0132.99.02.09.2011
PL
E

This manual suits for next models

1

Other Monacor Microphone manuals

Monacor ECM-10/SW User manual

Monacor

Monacor ECM-10/SW User manual

Monacor DMG-450 User manual

Monacor

Monacor DMG-450 User manual

Monacor img Stage Line HSE-60-SK User manual

Monacor

Monacor img Stage Line HSE-60-SK User manual

Monacor ECM-500 User manual

Monacor

Monacor ECM-500 User manual

Monacor Stage Line TXS-821HT User manual

Monacor

Monacor Stage Line TXS-821HT User manual

Monacor img Stage Line ECM-302B User manual

Monacor

Monacor img Stage Line ECM-302B User manual

Monacor HSE-300/SK User manual

Monacor

Monacor HSE-300/SK User manual

Monacor img Stage Line HSE-72 User manual

Monacor

Monacor img Stage Line HSE-72 User manual

Monacor PA Series User manual

Monacor

Monacor PA Series User manual

Monacor TXA-100HT User manual

Monacor

Monacor TXA-100HT User manual

Monacor img Stage Line ECM-285 User manual

Monacor

Monacor img Stage Line ECM-285 User manual

Monacor EMG-648P User manual

Monacor

Monacor EMG-648P User manual

Monacor JTS KA-8TH/1 User manual

Monacor

Monacor JTS KA-8TH/1 User manual

Monacor IMG STAGELINE DM-065 User manual

Monacor

Monacor IMG STAGELINE DM-065 User manual

Monacor PAM-10 User manual

Monacor

Monacor PAM-10 User manual

Monacor HSE-150A/SK User manual

Monacor

Monacor HSE-150A/SK User manual

Monacor PA-4000FMP User manual

Monacor

Monacor PA-4000FMP User manual

Monacor UT 16HW/1 User manual

Monacor

Monacor UT 16HW/1 User manual

Monacor HSE-200WP/BL User manual

Monacor

Monacor HSE-200WP/BL User manual

Monacor ECM-500L/SK User manual

Monacor

Monacor ECM-500L/SK User manual

Monacor img Stage Line DM-3200 User manual

Monacor

Monacor img Stage Line DM-3200 User manual

Monacor IMG STAGELINE HSE-300/SK User manual

Monacor

Monacor IMG STAGELINE HSE-300/SK User manual

Monacor 0235190 User manual

Monacor

Monacor 0235190 User manual

Monacor ECM-450 User manual

Monacor

Monacor ECM-450 User manual

Popular Microphone manuals by other brands

Electro-Voice RE20 Technical specifications

Electro-Voice

Electro-Voice RE20 Technical specifications

Beyerdynamic TG H57c Product information

Beyerdynamic

Beyerdynamic TG H57c Product information

Reloop sPod Platinum instruction manual

Reloop

Reloop sPod Platinum instruction manual

Clever Acoustics PM Z6 user manual

Clever Acoustics

Clever Acoustics PM Z6 user manual

Trust 31008 Quick installation guide

Trust

Trust 31008 Quick installation guide

Sterling SP130 owner's manual

Sterling

Sterling SP130 owner's manual

Mobility Sound BTH-600 instructions

Mobility Sound

Mobility Sound BTH-600 instructions

Toa AN-9001 operating instructions

Toa

Toa AN-9001 operating instructions

RODE Microphones NT5 instruction manual

RODE Microphones

RODE Microphones NT5 instruction manual

Shure SM87A user guide

Shure

Shure SM87A user guide

Motorola PMMN4095 series user guide

Motorola

Motorola PMMN4095 series user guide

Numark WS100 user guide

Numark

Numark WS100 user guide

Omnitronic DSM-500 user manual

Omnitronic

Omnitronic DSM-500 user manual

Shure Microflex MX391BP Series user guide

Shure

Shure Microflex MX391BP Series user guide

Heritage Audio Baby R.A.M. user manual

Heritage Audio

Heritage Audio Baby R.A.M. user manual

DÖRR CV03 instruction manual

DÖRR

DÖRR CV03 instruction manual

Audio Technica ES945 Install and operation instructions

Audio Technica

Audio Technica ES945 Install and operation instructions

Audio Technica AT831R Specifications

Audio Technica

Audio Technica AT831R Specifications

manuals.online logo
manuals.online logoBrands
  • About & Mission
  • Contact us
  • Privacy Policy
  • Terms and Conditions

Copyright 2025 Manuals.Online. All Rights Reserved.