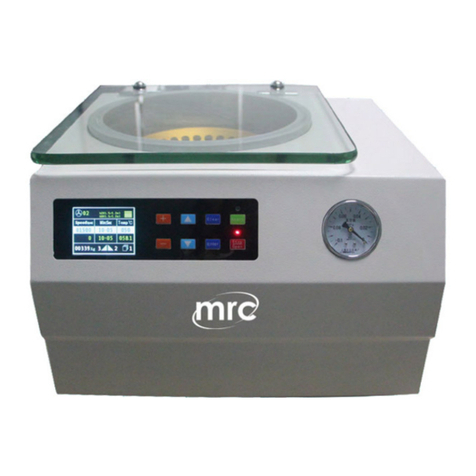
MRC HCEN-24 User manual

HCEN-24 Economical Capillary Centrifuge
User Manual
PLEASE READ THIS MANUAL CAREFULLYBEFORE OPERATION
Hagavish st. Israel 58817 Tel: 972 3 5595252, Fax: 972 3 5594529 [email protected]
MRC.2.22

Contents
Safety Precautions..........................................................................................................................................0
1. Specifications.............................................................................................................................................0
2. Scope of application...................................................................................................................................0
3. Environmental conditions ..........................................................................................................................0
3.1 Basic operating conditions ...............................................................................................................0
3.2 Transport and storage conditions......................................................................................................0
4.1 Mounting position............................................................................................................................1
4.2 Connection between power cable and ground wire..........................................................................1
5. Structure.....................................................................................................................................................1
6. Operating panel..........................................................................................................................................2
7. Rotor preparation........................................................................................................................................3
7.1 Prepare the samples to be separated.................................................................................................3
7.2 Transfer the samples into the centrifuge tube...................................................................................3
7.3 Ensure the balanced centrifuge tube.................................................................................................4
7.4 Check rotor.......................................................................................................................................4
7.5 Symmetrically load centrifuge tubes into rotor ................................................................................4
8. Operation....................................................................................................................................................4
8.1 Normal operation..............................................................................................................................4
8.2 RCF operation..................................................................................................................................7
8.3 Transient operation...........................................................................................................................8
9. Cleaning & Maintenance............................................................................................................................8
9.1 Cleaning ...........................................................................................................................................8
9.2 Wearing parts....................................................................................................................................9
9.3 Routine check...................................................................................................................................9
10. Common failures and solutions..............................................................................................................10
10.1 List of common failures ...............................................................................................................10
10.2 How to open the upper cover lid .............................................................................................11
10.3 Replace the fuse ...........................................................................................................................12
11. Introduction to rotor and centrifuge tube.............................................................................................12
11.1 Introduction to rotor .....................................................................................................................12
12. RCF calculation......................................................................................................................................14
13. Ordering information..............................................................................................................................15
14.Warranty.............................................................................................................................................15
14.1 Unit warranty................................................................................................................................15
14.2 Rotor warranty..............................................................................................................................15
After-sales services ......................................................................................................................................15

Safety Precautions
Carefully read the following safety precautions for a thorough understanding.
•The symbol is an internationally accepted safety mark.
•Ensure to operate thiscentrifuge safely as per the instructions and procedures described in this manual.
•Carefully read all safety messages in this manual for safe operation of this centrifuge.
•Safety messages are labeled as indicated below. They are in combination with signal words of
“WARNING” and “CAUTION” with the safety alert symbol wherever it is necessary.
Warning: personal danger.
Warning against potential danger, which might result in injury or death if the requirements contained
herein are not strictly complied with.
Caution: danger of damage to centrifuge.
Warning against potential danger of damage to the centrifuge, which might result in damage to the
centrifuge if the requirements contained herein are not strictly complied with.
NOTE:Notes indicate an area or subject of special merit, emphasizing either the product
'
s capability or
common errors in operation or maintenance.
⚫Do not use this centrifuge in any manner not mentioned in this user manual. In case of any problem,
please contact the vendor/supplier.
⚫This user manual provides complete safety precautions about potential danger, however users are
advised to stay alert against unpredictable accidents and use this centrifuge with care.
Warning
⚫This centrifuge is non-explosion proof and may not be used for separation of flammable or explosive
samples.
⚫Do not install this centrifuge near any flammable gas or chemical substances.
⚫Do not place any dangerous materials within 30cm radius of this centrifuge.
⚫When separating any toxic, radioactive materials or pathogenic micro-organism, necessary safety
measures must be taken and the user will be liable for any resulting negative consequences.
⚫If the centrifuge, rotor and accessories that have been contaminated by solutions with toxic, radioactive

or pathogenic materials, clean it according to the decontamination procedures specified.
⚫If you require service at site, please sterilize and decontaminate the centrifuge in advance, and then
notify the service center about the details of the materials and procedure.
⚫For safety purposes not enter within 30cm around this centrifuge when it is in operation.
⚫To avoid electrical shocks, ensure your hands are drybefore handling the power cord or turning On/Off
the power switch.
⚫For safety purposes do not enter within 30cm around this centrifuge in operation mode.
⚫Don’t open the centrifuge lid while the rotor is in operation.
⚫Unauthorized repairs, disassembly, or modifying the centrifuge except by our service center are
strictly prohibited.
Caution
•Ensure this centrifuge is placed on a solid, flat and firm table.
•Ensure that the centrifuge is on flat level table before operation.
•Ensure that the angle between the housing and upper lid is larger than the 70 degrees while opening
the lid.
•Do not put your fingers or hands in-between the housing and upper lid while closing the lid.
•Do not move/ relocate the centrifuges/ lean against it when the centrifuge is in operation.
•If there is any liquid spillage in the rotor chamber, please promptly clean and dry with a dry cloth to
avoid sample contamination.
•Keep the centrifugal chamber clean and ensure to remove any foreign particles dropped
inside the rotor chamber, before running the centrifuge.
•Cautions about rotor
(1) Check the rotor surface for corrosion or damage before use and do not use it if any problem is
found.
(2) Do not set the speed beyond the allowable minimum speed of the rotor (rotor and adapters). Make
sure to run it below the maximum speed.
(2) Do not exceed the allowable imbalance.

(3) The centrifuge tubes should be within the centrifuge actual capacity.
(4) If the rotor has a cover, be sure to tighten the cover before operation.
(5) If the rotor is provided with a lid, ensure it is secure it tightly before operation.
⚫If there is any abnormality observed during operation, Ensure to stop the centrifuge immediately,
contact the service center and inform about the failure code if displayed.
⚫Vibrations are likely to damage the centrifuge, contact our service center if abnormality observed.

1. Specifications
Maximum rotation speed
12,000rpm (500-12,000rpm) step: 100rpm
Maximum RCF
13680×g , step: 100×g
Capacity
AC24 (capillary×24)
Timing
10 s-99m-HOLD(continuous operation)
Drive motor
DC brushless motor
Safety performance
Dual door locks, over speed, over temperature and status diagnosis system.
Power
Single phase,220-240V, 50Hz/60Hz,380W
Dimensions(mm)
280(L) ×364(D) ×213(H)
Weight
10kgs
Acceleration / deceleration
time
40s↑40s↓
Noise
<65dB
Other functions
Rotation speed/acceleration switchover, transient operating performance,
Current run time parameter display and sound reminder
2. Scope of application
Scope of application: suitable for separation of mixed solutions at medical institutions.
3. Environmental conditions
3.1 Basic operating conditions
(1) Power supply: 220-240V, 50Hz
(2) Ambient temperature: 2℃~40℃
(3) Relative humidity: ≤80%RH
(4) No vibration or air flow present nearby that might affect performance
(5) No conductive dust, explosive gas or corrosive gas exists in ambient air.
3.2 Transport and storage conditions
(1) Range of ambient temperature: -40℃~55℃.
(2) Range of relative humidity: ≤93%RH

4. Installation and testing
Users must strictly comply with the installation instructions contained in this chapter. Be advised!
Warning
⚫Improper power connection might damage the centrifuge.
⚫Ensure to check the power supply before connection for compliance with the requirements.
4.1 Mounting position
(1) Place this centrifuge on a firm、flat and level surface, ensure the four feet of this centrifuge stand on the
counter firmly.Avoid installing on a slippery surface or surface prone to vibration.
(2) Ideal ambient temperature is 20℃±5℃, avoid placing the centrifuge in direct sunlight if temperature
(3) exceeds 30℃.
(4) Ensure to clear 10cm from the centrifuge on both sides and behind the centrifuge in order to ensure
air cooling efficiency.
(5) Prevent heat/water leakage near centrifuge, otherwise the rise in sample temperature or centrifuge
failure might occur easily.
4.2 Connection between power cable and ground wire
Warning
⚫Don’t touch the power cable or power switch with wet hands to avoid electric shock.
⚫This centrifuge must be properly grounded.
A minimum of 10A outlet providing a good grounding terminal is required and needs to meet the local
safety requirements.
5. Structure
Fig. 5.1 Front view of centrifuge
Sealing ring
Operating panel
Bolt
Housing

Fig. 5.2 Rear view of centrifuge
6. Operating panel
Fig. 6.1 Schematics of operating panel
Power switch
Power socket
Vent
Sight glass
Upper cover
Speed display Door lock display Time display
(1)
(3)
(4)
(2)
120 x 100rpm 60min

No.
Legend
Name
Function
1
Select Button
Press this button to choose the parameters setting.
3
Pulse Button
When the centrifuge lid is locked tightly, Press and hold this
button and the centrifuge run to the set rotation speed
4
Run start / stop key
Set the parameters to desired setting and press this button to
start run and operate the centrifuge.
Press this button during operation to stop the operation.
5
Parameter
adjustment knob
Rotate this knob clockwise/ anti clockwise to increase/
decrease the parameter setting value. Press this knob to
choose the desired speed or acceleration.
Fig. 6.2 Schematics of main display
•The main display is shown in Fig. 6.2, in which the speed is set at 12,000rpm and time is set to 60
minutes.
•The dock lock switch indicator shows whether it is open/close.
•When the speed icon rotates, it indicates the machine is running and its faster rotation indicates
higher rotation speed.
•The time display icon divides the entire set run time into 10 equal parts, displaying the ratio of
elapsed time to the total time.
7. Rotor preparation
7.1 Prepare the samples to be separated
7.2 Transfer the samples into the centrifuge tube
Caution
⚫Ensure that the centrifuge tubes are not overloaded with the samples which will result in leakage.

⚫Do not exceed the actual tube capacity as mentioned in this user manual.
7.3 Ensure the balanced centrifuge tube
⚫Although the centrifuge may be used with visually confirmed balance, it is recommended that the
samples are weighed using a balance to keep this centrifuge in a well-balanced condition to extend its
life expectancy.
⚫Never intentionally run the centrifuge under an imbalance condition even though the allowable
imbalance is not exceeded.
7.4 Check rotor
Ensure to check the rotor for any corrosion or scratch before every operation.
Caution
⚫If any corrosion or scratch is found on the rotor, please cease to use the rotor.
⚫Avoid the use of other manufacturer’s rotor on this centrifuge.
7.5 Symmetrically load centrifuge tubes into rotor
Caution
⚫Ensure to secure the rotor on the main shaft firmly. Otherwise, the rotor might fall off while the
centrifuge is in operation, resulting in damage to the centrifuge or rotor.
⚫Tighten the rotor lid to the rotor firmly.
8. Operation
8.1 Normal operation
The display screen is lit when the power switch is turned ON, and the centrifuge shows HELLO page, as
shown in Fig. 8.1.
Caution
⚫Avoid moving the centrifuge when it is in operation mode.
⚫Keep the centrifugal chamber clean and ensure to remove foreign particles from the centrifugal
chamber, such as fragments of broken centrifuge tubes if any.
⚫If any abnormal/ strange noise is noticed from the operating centrifuge, stop the operation
immediately and contact your service provider/ local supplier and also intimate the failure code
indicated if any.
⚫

. Fig. 8-1 Startup interface of centrifuge
.The centrifuge shows the centrifuge model HCEN-24, as shown in Fig. 8-2
Fig. 8-2 Model HCEN-24 interface
The centrifuge displays the last operating parameters, as shown in Fig. 8-3.
Fig. 8-3 Last operation interface
⚫Speed setting: 12000 rpm. Time setting 60minutes
⚫The upper lid is closed.
8.1.1 Rotor installation and replacement
Mount the rotor on the main shaft Tighten the rotor lid Mount the rotor
cover. Fig. 8-4 Rotor Installation
HEL LO
X 100g
X 100rpm
Sec/
min
12 24
120x 100rpm 60min

⚫When placing the rotor, ensure the full contact between the rotor and the main shaft.
⚫Load the rotor on to the shaft to ensure rotor is in position until it is well connected to the main shaft.
⚫If the rotor is loaded properly on the shaft, you will feel a “click” sound otherwise it is understood that
the rotor is not secured properly on the main shaft. Check once again and if necessary clean it again.
⚫Rotate the rotor slightly with your fingers to check if the rotor vibrates, if so attach the rotor again.
⚫Rotate the nut clockwise using the wrench to tighten the rotor to the shaft firmly.
⚫Rotate the rotor lid in clockwise to the rotor and close the rotor lid and ensure that it is in position.
Close the centrifuge lid and start operation.
⚫Remove the rotor after operation same as above by turning the locking nut counterclockwise.
8.1.2 Set operating parameters
Press the select button gently to select the parameters and set the parameter values to desired
setting. Use the parameter adjustment knob to set the selected parameters (whichever parameter
icon flashes). Rotate the parameter adjustment knob in clockwise/anticlockwise direction to increase or
decrease the parameter values to achieve the desired setting. The minimum speed increment is 10rpm, the
minimum time increment is 1 second.
(1)Set the rotation speed
•Press the select button to select the rotation speed in rpm.
•The speed value flashes indicating that the speed is in adjustment mode
•The minimum set speed is 500rpm, and the minimum step is 100rpm.
•Turn the parameter adjustment knob clockwise/anti-clockwise to increase/decrease the
parameter value.
(2) Set the running time
•Press the select button to make the time value flash and enter into the time setting mode.
•Turn the parameter adjustment knob to input the set time within a range of 10sec-99min.
•The centrifuge enters into continuous run mode if the time indicates HD.
Caution
⚫Place the rotor on the main shaft and ensure full contact between the rotor and the main shaft. Screw
up the nut on the rotor tightly using a wrench to connect the rotor with the main shaft firmly,
otherwise the rotor might fall off, causing damage to the centrifuge.
⚫Tighten the lid and rotor firmly.

8.1.3 Start operation
(1) Press the run start/stop button to start operation.
•The upper lid is locked and the rotor starts rotating.
•The timer starts only after the rotation speed reaches the set value, with the remaining run time
display.
(2) View and modify the operation programs
The operating parameters can be modified if the centrifuge operates at a steady speed.
Press the select button when the screen displays the set operating parameters. Press the select button
gently again to make the parameter icon flashes and turn the parameter adjustment knob to
change the parameter values. The centrifuge automatically returns to the normal operation mode and
continue to run according to the last set parameters after 7seconds of inactivity.
After change to the time setting parameter, the elapsed time will not be zeroed but will continue to
accumulate.
(3) Error message
•The centrifuge will automatically stop if any failure occurs in the running process, with the failure
code indicated on the time display window. By looking up table 10-1, the cause of failure can be found and
appropriate action may be taken.
8.1.4 Stop running
(1)The centrifuge will brake when it reaches the set time or button is pressed.
⚫When the rotor stops rotating, the centrifuge will start beeping to alert that the operation has finished.
(2)Open the door
⚫The door can be released automatically when the operation has stopped.
⚫Press the button to open the lid.
⚫After ending the operation, the program will store the set parameters of this operation, and will recall these
parameters when restarting the program.
Open the upper cover lid and take out the rotor lid, rotor and the samples.
8.2 RCF operation
(1) Turn power switch ON
(2) Set the RCF (Relative Centrifugal Force)
Caution
•The relative centrifugal force may not exceed the maximum relative centrifugal force allowed by the
centrifuge tube and its adapter.

•Press the select button to choose the rotation speed unit as xg. Relative centrifugal force enters
into the adjustment mode if the centrifugal acceleration value flashes.
•The centrifuge enters into operation mode if there is no activity for about 7Seconds
•Turn the parameter adjustment knob to adjust the relative centrifugal force in the increments of
100xg.
(3) Set the operating conditions
See Section 8.1 for operation of other parts.
8.3 Transient operation
This function is generally used to remove the samples attached to the inner wall of the centrifuge tube and
can also meet the application requirements for transient centrifugation.
(1) Switch power On, fix the rotor on the main shaft, tighten the rotor cover firmly and close the upper
cover.
(2) The centrifuge enters into the operation mode and displays the last set parameter values, and allows to
reset the target rotation speed.
(3) Press and hold the pulse key to increase the rotation speed until the set rotation speed is
achieved. Release the key to start decelerating and shutdown.
9. Cleaning & Maintenance
9.1 Cleaning
Caution
•Cleaning or sterilizing the centrifuge without complying the instructions contained herein might cause
damage to the centrifuge.
(1) Centrifuge
•The color of housing might change and the label thereon might fall off if the centrifuge is exposed to
ultraviolet for a prolonged period of time. Please cover the centrifuge with a cloth to avoid the
exposure to light after use.
•If the centrifuge becomes dirty, please clean it using a cloth/ sponge soaked with neutral cleaning
agent.
•The centrifuge can be sterilized using a cloth soaked in 70% alcohol solvent.
Reminder: this key works only when the rotor is inactive and the outer lid is locked firmly.

(2) Centrifugal chamber
•If the centrifuge chamber becomes dirty, clean it using a cloth/ sponge soaked with neutral cleaning
agent.
•The centrifuge chamber can be sterilized using a cloth soaked in 70% alcohol solvent.
(3) Drive shaft
•It is suggested that the drive shaft should be subjected to periodical maintenance by wiping it using a
piece of soft cloth and applying a thin layer of silicone grease on it.
(4) Upper cover
•Clean or sterilize the upper cover in the same manner as that of centrifuge(1).
(5) Rotor
•If the rotor is put out of service for a prolonged period of time, please remove the rotor from the
centrifugal chamber, remove the rotor’s lid and place the rotor upside down to dry the rotor hole and
prevent corrosion.
•If any sample leaks into the rotor hole, flush the rotor hole with clean water and apply a thin layer of
silicone grease on the rotor surface after it is dried.
•The rotor needs periodical maintenance. It is suggested that the rotor should be cleaned once every
three months to ensure cleanliness of the tube hole and main shaft hole before applying a thin layer of
silicone grease.
9.2 Wearing parts
The following lists the wearing parts of this centrifuge. Please replace the wearing parts in time according
to the suggestions in the following table.
No.
Wearing part
Replacement conditions
1
Sealing ring of the outer lid
Crack
2
Rubber seat of temperature sensor
9.3 Routine check
(1) Check whether the tabletop on which the centrifuge is placed is solid, level and flat and ensure the four
feet of the centrifuge remain in contact with the tabletop.
(2) Check whether the machine is reliably grounded, using a multi-meter. Check whether the grounding
pin in the power cable, centrifugal chamber and motor shaft are short-circuited. A short-circuit indicates a
Caution
•Never directly pour water or other solvents into the centrifugal chamber as these solvents might enter
into the drive unit and cause corrosion or damage to the bearings.

reliable grounding. In case of disconnection, identify the cause and eliminate the failure before the
centrifuge operation.
10. Common failures and solutions
10.1 List of common failures
This centrifuge is capable of self diagnosis. When the centrifuge fails, the time display window will
indicate the failure code, leading to the immediate identification of the cause of failure.
Phenomenon
Possible cause
Solution
No display found after power
ON
·No power supply to the power socket.
·Fuse burned out.
· Check and reconnect the power
supply.
·Replace the fuse.
Alarm code indicated on the time display window
E-02
Upper cover fails
·The door opens during operation.
·Press the key if the door is
opened.
·Immediately close the outer lid.
·Close the lid before operation.
E-03
Wrong rotor
identification
·Rotor can not be identified.
·Use the correct rotor.
·Confirm if the rotor identification line
is reliably connected and remount the
rotor.
E-04
Abnormal
temperature
·Temperature sensor got damaged.
·Temperature sensor not connected.
·Contact your service representative.
E-06
Abnormal rotation
speed setting
·The set rotation speed exceeds the
maximum allowed speed by the rotor.
·Change the set rotation speed value.
E-10~86
·See the service manual.
·Contact the service representative.
Table 10-1 Common failures and solutions
Failure code E-1-E-9 is related to erroneous operation. The centrifuge may continue in operation after error
correction.

10.2 How to open the upper cover lid
(1) When the centrifuge is turned ON, the rotor stops running and the upper cover lock may be opened by
pressing the door lock button on the right side of the machine. At this time, the upper cover may be turned
open.
(2) When the centrifuge is turned OFF, press the door lock button on the right side of the machine to open
the upper cover lock.At this time, the upper cover may be turned open.
Reminder:
•Open the upper cover only when the rotor is not running, if the centrifuge is powered ON,

10.3 Replace the fuse
(1) The centrifuge’s fuse is 250V, 5A time delay,size: Ф5×20.
(2) The centrifuge’s fuse is on the power socket. The fuse may be replaced by taking the fuse box out of
the power socket.
11. Introduction to rotor and centrifuge tube
Caution
•Carefully read the user manual and correctly install and use the rotor.
•Don’t exceed the maximum speed allowed by the rotor, test tube and adaptor. The maximum speed
allowed by certain adaptors is lower than the maximum speed of the rotor.
11.1 Introduction to rotor
11.1.1 Capillary rotor
(1) Introduction
(2) Mounting
Locking nut Mount the rotor lid
11.1.2 Rotor
Rotor lid
Reading dial
Nut
Capillary slot
Rotor

Rotor
number
Rotor
name
Centrifuge tube
Maximum
speed
(rpm)
Maximum
centrifugal radius
rmax (cm)
Maximum relative
centrifugal force
Rcf (×g)
1
AC24
24-ø1.75×75
capillary
12000
8.5
13680
Table 11.1 Rotor
11.1.3 Precautions
(1) The centrifuge rotor can separate samples with a density lower than 2.0g/ml. If the samples density is
over 2.0g/ml, please calculate allowable speed depending on the following formula.
Allow Speed (rpm) = Maximum speed
×
(2.0(g/ml)/Sample density (g/ml))1/2
(2) To prevent corrosion, remove the rotor from rotor chamber if not in use for a long term, then detach the
rotor lid and place upside down to dry the tube holes.
(3) If samples have leaked in the rotor holes, wash the hole with water, apply a thin coat of silicon grease
on the rotor surface after drying.
(4) It is recommended for regular rotor maintenance and should be cleaned every 3 months to keep the tube
holes and shaft clean.
(5)Apply a thin coat of silicon grease.
11.2 Centrifuge tube
11.2.1 Cleaning and sterilization
PA: polyallomer PC: polycarbonate PP: polypropylene O : Yes X : No
Table 11.2 cleaning and sterilization conditions for centrifuge tube
Conditions Material
PA
PC
PP
Cleaning
Fluid cleaning
Acidic cleaning agent (pH5 or lower)
X
X
X
Acidic cleaning agent (higher than pH5)
O
O
O
Alkali cleaning agent (higher than pH9)
O
X
O
Alkali cleaning agent (pH9 or lower)
O
O
O
Neutral cleaning agent (pH7)
O
O
O
70℃hot water
O
O
O
Ultrasonic cleaning
Neutral cleaning agent (pH7)
O
O
O
Sterilization
Autoclaving
115℃(0.7kg/cm2) 30 minutes
O
O
O
121℃(1.0kg/cm2) 20 minutes
X
O
O
126℃(1.4kg/cm2) 15 minutes
X
X
X
Boiling sterilization
15 to 30 minutes
O
O
O
Ultraviolet sterilization
200-300nm
X
X
X
Gas sterilization
Ethylene oxide
O
X
O
Formaldehyde
O
O
O

11.2.2 PC centrifuge tube cleaning
PC material has relatively low chemical stability to alkaline solvent, therefore use of cleaning agent with
pH value of over 9 should be avoided. Some neutral cleaning agents still have pH value of over 9 after
being diluted as recommended by the vendor, therefore use of cleaning agent with pH value of 7-9 is
recommended.
11.2.3 Autoclaving of PA, PC and PP centrifuge tube
PA begins softening at the temperature of 120℃, while PC and PP begin softening at 130℃. Generally,
PA may be sterilized for 30 minutes at 115℃(0.7 kg/cm2), while PC and PP may be sterilized for 20
minutes at 121℃(1.0 kg/cm2). Too high temperature would result in deformation of centrifuge tube.
Take the following steps, if using an autoclave:
(1) Place the centrifuge tube upright with opening facing upward. If the centrifuge tube is placed in an
inclined or horizontal manner, it will deform due to the effect of gravity.
(2) Remove the threaded cover and inner cover to prevent deformation or crack of the centrifuge tube.
(3) Take the centrifuge tube only when the autoclave cools down to room temperature.
11.2.4 Service life of centrifuge tube
The service life of plastic centrifuge tube depends upon the nature of sample, rotor speed and
centrifugation temperature. When the plastic centrifuge tube is used for centrifugation of conventional
neutral samples (pH5-pH9), its estimated service life at the maximum rotation speed is as follows:
High-quality centrifuge tube (PA, PC, PP): 30-50 times.
Conventional centrifuge tube: about 10 times (number of uses may be increased in case of low-speed use)
Notes: (1) The service life of centrifuge tube is also related to the cleaning and sterilization conditions;
(2) Never use any centrifuge tube with cracks on it.
12. RCF calculation
Relative centrifugal force (RCF)can be calculated using the following formula:
RCF=1.118×r×n2×10-5
r-rotation radius, unit: cm; n-rotation speed, unit: rpm
Table of contents
Other MRC Laboratory Equipment manuals
Popular Laboratory Equipment manuals by other brands

IKA
IKA EUROSTAR 20 DIGITAL user guide

Novatech
Novatech SCILogex MX-T6-Pro user manual

Thermo Scientific
Thermo Scientific Shandon ClearVue A79210100 Operator's guide

Waters
Waters Andrew+ quick start guide

Thermo Scientific
Thermo Scientific Thermo Scientific 494 Series operating manual

Agilent Technologies
Agilent Technologies 7890A Instruction guide