UX5000 Digital Terminal Mic Gain Adjustment Instructions
Before adjusting the gains on a digital terminal, adjustments must first be made to the analog trunks to be sure the levels are adequate.
Adjusting only the terminal’s gain may have no affect if the trunks aren’t normalized first.
1. Check the sidetone (volume) level on the analog trunks to be sure it’s at a good level.
2. As required, in Program 14-01-02 and 14-01-03, make sure the entry for each required trunk is set to default (32).
3. As required, use Program 81-07-01 to select the CODEC filter setting for each trunk. (Though Program 81-07-01 is trunk
based, if an entry of “4” is selected, the definition for the filter type defined in Program 81-17-01 is used for all trunks
defined as type 4. Adjusting this setting too high could cause feedback in the handset. This step is a trial-and-error process.
Start with the filter type closest to the trunk’s level, test and readjust if needed.
Program 81-07-01
Default: 1
Entries: 0 = Filter type 0 (no filter)
1 = Filter type 1 (600
Ω
Line Loss 0dB (~500m from CO provider - high/loud from telco)
2 = Filter type 2 (600
Ω
Line Loss 4dB (1-2km from CO provider - normal analog network)
3 = Filter type 3 (600
Ω
Line Loss 8dB (3km from CO provider - low from telco)
4 = Filter type 4 (use Program 81-17 setting)
Program 81-17-01
Default: 0
Entries: 0 = None
1 = Type 5: 600
Ω
Line Loss 2dB
2 = Type 6: 200
Ω
+ (100nF//680
Ω
)
(not used in the U.S.)
3 = Type 7: 160
Ω
+ (150nF//1100
Ω
)
(not used in the U.S.)
4 = Type 8: 900
Ω
4. After changing the entry in Program 81-07-01, place a test call to check the volume level on the trunk and as a handsfree call.
5. Program 14-01-02 can then be used to modify the dB level further, if needed.
Default: 32 (0dB)
Entries: 1~63 (-15.5 ~ +15.5dB in .5dB intervals)
The following procedures can be used, as needed to enhance the mic sensitivity transmit level of the UX5000
Enhanced
digital terminals
once the analog trunk level has been set as directed above.
Section 1 - Check the Current Version of your Enhanced Digital Terminals
Section 2 - Adjusting the Mic Transmit Level
Section 3 - Adjusting the Full Duplex Parameter
Section 4 - Resetting Terminal Factory Default Values
Section 1 - Check the Current Version of Your Enhanced Digital Terminal
Use these steps to verify the current version of firmware running on your Enhanced Digital Terminal. The procedure in
Section 2 -
Adjusting the Mic Transmit Level
is intended to be used on terminal firmware versions V1.80 and lower. If your terminal has
V1.C0 or higher, the settings in
Section 2
and
Section 3
have already been applied.
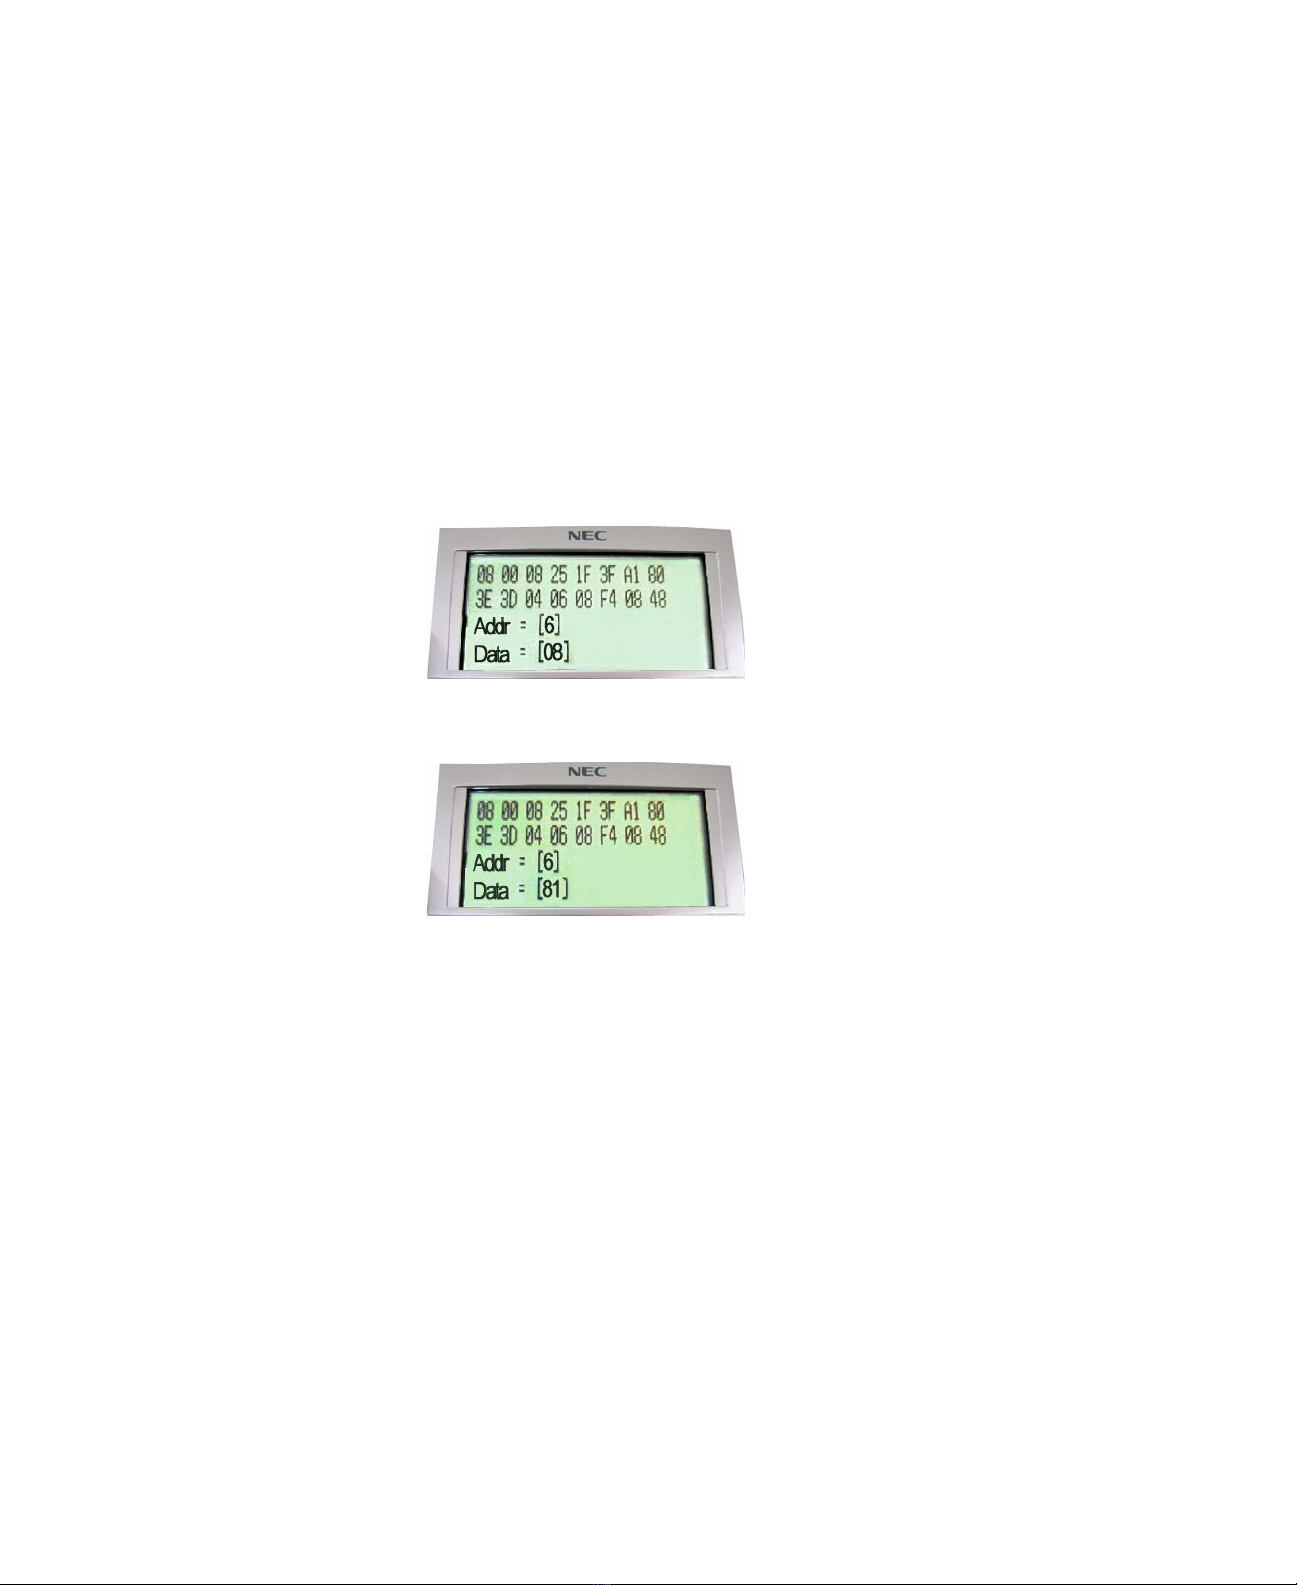
1. Unplug the line cord from the back of the terminal.
2. Press and hold both numeric keys
*
and
#
.
3. While holding the keys
*
and
#
, plug the line cord back into the terminal.
4. The LCD screen will display
Initialize
.
5. After 2 to 3 seconds, release keys * and # at the same time and the
Terminal
Information Menu
will be displayed.
6. Verify the Enhanced Digital Terminal firmware version is V1.08 or lower
before you proceed to
Section 2 - Adjusting the Mic Transmit Level
(V1.C0 and above will have the below values set from
the factory).