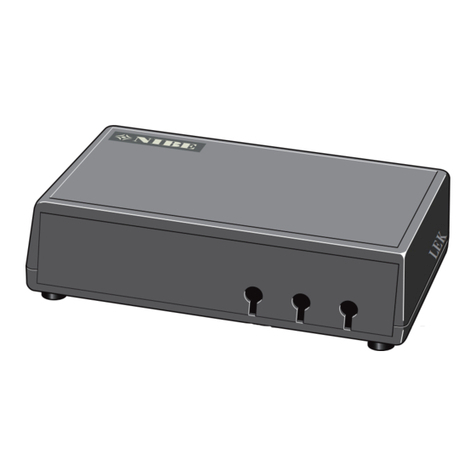
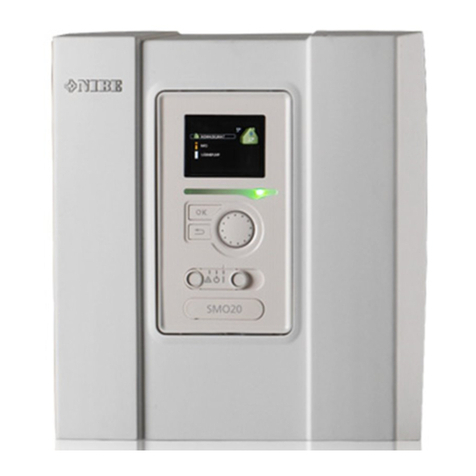
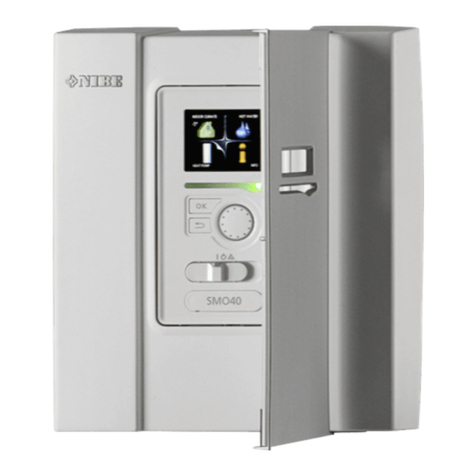
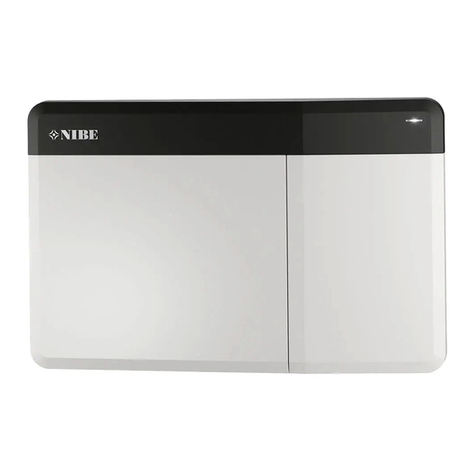
Nibe SMO 05 User guide

Installer manual
LEK
LEK
SMO 05
Accessories
IHB GB 1339-3
431197

4XLFN JXLGH
1DYLJDWLRQ 2N EXWWRQ FRQILUPVHOHFW
%DFN EXWWRQ EDFNXQGRH[LW
8SGRZQ EXWWRQV
PRYHLQFUHDVHUHGXFH
A detailed explanation of the button functions can be found on page 18.
How to scroll through menus and make different settings is described on page 19.
6HW WKH LQGRRU FOLPDWH
LQGRRU FOLPDWH
KRW ZDWHU
LQIR
P\ V\VWHP ;
The mode for setting the indoor temperature is reached, when in the start mode in the main menu, by pressing the
OK button twice. Read more about the settings on page 20.
,QFUHDVH KRW ZDWHU YROXPH
7(0325$5< /8;
RII
;
;
To temporarily increase the amount of hot water (if a hot water heater is installed to your SMO 05), first push the
down button once to mark menu 2 (water droplet) and then press the OK button twice. Read more about the settings
on page 24.
In event of disturbances in comfort
If a disturbance in comfort of any type occurs there are some measures that can be taken before you need to contact
your installer. See page 30 for instructions.

Table of Contents
1 Important information 2
Safety information 2
2 Delivery and handling 5
Mounting 5
Supplied components 6
Removing the covers 6
3 The Control Module Design 7
Room unit 7
Unit box 7
4 Pipe connections 8
General 8
Docking alternatives 8
5 Electrical connections 11
General 11
Connections 11
Settings 16
Connecting accessories 16
6 Commissioning and adjusting 17
Preparations 17
Commissioning with NIBE air/water heat
pump 17
Commissioning without NIBE air/water heat
pump 17
Check the reversing valve 17
7 Control - Introduction 18
Room unit 18
Menu system 18
8 Control - Menus 20
Menu 1 - INDOOR CLIMATE 20
Menu 2 - HOT WATER 24
Menu 3 - INFO 25
Menu 4 MY SYSTEM 26
Menu 5 - SERVICE 28
9 Disturbances in comfort 30
Manage alarm 30
Troubleshooting 30
Add. heat only 31
10 Accessories 32
11 Technical data 33
Dimensions and setting-out coordinates 33
Technical specifications 35
Electrical circuit diagram 36
Item register 37
1Table of Contents |SMO 05

Safety information
This manual describes installation and service procedures
for implementation by specialists.
This appliance is not intended for use by persons (includ-
ing children) with reduced physical, sensory or mental
capabilities, or lack of experience and knowledge, unless
they have been given supervision or instruction concern-
ing use of the appliance by a person responsible for their
safety.
Children should be supervised to ensure that they do not
play with the appliance.
Rights to make any design or technical modifications are
reserved.
©NIBE 2012.
Symbols
NOTE
This symbol indicates danger to machine or
person.
Caution
This symbol indicates important information
about what you should observe when maintain-
ing your installation.
TIP
This symbol indicates tips on how to facilitate
using the product.
Marking
This accessory is CE marked and fulfils IP20 (room unit)
and IP21 (unit box).
The CE marking means that NIBE ensures that the product
meets all regulations that are placed on it based on relev-
ant EU directives. The CE mark is obligatory for most
products sold in the EU, regardless where they are made.
IP20 means that the product can be touched by hand,
that objects with a diameter larger than or equivalent
to12.5 mm cannot penetrate and cause damage.
Serial number
The serial number can be found on one long side of the
cover on the unit box.
Install the cover on the unit box so that the serial number
is visible.
LEK
6HULDO QXPEHU
Caution
Always give the product's serial number when
reporting a fault.
Country specific information
Installer manual
This installer manual must be left with the customer.
SMO 05Chapter 1 | Important information2
1 Important information

Inspection of the installation
Current regulations require the heating installation to be inspected before it is commissioned. The inspection must be
carried out by a suitably qualified person. Fill in the page for information about installation data in the User manual.
DateSignatureNotesDescription
✔
Communication, heat pump
Electricity (page 11)
Supply connected 230 V
Outside sensor
Room sensor
Hot water sensor
Room unit
Bridge at installation of room unit
Dipswitch
Miscellaneous
Checking additional heater
Checking the function of the reversing valve
3Chapter 1 | Important informationSMO 05
..........................................................................................................................................................................................................................................................................................................................................................................................
.

Contact information
KNV Energietechnik GmbH, Gahberggasse 11, 4861 SchörflingAT
NIBE Wärmetechnik AG, Winterthurerstrasse 710, CH-8247 FlurlingenCH
Druzstevni zavody Drazice s.r.o, Drazice 69, CZ - 294 71 Benatky nad JizerouCZ
NIBE Systemtechnik GmbH, Am Reiherpfahl 3, 29223 CelleDE
Vølund Varmeteknik A/S, Member of the Nibe Group, Brogårdsvej 7, 6920 VidebækDK
NIBE Energy Systems OY, Juurakkotie 3, 01510 VantaaFI
AIT France, 10 rue des Moines, 67000 HaguenauFR
NIBE Energy Systems Ltd, 3C Broom Business Park, Bridge Way, Chesterfield S41 9QGGB
NIBE Energietechniek B.V., Postbus 2, NL-4797 ZG WILLEMSTAD (NB)NL
ABK AS, Brobekkveien 80, 0582 Oslo, Postadresse: Postboks 64 Vollebekk, 0516 OsloNO
NIBE-BIAWAR Sp. z o. o. Aleja Jana Pawła II 57, 15-703 BIAŁYSTOKPL
© "EVAN" 17, per. Boynovskiy, Nizhny NovgorodRU
NIBE AB Sweden, Box 14, Hannabadsvägen 5, SE-285 21 MarkarydSE
For countries not mention in this list, please contact Nibe
Sweden or check www.nibe.eu for more information.
SMO 05Chapter 1 | Important information4

Mounting
NOTE
For wall mounting, use the mounting adapted
for the base.
Unit box
100
235
250
160
175
Room unit
Mounting
SMO 05 cannot be installed directly against a wall be-
cause the connection terminal protrudes from the reverse.
Install SMO 05 either in a spare apparatus box or on the
plastic spacer supplied.
If you want to use the room temperature sensor in SMO
05 the position of the room unit is important. See page
13.
1.
LEK
Open SMO 05 by inserting a screwdriver in one of
the 4 mm wide gaps in the edge. Press the screw-
driver straight in to open the clips. Repeat for the
other three clips.
2.
LEK
Without plastic spacer: Place the rear panel in front
of the apparatus box and screw to the wall.
With plastic spacer: Screw the plastic spacer into the
wall. Then screw the the rear panel into the plastic
spacer with the two screws supplied.
3.
LEK
Connect the room unit, see page 12.
4.
LEK
Angle the front panel approx. 30 ° and secure the
two clips on one side. Then close the unit and secure
the two clips on the other side.
For dimensions and setting-out coordinates see page 34.
5Chapter 2 | Delivery and handlingSMO 05
2 Delivery and handling

Supplied components
LEK
LEK
Plastic spacer
frame
Room unitOutside sensor
LEK
Room sensorTemperature
sensor
Unit box
LEK
LEK
Insulation tapeCable tiesAluminium tape
LEK
Time relay
Removing the covers
Unit box
LEK
Remove the four screws in their respective corners and
lift the cover.
The outdoor temperature sensor/Room
temperature sensor
LEK
SMO 05Chapter 2 | Delivery and handling6

Room unit
Front
Rear side
+12V GND B A
-
Electrical components
Room unitAA 25
Terminal block, communication connectionJ3
Designations in component locations according to
standard IEC 81346-1 and 81346-2.
Unit box
LEK
AA5-X4
AA5-S2
AA5-X2 AA5-X9 X1
FA1
AA5-F1AA5
Electrical components
Miniature circuit-breaker. 10AFA1
Terminal block, power supplyX1
Accessory cardAA5
Terminal block, sensors and external
blocking
AA5-X2
Terminal block, communicationAA5-X4
Terminal block, circulation pump, mixing
valve and auxiliary relay
AA5-X9
DIP switchAA5-S2
Fine wire fuse, T4AH250VAA5-F1
Designations in component locations according to
standard IEC 81346-1 and 81346-2.
7Chapter 3 | The Control Module DesignSMO 05
3 The Control Module Design

General
Pipe installation must be carried out in accordance with
current norms and directives. See manual for NIBE
F2015/F2025/F2016/F2026/F2300 for installation of the
heat pump.
Symbol key
MeaningSymbol
Shut-off valve
Non-return valve
Shunt / shuttle valve
Safety valve
Trim valve
Temperature sensor
Pressure gauge
P
Circulation pump
Particle filter
Temperature sensor installation on pipe
K
Install the temperature sensors with cable ties (secure the
first cable tie to the pipe on the centre of the sensor and
the second about 5 cm after the sensor) and aluminium
tape. Then insulate with supplied insulation tape.
NOTE
Sensor and communication cables must not be
placed near power cables.
Docking alternatives
SMO 05 can be connected in several different ways, some
of which are shown below.
Further option information is available at www.nibe.eu
and in the respective assembly instructions for the ac-
cessories used. See page 32 for a list of the accessories
that can be used with SMO 05.
NOTE
This is the outline diagram. Actual installations
must be planned according to applicable stand-
ards.
Explanation
SMO 05AA25
Display unitAA4
Outside sensorBT1
Hot water sensor, ChargingBT6
Hot water sensor, Top (VPB)BT7
Flow sensor, ExternalBT25
Room sensorBT50
Time relayKF1
Heat pump (F2026/F2300)EB100
Charge pumpGP12
Particle filterHQ1
Miscel-
laneous
Immersion heaterEB1
Immersion heaterEB20
Expansion vessel closed, Hot waterCM4
Accumulator tankCP1
Accumulator tank with hot water heating
(VPA/VPAS/VPB)
CP10
Buffer vessel (UKV)CP11
Safety valve, Heating mediumFL2
Safety valve, Heat pumpFL10
Circulation pump, Heating mediumGP10
Auxiliary relay/ContactorKA10
Auxiliary relay/ContactorKA11
Drain valve, Heating mediumQM1
Shut-off valve, Heating medium, FlowQM31
Shut off valve, Heating medium, ReturnQM32
Shut-off valveQM40
Reversing valve, Hot water/Heating mediumQN10
Overflow valveQN26
Control valveQN50
Control valveQN51
Non-return valveRM10
Designations according to standards 81346-1 and 81346-
2.
SMO 05Chapter 4 | Pipe connections8
4 Pipe connections

NIBE F2026 docked with SMO 05 and immersion heater (floating condensing)
EB100
CM4
FL2
FL10
CP11
KA11
QM40
GP12
QM1
EB100-HQ1
QN10
RM10
AA25-BT1 AA25-BT50
AA25 AA25-AA4
EB1
QN51
AA25-BT6
QN50
CP10
FL2
EB20
AA25-
BT25
QM32
QM31
GP10
QN26
KA10
9Chapter 4 | Pipe connectionsSMO 05

NIBE F2300 docked with SMO 05 and immersion heater (floating condensing)
-EB101
-EB101
-CM1
-FL2
-FL10
-CP11
-AA25
-KA10
-AA25
-KA11
-CP10
-EB20
-AA25
-BT25
-QM40
-GP12
-QM1 -HQ1
-QN10
-RM1
-AA25-BT1 -AA25-BT50
-QM32
-QM31
-AA25 -AA25-AA4
-EB1
-RN11
-AA25
-BT6
-CP10
-GP10
-FL11
-RN10
-AA25
-BT7
-QN26
602
The heating medium side and the hot water side must
be fitted with the necessary safety equipment in accord-
ance with the applicable regulations.
Note! This is an outline diagram. Actual installations must
be planned according to applicable standards.
The principle above requires accessories.
SMO 05Chapter 4 | Pipe connections10

General
NOTE
All electrical connections must be carried out by
an authorised electrician.
Electrical installation and wiring must be carried
out in accordance with the stipulations in force.
When installing SMO 05, NIBE's air/water heat
pump and any addition must be current free.
Caution
The relay outputs on the accessory card (AA5)
can have a max load of 2 A (230 V) in total.
Connections
NOTE
To prevent interference, unscreened communic-
ation and/or sensor to external connections
cables must not be laid closer than 20 cm to
high voltage cable when cable routing.
Connecting the supply
Connect the power supply to terminal block X1 as illus-
trated.
3
2
1N
230V 50Hz-X1
L
PE
8QLW ER[ ([WHUQDO
11Chapter 5 | Electrical connectionsSMO 05
5 Electrical connections

Communication with heat pump
NIBE F2015/F2025/F2300
The heat pump is connected to terminal block X4:1 (A),
X4:2 (B) and X4:3 (GND) on the accessory card (AA5)
from terminal block -AA21:J2 in F2015/F2300 or from
terminal block -E34:J2 in F2025.
Use a cable of at least 0.5 mm² cable area.
GND
B
A
6
5
4
7
3
2
1
8
+HDW SXPS 8QLW ER[
$$;$$(-
ON
12345678
-X9
-X2
24 20212223 1516171819 1011121314 567891
1
N
L
PE
PE
1
2
3
4
5
6
7
8
2
3
4
5
6
7
8
9
234
-X8
-X4
-X10
-X1
$$;
34
$$(-
NIBE F2016/F2026
The heat pump is connected to terminal X4:1, X4:2 and
X4:3 on the accessories card (AA5) from terminal -X5 (3,
4, 5, 6) i F2016/F2026, as illustrated.
Use a cable of at least 0.5 mm² cable area.
564231
6
5
4
7
3
2
1
+HDW SXPS 8QLW ER[
; $$;
ON
12345678
-X9
-X2
24 20212223 1516171819 1011121314 567891
1
N
L
PE
PE
1
2
3
4
5
6
7
8
2
3
4
5
6
7
8
9
234
-X8
-X4
-X10
-X1
$$;
LEK
;
Room unit
The room unit is connected to terminal block X4:4 (A),
X4:5 (B), X4:7 (GND) and X4:8 (+12V) on the accessory
card (AA5). Fit a bridge between X4:6 and X4:7.
Use a cable of at least 0.5 mm² cable area.
6
5
4
7
3
2
1
8
A
B
GND
+12V
5RRP XQLW 8QLW ER[
$$;$$-
ON
12345678
-X9
-X2
24 20212223 1516171819 1011121314 567891
1
N
L
PE
PE
1
2
3
4
5
6
7
8
2
3
4
5
6
7
8
9
234
-X8
-X4
-X10
-X1
$$;
SMO 05Chapter 5 | Electrical connections12

Outside sensor
Install the outside temperature sensor (BT1) in the shade
on a wall facing north or north-west, so it is unaffected
by the morning sun.
Connect the sensor to terminal block X2:23 and X2:24
on the accessory card (AA5). Use a 2 core cable of at least
0.5 mm² cable area.
If a conduit is used it must be sealed to prevent condens-
ation in the sensor capsule.
24 20212223 171819
8QLW ER[
([WHUQDO
$$;
%7
ON
12345678
-X9
-X2
24 20212223 1516171819 1011121314 567891
1
N
L
PE
PE
1
2
3
4
5
6
7
8
2
3
4
5
6
7
8
9
234
-X8
-X4
-X10
-X1
$$;
Room sensor
SMO 05 is delivered with a room sensor supplied (BT50).
The room temperature sensor has up to three functions:
1. Show current room temperature in the heat pump's
display.
2. Option of changing the room temperature in °C.
3. Makes it possible to change/stabilise the room tem-
perature.
Install the sensor in a neutral position where the set
temperature is required. A suitable location is on a free
inner wall in a hall approx. 1.5 m above the floor. It is
important that the sensor is not obstructed from measur-
ing the correct room temperature by being located, for
example, in a recess, between shelves, behind a curtain,
above or close to a heat source, in a draft from an extern-
al door or in direct sunlight. Closed radiator thermostats
can also cause problems.
SMO 05 operates without the sensor, but if one wishes
to read off the accommodation's indoor temperature in
SMO 05’s display the sensor must be installed. Connect
the room temperature sensor to X2:15 and X2:16 on the
accessory card (AA5).
Use a 2 core cable of at least 0.5 mm² cable area.
24 20212223 1516171819
8QLW ER[
([WHUQDO
$$;
%7
ON
12345678
-X9
-X2
24 20212223 1516171819 1011121314 567891
1
N
L
PE
PE
1
2
3
4
5
6
7
8
2
3
4
5
6
7
8
9
234
-X8
-X4
-X10
-X1
$$;
Caution
Changes of temperature in accommodation take
time. For example, short time periods in combin-
ation with underfloor heating will not give a
noticeable difference in room temperature.
13Chapter 5 | Electrical connectionsSMO 05

Temperature sensor, hot water charging
The temperature sensor, hot water charging (BT6) is
placed in the submerged tube on the water heater.
Connect the sensor to terminal block X2:21 and X2:22
on the accessory card (AA5). Use a 2 core cable of at least
0.5 mm² cable area.
Hot water charging can be activated in menu 5.2.
24 20212223 171819
8QLW ER[
([WHUQDO
$$;
%7
ON
12345678
-X9
-X2
24 20212223 1516171819 1011121314 567891
1
N
L
PE
PE
1
2
3
4
5
6
7
8
2
3
4
5
6
7
8
9
234
-X8
-X4
-X10
-X1
$$;
Temperature sensor, hot water top
A temperature sensor for hot water top (BT7) can be
connected to SMO 05 for showing the water temperature
at the top of the tank (placed in submerged tube).
Connect the sensor to terminal block X2:19 and X2:20
on the accessory card (AA5). Use a 2 core cable of at least
0.5 mm² cable area.
24 20212223 1
7
1819
8QLW ER[
([WHUQDO
$$;
%7
ON
12345678
-X9
-X2
24 20212223 1516171819 1011121314 567891
1
N
L
PE
PE
1
2
3
4
5
6
7
8
2
3
4
5
6
7
8
9
234
-X8
-X4
-X10
-X1
$$;
Temperature sensor, external flow line
The temperature sensor, external flow line (BT25) is con-
nected to terminal block X2:17 and X2:18 on the access-
ory card (AA5). Use a 2 core cable of at least 0.5 mm2
cable area.
24 20212223 16171819
8QLW ER[
([WHUQDO
$$;
%7
ON
12345678
-X9
-X2
24 20212223 1516171819 1011121314 567891
1
N
L
PE
PE
1
2
3
4
5
6
7
8
2
3
4
5
6
7
8
9
234
-X8
-X4
-X10
-X1
$$;
Switch for external blocking of addition
and/or compressor
In those cases external blocking of addition (B) and/or
compressor (A) is wanted, this can be connected to ter-
minal block X2:11 and X2:12 (addition) respectively ter-
minal block X2:13 and X2:14 (compressor) on the access-
ory card (AA5).
The addition and/or the compressor are disconnected by
connecting a potential free switch function to actual ter-
minal block. Use a 2 core cable of at least 0.5 mm² cable
area.
External blocking of addition and compressor can be
combined.
A closed contact results in the electrical output being
disconnected.
1516 111121314
8QLW ER[
([WHUQDO
$$;
$%
ON
12345678
-X9
-X2
24 20212223 1516171819 1011121314 567891
1
N
L
PE
PE
1
2
3
4
5
6
7
8
2
3
4
5
6
7
8
9
234
-X8
-X4
-X10
-X1
$$;
Contact for external adjustment.
An external contact function can be connected to SMO
05 to change the supply temperature and the room
temperature.
When the contact is closed, the offset heating curve is
changed by the number of steps selected in the menu
1.9.2 "external adjustment". If a room temperature
sensor is installed and activated the desired room temper-
ature (°C) is set in the menu.
The contact must be potential free and connected to
terminal block X2:9 and X2:10 on the accessory card
(AA5).
1516 1011121314 89
8QLW ER[
([WHUQDO
$$;
ON
12345678
-X9
-X2
24 20212223 1516171819 1011121314 567891
1
N
L
PE
PE
1
2
3
4
5
6
7
8
2
3
4
5
6
7
8
9
234
-X8
-X4
-X10
-X1
$$;
SMO 05Chapter 5 | Electrical connections14

Connection of the circulation pump (GP10)
The circulation pump is connected to terminal block X9:7
(N), X9:8 (230 V) and X1:3 (PE) on the accessory card
(AA5).
NOTE
During the emergency mode function, the circu-
lation pump requires external voltage.
1
2
3
4
5
6
7
8
9
L
N
PE
3
2
1
8QLW ER[ ([WHUQDO
$$;
;
*3
ON
12345678
-X9
-X2
24 20212223 1516171819 1011121314 567891
1
N
L
PE
PE
1
2
3
4
5
6
7
8
2
3
4
5
6
7
8
9
234
-X8
-X4
-X10
-X1
$$;
Connection of the reversing valve motor
(QN10)
The reversing valve is connected to terminal block X9:5
(N), X9:6 (230 V during hot water production, 0 V during
heating) and X10:2 (230 V) on the accessory card (AA5).
1
2
3
4
5
6
7
8
9
8QLW ER[ ([WHUQDO
$$;
41
$$;
1
/
/
ON
12345678
-X9
-X2
24 20212223 1516171819 1011121314 567891
1
N
L
PE
PE
1
2
3
4
5
6
7
8
2
3
4
5
6
7
8
9
234
-X8
-X4
-X10
-X1
$$;
$$;
Connection of additional heat (EM1/EB1)
The additional relay (QA1) is connected to the accessories
card (AA5) as illustrated from QA1:A1 to AA5-X9:2 (230
V) and from QA1:A2 to AA5-X9:1 (N).
1
2
3
A1 A2
$$; 4$
8QLW ER[ (0 (%
1
/
ON
12345678
-X9
-X2
24 20212223 1516171819 1011121314 567891
1
N
L
PE
PE
1
2
3
4
5
6
7
8
2
3
4
5
6
7
8
9
234
-X8
-X4
-X10
-X1
$$;
Connection of additional heat (EM1/EB1) and
time relay
The addition can be controlled in two steps using a time
relay (KF1). The additional relay (QA1) is connected to
the accessories card (AA5) as illustrated from QA1:A1 to
AA5-X9:2 (230 V) and from QA1:A2 to AA5-X9:1 (N).
Connect the time relay as illustrated.
LEK
3
2
1
ON
12345678
.) $$
1
2
3
A1 A2
A1 A2
A1 A2
15 18
Steg 1
Steg 2
Tidrelä 2h
$$;
4$
8QLW ER[ (0 (%
1
/
/
1
7LPH UHOD\ KUV
6WHS
6WHS
4$
.)
15Chapter 5 | Electrical connectionsSMO 05

Connection of add. heat for hot water
The additional relay (QA1) is connected to the accessories
card (AA5) as illustrated from QA1:A1 to AA5-X9:4 (230
V) and from QA1:A2 to AA5-X9:3 (N).
1
2
3
4A1 A2
L
N
L
N
8QLW ER[ &3
$$; 4$
ON
12345678
-X9
-X2
24 20212223 1516171819 1011121314 567891
1
N
L
PE
PE
1
2
3
4
5
6
7
8
2
3
4
5
6
7
8
9
234
-X8
-X4
-X10
-X1
$$;
Settings
DIP switch
The DIP switch on the accessory card must be set as fol-
lows.
ON
12345678
ON
12345678
-X9
-X2
24 20212223 1516171819 1011121314 567891
1
N
L
PE
PE
1
2
3
4
5
6
7
8
2
3
4
5
6
7
8
9
234
-X8
-X4
-X10
-X1
$$6
Connecting accessories
Instructions for connecting other accessories are in the
installation instructions provided. See page 32 for the list
of the accessories that can be used with SMO 05.
SMO 05Chapter 5 | Electrical connections16

Preparations
႑NIBE F2015/F2025/F2016/F2026/F2300 must have a
control card with display with version 2.10 or later.
The control card version is displayed in the heat
pump's display upon start-up.
႑SMO 05 must be ready-connected.
႑Read how to use the room unit on page 18.
Commissioning with NIBE
air/water heat pump
NIBE F2015/F2025
႑Follow the instructions in the heat pump's Installation
and Maintenance under section "Commissioning and
adjustment" – "Start-up and inspection".
NIBE F2016/F2026
႑Follow the instructions in the heat pump's Installation
manual under section "Commissioning and adjust-
ment" – "Start-up and inspection".
NIBE F2300
႑Follow the instructions in the heat pump's Installation
manual under section "Commissioning and adjust-
ment" – "Start-up and inspection".
SMO 05
1. Power the heat pump.
2. Power SMO 05.
3. Make settings that affect actual docking.
4. Set curve slope and offset heating curve in menu
1.9.1. See page 21.
5. Set the correct flow during hot water production
according to the heat pump's Installation manual.
Check the difference between BT2 and BT3 in menu
3.
Commissioning without NIBE
air/water heat pump
1. Go to menu 4.2 op. mode.
2. Mark ”add. heat only” using the up and down but-
tons and then press the OK button.
3. Return to the main menus by pressing the Back but-
ton.
Caution
When commissioning without NIBE air/water
heat pump an alarm communication error may
appear in the room unit.
Reset the alarm when setting ”add. heat only“
in menu 4.2.
Check the reversing valve
1. Change menu 4.2 to manual operating mode with
heating permitted.
2. Change degree minutes to 0 in menu 4.9.3 "current
value".
3. Create hot water demand.
4. Check that the reversing valve is open for hot water
charging.
5. Change degree minutes in menu 4.9.3 "current
value" to a lower value than shown in menu 4.9.3
"start addition" (factory setting: -400).
6. Check that the reversing valve is set to open for
heating operation.
7. Change menu 4.2 to desired operating mode.
8. Reset menu 4.9.3 "current value" to 0.
17Chapter 6 | Commissioning and adjustingSMO 05
6 Commissioning and adjusting

Room unit
$
% & ' (
Display
Instructions, settings and operational information
are shown on the display.
A
Stand-by button
The room unit can be switched to stand-by mode
using the stand-by button. Heat pump operation
is not affected by pressing the button.
B
Back button
The back button is used to:
႑go back to the previous menu.
႑change a setting that has not been con-
firmed.
C
OK button
The OK button is used to:
႑confirm selections of sub menus/options/set
values.
D
Up and down buttons
With the up and down buttons you can:
႑scroll in menus and between options.
႑increase and decrease the values.
႑change page in multiple page instructions
E
Menu system
When the room unit starts up you come to the informa-
tion menu. Basic information about your system status
is shown here.
2XWGRRU WHPSHUDWXUH
,QGRRU WHPSHUDWXUH
7HPS OX[ DFWLYDWHG
+RW ZDWHU WHPS
Press any button to go to the main menu.
LQGRRU FOLPDWH
KRW ZDWHU
LQIR
P\ V\VWHP
The information menu shows:
႑on starting
႑when the back button in the main menu is pressed
႑after 15 minutes of inactivity.
In the event of an alarm a symbol is shown in the display
together with the alarm's number. See page 30 for in-
structions.
In the other menus the alarm symbol is shown in the
bottom right hand corner.
SMO 05Chapter 7 | Control - Introduction18
7 Control - Introduction
Other manuals for SMO 05
1
Table of contents
Other Nibe Control Unit manuals
Popular Control Unit manuals by other brands

Hi-Link
Hi-Link HLK-7628D user manual

ABB
ABB WaveLINE 6731-21-500 Installation and operating instructions

Fluidmaster
Fluidmaster 400LS Technology Installation Instructions

LOVATO ELECTRIC
LOVATO ELECTRIC ATL DPS1 operating manual

Emerson
Emerson Fisher ET instruction manual

Texas Instruments
Texas Instruments LMK00725EVM user guide

Dasan
Dasan TMS3.0 installation manual

Tridonic
Tridonic SLE G6 Technical guide

Linx Technologies
Linx Technologies FCTN-MD09 Series Data guide

Image Engineering
Image Engineering iQ-LED V2 Setup instructions

EUCHNER
EUCHNER ECB-A-2K-A1-160397 operating instructions

Miranda
Miranda NV5100MC Master Control Operator's guide