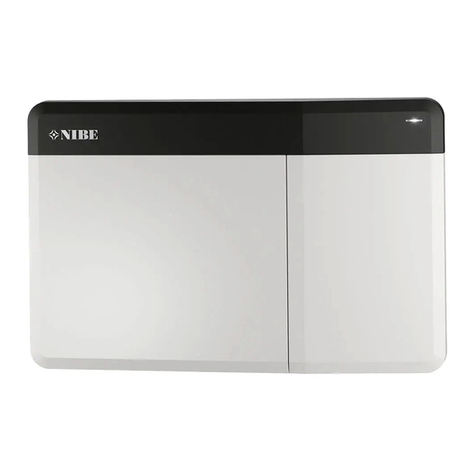
Nibe FLM User guide

Installer manual
LEK
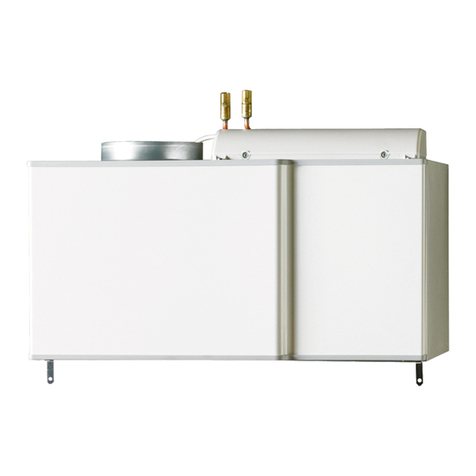
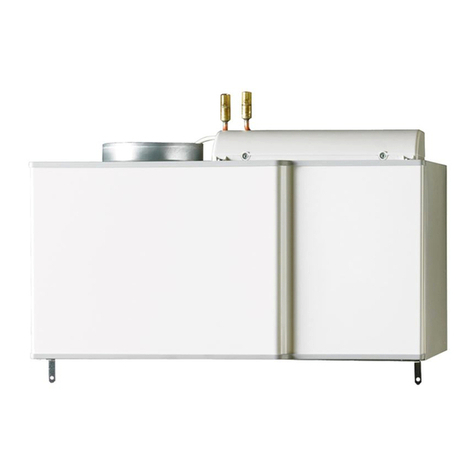
NIBE FLM
Exhaust air module
IHB GB 1014-2
031375

LEK
LEK
LEK

Table of Contents
1 Important information 2
Safety information 2
2 Delivery and handling 5
Transport 5
Assembly 5
Supplied components 5
Removing the covers 5
3 The design of the exhaust air mod-
ule 6
4 Pipe and ventilation connec-
tions 8
General pipe connections 8
Dimensions and pipe connections 8
Brine side 9
Condensation water hose 11
General ventilation connection 12
Ventilation flow 12
Adjusting ventilation 12
5 Electrical connections 13
General 13
Connections 13
6 Commissioning and adjusting 15
Preparations 15
Filling and venting 15
Start-up and inspection 16
7 Service 19
Service actions 19
8 Disturbances in comfort 20
Info-menu (F1145/F1245) 20
Manage alarm (F1145/F1245) 20
Troubleshooting 20
9 Accessories 22
Brackets 22
10 Technical data 23
Dimensions and setting-out coordinates 23
Technical specifications 24
Electrical circuit diagram 25
Item register 26
1Table of Contents |NIBE FLM

Safety information
This manual describes installation and service procedures
for implementation by specialists.
This appliance is not intended for use by persons (includ-
ing children) with reduced physical, sensory or mental
capabilities, or lack of experience and knowledge, unless
they have been given supervision or instruction concern-
ing use of the appliance by a person responsible for their
safety.
Children should be supervised to ensure that they do not
play with the appliance.
Rights to make any design or technical modifications are
reserved.
©NIBE 2010.
Symbols
NOTE
This symbol indicates danger to machine or
person.
Caution
This symbol indicates important information
about what you should observe when maintain-
ing your installation.
TIP
This symbol indicates tips on how to facilitate
using the product.
Marking
This exhaust air module is CE marked and fulfils IP21.
The CE marking means that NIBE ensures that the product
meets all regulations that are placed on it based on relev-
ant EU directives. The CE mark is obligatory for most
products sold in the EU, regardless where they are made.
IP21 means that the product can be touched by hand,
that objects with a diameter larger than or equivalent to
12.5 mm cannot penetrate and cause damage and that
the product is protected against vertically falling drops.
Serial number
The serial number can be found at the bottom left inside
the front cover.
LEK
6HULDO QXPEHU
Caution
Always give the product's serial number when
reporting a fault.
Country specific information
Installer manual
This installer manual must be left with the customer.
NIBE FLMChapter 1 | Important information2
1 Important information

Inspection of the installation
Current regulations require the exhaust air module to be inspected before it is commissioned. The inspection must be
carried out by a suitably qualified person. Fill in the page for information about installation data in the User manual.
DateSignatureNotesDescription
✔
Ventilation (page 12)
Setting the ventilation flow
Brine (page 9)
Non-return valve
System flushed
System vented
Antifreeze
Expansion vessel
Particle filter
Safety valve
Shut off valves
Circulation pump setting
Checking the condensation water seal
Trim valve
Electricity (page 13)
Supply connected 230 V
Circuit fuses
3Chapter 1 | Important informationNIBE FLM
..........................................................................................................................................................................................................................................................................................................................................................................................
.

Contact information
KNV Energietechnik GmbH, Gahberggasse 11, 4861 SchörflingAT
NIBE Wärmetechnik AG, Winterthurerstrasse 710, CH-8247 FlurlingenCH
Druzstevni zavody Drazice s.r.o, Drazice 69, CZ - 294 71 Benatky nad JizerouCZ
NIBE Systemtechnik GmbH, Am Reiherpfahl 3, 29223 CelleDE
Vølund Varmeteknik, Filial af NIBE AB, Brogårdsvej 7, 6920 VidebækDK
NIBE – Haato OY, Valimotie 27, 01510 VantaaFI
NIBE Energy Systems Ltd, 3C Broom Business Park, Bridge Way, Chesterfield S41 9QGGB
NIBE Energietechniek B.V., Postbus 2, NL-4797 ZG WILLEMSTAD (NB)NL
NIBE AB, Fekjan 15F, 1394 NesbruNO
NIBE-BIAWAR Sp. z o. o. Aleja Jana Pawła II 57, 15-703 BIAŁYSTOKPL
© "EVAN" 17, per. Boynovskiy, Nizhny NovgorodRU
NIBE AB Sweden, Box 14, Järnvägsgatan 40, SE-285 21 MarkarydSE
For countries not mention in this list, please contact Nibe
Sweden or check www.nibe.eu for more information.
NIBE FLMChapter 1 | Important information4

Transport
The exhaust air module should be transported and stored
in the dry.
Assembly
NIBE FLM is installed on top of the ground heat pump or
freestanding on brackets. Noise from the circulation pump
or fan can be transferred to the brackets.
႑Install with its back to an outside wall, ideally in a
room where noise does not matter, in order to elim-
inate noise problems. If this is not possible, avoid
placing it against a wall behind a bedroom or other
room where noise may be a problem.
႑Wherever the unit is located, walls to sound sensitive
rooms should be fitted with sound insulation.
႑Route pipes so they are not fixed to an internal wall
that backs on to a bedroom or living room.
Installation area
Leave a space of 500 mm in front of the exhaust air
module. Approximately 50 mm free space is required on
each side in order to open the side hatches. The hatches
do not need to be opened during service, all service on
NIBE FLM can be carried out from the front.
500
10–25*
(50) (50)
*Depending on routing of supply cables and pipes.
NOTE
Ensure that there is sufficient space (300 mm)
above the exhaust air module for installing
ventilation hoses.
Supplied components
LEK
Non-return valve Ø 32 mmTrim valve Ø 15 mm
LEK
2 x screws (T25) for in-
stalling NIBE FLM on
F1145/F1245
Condensation water hose Ø
20 mm
Location
The bag of supplied items is placed on top of NIBE FLM.
Removing the covers
Front cover
1. Remove the service cover by pulling it straight out.
LEK
Side covers
1. Undo the screws at the upper edge
2. Lift the side hatches upwards and twist the cover
outwards slightly.
3. Assembly takes place in the reverse order.
LEK
5Chapter 2 | Delivery and handlingNIBE FLM
2 Delivery and handling

LEK
$$
6) $$6
LEK
;/ %7
+4
;/
$$
40
3)
%7
LEK
:
6) 6)
;/:
LEK
*4(3
;/ ;/
*3
%7 %7
NIBE FLMChapter 3 | The design of the exhaust air module6
3 The design of the exhaust air module

Exhaust air module
NIBE FLMAZ
Pipe connections
Connection, brine in, compression ring Ø 15 mmXL6
Connection, brine out, compression ring Ø 15
mm
XL7
Ventilation connection exhaust air, Ø 160 mmXL31
Ventilation connection extract air, Ø 160 mmXL32
Drip-pan drainXL40
HVAC components
Venting brineQM21
Circulation pumpGP2
Heat exchangerEP16
Sensors etc.
Temperature sensor, exhaust airBT20
Temperature sensor, extract airBT21
Temperature sensor, collector inBT26
Temperature sensor, collector outBT27
Electrical components
Accessory cardAA5
Dip switchAA5-S2
Joint cardAA100
Switch, position0-1,main switchSF1
Switch, position0-1,circulation pumpSF2
PotentiometerSF3
Cord with connection plugW1
Control cableW6
Ventilation
FanGQ2
Air filterHQ10
Miscellaneous
Type platePF1
Designations in component locations according to
standard IEC 81346-1 and 81346-2.
7Chapter 3 | The design of the exhaust air moduleNIBE FLM

General pipe connections
Pipe installation must be carried out in accordance with
current norms and directives.
Lowest permitted temperature on incoming brine is -5
°C.
Symbol key
MeaningSymbol
Venting valve
Shut-off valve
Non-return valve
Control valve
Shunt / shuttle valve
Safety valve
Temperature sensor
Pressure gauge
P
Circulation pump
Particle filter
Fan
Compressor
Heat exchanger
Dimensions and pipe connec-
tions
32
320
38
58
408
100
72
NIBE FLMChapter 4 | Pipe and ventilation connections8
4 Pipe and ventilation connections

Brine side
Output transfer to brine
0
0,5
1
1,5
2
100 150 200 250 300
%ULQH LQ DW r&
%ULQH LQ DW r&
$LU IORZ PuK
7UDQVIHUUHG SRZHU N:
The diagram shows the effect transferred from the vent-
ilation air to the brine and applies to an air temperature
of +20°C and 50% relative air humidity.
Expansion vessel
The brine circuit must be supplied with a pressure expan-
sion vessel (CM3). If there is already a level vessel (CM2)
installed this should be replaced. The brine side must be
pressurised to at least 0.5 bar.
The pressure expansion vessel should be dimensioned as
set out in the diagram, to prevent operating disturbances.
The pressure expansion vessel covers the temperature
range from -10 °C to +20 °C for the brine at a pre-pres-
sure of 0.5 bar and the safety valve's opening pressure
of 3 bar.
0
0100 200 300
10
20
30
40
50
400 500 600 700 800 900 1000
([SDQVLRQ YHVVHO
%ULQH
YROXPH
Trim valve
The brine circuit is supplied with trim valve (RN1). This is
necessary for adjusting the brine flow.
P
)LOOLQJ
FRQQHFWLRQ
&0
51
*3
*4
40
NOTE
Venting may be necessary at installation and
after a period of use. Vent through venting valve
(QM21). When venting, the switch for the circu-
lation pump (SF2) must be set to ”0”.
9Chapter 4 | Pipe and ventilation connectionsNIBE FLM

Connecting to NIBE F1145/F1245
1. Remove the service cover from F1145/F1245.
2. Remove the top panel on F1145/F1245 (installed with
6 screws).
3. Install NIBE FLM from the top and slide into position.
4. Secure NIBE FLM with the 2 supplied screws.
5. Connect brine and ventilation pipes.
6. Reinstall the service cover on F1145/F1245.
NIBE FLM can also be installed freestanding on brackets.
LEK
LEK
Connecting to another heat pump
1. Install NIBE FLM on brackets.
2. Connect brine and ventilation pipes.
LEK
LEK
NIBE FLMChapter 4 | Pipe and ventilation connections10

Condensation water hose
1. Connect the condensation water hose to the drip-
pan drain (XL40).
2. Shape the hose into a water seal (see image). If NIBE
FLM is connected to F1245 there is space for the
hose and the water seal in the heat pump's insula-
tion.
3. Route the hose to a floor drain or similar.
4. Refill the water seal with water.
Ensure that the end of the hose runs out above the water
level in the floor drain. The hose must be easily accessible
for future cleaning.
LEK
11Chapter 4 | Pipe and ventilation connectionsNIBE FLM

General ventilation connection
Ventilation installation must be carried out in accordance
with current norms and directives.
To prevent fan noise being transferred to the exhaust air
devices, it may be a good idea to install a silencer in the
duct. This is especially important if there are exhaust air
devices in bedrooms.
Connections must be made via flexible hoses, which must
be installed so that they are easy to replace. The extract
air duct must be provided with diffusion-tight insulation
over its entire length. Provision must be made for inspec-
tion of the duct. Make sure that there are no reductions
of cross-sectional area in the form of creases, tight bends
etc, since this will reduce the ventilation capacity. The air
duct system must be a minimum of air tightness class B.
Exhaust air duct
Exhaust air duct (kitchen fan) must not be connected to
NIBE FLM.
NOTE
A duct in a masonry chimney stack must not be
used for extract air.
275
451
158
195
Ø160
LEK
([WUDFW DLU
([KDXVW DLU
Ventilation flow
Connect NIBE FLM so that all exhaust air except exhaust
air duct air (kitchen fan) passes the heat exchanger (EP16)
in the exhaust air module. The lowest ventilation flow
according to current standards is 0.35 l/s per m² floor
area. For optimum exhaust air module performance the
ventilation flow should not be less than 110 m³/h (31 l/s).
Ensure that the ventilation openings are not blocked. If
the exhaust air module is connected to F1145/F1245 set
the ventilation capacity in the heat pump's menu system
(menu 5.1.5). Otherwise the ventilation capacity is set via
potentiometer (AA5-SF3).
Adjusting ventilation
To obtain the necessary air exchange in every room of
the house, the exhaust air devices must be correctly posi-
tioned and adjusted and the fan in the exhaust air module
adjusted.
The factory setting for the ventilation on the exhaust air
module is high and you should therefore adjust the
ventilation immediately after installation so that it is set
according to the projected value for the house.
A defective ventilation installation may lead to reduced
installation efficiency and thus poorer operating economy,
and may result in moisture damage to the house.
NIBE FLMChapter 4 | Pipe and ventilation connections12

General
All electrical equipment is connected at the factory.
႑Disconnect NIBE FLM before insulation testing the
house wiring.
႑For the exhaust air module wiring diagram, see page
25.
႑Signal cables to external connections must not be laid
close to high current cables.
႑If the supply cable is damaged, only NIBE, its service
representative or similar authorised person may re-
place it to prevent any danger and damage.
NOTE
Electrical installation and service must be carried
out under the supervision of a qualified electri-
cian. Electrical installation and wiring must be
carried out in accordance with the stipulations
in force.
Connections
Connecting to F1145/F1245
In cases where NIBE FLM is installed together with
F1145/F1245 it is possible to connect the supply for NIBE
FLM on the terminal block in the heat pump. If this is the
case, remove the plug on the connection cable (W1) and
then connect the cable to the base card (AA2) terminal
block X1:4-6.
X1:4 Yellow/green
X1:5 Blue
X1:6 Brown
12 3 4 5 6
F1145
NIBE FLM
$$;
)
$$;
1
2
3
4
5
6
F1245
NIBE FLM
$$;
) $$;
13Chapter 5 | Electrical connectionsNIBE FLM
5 Electrical connections

The control cable (W6) with the connector X36 is connec-
ted to the contact X6 on the base card(AA2).
F1145
NIBE FLM
XJ6 X6
$$;
)
$$;
F1245
NIBE FLM
XJ6
X6
$$;
)
$$;
Connecting to another heat pump
In cases where NIBE FLM is installed together with another
heat pump, connect the exhaust air module to a groun-
ded single phase wall socket or through a permanent in-
stallation. For permanent installations, NIBE FLM must be
preceded by an isolator switch with at leasta3mm
breaking gap.
For installations with another heat pump do not connect
control cable (W6).
NIBE FLMChapter 5 | Electrical connections14

Preparations
1. Check that the switch ((SF1)) is in position " O".
2. Check that the filling valves are fully closed (see im-
age below).
Filling and venting
Filling and venting the brine system
When filling the brine system, mix the water with anti-
freeze in an open container. The mixture should be pro-
tected against freezing down to about -15 °C. The brine
is filled by connecting a filling pump.
1. Check that the level vessel (CM2) is replaced with
expansion vessel (CM3).
2. Check the brine system for leakage.
3. Connect the filling pump and return line on the brine
system's filler connector as illustrated.
4. Close the three way valve in the filler connector (ac-
cessory).
5. Open the valves on the filler connector.
6. Start the filling pump.
7. Fill until liquid enters the return pipe.
8. Vent the brine system with venting valve (QM21) on
NIBE FLM.
9. Close the valves on the filler connector.
10. Open the three way valve in the filler connector.
P
)LOOLQJ
FRQQHFWLRQ
&0
51
*3
*4
40
NOTE
Venting may be necessary at installation and
after a period of use. Vent through venting valve
(QM21). When venting, the switch for the circu-
lation pump (SF2) must be set to ”0”.
15Chapter 6 | Commissioning and adjustingNIBE FLM
6 Commissioning and adjusting

Start-up and inspection
6) 6)
Start-up with F1145/F1245
1. Set the main switch (SF1) and the switch for circula-
tion pump (SF2) on NIBE FLM to mode "1".
2. Check that the fan (GQ2) and circulation pump (GP2)
are running.
3. Turn the heat pump's switch (SF1) to "".
4. Follow the instructions in the start guide in the heat
pump display. If the start guide does not start when
you start the heat pump, start it manually in menu
5.7.
Starting-up with ventilation only
In cases where NIBE FLM is to be run with ventilation
only, e.g. before the brine side is ready for connection.
In this mode the circulation pump must be switched off.
1. Follow points 1-4 under "Starting with
F1145/F1245", but leave the switch for circulation
pump (SF2) in "0" mode.
2. When the brine side is connected the switch, circula-
tion pump (SF2) is set to mode "1".
Commissioning Commissioning with F1145/F1245
The first time the heat pump is started a start guide is
started. The start guide instructions state what needs to
carried out at the first start together with a run through
of the heat pump’s basic settings.
The start guide ensures that the start-up is carried out
correctly and cannot be bypassed. The start guide can be
started later in menu 5.7.
LEK
6)
7
$$6
$$
Starting-up with another heat pump
1. Set main switch (SF1) and the switch for circulation
pump (SF2) to mode "0".
2. Set the dip switch (AA5-S2) on the accessories board
(AA5) as illustrated below.
3. Set the main switch (SF1) and the switch for circula-
tion pump (SF2) on NIBE FLM to mode "1".
4. Check that the fan (GQ2) and circulation pump (GP2)
are running.
5. If necessary, set the speed on the fan using the po-
tentiometer (SF3).
6. Start the heat pump.
ON
12345678
ON
12345678
$$6
:LWK DQRWKHU KHDW
SXPS
:LWK ))
Starting-up with ventilation only
In cases where NIBE FLM is to be run with ventilation
only, e.g. before the brine side is ready for connection.
In this mode the circulation pump must be switched off.
1. Follow points 1-6 under "Starting with another heat
pump", but leave the switch for circulation pump
(SF2) in "0" mode.
2. When the brine side is connected, the switch for cir-
culation pump (SF2) is set to mode "1".
Starting-up with another heat pump
Start the brine pump in the heat pump (see your heat
pump's handbook).
NIBE FLMChapter 6 | Commissioning and adjusting16

The brine flow over NIBE FLM is regulated by the circula-
tion pump (GP2) and trim valve (RN1) so that the temper-
ature difference on brine in and out from NIBE FLM be-
comes 2–4 degrees. The temperature is measured using
external test equipment.
Adjustments are made when the heat pump is running.
Temperature difference applies at 20 °C room temperat-
ure and 0 °C in the brine.
The brine flow through NIBE FLM will be from 0.1 l/s (360
l/h) to 0.15 l/s (540 l/h) at the above temperature differ-
ences, depending on the ventilation flow.
When the heat pump is at a standstill the internal circula-
tion pump in NIBE FLM gives from 0.085 l/s (306 l/h) to
0.125 l/s (450 l/h) in the return charging flow to the col-
lector. This applies to a heat heat pump with approxim-
ately 4 kW rated output. For a 15 kW heat pump the
corresponding flow is from 0.09 l/s (324 l/h) to 0.14 l/s
(504 l/h).
Setting the ventilation
The factory setting for ventilation on the exhaust air
module is high. Ventilation must be set according to ap-
plicable norms. If NIBE FLM is connected to F1145/F1245
make the setting in menu 5.1.5. Otherwise ventilation is
set via potentiometer (AA5-SF3).
Even if ventilation is roughly set at installation it is import-
ant that a ventilation adjustment is ordered and permit-
ted.
NOTE
Order a ventilation adjustment to complete the
setting.
Tillgänglig
tryck
(Pa)
0
0
0
0
50
100
150
200
250
300
350
400
450
500
50 100 150 200 250 300 350 400
Luftflöd
e
(m³/h)
(l/s)
20%
40%
60%
80%
100%
25 50 75 100
$LUIORZ
P
K
OV
$YDLODEOH
SUHVVXUH
3D &DSDFLW\ GLUHFW FXUUHQW IDQ
Effekt
(watt)
Luftflöde
(m³/h)
(l/s)
0
20
40
60
80
100
120
140
160
180
40%
50%
80%
100%
20%
60%
0
0
50 100 150 200 250 300 350 400
25 50 75 100
3RZHU GLUHFW FXUUHQW IDQ
3RZHU RXWSXW
:
$LUIORZ P
K
17Chapter 6 | Commissioning and adjustingNIBE FLM

Setting the pump speed
The speed of the circulation pump (GP2) is set using the
switch on the pump so that it achieves the projected flow
for the house.
LEK
6ZLWF
K
I
II
III
Tryck
(kPa)
Flöde
(l/h)
0
0
10
20
30
40
50
60
200 400 600 800 1000 1200
3UHVVXUH
N3D
)ORZ
OK
,
,,
,,,
&DSDFLW\ FLUFXODWLRQ SXPS
Effekt
(W)
Flöde
(l/h)
0
0
10
20
30
40
50
60
70
80
90
100
200 400 600 800 1000 1200
I
II
III
3RZHU RXWSXW
:
)ORZ
OK
,
,,
,,,
2XWSXW FLUFXODWLRQ SXPS
NIBE FLMChapter 6 | Commissioning and adjusting18
Other manuals for FLM
3
Table of contents
Other Nibe Control Unit manuals
Popular Control Unit manuals by other brands

Lunos
Lunos 5/UNI-FT operating manual

morse
morse 5154 Series Operator's manual

Wandel & Goltermann
Wandel & Goltermann OLA-35 Description and operating manual

Data Translation
Data Translation DT9850 Series user manual

Toro
Toro 220G Series Installation and operating instructions

Viking
Viking TMS-RDMA user guide

Telit Wireless Solutions
Telit Wireless Solutions GC864 Series Hardware user's guide

Valcom
Valcom V-2001A-E introduction

Honeywell
Honeywell Notifier FCM-1 Installation and maintenance instructions

GEM
GEM 620 Series Assembly instructions

Vaillant
Vaillant 00 2003 6743 installation instructions

Vimar
Vimar 03905 Installer manual