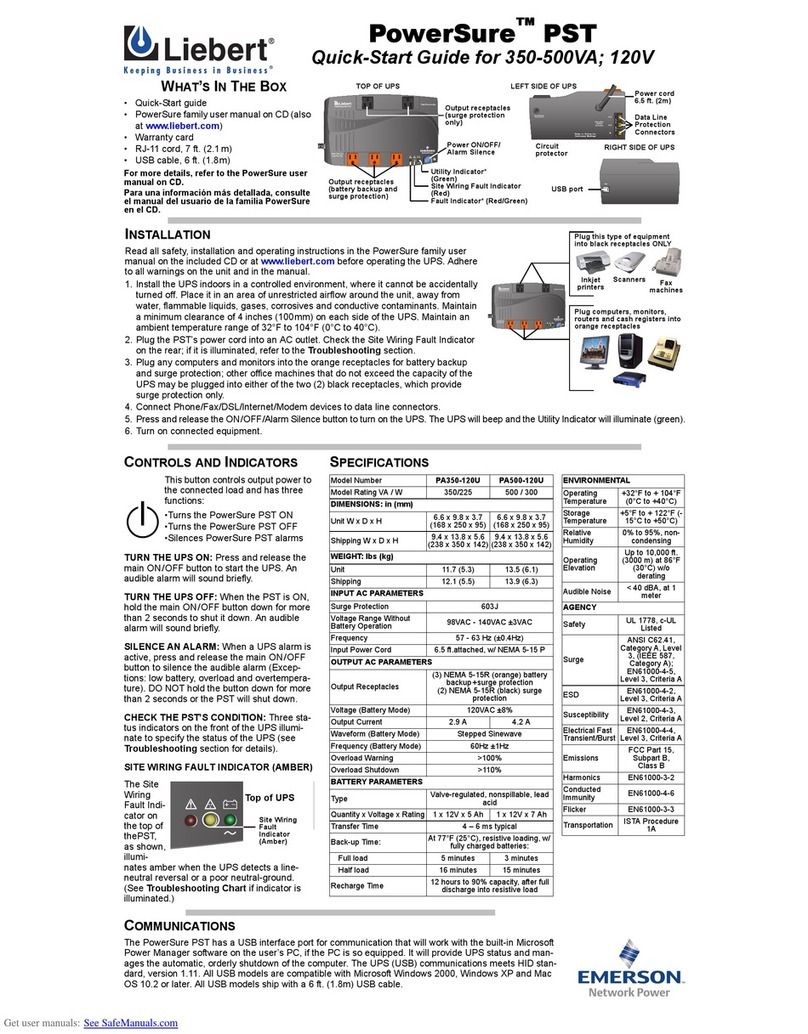
Njoy Aten PRO Series User manual

Aten PRO Series User Manual
Manual de utilizare
PWUP-OL300AP-AZ01B
PWUP-OL200AP-AZ01B
PWUP-OL100AP-AZ01B
v. 1
Before using this product, carefully read all product documentation and retain it for future reference.

02 03
UPS Unit
User Manual
USB Cable
Management Software CD
Power Cord
Package Contents
Product Overview
1
2
Front View
LCD panel
The following models belong to the Aten PRO Series:
Aten PRO 1000
Aten PRO 2000
Aten PRO 3000
1000VA
2000VA
3000VA
This UPS will protect your electronic equipment from
physical damage and will provide emergency battery backup
power to prevent data loss in the event of power problems.
Thank you for purchasing our products!
Please read this manual before using the product.
Focusing on quality at competitive prices, nJoy
designs consumer products for a better and
enjoyable way into the digital world.
English
Română

04 05
LCD Panel
1. Input & Battery Voltage Info
2. Remaining Backup Time Info
3. Fault Info
4. Mute Operation
5. Output & Battery Voltage Info
6. Battery mode indicator
7. Load Info
8. Mode Operation Info
1
6
7
8
3 4
2
5
1. AC input
2. Input circuit breaker
3. USB communication port
4. RS-232 communication port
5. Output receptacles
6. SNMP web card intelligent
slot (optional - can be installed
by user any time)
Back View
1000
2000
3000
1
1
2
2
36
3
4
4
5
5
1
2
3
4
5
English
Română
6
6

06 07
Please comply with all warnings and operating instructions
in this manual strictly. Save this manual properly and
carefully read the following instructions before installing
the unit. Do not operate this unit before reading through all
safety information and operating instructions carefully:
Important Safety Warnings3
Transportation
• Please transport the UPS system only in the original
package to protect against shock and impact.
Preparation
• Condensation may occur if the UPS system is moved
directly from cold to warm environment. The UPS
system must be absolutely dry before being installed.
Please allow at least two hours for the UPS system to
acclimate to the environment.
• Do not install the UPS system near water or in moist
environments.
• Do not install the UPS system where it would be
exposed to direct sunlight or near heat sources.
• Do not block ventilation holes in the UPS housing.
Installation
• Do not connect appliances or devices which would
overload the UPS system (e.g. laser printers) to the
UPS output sockets.
• Place cables in such a way that no one can step on or
trip over them.
• Do not connect domestic appliances such as hair
dryers to UPS output sockets.
• The UPS can be operated by any individuals with no
previous experience.
• Connect the UPS system only to an earthed shockproof
outlet which must be easily accessible and close to the
UPS system.
• Please use only VDE-tested, CE-marked mains cable
(e.g. the mains cable of your computer) to connect the
UPS system to the building wiring outlet (shockproof
outlet).
• Please use only VDE-tested, CE-marked power cables
to connect the loads to the UPS system.
• When installing the equipment, it should ensure that
the sum of the leakage current of the UPS and the
connected devices does not exceed 3.5mA.
Operation
• Do not disconnect the mains cable on the UPS system
or the building wiring outlet (shockproof socket
outlet) during operations since this would cancel
the protective earthing of the UPS system and of all
connected loads.
• The UPS system features its own, internal current
source (batteries). The UPS output sockets or output
terminals block may be electrically live even if the UPS
system is not connected to the building wiring outlet.
• In order to fully disconnect the UPS system, first press
the OFF/Enter button to disconnect the mains.
• Prevent fluids or other foreign objects from entering
English
Română

08 09
the inside of the UPS system.
Maintenance, service and faults
• The UPS system operates with hazardous voltages.
Repairs may be carried out only by qualified
maintenance personnel.
• Caution - risk of electric shock. Even after the unit is
disconnected from the mains (building wiring outlet),
components inside the UPS system are still connected
to the battery and electrically live and dangerous.
• Before carrying out any kind of service and/or
maintenance, disconnect the batteries and verify that
no current is present and no hazardous voltage exists
in the terminals of high capability capacitor such as
BUS-capacitors.
• Only persons are adequately familiar with batteries
and with the required precautionary measures
may replace batteries and supervise operations.
Unauthorized persons must be kept well away from
the batteries.
• Caution - risk of electric shock. The battery circuit
is not isolated from the input voltage. Hazardous
voltages may occur between the battery terminals
and the ground. Before touching, please verify that no
voltage is present!
• Batteries may cause electric shock and have a high
short-circuit current. Please take the precautionary
measures specified in this manual and any other
measures necessary when working with batteries:
remove wristwatches, rings and other metal objects,
use only tools with insulated grips and handles.
• When changing batteries, install the same number
and same type of batteries.
• Do not attempt to dispose of batteries by burning
them. This could cause battery explosion.
• Do not open or destroy batteries. Escaping electrolyte
can cause injury to the skin and eyes. It may be toxic.
• Please replace the fuse only with the same type and
amperage in order to avoid fire hazards.
• Do not dismantle the UPS system.
• WARNING!
This is a category C2 UPS product. In a residential
environment, this product may cause radio
interference, in which case the user may be required to
take additional measures. (only for 220/230/240 VAC
system).
Installation4
The UPS can protect your equipment from all
power problems such as surges, spikes, blackouts,
brownouts and line noise. When AC power is present
and the ON/Mute switch is turned ON, the UPS will
provide pure and stable AC power to the output. The
UPS will also charge the battery in the on-line mode.
The UPS is simple to install and operate. Please
read the following steps before connecting any
equipments to this UPS:
English
Română

10 11
The UPS is composed of mains input, EMI/RFI filters,
rectifier/PFC, inverter, battery charger, DC-to-DC
converter, battery, dynamic bypass and UPS output.
The operating principle of the UPS is shown below:
EMI/RFI
Filters
Recer
/FFC Inverter
DC-to-DC
converter
Dynamic
Bypass
Output
Input
Baery
Baery
Charger
Operating principle4.1 Connecting your equipment and first usage
4.2
Step1. Connect the UPS to a grounded AC power outlet.
Step 2. UPS Output Connection: simply connect
devices to the outlets.
Step 3. Turn on the UPS: Press the ON/Mute button
on the front panel for two seconds to power
on the UPS. The battery charges fully during
the first 5 hours of normal operation. Do not
expect full battery run capability during this
initial charge period.
Step4. Plug your PC or peripheral equipment (monitor,
tv, scanner, fax, speakers etc.) into the power
outlets of the UPS (these will provide emergency
battery backup power during power blackouts as
well as surge protection from surges and spikes).
Step 5. Communication connection: To allow for
unattended UPS shutdown/start-up and
status monitoring, connect the
communication cable on one end to the USB
port and the other to the communication port
of your PC. With the monitoring software
installed, you can schedule UPS shutdown/
start-up and monitor UPS status through PC.
English
Română

12 13
Do NOT plug
LASER PRINTERS
into any of the
outlets.
Do NOT plug any
SURGE STRIPS
into any of the
outlets.
CAUTION
Step 6. Install software: For optimal computer
system protection, install the UPS monitoring
software from the CD provided in the package
to fully configure UPS shutdown.
Button operations
Operations
5.1
5
ON/Mute Button
• Turn on the UPS: Press and hold ON/Mute button for at
least 2 seconds to turn on the UPS.
• Mute the alarm: When the UPS is on battery mode,
press and hold this button for at least 5 seconds to
disable or enable the alarm system. This does not
apply to the situations when warnings or errors occur.
• Up key: Press this button to display previous selection
in UPS settings mode.
English
Română
ON/MUTE SELECT OFF/ENTER
• Switch to UPS self-test mode: Press and hold ON/Mute
button for 5 seconds to enter UPS self-testing while in
AC mode, ECO mode, or converter mode.
OFF/Enter Button
• Turn off the UPS: Press and hold this button for at
least 2 seconds to turn off the UPS. The UPS will be
in standby mode under normal power or transfer to
Bypass mode if the Bypass setting is enabled.
• Confirm selection key: Press this button to confirm
selection in UPS settings mode.
Select Button
• Switch LCD message: Press this button to change the
LCD message for input voltage, input frequency, battery
voltage, output voltage and output frequency. It will
return back to default display after a 10 seconds pause.
• Settingsmode:Pressandholdthisbuttonfor 5 seconds
to enter UPS settings mode when the UPS is in standby
mode or bypass mode.
• Down key: Press this button to display next selection in
UPS settings mode.
ON/Mute + Select Button
• Switchtobypassmode:Whenthemainpowerisnormal,
press ON/Mute and Select buttons simultaneously for
5 seconds. Then the UPS will enter to bypass mode.
This action will be ineffective when the input voltage is
out of acceptable range.

14 15
LCD Panel Indicators5.2
Display Function
Remaining backup time information
Indicates the remaining backup time in pie
chart.
Indicates the remaining backup time in
numbers.
H: hours, M: minutes, S: seconds
Fault information
Indicates that the specified warning and fault
occurs.
Mute operation
Indicates that the UPS alarm is disabled.
Output & Battery voltage information
Indicates the output voltage, frequency or
battery voltage.
Vac: output voltage, Vdc: battery voltage, Hz:
frequency
Load information
Indicates the load level by 0-25%, 26-50%,
51-75%, and 76-100%.
Indicates overload.
Indicates the load or the UPS output is short
circuit
Mode operation information
Indicates if the UPS connects to the mains.
Indicates if the battery is working.
Indicates if the bypass circuit is working.
Indicates if the ECO mode is enabled.
Indicates if the Inverter circuit is working.
Indicates if the output is working.
Battery information
Indicates the Battery level by 0-25%, 26-50%,
51-75%, and 76-100%.
Output & Battery voltage information
Indicates if the battery is fault.
Indicates low battery level and low battery
voltage.
Input & Battery voltage information
Indicates the input voltage or frequency or
battery voltage.
Vac: Input voltage, Vdc: battery voltage, Hz: input
frequency
English
Română

16 17
Audible Alarm Indicators
LCD display wordings index
5.3
5.4
Mode Alarm
Battery Mode Sounding every 4 seconds
Low Battery Sounding every second
Overload Sounding twice every second
Fault Continuously sounding
Bypass Mode Sounding every 10 seconds
Abbreviation Display content Meaning
ENA Enable
DIS Disable
ESC Escape
HLS High loss
LLS Low loss
BAT Battery
CF Converter
UPS Settings5.5
1
23
There are three parameters to set up the UPS.
• Parameter 1: For program alternatives. Refer to below
table.
• Parameter 2-3: The settings options or values for each
program.
UPS setting mode can be accessed only when the UPS is in
Stand-by mode. You can put the UPS in Stand-by mode by
pressing OFF button for at least 2 seconds. After the UPS is in
Stand-by mode, you can access Settings by pressing Select
button for at least 5 seconds.
TP Temperature
CH Charger
FU Bypass frequency
unstable
EE EEPROM error
English
Română

18 19
Parameter 1 Settings
01: Output voltage settings
Parameter 3: you may choose the
following output voltage:
200: presents output voltage is 200Vac
208: presents output voltage is 208Vac
220: presents output voltage is 220Vac
230: presents output voltage is 230Vac
(Default)
240: presents output voltage is 240Vac
NOTE: Derate to 80% of capacity
when the output voltage is adjusted to
200/208Vac.
02: Frequency Converter enable/disable
Parameter 2&3: Enable or disable
converter mode. You may choose
the following two options:
CF ENA: converter mode enable
CF DIS: converter mode disable
(Default)
NOTE: Derate to 80% of capacity in
Frequency converter mode.
03: Output frequency settings
Parameter 2&3: Output frequency
setting. You may set the initial
frequency on battery mode:
BAT 50: presents output frequency
is 50Hz
BAT 60: presents output frequency
is 60Hz
If converter mode is enabled, you
may choose the following output
frequency:
CF 50: presents output frequency
is 50Hz
CF 60: presents output frequency
is 60Hz
04: ECO enable/disable
Parameter 3: Enable or disable
ECO function. You may choose the
following two options:
ENA: ECO mode enable
DIS: ECO mode disable (Default)
05: ECO voltage range settings
Parameter 2&3: Set the
acceptable high voltage point and
low voltage point for ECO mode by
pressing Down key or Up key.
HLS: High loss voltage in ECO
mode in parameter 2 (the setting
range in parameter 3 is from +7V
to +24V of the nominal voltage -
Default: +12V)
LLS: Low loss voltage in ECO mode
in parameter 2 (the setting range
in parameter 3 is from -7V to -24V
of the nominal voltage - Default:
-12V)
English
Română

20 21
06: Bypass enable/disable when UPS is off
Parameter 3: Enable or disable
Bypass function. You may choose
the following two options:
ENA: Bypass enable
DIS: Bypass disable (Default)
07: Bypass voltage range settings
Parameter 2&3: Set the acceptable
high voltage point and acceptable
low voltage point for Bypass mode
by pressing the Down key or Up
key.
HLS: Bypass high voltage point
-> 230-264: setting the high
voltage point in parameter 3
from 230Vac to 264Vac. (Default:
264Vac)
LLS: Bypass low voltage point
-> 170-220: setting the low voltage
point in parameter 3 from 170Vac
to 220Vac. (Default: 170Vac)
08: Autonomy limitation settings
Parameter 3: Set up backup time
on battery mode for general
outlets.
0-999: setting the backup time in
minutes from 0-999 for general
outlets on battery mode.
0: When setting as “0”, the backup
time will be only 10 seconds.
999: When setting as “999”,
the backup time setting will be
disabled. (Default)
Operating Mode Description5.6
Operating
mode
Description LCD display
Online
mode
When the input voltage
is within acceptable
range, the UPS will
provide pure and
stable AC power to the
output. The UPS will
also charge the battery
in the on-line mode.
ECO mode
Energy saving mode:
When the input voltage
is within voltage
regulation range,
the UPS will bypass
voltage to output for
energy saving.
Frequency
Converter
mode
When input frequency
is within 40 Hz to 70
Hz, the UPS can be set
at a constant output
frequency, 50 Hz or 60
Hz. The UPS will still
charge battery under
this mode.
English
Română

22 23
Battery
mode
When the input
voltage is beyond the
acceptable range or
power failure and
alarm is sounding
every 4 second, the
UPS will backup power
from battery.
Bypass
mode
When input voltage
is within acceptable
range but the UPS is
overloaded, the UPS
will enter bypass
mode or bypass mode
can set by from the
front front panel. The
alarm is sounding
every 10 second.
Standby
mode
The UPS is powered off
and not supply power
through its output,
but it can still charge
batteries.
Faults Reference Code5.7
Fault code Fault event Icon
01 Bus start fail X
02 Bus over X
03 Bus under X
04 Bus unbalance X
11 Inverter soft start fail X
12 Inverter voltage high X
13 Inverter voltage Low X
14 Inverter output short
27 Battery voltage too high
28 Battery voltage too low
41 Over temperature X
43 Overload
English
Română

24 25
Warning indicator5.8
Warning Icon
(flashing)
Alarm
Low Battery Sounding every second
Overload Sounding twice every
second
Battery is not
connected Sounding every second
Over Charge Sounding every second
Over temperature Sounding every second
Charger failure Sounding every second
Battery fault Sounding every second
Out of bypass
voltage range Sounding every second
Bypass frequency
unstable Sounding every second
EEPROM error Sounding every second
Troubles and solutions6
Problem Possible Cause Solutions
No indication and alarm
even though the mains
is normal.
The AC input
power is not
connected well.
Check if input
power cord is
firmly connected
to the mains.
The AC input is
connected to the
UPS output.
Plug the AC input
to the AC input
correctly.
The icon
and
flashing on LCD display
and alarm is sounding
every second.
The external or
internal battery
is incorrectly
connected.
Check if all
batteries are
connected well.
Fault code is shown as
27 and the icon
is lighting on LCD
display and the alarm is
continuously sounding.
Battery voltage
is too high or the
charger is faulty.
Contact the
service center.
Fault code is shown
as 28 and the icon
is lighting on LCD
display and alarm is
continuously sounding.
Battery voltage
is too low or
the charger is
faulty.
Contact the
service center.
English
Română

26 27
The icon
and is
flashing on LCD
display and alarm
is sounding twice
every second.
The UPS is overloaded.
Remove excess
loads from UPS
output.
The UPS is overloaded.
Devices connected to
the UPS are fed directly
by the electrical net-
work via bypass.
Remove excess
loads from UPS
output.
After repetitive
overloads, the UPS is
locked in the Bypass
mode. Connected
devices are fed directly
by the mains.
Remove excess
loads from UPS
output first.
Then shut down
the UPS and
restart it.
Fault code is shown
as 43 and The icon
is lighting on LCD
display and alarm
is continuously
sounding.
The UPS shut down
automatically because
of overload at the UPS
output.
Remove excess
loads from the
UPS.
Fault code is shown
as 14 and the icon
is lighting on LCD
display and alarm
is continuously
sounding.
The UPS shut down
automatically because
short circuit occurs on
the UPS output.
Check output
wiring and
if connected
devices are in
short circuit
status.
Disposal of Old Electrical & Electronic Equipment
(Applicable in the European Union and other European countries
with separate collection systems)
This symbol on the product or on its packaging indicates that this product shall
not be treated as household waste.
Instead it shall be handed over to the applicable collection point for the
recycling of electrical and electronic equipment.
By ensuring this product is disposed of correctly, you will help prevent potential
negative consequences for the environment and human health, which could
otherwise be caused by inappropriate waste handling of this product.
The recycling of materials will help to conserve natural resources.
Fault code
is shown as
01, 02, 03,
04, 11, 12, 13
and 41 on
LCD display
and alarm is
continuously
sounding.
A UPS internal fault has
occurred. There are two
possible results:
1. The load is still supplied,
but directly from AC power
via bypass.
2. The load is no longer
supplied by power.
Contact the
service center.
Battery
backup time
is shorter
than nominal
value.
Batteries are not fully
charged.
Charge the
batteries for at
least 5 hours
and then check
capacity. If the
problem still
persists, contact
the service center.
Battery defects Change battery.
English
Română

28 29
Din seria Aten PRO fac parte următoarele modele:
Aten PRO 1000
Aten PRO 2000
Aten PRO 3000
1000VA
2000VA
3000VA
UPS-ul vă protejează echipamentele electronice de daune fizice
și oferă o baterie de rezervă pentru a preveni pierderile de date
în cazul întreruperilor accidentale ale energiei electrice.
Mulțumim pentru că ați ales produsele noastre!
Vă rugăm citiți manualul de utilizare înainte de a pune în
funcțiune acest produs.
Concetrându-ne pe calitate la preţuri competitive,
construim produse pentru consumatori în ideea unei
interacţiuni cât mai plăcute cu lumea digitală.
Unitatea UPS
Manual de utilizare
Cablu USB
CD cu program de management
Cablu de alimentare
Prezentarea produsului
Prezentarea produsului
1
2
Vedere frontală
Afișaj LCD
English
Română

30 31
Afișaj LCD
1. Informații despre tensiunea
de intrare și tensiunea
bateriei
2. Informații despre timpul de
backup rămas
3. Informații despre defecte și
erori
4. Operație în mod silențios
5. Informații despre Ieșire și
tensiunea bateriei
6. Indicator mod baterie
7. Informații despre sarcină
8. Informații despre modul de
operare
1
6
7
8
3 4
2
5
Vedere din spate
1000
1
2
3
4
5
6
1. Conector pentru cablul de
intrare tensiune (tip IEC)
2. Întrerupător de circuit
(siguranță)
3. Port de comunicare USB
4. Port de comunicare RS-232
5. Conectori iesire (tip Schuko)
6. Slot pt Card Web Inteligent
SNMP (opțional - poate fi
instalat de către utilizator)
2000
3000
1
2
3
4
5
1
2
3
4
5
6
6
English
Română

32 33
Vărugămsărespectațitoateavertismenteleșiinstrucțiunile
de utilizare din acest manual. Păstrați acest manual în mod
corespunzător și citiți cu atenție următoarele instrucțiuni
înainte de instalarea aparatului. Nu folosiți această unitate
înainte de a citi prin toate instrucțiunile de siguranță și de
utilizare cu atenție:
Avertizări de siguranță3
Transport
• Vă rugăm să transportați sistemul UPS numai în
ambalajul original pentru a-l proteja împotriva
șocurilor.
Pregătire
• Condensul poate apărea dacă sistemul UPS este
mutat dintr-un mediu rece în unul cald. Sistemul UPS
trebuie să fie uscat înainte de a fi instalat. Vă rugăm să
alocați cel puțin două ore pentru ca sistemul UPS să se
aclimatizeze cu mediul unde doriți să îl instalați.
• Nu instalați sistemul UPS lângă apă sau în medii
umede.
• Nu instalați sistemul UPS acolo unde ar fi expus la lumina
directă a soarelui sau în apropierea surselor de încălzire.
• Nu blocați orificiile de ventilație ale carcasei UPS-ului.
Instalare
• Nu conectați aparate sau dispozitive care ar
suprasolicita sistemul UPS (de exemplu: imprimantele
laser) la mufele de ieșire UPS.
• Instalați cablurile în așa fel încât nimeni să nu calce pe ele.
• Nu conectați aparate de uz casnic, cum ar fi uscătoare
de păr la prizele de ieșire UPS.
• UPS-ul poate fi folosit de orice persoană, fără a
necesita nici o experiență anterioară.
• Conectați sistemul UPS numai la o priză cu
împământare, care trebuie să fie ușor accesibilă și
aproape de sistemul UPS.
• Vă rugăm să folosiți numai cabluri de alimentare
testate VDE și cu marcaj CE (de exemplu: cablul de
alimentare de la computer) pentru a conecta sistemul
UPS la rețeaua electrică a clădirii.
• Vă rugăm să folosiți numai cabluri de alimentare
testate VDE și cu marcaj CE pentru a conecta sarcinile
la sistemul UPS.
• La instalarea echipamentului, trebuie să vă asigurați
că totalul curentului de scurgere al UPS și al
dispozitivelor conectate nu depășește 3,5 mA.
Operare
• Nu deconectați cablul de alimentare de la sistemul
UPSsau dela prizaclădiriiîn timpulutilizării, deoarece
acest lucru ar anula împământarea de protecție a
sistemului UPS și a tuturor sarcinilor conectate.
• Sistemul UPS are propria sursă de curent intern
(baterii). Prizele de ieșire sau terminale de ieșire pe
categorii pot fi încărcate electric, chiar dacă sistemul
UPS nu este conectat la sistemul electric al clădirii.
• Pentru a deconecta complet sistemul UPS, apăsați
întâi butonul OFF/Enter pentru a deconecta sursa de
alimentare.
English
Română

34 35
• Nu lăsați să ajungă în interiorul unității UPS orice
obiect străin sau lichide.
Întreținere, Service și Defecte
• Sistemul UPS funcționează cu tensiuni periculoase.
Reparațiile pot fi efectuate numai de către personalul
de întreținere calificat.
• Atenție - risc de șoc electric. Chiar și după ce aparatul
este deconectat de la rețeaua electrică, componentele
din interiorul sistemului UPS sunt încă conectate la
baterie și sunt încărcate electric și periculoase.
• Înainte de a efectua orice fel de service și / sau
întreținere, deconectați bateriile și verificați să nu
existe curent sau tensiune periculoasă în terminalele
condensatorului de mare capacitate, cum ar fi
condensatorul BUS.
• Numai persoanele care sunt familiarizate în mod
adecvat cu baterii și cu măsurile de precauție necesare
pot înlocui bateriile și supraveghea operațiunile.
Persoane neautorizate trebuie să fie ținute departe de
baterii sistemului UPS.
• Atenție - risc de șoc electric. Circuitul bateriei nu este
izolat de tensiunea de intrare. Tensiuni periculoase pot
apărea între bornele bateriei și pământ. Înainte de a
atinge, vă rugăm să verificați că nu există tensiune!
• Bateriile pot provoca șoc electric. Vă rugăm să luați
măsurile de precauție specificate mai jos, precum și
orice alte măsuri necesare atunci când se lucrează
cu bateriile sistemului: dați-vă jos ceasurile de
mână, inelele și alte obiecte metalice și folosiți doar
instrumente cu mânere izolate.
• La schimbarea bateriilor, instalați același număr și
același tip de baterii.
• Nu încercați să aruncați bateriile prin arderea lor.
Acest lucru poate cauza explozia bateriilor.
• Nu deschideți sau distrugeți bateriile. Evadarea
electroliților poate provoca leziuni la nivelul pielii și
ochilor și poate fi toxic.
• Vă rugăm să înlocuiți siguranța numai cu același tip
de siguranță și amperaj pentru a evita pericolele de
incendiu.
• Nu dezasamblați sistemul UPS.
• Atenționare!
Acesta este un produs din categoria C2. Într-un mediu
rezidențial, poate cauza interferențe radio, caz în care
utilizatorul este rugat să ia măsuri suplimentare!
Instalarea4
UPS-ul vă poate proteja echipamentul de toate problemele
legate de tensiunea electrică cum ar fi: supra sarcina,
fluctuații de tensiune, căderi de tensiune și zgomotul de pe
rețea. Când curentul este prezent la rețeaua de alimentare
și comutatorul (ON/Mute) este pornit (ON) UPS-ul își
încarcă bateria și asigură echipamentului energia necesară
funcționării direct de la rețea. Bateria poate oferi energia
necesară pentru a vă finaliza munca, salva datele și opri în
siguranță sistemul atunci când apar căderi de tensiune.
UPS-ul este simplu de folosit și de instalat. Urmați pașii de
mai jos înainte de a conecta echipamentul la UPS:
English
Română

36 37
Conectarea echipamentelor și prima folosirePrincipiu de funcționare4.1
Pasul 1.Conectați UPS-ul la o priză cu împământare.
Pasul 2. Conectarea la UPS: Pentru ieșiri de tip priză, pur
și simplu conectați dispozitivele la prize electrice.
Pentru ieșiri sau intrări de tip terminal (doar
pentru modelul Aten PRO 3000), vă rugăm să
urmați pașii de mai jos pentru configurarea
cablurilor:
• Scoateți capacul mic de la terminal
• Vă sugerăm să folosiți cabluri de alimentare
AWG14 sau de 2.1mm
• La finalizarea configurației cablurilor, vă
rugăm să verificați dacă firele sunt fixate
ferm.
• Puneți capacul mic înapoi pe panoul din spate
al sistemului.
Pasul 3. Conectați echipamentele electronice (calculator,
TV, centrale, scanner, fax, boxe etc.) la prizele cu
protecție (acestea vă vor furniza energia necesară
pentru funcționarea continuă în siguranță a
echipamentelor).
Pasul 4.Porniți sistemul UPS: Apăsați butonul ON / Mute
de pe panoul frontal timp de două secunde pentru
a porni UPS-ul. Bateria se încarcă complet în
primele cinci ore de funcționare normală. Nu vă
așteptați la capacitatea de funcționare completă
a bateriei în această perioadă de încărcare
inițială.
English
Română
4.2
Sursa neîntreruptibilă de tensiune are în componența
sa: intrarea de la rețea, filtrele pentru EMI / RFI
(interferențe electromagnetice / interferențe radio-
frecvență), redresorul și PFC (corecția factorului de
putere), încărcătorul bateriilor, bateriile, convertorul
DC-DC (tensiune continuă la tensiune continuă),
invertorul, bypassul dinamic și ieșirea sursei
neîntreruptibile de tensiune.
Principiul de funcționare a acestui UPS este
următorul:
EMI/RFI
Filters
Recer
/FFC Inverter
DC-to-DC
converter
Dynamic
Bypass
Output
Input
Baery
Baery
Charger

38 39
Butoane
Operații
5.1
5
NU conectați
imprimante laser la
nici una din prizele
UPS-ului.
NU conectați alte
ACCESORII CU
PROTECȚIE la
niciuna din prize.
ATENTIE
Pasul 5.Conexiunea de comunicare: Pentru a permite
oprirea / pornirea nesupravegheată a UPS-ului și
monitorizarea stării acestuia, conectați un capăt
al cablului de comunicare la portul USB/RS-232
și celălalt la portul de comunicare al PC-ului. Cu
software-ul de monitorizare instalat, puteți
programa oprirea și pornirea UPS-ului și să
monitorizați starea UPS prin intermediul PC-ului.
Pasul 6.Instalați software-ul: Pentru o protecție optimă a
sistemului de calculator, instalați software-ul de
monitorizare a sistemului UPS de pe CD-ul
furnizat în pachet pentru a configura complet
procedura de închidere a UPS-ului.
ON/MUTE SELECT OFF/ENTER
Butonul ON/Mute
• Pornirea UPS-ului: Apăsați și țineți apăsat butonul ON /
Mute pentru cel puțin 2 secunde pentru a porni UPS-ul.
• Oprirea alarmei: Când UPS-ul este în modul de baterie,
țineți apăsat acest buton timp de cel puțin 5 secunde
pentru a activa sau dezactiva sistemul de alarmă. Nu se
aplică la situațiile în care apar avertismente sau erori.
• Tasta sus: Apăsați acest buton pentru a afișa selecția
anterioară în modul de setare UPS.
• Comutarea la modul UPS de auto-testare: Apăsați
și țineți apăsat butonul ON / Mute timp de 5 secunde
pentru a accesa modul UPS de auto-testare în timp ce
sunteți în modul AC, ECO sau convertor.
Butonul OFF/Enter
• Oprirea UPS-ului: Apăsați și țineți apăsat acest buton timp
de cel puțin două secunde pentru a opri UPS-ul. UPS-ul
va fi în modul de așteptare (standby) sau va fi transferat în
modul bypass în cazul în care acest mod este activat.
• Tasta de confirmare a selecției: Apăsați acest buton
pentru a confirma selecția în modul de setare UPS.
Butonul de Selectare
• Comutare mesaj LCD: Apăsați acest buton pentru
a schimba mesajul de pe LCD în informații pentru
tensiune de intrare, frecvență intrare, tensiunea
bateriei, tensiunea de ieșire și frecvența de ieșire. Acesta
English
Română
This manual suits for next models
6
Table of contents
Languages:
Other Njoy UPS manuals
Njoy
Njoy Shed 625 User manual
Njoy
Njoy Code Series User manual
Njoy
Njoy Garun 30KL User manual
Njoy
Njoy Garun Series User manual
Njoy
Njoy Argus Series User manual

Njoy
Njoy Token Series User manual
Njoy
Njoy Aster Series User manual

Njoy
Njoy Shed 625 User manual
Njoy
Njoy Keen Series User manual
Njoy
Njoy UPCMTOP960HASCG02B User manual
Njoy
Njoy Ranger 30KT User manual
Njoy
Njoy UPCSBLS665TRPCG01B User manual
Njoy
Njoy Ranger 60KR User manual

Njoy
Njoy Argus Series User manual
Njoy
Njoy Balder Series User manual
Njoy
Njoy Akin Series User manual
Njoy
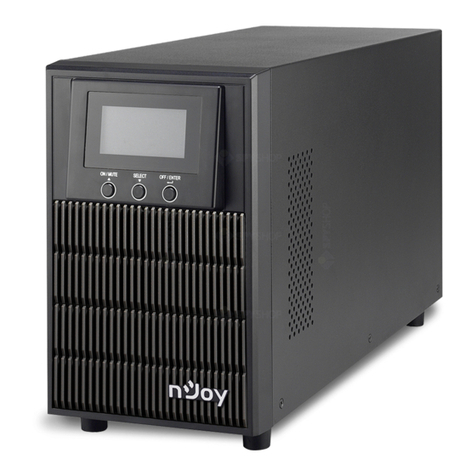
Njoy PWUP-OL300AT-AZ01B User manual

Njoy
Njoy Ranger 30KR User manual
Njoy
Njoy Astris 5K/3P2T2 User manual
Njoy
Njoy Cadu Series User manual

