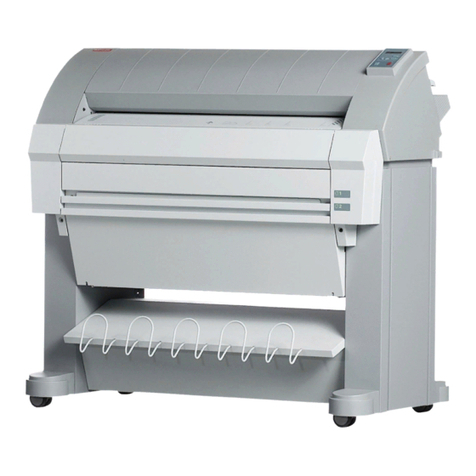
Oce CS 5070 User manual

Océ CS
5050/5070
User Manual

Copyright
Océ-Technologies B.V. Venlo, The Netherlands © 1999
All rights reserved. No part of this work may be reproduced, copied, adapted,
or transmitted in any form or by any means without written permission from
Océ.
Océ-Technologies B.V. makes no representation or warranties with respect to
the contents hereof and specifically disclaims any implied warranties of
merchantability or fitness for any particular purpose.
Further, Océ-Technologies B.V. reserves the right to revise this publication and
to make changes from time to time in the content hereof without obligation to
notify any person of such revision or changes.
Edition 1.0
Océ-Technologies B.V.
GB
Trademarks
Products in this manual are referred to by their trade names.
In most, if not all cases, these designations are claimed as
trademarks or registered trademarks of their respective
■companies.

Contents 3
Contents
Chapter 1 Introduction
Printing with Océ CS 5050/5070 10
Graphic reproductions 10
Easy to use 11
Choice of appropriate inks and media 11
Obtaining quality reproductions 12
Choice of print mode 12
Original image type 12
Original image clarity and colour 13
Scanner type 13
Scan resolution 14
Post-scanning image correction and sharpening 14
Ink cartridge preparation and alignment 15
Chapter 2 Getting started
Using the control panel 18
Start-up checklist 18
Locating the control panel 18
Accessing the menu functions 19
Setting the language 19
Loading media 20
Using the power media feed and take-up system 20
Loading roll media 21
Using the take-up roll 21
Setting drying time 23
Loading sheet media 23
Moving the carriage 23
Installing the cutter 24
Filling the ink reservoirs 25
Installing ink cartridges 27
Placing the cartridges 27
Priming the ink delivery lines 27
Printing a colour test 32
Printing the prime pattern 33
Calibrating cartridges 35
Defining calibration units 36

4 Océ CS 5050/5070 User Manual
Cartridge recognition 37
Calibrating the colour deadband 38
Calibrating the paper axis 39
Operating the printer 40
Chapter 3 Printing options
Main menu at a glance 42
Using the default settings 43
Choosing print mode options 46
Selecting resolution (dpi) 47
Selecting a colour mode 48
Selecting quality modes 48
Setting the number of print passes 49
Setting the carriage speed 49
Selecting the print direction 50
Choosing "feed media" options 51
Detecting the "end of media" 51
Using the media counter 52
Choosing paper options 54
Media standards 54
Rollfeed media: sizes and maximum printing areas 55
Sheet media: sizes and maximum printing areas 57
Setting margins 59
Setting auto-load delay 60
Selecting auto-cut 60
Saving media 61
Selecting auto-wipe 61
Applying ink reduction 61
Selecting ink preheat 62
Turning on the dryer 63
Setting the dry time 63
Adjusting the LCD contrast 63
Saving user options 64
Chapter 4 Printing with HP-GL/2
Overview 66
Accessing the HP-GL/2 menu options 66
Selecting the palette 67
Setting the "Control" function 67
Rotating a print 68

5
Making reprints 68
Nesting 69
Applying the ink limit 70
Printing an HP-GL/2 test file 70
Chapter 5 Printer maintenance and storage
Ink reservoir and cartridge maintenance 72
Refilling ink reservoirs 72
Changing ink types 73
Removing and storing ink cartridges 73
Removing the reservoirs 74
Installing new cartridges 75
Refilling ink cartridges 75
Purging ink delivery lines 77
Periodic cleaning 78
Materials to use for cleaning 79
Cleaning the ink cartridge jet plate 80
Cleaning the service station 81
Replacing the service station wipers 82
Cleaning the slide shaft 84
Cleaning the encoder strip 84
Maintaining the Océ Prime tool 86
Transporting or storing your printer 87
Accessing printer information 87
Chapter 6 Error handling and troubleshooting
Error handling 90
Unrecognised cartridge 90
Checking the quality of ink cartridges 91
Getting cartridge information 91
Running the prime test 91
Compensating for electrically defective jets 93
clearing clogged jets 93
Compensating manually for clogged jets 94
Troubleshooting 96
Troubleshooting areas 96
Isolating problems 96
Printer behaviour 97
Print quality 101
Data transfer 104
6 Océ CS 5050/5070 User Manual
Application software 104
Calling for assistance 106
Appendix AGlossary
Appendix BQuick reference card
Using the “Quick Reference Card” 112
Appendix CSupplies
Caring for inks and media 116
Inks and ink cartridges 116
Caring for your media 117
Inks for Océ CS 5050/5070 printers 118
Océ Standard Colour Inks accessory kits 118
Océ Standard Colour Inks replacement cartridges 118
Océ Outdoor Inks accessory kits 119
Océ Outdoor Colour Inks replacement cartridges 119
Media for Océ CS 5050/5070 printers 120
Miscellaneous Océ CS 5050/5070 accessories 121
Appendix DTechnical specifications
Océ CS 5050/5070 printer specifications 124
Appendix ESafety information
Instructions for safe use 128
Safety data sheets 130
Appendix F Miscellaneous
Notation conventions 132
Reader’s comment sheet 133

8 Océ CS 5050/5070 User Manual

9
Océ CS 5050/5070
User Manual
Chapter 1
Introduction
The Océ CS 5050and 5070 are wide-format colourprinters
that provide professional quality prints with all the
brilliance and gloss of liquid ink. The Océ CS 5050/5070
printers reduce production time while maintaining
exceptional graphics quality.

10 Océ CS 5050/5070 User Manual
Printing with Océ CS 5050/5070
The Océ CS 5050/5070 wide-format inkjet printers can reproduce graphics up
to the length of a roll of media. Large format colour printing combines the
technical sophistication of the Océ CS 5050/5070 series with the unique
qualities of Océ proprietary inks and media (coated canvas, vinyl, film, paper,
etc.)
Graphic reproductions
The Océ CS 5050/5070 addresses the following printing needs:
[1] Rear-view Océ CS 5050/5070 printer
■ Posters ■ Signs ■ Fine art
■ Banners ■ Displays ■ Proofing
■ DTP ■ Imposition proofing ■ Textile design
■ Packaging prototypes ■ Point of purchase ■ Exhibits

Introduction 11
Easy to use
Continuous-feeding ink system The printers use 500 ml reservoirs for each
colour to ensure that there is anadequate ink supply for large print jobs. Simply
check the transparent plastic reservoirs and refill them if necessary prior to
printing. In addition, the printer’s dual ink system speeds up the process of
switching between different types of ink.
Acceptance of raster-oriented data in HP RTL format In this mode, printing
begins immediately after the printer receives the first complete line of HP RTL
data. Depending on the software used, it is possible to reproduce millions of
colours, yielding high-quality results for full-colour images or 3-dimensional
renderings.
Choice of appropriate inks and media
Océ inks and media are developed specifically to work together to achieve the
widest range of colours available, for high colour fidelity. For details about the
appropriate types of media for different print jobs, see ‘Media for Océ CS
5050/5070 printers’ on page 120.

12 Océ CS 5050/5070 User Manual
Obtaining quality reproductions
Depending on the print mode you use, inkjet printing can produce a wide
variety of print qualities. Hence, before starting a print job, it is essential that
you understand what the required output quality will be, based on the future
use of the reproduced graphic, as well as the time and cost involved in
achieving that required print quality.
Several factors can affect the quality of reproduced graphics. Use the following
guidelines to obtain optimal print quality with the Océ CS 5050/5070.
Choice of print mode
There are printing modes, each of which compromises between image quality
and speed. When printing heavy renderings, maps,or art graphics, choose one
of the quality printing modes. Certain types of media also require quality
printing modes.
To select the appropriate printing mode for a specific print job, refer to
‘Selecting quality modes’ on page 48.
Original image type
The type of original image influences the quality of the final print.
■For best results, use an original transparency (not a duplicate) with extremely
crisp edge definition.
■Print film photos are not quite as good, because they are removed one level
from the original film. Also, because of the emulsion process used to make
photo prints, edge definitions tend to be lost.
■Colour prints must be of very good quality to produce acceptable scaled
prints.
■Some digital photo files may be unacceptable for large format printing, as
they only contain a small fraction of the information contained in a film
transparency.

Introduction 13
■CD images in TIFF or EPS format of 28MB or more are preferable for high
quality prints. Avoid compressed image files such as GIF or JPEG, since these
files can lose valuable data after compression. However, if you must use a
compressed file, take into account the following:
■Choose the JPEG format in case some quality loss is acceptable. (The
compression factor determines the final image quality.)
■Choose LZW if quality loss is not acceptable.
Note: When using LZW, the compression factor will be very low on photo
images.
Original image clarity and colour
The quality of the original transparency, photograph, or digital file determines
the input as well as output clarity and colour of the image. By using a good,
clear original, you can maintain the image quality throughout the printing
process.
■An out-of-focus photograph will result in a fuzzy inkjet print, despite the
after-effects of sharpening corrections.
■Variations in film, speed, grain, or developing process can affect the lightness
or darkness of the image for which colour corrections cannot compensate.
Scanner type
It is essential to understand the required (output) print quality of an image, and
to use the appropriate scanner to scan that image into a digital file. Use a
scanner that can achieve enough colour fidelity and edge clarity to meet the
overall print requirement. An image scanned using a low-performance scanner
will lose detail, clarity, and colour.

14 Océ CS 5050/5070 User Manual
Scan resolution
Choosing the right resolution for the output print size (as well as the amount
of scaling needed after scanning) determines the best scan resolution for each
image. A resolution that is too low will diminish the print quality (insufficient
detail). A resolution that is too high slows down the raster image processor
(OGSL) without adding quality to the image.
Use the following guidelines to set end resolution:
■150 dpi for sharp, detailed images intended for close viewing
■100 dpi for viewing from a significant distance
■Keep text and logos as vector information (i. e. Postscript fonts and formats),
which will always print at the printer’s resolution.
Most scanners can interpolate or “imitate” high-resolution scanning. However,
do not use the interpolated resolution of your scanner to compute the image
size. Instead, use the scanner’s highest true optical resolution to maintain
image quality.
Post-scanning image correction and sharpening
Before printing a scanned image, you must perform some basic image
corrections and sharpening to ensure a high-quality, wide-format colour print.
Tonal correction If necessary, remove the colour cast from the midtones of an
image using a function such as “Auto" levels in PhotoShop. This function
allows you to re-adjust the black and white points in the image and redistribute
the intermediate colours proportionately. In most cases, this correction is
sufficient for properly exposed images. However, in very dark night scenes or
in very white snow backgrounds, you must make a manual correction by
adjusting the histogram.
Sharpening To improve the edge details of an image, use the “Unsharp Mask
filter” in Photoshop. This can digitally refocus an image that has become
blurred from scanning or interpolation. A small over-estimation of the filter
effect can be diffused in the printing process; however, a large over-estimation
can give the image a hard, pixelated appearance.

Introduction 15
Ink cartridge preparation and alignment
Cartridge maintenance and alignment are key factors in printer performance,
which in turn affect colour, accuracy, and image quality. Use the following
recommendations to keep your cartridges in optimal working condition:
■Keep the printer wiping stations clean so that the heads stay clean.
■Align and check cartridges to make sure all nozzles work properly.
■To achieve the best possible accuracy, use a loupe to evaluate the registration
of test patterns.
■Re-align all cartridges when you adjust, move, or replace a cartridge, since
even small, one-pixel errors can affect both colour and image quality.

16 Océ CS 5050/5070 User Manual

17
Océ CS 5050/5070
User Manual
Chapter 2
Getting started
This section explains the initial installation of the Océ CS
5050/5070:
■using the control panel
■loading media
■filling ink reservoirs
■installing, priming, and calibrating ink cartridges
■calibrating the colour deadband and the paper axis

18 Océ CS 5050/5070 User Manual
Using the control panel
Before printing, make sure that you are familiar with the start-up checklist and
the control panel’s main menu functions.
Start-up checklist
To start the CS 5050/5070, check the following:
■Be sure that the power cord is plugged into the wall socket.
■Be sure that the printer connects to your computer using a parallel cable.
■Turn on the printer before attempting to print.
Locating the control panel
The control panel is located on the right-hand side of the printer. It includes
eight buttons and a display which indicates modes and settings, as illustrated
below. For a complete summary of all printer options, see ‘Main menu at a
glance’ on page 42.
[2] Océ CS 5050/5070 control panel
Load Media
Cut
Pause
Reset
Feed Media Menu
Set Up Menu
Utility Menu

Getting started 19
Accessing the menu functions
There are two types of menus:
■action menus provide a list of additional menus or immediate tasks to
perform.
■selection menus let you view and modify printer settings.
▼
▼▼
▼To select menu functions
1To select a function, press the button displayed next to the function.
The display lists options available for the selected function.
2Press the Next Option or Prev. Option buttons to display the selections.
3When the selection you want is displayed, press the button for that option and
press OK.
4Depending on the type of menu, you can return to the previous menu level by
pressing the OK or Exit button.
5Press Exit consecutively to return to the main menu.
6Press the Cancel button to restore the previous setting and exit the menu.
Setting the language
The Océ CS 5050/5070 can display menu items in English, German, French,
Italian, Portuguese, Korean, Japanese, and simplified or traditional Chinese.
▼
▼▼
▼To set a language
1Press Setup/User settings/Language.
2Select the language you want.
3Press OK.

20 Océ CS 5050/5070 User Manual
Loading media
You can use either roll media or cut sheets. The printer is set for roll media as
its default. To ensure straight paper loading and avoid skewing, hold the media
parallel to the platen line. Use the loading lines on the platen as a guide. The
printer has sensors which detect the presence of media and activate the feed
and take-up mechanisms.
The roll media core must have an inside diameter of 5 cm and a maximum
outside diameter of 15 cm (about 6 inches). If your media has an inside
diameter of 8 cm, use the core adapter provided. If you want to store prints on
the take-up roll, you will need to have extra cores available.
Caution: The Océ CS 5050/5070 printers (60” version) can use media up to
60" (1,52 m) wide. The media roll may be heavy, so have someone help you
to load it. Before printing, check that you have a take-up roll core available
that is the same width as the media roll core you are loading.
Attention: If your roll media has wrinkled or damaged edges, cut off the
damaged part of the roll prior to loading, to prevent the media from
jamming in the printer. Load only media with an edge that is perfectly
horizontal into the printer. Make sure not to leave fingerprints on the
printing side of glossy media paper.
Using the power media feed and take-up system
The power media feed and take-up system facilitates long, unattended print
jobs by automatically unwinding and rewinding media as prints are generated.
It includes a feed roll, a take-up roll, and sensors which prevent media from
touching the floor.
When the unit is first switched on, the feeder may turn for a few seconds. If the
take-up turns, it indicates that the sensor is blocked. Clear anything blocking
the sensor before proceeding.
This manual suits for next models
1
Table of contents
Other Oce Printer manuals

Oce
Oce TCS500 User manual

Oce
Oce arizona 1240 GT User manual

Oce
Oce Arizona T220 User manual

Oce
Oce VarioPrint 6000 MICR+ series User manual

Oce
Oce TCS400 Installation instructions

Oce
Oce CS9160 User manual

Oce
Oce VarioPrint 6160 User manual

Oce
Oce VarioPrint 6180 Titan Operating manual

Oce
Oce PlotWave 300 User manual

Oce
Oce Arizona 200 GT User manual