1. 1. 1. Basic Printing Workflow > Printing procedure >
Printing Options Using Rolls and Sheets
The printer supports both rolls and sheets.
This section introduces the main features of each, as well as the main printing methods available. Select
rolls or sheets to suit your particular printing application.
Note
・For information on the types of paper the printer supports (See "Types of
Paper (6.1.1).")
・A variety of other ways to print are available besides those introduced here.
Choose the printing method that suits your particular printing application, referring
to "Working With Various Print Jobs" and "Enhanced Printing Options" from the
table of contents.
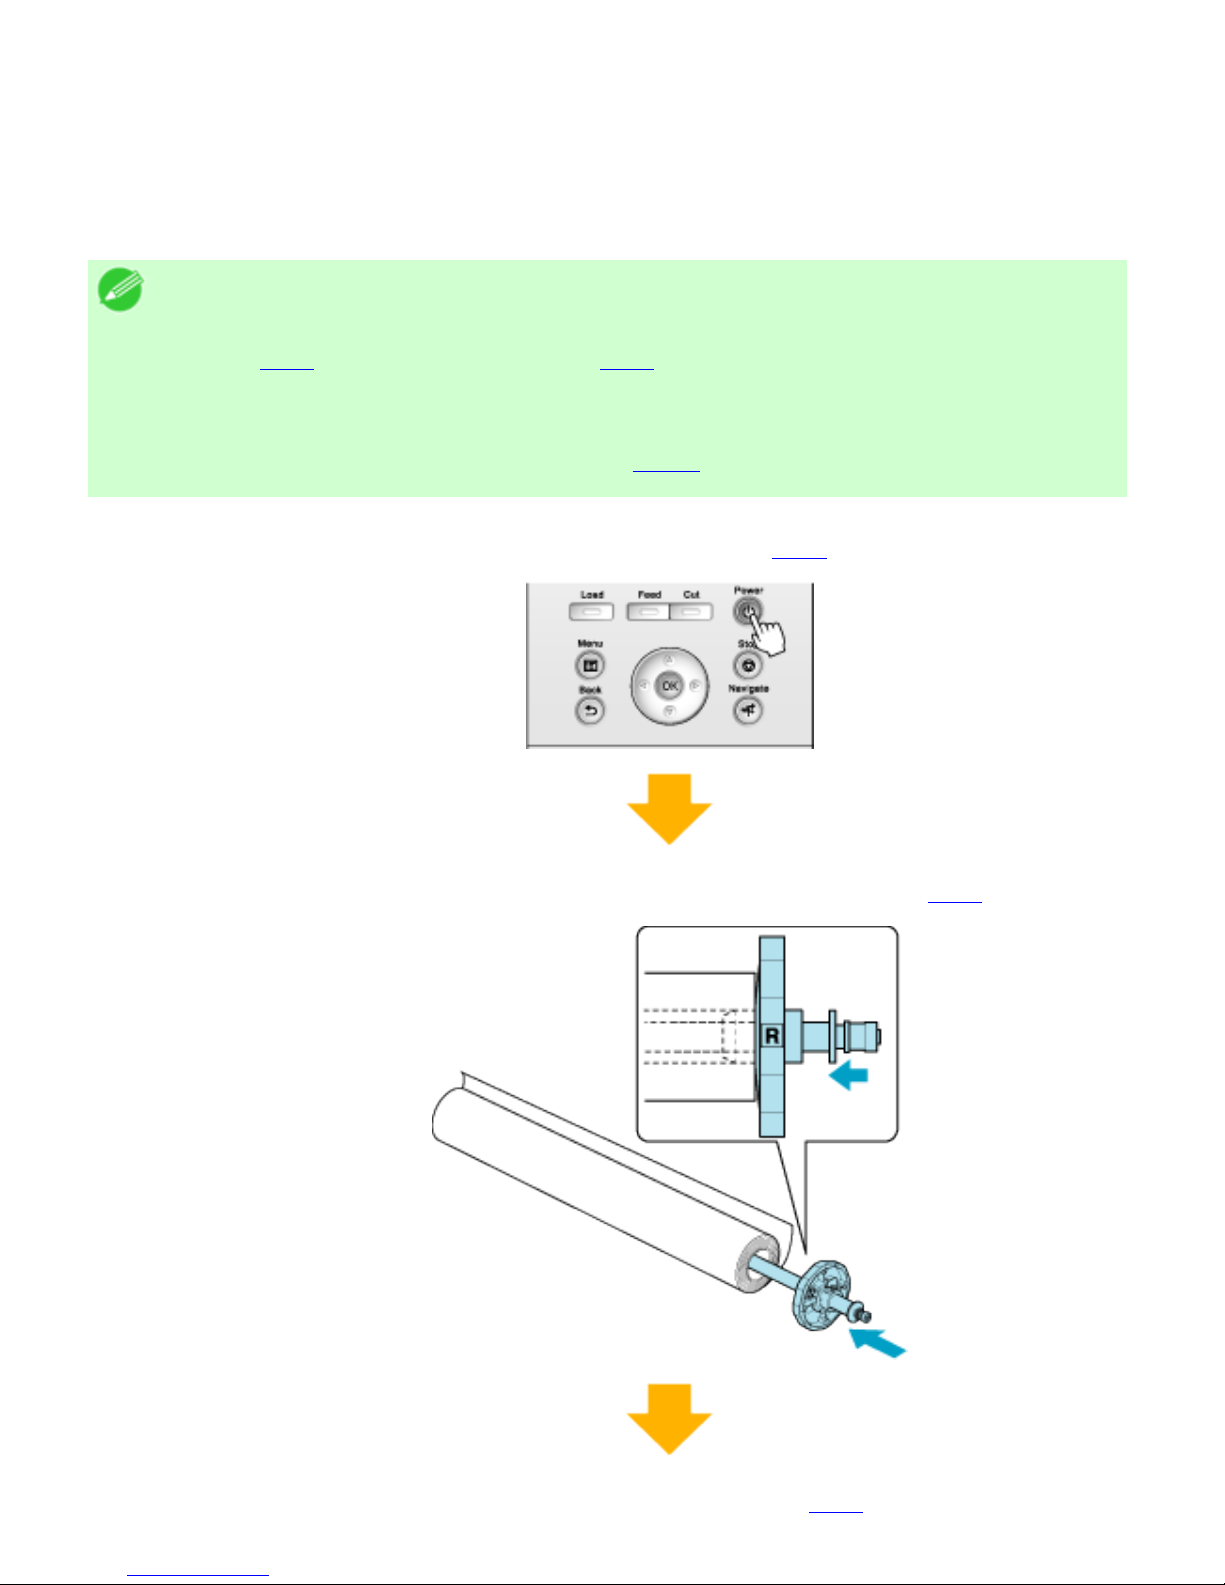
Roll printing
Media in spooled rolls is generally called Roll Media. Rolls are loaded on the Roll Holder, which are in turn
loaded in the printer.
Rolls can be used to print large photos or create posters or banners that cannot be printed on regular
sheets.
●Large-format printing
Easily print vertical or horizontal banners from familiar applications such as Microsoft Office
applications.
(See "Printing Vertical or Horizontal Banners (Large-Format Printing) (3.6.1).")
●Borderless printing
Print without a margin (border) around posters or photos.
(See "Borderless Printing on Paper of Equivalent Size (3.5.1).")
(See "Borderless Printing by Resizing Originals to Fit the Roll Width (3.5.4).")
(See "Borderless Printing at Actual Size (3.4.4).")
●Banner printing
You can print multiple pages as a single continuous image, without margins between pages.
(See "Printing Multiple Pages Continuously (3.7.4).")
●90-degree rotation before printing
Originals in portrait orientation are rotated 90 degrees when possible to use paper more efficiently.
(See "Conserving Roll Paper by Rotating Originals 90 Degrees (3.9.1).")
●Enlarged/reduced printing
You can freely adjust the size of originals by enlarging or reducing originals before printing.
(See "Resizing Originals to Match the Paper Size (3.3.1).")
(See "Resizing Originals to Fit the Roll Width (3.3.4).")
(See "Resizing Originals by Entering a Scaling Value (3.3.7).")
Sheet printing
Sheets refer to individual sheets of paper.