4
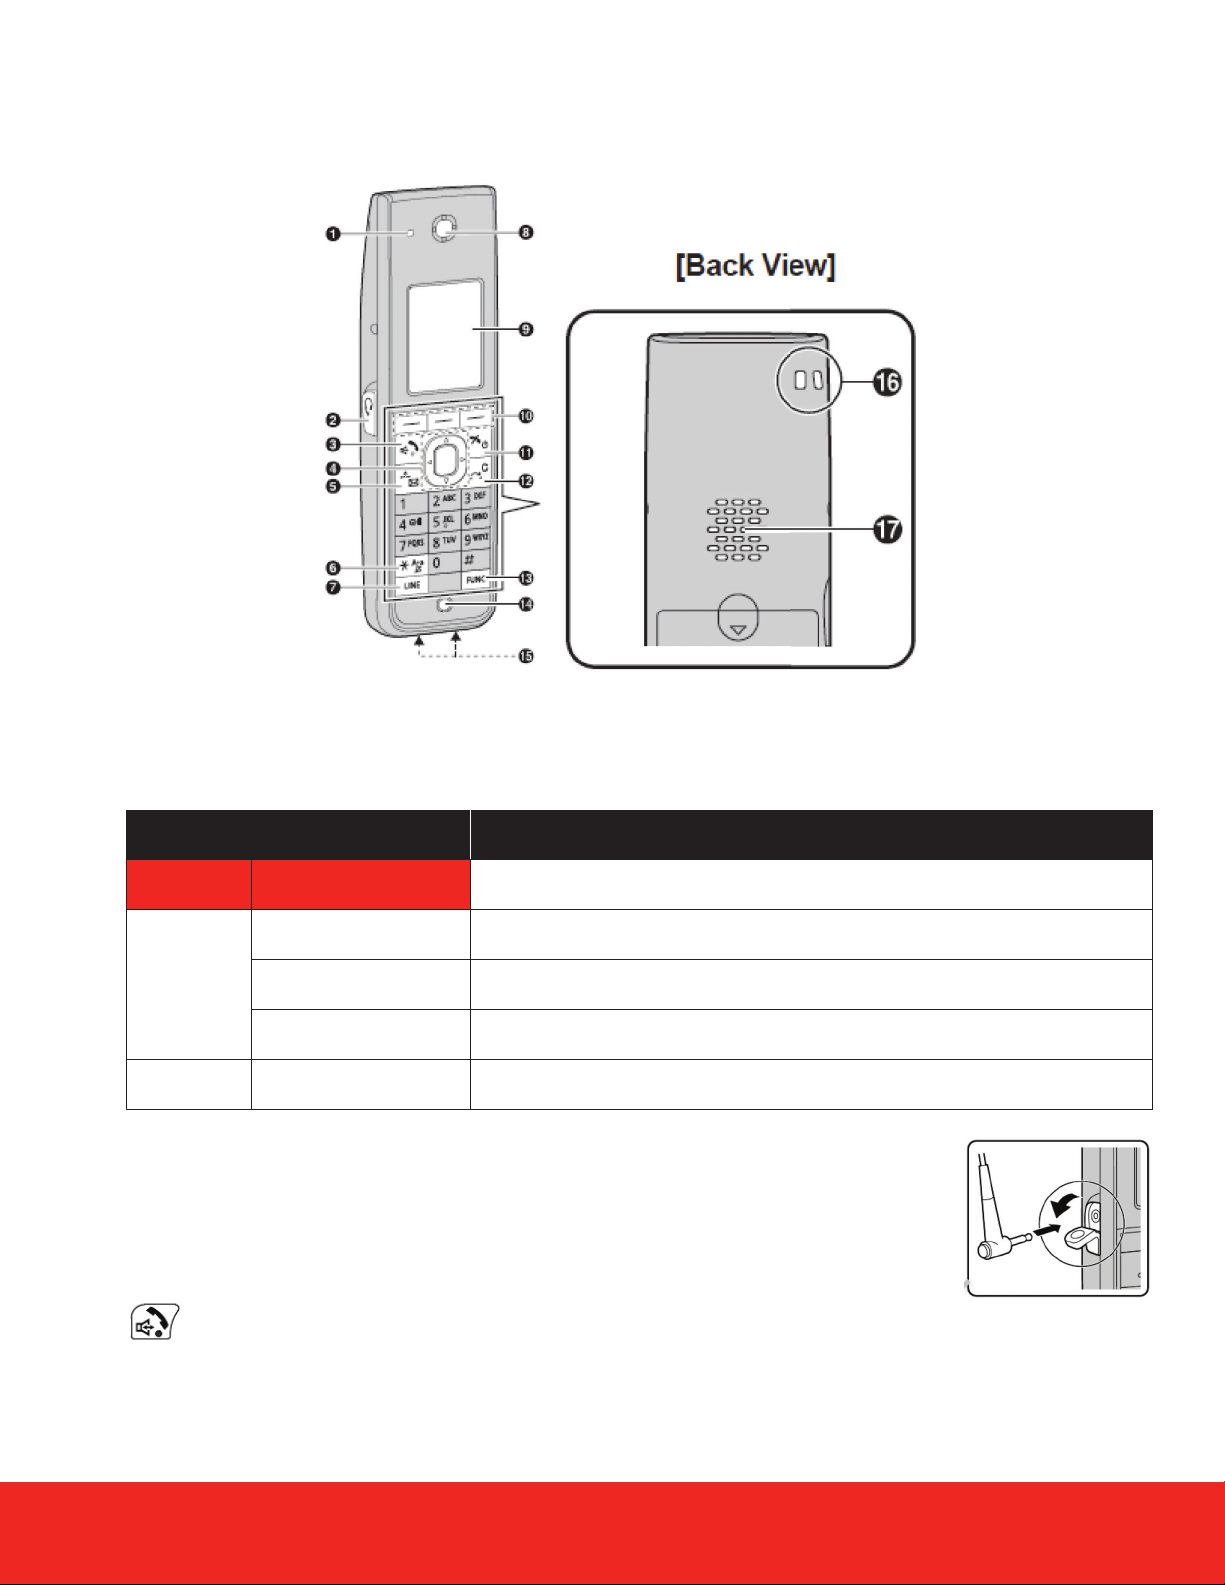
KX-TPA60: Viewing your phone keys and hardware
The Hold/MSG key is used during a call to place
the call on Hold. In standby mode, this key can be
used to retrieve a call on hold if there one or used
to access your voicemail box while no calls are
taking place.
Used to turn Silent Mode on or off when pressed
for more than 2 seconds in standby mode.
The Line Key is used to confirm the line status or
seize a line.
Earphone that converts electrical signals into sound.
See Display section for more details.
The A/B/C keys (located from left to right) are
used to select the item displayed on the bottom
line of the display.
The XFER/CLR key is used to transfer a call to
another party, or to clear digits or characters.
Pressing the FUNC key followed by a keypad
number (0-9) allows you to perform various
common functions quickly such as Redial,
incoming logs or conference.
Allows the device’s Lithium Ion battery to be
recharged when placed in its appropriate cradle.
The Strap holes are used to attach phone straps.
Used when hands free is selected and allows
sound to be emanated from the device.
Hold/MSG Key
Silent mode Key
Line Key
Receiver
Display
Soft Keys
XFER/CLR Key
FUNC Key
Microphone
Charge Contacts
Strap Holes
Hands Free Speaker
5
6
7
8
9
10
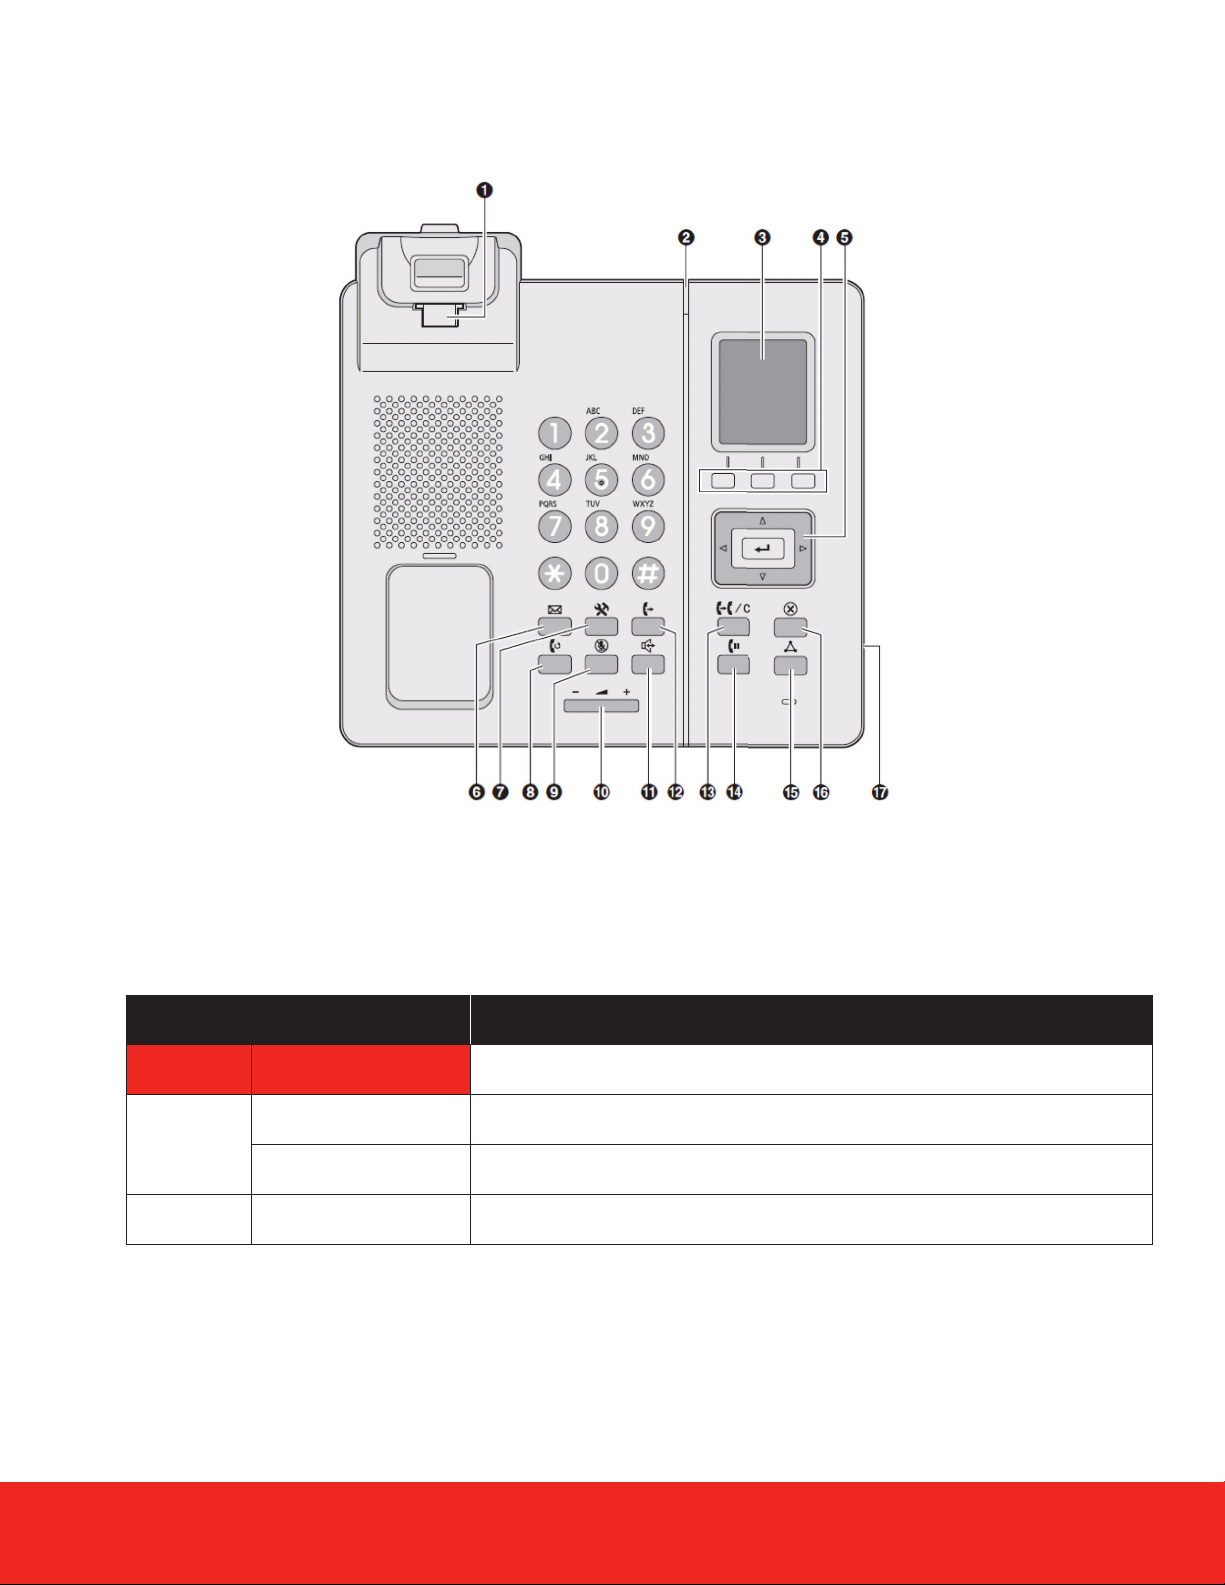
The Power/Cancel Key is used to end calls, exit the
phonebook or Function mode. Press and hold this
key to turn the handset on or off.
Power/Cancel Key11
12
13
14
15
16
17
The Navigator Key includes four arrow keys and a center key. The arrow keys are used to adjust the ringer/
receiver volume or move the cursor to select an item. The center key is used to confirm a selection.
If in standby mode, pressing the keys below perform the following functions:
LEFT ( ◄ ) ® : Used to display the Incoming call log.
UP ( ▲ ) ® : Used to adjust the ringer volume.
RIGHT ( ► ) ® : Used to open the phonebook.*1
DOWN ( ▼ )®:
Short press: Used to display the Outgoing call log.
Long press: Used to display the line status.
CENTRE ® : Used to display the Menu
Note: In this user guide, when a procedure instructs you to “press OK”, you can also press the [CENTER] key to confirm the selection.
Navigator Key4