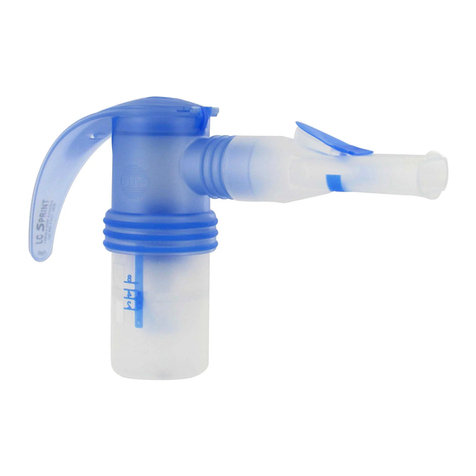
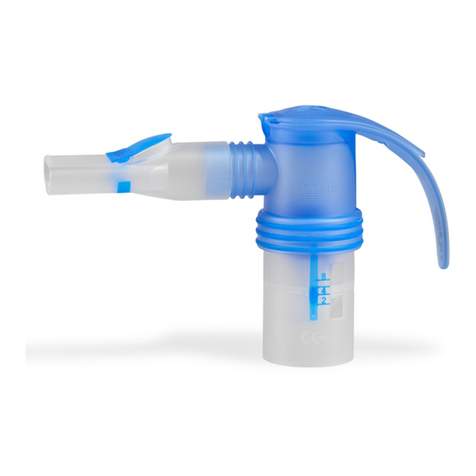
Pari Trek S User manual

INSTRUCTIONS FOR USE
INSTRUCCIONES DE USO
IMPORTANT: Read instructions and safety precautions before use.
IMPORTANTES: Leer las instrucciones y precauciones de seguridad antes de untilizar el producto.
ENGLISH - ESPAÑOL


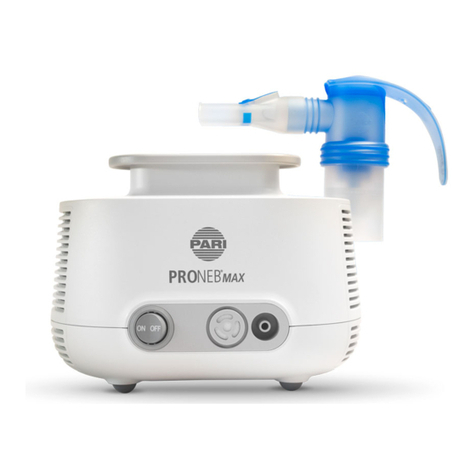
PARI TREK®S COMPRESSOR
COMPRESOR PARI TREK®S
CARRYING CASE
ESTUCHE PARA TRANSPORTE
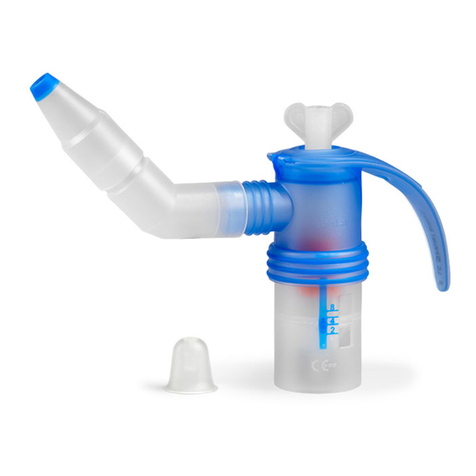
PARI REUSABLE NEBULIZER WITH
WING TIPTM TUBING
NEBULIZADOR REUTILIZABLE PARI
CON TUBO WING TIPTM
INSTRUCTIONS FOR USE
INSTRUCCIONES DE USO
INSTRUCTIONAL DVD
DVD CON INSTRUCCIONES
MULTI-VOLTAGE AC ADAPTER
ADAPTADOR CA MULTIVOLTAJE
POWER CORD
CABLE
12 V DC ADAPTER
ADAPTADOR DE 12 V CC
PARI TREK®S RECHARGEABLE BATTERY (optional accessory)
PARI TREK®S BATTERÍA RECARGABLE (accessorio optativo)
PORTABLE POWER KIT
(optional accessory)
PART #047F25
UNIDAD DE POTENCIA
PORTATIL
(accessorio optativo)
PARTE #047F25
INSTRUCTIONS FOR USE
INSTRUCCIONES DE USO
IMPORTANT:Read instructions and safety precautions before use.
IMPORTANTES:Leer las instrucciones y precauciones de seguridad antes de untilizar el producto.
ENGLISH - ESPAÑOL
I. PARITREK®S COMPRESSOR SYSTEM COMPONENTS
COMPONENTES DEL SISTEMA COMPRESOR PARITREK®S
1

8
7
11
2
1
3
9
6
5
4
10
8
7
11
2
1
3
9
6
5
4
10
II. PARITREK®S COMPRESSOR ILLUSTRATION
1. PARI TREK®S Compressor
2. Air Filter
3. Air Outlet
4. Nebulizer Holder - Wing Tip™
5. Power Receptacle
6. On/Off Switch
7. Nebulizer Holder
8. Elastomer feet
9. Multi-Voltage AC Adapter
10. Power Indicator Light
11. Power Cord
ILUSTRACIÓN DEL COMPRESOR
PARITREK®S
1. Compressor PARI TREK®S
2. Filtro de aire
3. Salida de aire
4. Soporte del nebulizador - Wing Tip™
5. Toma de alimentación eléctrica
6. Interruptor On/Off (Encendido/Apagado)
7. Soporte del nebulizador
8. Base del elastómero
9. Adaptador CA multivoltaje
10. Luz indicadora de electricidad
11. Cable
2

3
6
4
5
1
2
III. PARITREK®S RECHARGEABLE BATTERY
AND 12V DC ADAPTER ILLUSTRATION
(OPTIONAL PORTABLE POWER KIT)
1. Battery Level Indicator
2. Charge Indicator
3. Charge Receptacle
4. Release Button
5. 12V DC Adapter
6. Battery Contacts (not visible in illustration)
ILUSTRACION DE LA BATERÍA
RECARGABLE PARITREK®SY
DEL ADAPTADOR DE 12V CD
(JUEGO DE BATERÍA PORTÁTIL OPCIONAL)
1. Indicador de nivel de batería
2. Indicador de carga
3. Toma para el adaptador de carga
4. Botón disparador
5. Adaptador de 12V CD
6. Contactos de la batería (no se ve en la ilustración)
3

FIGURE A
FIGURE C
FIGURE B
A
RELEASE BUTTON
BOTÓN
DISPARADOR
B
B
2
1
3
4

A LWAYS U SE W I N G T I P TM
TUBING WITH PARITREK®S
COMPR ESSOR
UTILICE SIEMPRE EL TUBOWING TIPTM
CON EL COMPRESOR
PARITREK®S.
(BATTERY WITH COMPRESSOR)
(BATERÍA CON COMPRESOR)
FIGURE F
(BATTERY ONLY)
(SÓLO BATERÍA)
FIGURE D
FIGURE E
5

FIGURE G
12
3
4 5
6

I. PARI TREK®S COMPRESSOR SYSTEM COMPONENTS.................................................................
II. PARI TREK®S COMPRESSOR ILLUSTRATION..................................................................................
III. PARI TREK®S BATTERY & 12V DC ADAPTER ILLUSTRATION...................................................
Other Illustrations.......................................................................................................................................
IV. INTRODUCTION.......................................................................................................................................
V. SAFETY PRECAUTIONS
Compressor Safety Precautions...............................................................................................................
Nebulizer Safety Precautions....................................................................................................................
Battery Safety Precautions.........................................................................................................................
VI. GETTING STARTED...................................................................................................................................
VII. COMPRESSOR
Set Up.............................................................................................................................................................
Operation From a Wall Power Source...................................................................................................
Operation Using 12VDC Adapter...........................................................................................................
Operation Using the Rechargeable Battery...........................................................................................
VIII. NEBULIZER
Set Up.............................................................................................................................................................
Treatment......................................................................................................................................................
Cleaning.........................................................................................................................................................
Disinfecting and Sterilizing.........................................................................................................................
IX. RECHARGEABLE BATTERY
Charging.........................................................................................................................................................
Storing............................................................................................................................................................
X. PARI TREK®S COMPRESSOR
Maintenance..................................................................................................................................................
Specifications................................................................................................................................................
Limited Warranty.........................................................................................................................................
Return Procedure........................................................................................................................................
1
2
3
4-6
8
9
11
12
13
13
14
14
14
16
16
17
17
18
18
19
20
22
23
7ENGLISH

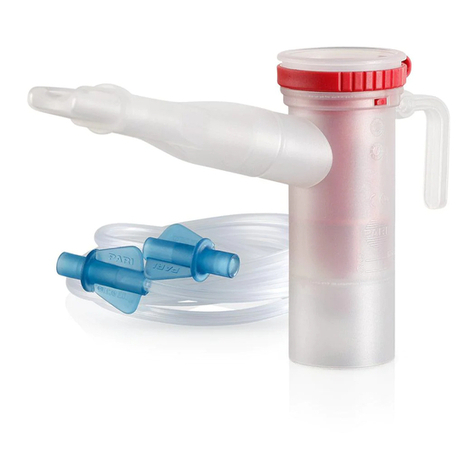
PARITREK®S COMPRESSOR INSTRUCTIONS FOR USE
IV. INTRODUCTION
These instructions contain important information and safety precautions on the PARI TREK® S Compressor
Nebulizer System.
• Illustrations of the PARI TREK®S Compressor System Components are on Page 1.
• Illustrations of the PARI TREK®S Compressor are on Page 2.
• Illustrations of the Rechargeable Battery and 12V DC Adapter for the PARI TREK®S
Compressor are on Page 3.
• The illustrations to view while reading the instructions are on Pages 4-6.
Before using your PARI TREK®S Compressor Nebulizer System, you should read and understand the entire
Instructions For Use for the PARI TREK®S Compressor, PARI Reusable Nebulizer and optional rechargeable
battery. Take special note of all safety precautions marked DANGER and WARNING. Save these
instructions for future reference.
V. SAFETY PRECAUTIONS
IMPORTANT SAFEGUARDS
Read all warnings before using your PARITREK®S compact nebulizer system, rechargeable battery
and 12V DC adapter.
Caution: U.S. Federal Law restricts this device to sale by or on the order of a physician. Use only when
prescribed by a physician and with the prescribed medication. Read all warnings and instructions before use.
Use the product only for its intended use as described in these Instructions for Use. Improper use can result
in serious or fatal illness/injury, improper treatment or property damage.
WARNING
8ENGLISH

The Trek®S Compact Nebulizer System is a portable, DC-powered compressor intended to provide a
source of compressed air for use with jet nebulizers.The Trek®S is intended for adult and pediatric patients.
Use only with nebulizers, tubing and accessories authorized by PARI for this device, for example, the PARI
LC®Plus or LC®Sprint Reusable Nebulizer. Please refer to the compressor specifications on page 18 to
ensure that any other components are compatible with this system. Other nebulizers, tubing and accessories
may not be compatible and/or result in improper treatment. Use with other tubing, nebulizers and
accessories should be reviewed with your healthcare professional.
COMPRESSOR SAFETY PRECAUTIONS
To reduce the risk of serious or fatal injury from electrocution:
1. Do not place or store the product where it can fall or be knocked into bathtub, sink, water, or other
liquid. Do not place or drop into water or other liquid. Do not use while bathing.
2. Do not reach for a product that has fallen into water or other liquid. Unplug immediately.
3. Always unplug immediately after using.
To reduce the risk of serious or fatal injury from electrocution, fire, burns and to reduce the risk of damage
and malfunction of the unit:
1. Before use, check the serial number label on the bottom of the compressor, battery and on the Multi-
Voltage AC Adapter to ensure that the voltage and current indicated on the unit correspond with the
voltage and current available.
DANGER
WARNING
9ENGLISH

2. Never operate this product if it:
• Has a damaged cord or plug
• Is not working properly
• Has been dropped or damaged
• Has been exposed to any liquids inside the case
Return non-operating product to an authorized PARI Service Center for examination, repair or replacement.
3. Keep all electrical cords away from heated surfaces. Do not overload wall outlets or use extension cords.
4. Do not operate where oxygen is being administered in a closed environment such as an oxygen tent.
5. Never drop or insert any object into any openings.
6. Be sure the PARI TREK®S Compressor and the Multi-Voltage AC Adapter are unplugged prior to cleaning.
7. Do not open or disassemble the PARI TREK®S Compressor. Refer all servicing to an authorized PARI
Service Center.
8. Use only adapters that are authorized for the PARI TREK®S Compressor. Use of unapproved accessories
can lead to improper treatment or damage to the compressor, adapters, or the battery.
9. Never spray liquids onto the compressor housing or battery. Fluid could cause damage to the electrical
and compressor parts and could lead to a malfunction. In the event that fluids enter the unit, return the
product to an authorized PARI Service Center for examination and repair.
10. Do not use the PARI TREK®S Compressor or the PARI Reusable Nebulizer while operating a vehicle.
11. Portable and mobile RF communication devices can disrupt electrical medical equipment.The electrical
field generated when the compressor is running can interfere with screens and monitors (flickering). For
this reason, the compressor must be placed far enough away from screens/monitors to prevent such
interference. Technical electromagnetic compatibility data is available in table form upon request from PARI
Respiratory Equipment Inc. / Patient Connection 1.800.FAST.NEB (327.8632), press 2.
10ENGLISH

NEBULIZER SAFETY PRECAUTIONS
1. Nebulizer is for single patient use (one person) only. Do not share your nebulizer with other patients.
2. To reduce the risk of increased bacterial growth, infection, illness, or injury from contamination,
thoroughly clean and dry all parts of the nebulizer and thoroughly dry any moisture or condensation in the
tubing at the end of every treatment, following the Instructions for Use that are enclosed with the PARI
Reusable Nebulizer.
3. Cleaning the nebulizer after each treatment is not enough, you must also regularly disinfect or sterilize the
nebulizer between treatments to prevent serious or fatal illness caused by contamination of the nebulizer.
4. Never use a nebulizer with a clogged nozzle. If the nozzle is clogged, the aerosol mist will be reduced,
altered or stopped, which will diminish or eliminate the effectiveness of the treatment. If clogging occurs,
replace with the same model PARI Reusable Nebulizer.
5. Close supervision is necessary when this product is used by or near children and physically or mentally
impaired persons. Never use when sleeping or drowsy.
6.This product contains small parts that may present a choking hazard to small children. The tubing also
presents a strangulation hazard. ALWAYS USE CLOSE ADULT SUPERVISION WHEN ADMINISTERING A
TREATMENT TO A CHILD. DO NOT LEAVE CHILD UNATTENDED DURING TREATMENT.
7. Children under the age of 3 or any patient who is unable to use a mouthpiece properly under supervision
should use a face mask.
8. Before use, check PARI Reusable Nebulizer for proper assembly. All parts should be seated firmly in place.
Use of an improperly assembled nebulizer could diminish or prevent adequate delivery of medication and
the effectiveness of the treatment.
WARNING
11 ENGLISH

BATTERY SAFETY PRECAUTIONS
1. Use only the PARI TREK®S Rechargeable Battery described in these Instructions For Use for
operating your PARI TREK®S Compressor.
2. Do not immerse the PARI TREK®S Rechargeable Battery in water.
3. Do not touch the battery with wet or moist hands.
4. Do not expose battery to direct sunlight, humidity, extreme temperatures or chemicals.
5. Make sure battery poles do not come into contact with keys or other metal objects, causing a “short
circuit”.
6. To charge the PARI TREK®S Rechargeable Battery use only the PARI TREK®S Multi-Voltage AC Adapter
or optional 12V DC Adapter. Using other adapters may damage the battery.
7. In case of failure in charging or operating, unplug the Rechargeable Battery from the Multi-Voltage AC
Adapter and turn the unit off. Should the Rechargeable Battery fail to charge or operate properly, even
if the Instructions For Use are followed, notify the Authorized Service Center by calling PARI Patient
Connection toll free (USA) at 1.800.FAST.NEB (327.8632), then press 2.
8. Do not attempt to open the plastic case or to replace any components. Do not disassemble Rechargeable
Battery. The Rechargeable Battery is a sealed unit and can not be repaired.
9. Protect the environment: when replacing the Rechargeable Battery, recycle old battery or dispose of
properly in accordance with local laws.
10. Do not incinerate (burn).
SAVETHESE INSTRUCTIONS
WARNING
12ENGLISH

VI. GETTING STARTED
1. Check the box to make sure the following basic components of the PARI TREK®S Compressor Nebulizer
System are enclosed:
• PARI TREK®S Compressor
• Multi-Voltage AC Adapter
• Power Cord
• PARI Reusable Nebulizer with Wing Tip™ Tubing
• Carrying Case
• PARI TREK®S Compact Nebulizer System Instructions For Use
• Patient Instructional DVD
• 12V DC Adapter
Refer to Page 1 to view component illustrations.
If you did not receive the components listed, please contact the dealer where you purchased your PARI
TREK®S Compact Nebulizer System.
2. It is a good idea to keep an extra PARI Reusable Nebulizer (part no. 023F35 for PARI LC®SPRINT) and
an extra PARI TREK®S Compressor Air Filter (part no. 041E4851P12) on hand at all times. You may need
them if parts become lost, damaged, or soiled.
VII. COMPRESSOR
COMPRESSOR SET UP
1. Place the PARI TREK®S Compressor on a stable flat surface. Place the unit in an area that is clean and
free of dust.
NOTE: Check the filter monthly or every 10-12 treatments and replace immediately if dirty, clogged, or wet to
ensure proper operation of the compressor.
13 ENGLISH

OPERATION FROM A WALL POWER SOURCE
1. Attach the Power Cord to the Multi-Voltage AC Adapter. Plug the other end of the Power Cord into the
wall outlet.The Power Indicator on Multi-Voltage AC Adapter will illuminate green. Next, plug the Multi-
Voltage AC Adapter into the Power Receptacle on the side of the PARI TREK®S Compressor. Refer to Page
4 Figure A.
2. The PARI TREK®S Multi-Voltage AC Adapter automatically adjusts to the incoming voltage (100-240V)
so that it can be used in most countries. For use internationally, plug pattern adapters may be required to
plug the Power Cord into a wall outlet. See voltages listed on the Multi-Voltage AC Adapter label for more
specific information.
OPERATION USING 12V DC CAR ADAPTER
NOTE: Do not use the PARITREK®S Compressor or the PARI Reusable Nebulizer while operating a vehicle.
1. Plug the 12V DC Adapter into the vehicle outlet and plug the other end of the adapter into the Power
Receptacle on the side of the PARI TREK®S Compressor or optional Rechargeable Battery Pack. Refer to
Page 4 Figure B.
OPERATION USING THE RECHARGEABLE BATTERY (optional accessory)
1. Completely charge the battery before using for the first time for more than two hours or until all three
battery level indicators are lit, and the charge indicator turns off. Refer to Charging the Battery on
Page 18.
2. The Rechargeable Battery can not be connected directly to the PARI TREK®S Compressor if either the
Multi-Voltage AC Adapter or 12V DC Adapter are plugged into Power Receptacle of the PARI TREK®S
Compressor. Refer to Page 4 Figure C Number 1.
3. Attach the Rechargeable Battery to the PARI TREK®S Compressor by placing the Battery onto the rear
section of the PARI TREK®S Compressor and sliding it into place. Refer to Page 4 Figure C Number 1.
Ensure battery is securely locked onto the compressor before use.
14ENGLISH

4. Use the Battery Indicator lights to determine the status of the Battery: (Refer to Battery Illustration on
Page 3.)
Charging:
Charge LED “ON” - Battery is being charged.
Charge LED “OFF” - Battery is fully charged.
Operation With Battery:
Three Green Lights - Battery has more than 75% remaining battery life.
Two Green Lights - Battery has more than 50% remaining battery life.
One Green Light - Battery has more than 25% remaining battery life.
One Green Light flashing - Less than 25% of the battery life is remaining.
When the battery is completely discharged all indicators on the battery will extinguish and the compressor
will shut off. Refer to Charging the Battery on Page 18.
Note: If battery fails to operate, connect the Power Cord into the Multi-Voltage AC Adapter and plug the other end of
the Power Cord into the wall outlet. Plug the other end of the Multi-Voltage AC Adapter into the Charge Receptacle
on the side of the Rechargeable Battery. The Charge Indicator should turn “ON” indicating that the battery has re-set
and is now charging. If the Charge Indicator does not appear, or if all four indicators are blinking, the battery has
failed and should not be used. Please contact PARI Patient Connection at 1.800.FAST.NEB (327.8632) and
press 2.
5. To remove the Battery from the PARI TREK®S Compressor, push and hold the Release Button down
(2-A) on the underside of the Rechargeable Battery then slide the Battery from the compressor (2-B) and
remove from the compressor. Refer to Page 4 Figure C, Numbers 2-A and 2-B.
6. The Rechargeable Battery can be recharged while it is attached to the PARI TREK®S Compressor. Refer
to Page 5 Figure F.
15 ENGLISH

VIII. NEBULIZER
NEBULIZER SET UP (Note: Nebulizer is not sterile)
1. Thoroughly read and follow the Nebulizer Set Up in the Instructions for Use that are enclosed with the
PARI Reusable Nebulizer.
2. WINGTIP™TUBING MUST ALWAYS BE USEDTO ATTACH NEBULIZERTO PARI
TREK®S COMPRESSOR. Refer to Page 5, Figure D.
NEBULIZERTREATMENT
1. Take your treatment as directed by your physician.
2. The PARI Reusable Nebulizer has two valves that open and close during the nebulizer treatment when
the Mouthpiece is used. These valves help to maximize aerosol delivery and minimize medication waste.
3. Sit in a relaxed, upright position and press the black On/Off Switch (Refer to Page 2) to turn on the
PARI TREK®S compressor.
4. Place the Mouthpiece on top of your tongue and close your lips around the Mouthpiece. Take slow deep
breaths to inhale the aerosol medication slowly. Refer to Page 5 Figure E. As you inhale, the valve on the
Inspiratory Valve Cap opens.
5. Exhale slowly through your mouth. As you exhale, the ExpiratoryValve on the Mouthpiece opens,
releasing your exhaled aerosol. At the same time, the InspiratoryValve closes on the top of the nebulizer
which reduces waste.
6. Continue steps 4 and 5 until the medication is gone or you hear a “sputtering” noise. Press the black On/
Off Switch to turn off the PARI TREK®S Compressor.
The PARI TREK®S Compressor is protected by a thermal switch. If the PARI TREK®S Compressor
has reached its temperature limit it will automatically turn off to prevent damage to the PARI TREK®S
Compressor. In the unlikely event this occurs, the PARI TREK®S Compressor may need approximately 30
minutes to cool down prior to resuming the treatment.
16ENGLISH

Switch off the the PARI TREK®S Compressor and let it cool down before restarting. If the PARI TREK®S
Compressor does not start after it is switched on after cooling for 30 minutes, please allow another few
minutes for the compressor to cool and try again.
TREATMENT TIMES
• Patients who use a 2.5ml volume ll will typically nd that the PARI TREK®S Compressor
will deliver the treatment in less than 10 minutes.Treatment time depends upon breathing
volume, patient’s age and disease state.
• The PARI TREK®S Compressor was designed for intermittent use to deliver aerosol
medications, and not for continuous use humidification or prolonged treatments
(not over 30 minutes at one time).The PARI TREK®S Compressor is equipped with a
resettable thermal protector to prevent damage to the PARI TREK®S compressor unit. If
the thermal protector cuts off, the PARI TREK®S Compressor will shut down until it is cool
(approximately 30 minutes), then treatments can continue.
• If you will be using the PARI TREK®S Compressor for treatments longer than 30
continuous minutes at one time, please contact PARI Patient Connection at 1.800.FAST.NEB
(327.8632) (USA), then press 2 for tips on prolonged use.
CLEANINGTHE PARI REUSABLE NEBULIZER
1. Thoroughly read and follow the Cleaning section in the Instructions for Use that are enclosed with the
PARI Reusable Nebulizer.
DISINFECTING AND STERILIZINGTHE PARI REUSABLE NEBULIZER
1. Thoroughly read and follow the Disinfecting and Sterilizing sections in the Instructions for Use that are
enclosed with the PARI Reusable Nebulizer.
17 ENGLISH

IX. RECHARGEABLE BATTERY
CHARGINGTHE BATTERY (optional accessory)
1.The PARI TREK®S Battery must be charged for more than two hours before using it the first time. Refer
to PARI TREK®S Battery Illustration on Page 3.
2.To charge the Battery, connect the Power Cord into the Multi-Voltage AC Adapter and plug the other end
of the Power Cord into the wall outlet. Plug the other end of the Multi-Voltage AC Adapter into the Charge
Receptacle on the side of the Rechargeable Battery. Refer to Page 5 Figure F. The Charge Indicator will
turn “ON” indicating the Battery is charging.
3.When the Rechargeable Battery is fully charged, the charge Indicator will turn “OFF” indicating the
Battery is fully charged. Unplug the Multi-Voltage AC Adapter from the Charge Receptacle on the side of
the Rechargeable Battery. The amount of time it takes to recharge the Battery will depend on the age and
charge level of the Battery.
NOTE: Do not leave the Multi-Voltage AC Adapter plugged into the Rechargeable Battery for more than 7 days.
Leaving the battery connected to the power adapter for long periods of time may decrease the life of the battery.
4.When not regularly using the Battery, the Battery should be fully charged every six months to optimize
and preserve the life of the Rechargeable Battery.
STORINGTHE RECHARGEABLE BATTERY (optional accessory)
1.The Battery should be stored fully charged in a cool dry place.
2. Battery should be fully charged every six months.
NOTE: If the Battery goes for a long period of time without charging, Battery life will be decreased.
18ENGLISH
Other manuals for Trek S
3
Table of contents
Languages:
Other Pari Medical Equipment manuals

Pari
Pari LC PLUS 022G8100 User manual

Pari
Pari eFlow rapid User manual

Pari
Pari LC SPRINT 023B8001 User manual

Pari
Pari MONTESOL User manual

Pari
Pari Easycare User manual

Pari
Pari VORTEX Tracheo 051 User manual

Pari
Pari Trio User manual

Pari
Pari LC SPRINT SINUS User manual

Pari
Pari BOY N User manual

Pari
Pari Vortex User manual