manuals.online logo
Brands
  1. Home
  2. •
  3. Brands
  4. •
  5. Polaris
  6. •
  7. Automobile Accessories
  8. •
  9. Polaris 2879976 User manual

Polaris 2879976 User manual

This manual suits for next models

1

Other Polaris Automobile Accessories manuals
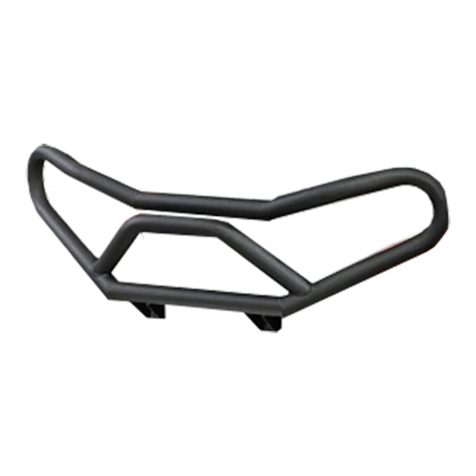
Polaris 2879201 User manual

Polaris

Polaris 2879201 User manual

Polaris RideCommand User manual

Polaris

Polaris RideCommand User manual

Polaris 2877466 User manual

Polaris

Polaris 2877466 User manual

Polaris 2884764 User manual

Polaris

Polaris 2884764 User manual

Polaris RIDE COMMAND User manual

Polaris

Polaris RIDE COMMAND User manual

Polaris 2882270 User manual

Polaris

Polaris 2882270 User manual

Polaris BT50 Luxx User manual

Polaris

Polaris BT50 Luxx User manual

Polaris 2879039 User manual

Polaris

Polaris 2879039 User manual

Polaris 2879719 User manual

Polaris

Polaris 2879719 User manual

Polaris 2880325 User manual

Polaris

Polaris 2880325 User manual

Polaris 2878840 User manual

Polaris

Polaris 2878840 User manual

Polaris FR-1516 User manual

Polaris

Polaris FR-1516 User manual

Polaris 2876958 User manual

Polaris

Polaris 2876958 User manual

Polaris 2878839 User manual

Polaris

Polaris 2878839 User manual

Polaris 2882271 User manual

Polaris

Polaris 2882271 User manual

Polaris CM50 User manual

Polaris

Polaris CM50 User manual

Polaris RIDE COMMAND User manual

Polaris

Polaris RIDE COMMAND User manual

Polaris 2881529 User manual

Polaris

Polaris 2881529 User manual

Polaris 2883419 User manual

Polaris

Polaris 2883419 User manual

Polaris HK-338 User manual

Polaris

Polaris HK-338 User manual

Polaris 2880612 User manual

Polaris

Polaris 2880612 User manual

Polaris 2882167 User manual

Polaris

Polaris 2882167 User manual

Polaris 2883687 User manual

Polaris

Polaris 2883687 User manual

Polaris ToyotaLUXX User manual

Polaris

Polaris ToyotaLUXX User manual

Popular Automobile Accessories manuals by other brands

Magneti Marelli AC161 Installation instruction

Magneti Marelli

Magneti Marelli AC161 Installation instruction

FDI uEZ GUI Start here

FDI

FDI uEZ GUI Start here

JCROffroad JT Install instructions

JCROffroad

JCROffroad JT Install instructions

Rostra VOXXElectronics 250-1930 owner's guide

Rostra

Rostra VOXXElectronics 250-1930 owner's guide

TOP VEHICLE TECH GR3FORD5 installation manual

TOP VEHICLE TECH

TOP VEHICLE TECH GR3FORD5 installation manual

Safe Fleet PRIME DESIGN AR-2000-BLK manual

Safe Fleet

Safe Fleet PRIME DESIGN AR-2000-BLK manual

Skoda Fabia Combi 5J Fitting instructions

Skoda

Skoda Fabia Combi 5J Fitting instructions

Camcar 40077 Al Mounting instructions

Camcar

Camcar 40077 Al Mounting instructions

Camcar 40089 AL Mounting instructions

Camcar

Camcar 40089 AL Mounting instructions

Impac Tradesman 2000 installation manual

Impac

Impac Tradesman 2000 installation manual

DVB OFFROAD BRSB-01 installation manual

DVB

DVB OFFROAD BRSB-01 installation manual

Safari Snorkel SS385HF installation guide

Safari Snorkel

Safari Snorkel SS385HF installation guide

ULTIMATE SPEED 279746 Assembly and Safety Advice

ULTIMATE SPEED

ULTIMATE SPEED 279746 Assembly and Safety Advice

SSV Works DF-F65 manual

SSV Works

SSV Works DF-F65 manual

ULTIMATE SPEED CARBON Assembly and Safety Advice

ULTIMATE SPEED

ULTIMATE SPEED CARBON Assembly and Safety Advice

Witter F174 Fitting instructions

Witter

Witter F174 Fitting instructions

WeatherTech No-Drill installation instructions

WeatherTech

WeatherTech No-Drill installation instructions

TAUBENREUTHER 1-336050 Installation instruction

TAUBENREUTHER

TAUBENREUTHER 1-336050 Installation instruction

manuals.online logo
manuals.online logoBrands
  • About & Mission
  • Contact us
  • Privacy Policy
  • Terms and Conditions

Copyright 2025 Manuals.Online. All Rights Reserved.

APPLICATION
Verify accessory fitment at Polaris.com.
BEFORE YOU BEGIN
Read these instructions and check to be sure all parts and tools are accounted for. Please retain these
installation instructions for future reference and parts ordering information.
KIT CONTENTS
This Kit includes:
NOTE
Kit PN 2881531 shown; Kit PN 2879976 similar except as noted below.
REF QTY PART DESCRIPTION PART NUMBER
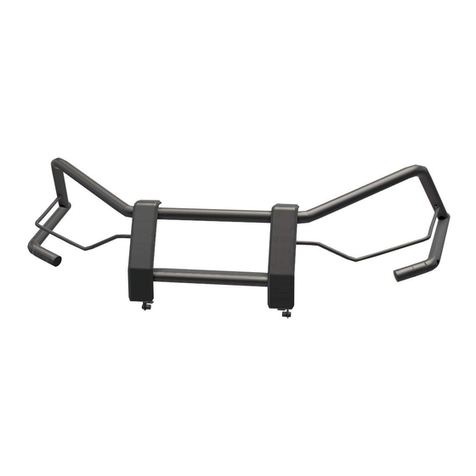
1 1 Headache Rack Assembly (includes items 1.1–1.10) -
1.1 1 - Headache Rack, Moveable -
1.2 2 - Retainer Spacer - 25 mm -
1.3 2 - Washer, Spring - M6 -
1.4 2 - Screw, Torx®- M6 X 1.0 X 15 -
1.5* 2 - Strap -
1.6 4 - Bumper -
1.7* 2 - Washer - 12.5 X 20 X 2 -
1.8* 2 - Screw, Shoulder - M10 X 1.5 -
1.9 1 - Headache Rack, Fixed -
1.10 2 - Bushing -
2 4 Expansion Anchor Kit, Lock & Ride®2875250
Instr 9926584 Rev 03 2018-05 Page 1 of 3
P/N 2879976, 2881531
HEADACHE RACK KIT
Instr 9926584 Rev 03 2018-05 Page 2 of 3
REF QTY PART DESCRIPTION PART NUMBER
3* 4 Screw, Shoulder - M8 X 1.25 -
4* 2 Washer - 8.4 X 16 X 1.5 -
1 Instructions 9926584
Items marked (*) are included in Hardware Kit PN 2206118.
TOOLS REQUIRED
• Safety Glasses
• Screwdriver, Phillips
• Socket Set, Hex Bit, Metric
• Wrench Set, Metric
IMPORTANT
Your HEADACHE RACK KIT is exclusively designed for your vehicle. Please read the installation instructions
thoroughly before beginning. Installation is easier if the vehicle is clean and free of debris. For your safety, and to
ensure a satisfactory installation, perform all installation steps correctly in the sequence shown.
INSTALLATION INSTRUCTIONS
1. Shift vehicle transmission into “PARK”. Turn
ignition switch to “OFF” position and remove key.
2. Install shoulder screw eand washer rto fixed
rack A. Tighten screw. Repeat for RH side.
NOTE
Shoulder screw functions as strap retention post.
3. Raise moveable rack B, then secure two straps C
to shoulder screws einstalled in previous step.
4. Install shoulder screw eto fixed rack A. Tighten
screw. Repeat for RH side.
NOTE
Washers are not used at these locations.
Instr 9926584 Rev 03 2018-05 Page 3 of 3
5. Assemble and install LOCK & RIDE®expansion
anchor wto each corner of fixed rack A. Observe
location of nylon washer Dand steel washer E.
6. Ensure all expansion anchors ware unlocked,
then install headache rack assembly qinto bed
until anchors are fully seated. Depress levers to
lock in place.
If installation is loose, remove rack from bed,
tighten nut at base of affected anchor(s), and
reinstall.
FEEDBACK FORM
A feedback form has been created for the installer to provide any comments, questions
or concerns about the installation instructions. The form is viewable on mobile devices
by scanning the QR code or by clicking HERE if viewing on a PC.
FEEDBACK FORM