manuals.online logo
Brands
  1. Home
  2. •
  3. Brands
  4. •
  5. Polycom
  6. •
  7. IP Phone
  8. •
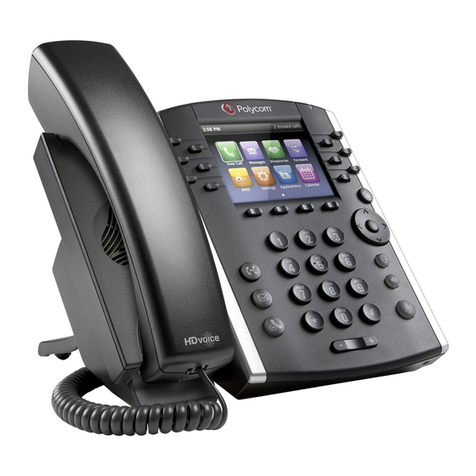
  9. Polycom SoundPoint IP 650 Instruction manual

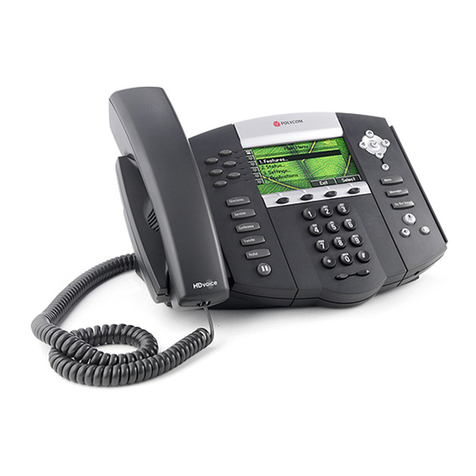
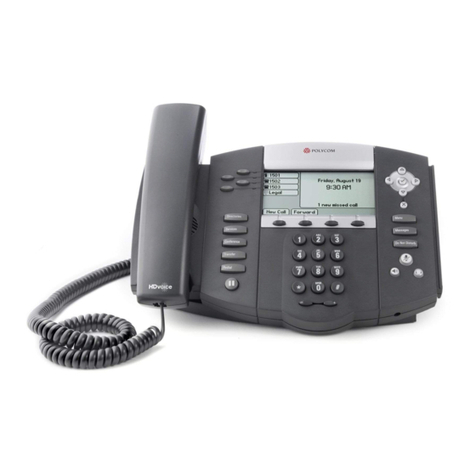
Polycom SoundPoint IP 650 Instruction manual

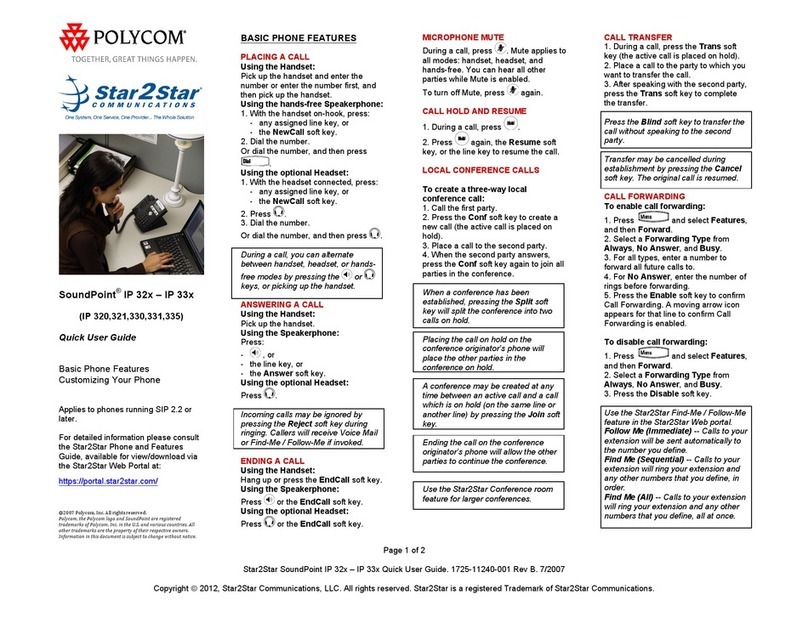
SoundPoint® IP650
Quick User Guide
PLACING A CALL
Using the Handset:
Pick up the handset and enter the number or
enter the number first, and then pick up the
handset.
Using the hands-free Speakerphone:
1. With the handset on-hook, press:
-any assigned line key, or
-the New Call soft key.
2. Dial the number.
Or dial the number, and then press the Dial
soft key
Using the optional Headset:
1. Press & dial the number.
During a call, you can alternate between
hands-free, headset, handset or modes
by pressing the or keys, or picking
up the handset.
ANSWERING A CALL
Using the Handset:
Pick up the handset!
Using the Speakerphone:
Press :
- , or
-the line key (green flashing LED), or
-the Answer soft key.
Using the optional Headset:
Press .
Incoming calls may be ignored by
pressing the Reject soft key during
ringing.
ENDING A CALL
Using the Handset :
Hang up or press the EndCall soft key.
Using the Speakerphone :
Press or the EndCall soft key.
Using the optional Headset :
Press or the EndCall soft key.
MICROPHONE MUTE
During a call, press . Mute applies to all
modes : handset, headset, and hands-free.
You can hear all other parties while Mute is
enabled.
To turn off Mute, press again.
CALL HOLD AND RESUME
1. During a call, press the Hold soft key
2. To resume, press the Resume soft key,
or the line key to resume the call.
When a call has been on hold for an
extended period of time, both visual and
audible alerts may appear.
LOCAL CONFERENCE CALLS
To create a three-waylocal conference
call :
1. Call the first party.
2. Press the Confrnc soft key to create a
new call (the active call is placed on hold).
3. Place a call to the second party.
4. When the second party answers, press the
Confrnc button again to join all parties in
the conference.
When a conference has been established,
pressing the Split soft key will split the
conference into two calls on hold.
Placing the call on hold on the conference
originator’s phone will place the other
parties in the conference on hold.
Ending the call on the conference
originator’s phone will allow the other
parties to continue the conference.
CALL TRANSFER
1. During a call, press the Trans button (the
active call is placed on hold).
2. If you do not need to talk to the transfer
target - Press the Blind soft key then enter
the number. As soon as you enter a valid
number, the call will be transferred.
3. If you do need to confer with the transfer
target, press the Normal soft key and enter
the number. When connected & ready to
complete the transfer, press Trans
Transfer may be cancelled during
pressing the Cancel soft key. The
original call is resumed.
CALL FORWARDING
To enable Call Forwarding:
Lift handset, dial *21 immediately followed by
the destination number, then press Send to
action.
Don’t forget to prefix the destination number
with 9 if it is an external number such as a
mobile.
To cancel Call Forwarding: Lift handset, dial
#21 & press Send.
By default, the line 2 button of your phone is
setup to indicate whether advert is in place. If the
red indicator against the line 2 button is ON, a
divert is present, if not,, there is no divert in place.
To remove a divert with this indicator present,
simply press the “Line 2” button & then the “End
Call” option.
DO NOT DISTURB
To activate Do Not Disturb:
Press the Do Not Disturb button. Your phone
will not ring with this option set but will show
“Do Not Disturb” on its display.
Note that anyone calling your number while
“Do Not Disturb” is set will either be sent to
your voicemail (if present) or to a recorded
message saying that you are not available.
Attempted calls to your number will show as
Missed calls on your phones display.
To cancel Do Not Disturb:
Press the Do Not Disturb button.
Issue : December 2010 SoundPoint IP650 Quick User Guide 1
CALL LISTS
From the idle display, use the arrow buttons
to view Received , Missed &Placed
Call lists.
Alternatively, press Menu, 1, 2 and select
the call list you wish to view –or option 4for
Clear List and follow the on screen options.
From this screen, use the soft keys for the
following options:
1. Clear to delete the call from the list
2. Info to view detailed call information.
3. Save to store the contact to the Contact
Directory –then see Edit a contact.
4. Dial to ring them back.
VOICE MAIL
If you have a voicemail account, dial 15577
to access it.
VOLUME ADJUSTMENT
Press the volume keys to adjust
handset, headset, and hands-free speaker
volume during a call. Pressing these keys in
idle state adjusts the ringer volume.
To conform to regulatory requirements,
handset and headset volume will return to
a preset level after each call, but the
configurationcan be changed by your
system administrator. Hands-free volume
settings will be maintained across calls.
RING TYPE
The implementation of these phones means
that the ring type/tone cannot be set by the
individual.
If you are in a situation where you need to be
able to differentiate between the rings of a
number of telephones in your office, please
contact Telephone-Services.
CONTACT DIRECTORY
To add a contact in your local phone
directory:
1. Press the Directories button then 1or
Select to enter the Contact Directory.
2. Press More then Add and enter First
Name from the dial pad.
3. Press to move to Last Name.
4. Press to Contact and enter the
contacts phone number.
5. If the contact entered uses a Polycom
phone, you can to Watch Buddy &
to Enable this feature –which will allow
you to see when the contacts phone is
busy.
6. Press Save to store the entry or Cancel
to abort entry & repeat steps 2 to 5 for
additional contacts.
7. Press Back softkey when complete &
then Exit to return to the idle display.
Contacts can be easily added from Call
Lists. For more information, see CALL
LISTS section above.
To search for a contact:
1. Press the Dir soft key.
2. Using the dial pad, enter the first
characters for the Last name. For example,
to find the first directory entry with the last
name starting with J, press the 5 key once.
Searches are case insensitive. Dial the
successful match from the resulting search
screen.
To edit a contact:
1. Press the Dir soft key.
2. Search for contact (see above).
3. Press the Edit soft key and make the
necessary changes.
4. Press to end data entry
5. Press the Yes or Cancel soft keys to
accept or cancel changes.
6. Press repeatedly to return to the idle
display.
If an incoming number matches an entry in
your Contact Directory, the name will be
displayed as well as the incoming number.
This may be overridden by a system set
naming function for some extensions.
HEADSET MEMORY MODE
For permanent or full-time headset
users, there is an option to default all
calls to the headset.
To enable Headset Memory Mode:
1. Press and select Settings
followed by Basic, Preferences, and
then Headset Memory.
2. Use and and press to
enable Headset Memory Mode.
To activate Headset Memory Mode :
Press twice. The Headset icon will flash.
To disable Headset Memory Mode :
Repeat steps 1 and 2 and select Disable.
TROUBLESHOOTING
No display on phone. In this case there is
no power to the phone. If your phone has a
power adaptor connected to it, ensure it is
plugged in and switched on.
If your phone does not have a power adaptor
(in this case the phone is powered by the
data network) ensure that the network cable
is connected securely to the phone and the
wall socket. Contact Telephone-Services on
x13030 for further assistance.
Phone continuously restarts or shows
and error message. Verify that the network
cable is connected securely to the phone and
the wall socket. If it is, note the error
message & contact Telephone-Services on
13030 for further assistance.
Phone is powered on & showing the
correct date, time and extension number
but will not dial anyone. In this case, note
whether the telephone icon on the right of the
display shows a solid phone or a hollow
phone and call Telephone-Services for
assistance on 13030.
Phone restarts when you power on/off
your PC. Check that the PC is connected to
the port labeled “PC” in the back of the
phone & the port labeled “LAN” is connected
to the data socket. Having the connections
the wrong way around can cause the phone
to restart.
CONNECTIONS TO YOUR PHONE:
Network cable to Polycom LAN port
Network cable from Polycom PC port
Issue : December 2010 SoundPoint IP650 Quick User Guide 2
Data
Socket
Optional
Power
Adaptor

Other manuals for SoundPoint IP 650

22

Other Polycom IP Phone manuals

Polycom KIRK 6020 User manual

Polycom

Polycom KIRK 6020 User manual

Polycom Integra VVX 500 User manual

Polycom

Polycom Integra VVX 500 User manual

Polycom VVX 300 User manual

Polycom

Polycom VVX 300 User manual

Polycom SoundPoint IP 320 User manual

Polycom

Polycom SoundPoint IP 320 User manual

Polycom SoundPoint IP 550 User manual

Polycom

Polycom SoundPoint IP 550 User manual

Polycom VVX 3 Series User manual

Polycom

Polycom VVX 3 Series User manual

Polycom PENNNET 650 User manual

Polycom

Polycom PENNNET 650 User manual

Polycom SoundPoint IP 331 Installation guide

Polycom

Polycom SoundPoint IP 331 Installation guide

Polycom SoundStation IP 7000 User manual

Polycom

Polycom SoundStation IP 7000 User manual

Polycom SoundPoint IP 501 User manual

Polycom

Polycom SoundPoint IP 501 User manual

Polycom VVX 400 User manual

Polycom

Polycom VVX 400 User manual

Polycom SoundStation IP 5000 User manual

Polycom

Polycom SoundStation IP 5000 User manual

Polycom VVX410 User manual

Polycom

Polycom VVX410 User manual

Polycom SoundPoint IP 650 User manual

Polycom

Polycom SoundPoint IP 650 User manual

Polycom VVX 350 Instruction manual

Polycom

Polycom VVX 350 Instruction manual

Polycom Unison Poly 311 User manual

Polycom

Polycom Unison Poly 311 User manual

Polycom CX500 Lync Edition User manual

Polycom

Polycom CX500 Lync Edition User manual

Polycom VVX 300 User manual

Polycom

Polycom VVX 300 User manual

Polycom VVX 310 User manual

Polycom

Polycom VVX 310 User manual

Polycom VVX D230 User manual

Polycom

Polycom VVX D230 User manual

Polycom VVX 411 User manual

Polycom

Polycom VVX 411 User manual

Polycom SoundStation IP 5000 Instruction manual

Polycom

Polycom SoundStation IP 5000 Instruction manual

Polycom SoundStation IP 3000 User manual

Polycom

Polycom SoundStation IP 3000 User manual

Polycom SoundPoint IP 450 User manual

Polycom

Polycom SoundPoint IP 450 User manual

Popular IP Phone manuals by other brands

Mitel 5235 user guide

Mitel

Mitel 5235 user guide

Philips VOIP841 quick start guide

Philips

Philips VOIP841 quick start guide

Mitel MiVoice 6940 user guide

Mitel

Mitel MiVoice 6940 user guide

Avaya 4620 user guide

Avaya

Avaya 4620 user guide

Selta NETFON 100 user guide

Selta

Selta NETFON 100 user guide

Avaya 1616 brochure

Avaya

Avaya 1616 brochure

Avaya J139 Using

Avaya

Avaya J139 Using

AddPac AP-IP200 installation guide

AddPac

AddPac AP-IP200 installation guide

Avaya IP Office 9608 manual

Avaya

Avaya IP Office 9608 manual

LG-Nortel IP8830 user guide

LG-Nortel

LG-Nortel IP8830 user guide

Cisco 6941 - Unified IP Phone Slimline VoIP quick start guide

Cisco

Cisco 6941 - Unified IP Phone Slimline VoIP quick start guide

Yealink T48S Skype For Business Edition user guide

Yealink

Yealink T48S Skype For Business Edition user guide

Escene ES282-PC Quick operation guide

Escene

Escene ES282-PC Quick operation guide

Snom uc600 quick start guide

Snom

Snom uc600 quick start guide

Mitel 6863i user guide

Mitel

Mitel 6863i user guide

Toshiba Strata CIX DKT2404-DECT user guide

Toshiba

Toshiba Strata CIX DKT2404-DECT user guide

Cisco 8851 Quick reference guide

Cisco

Cisco 8851 Quick reference guide

Siemens HIPATH 2000 manual

Siemens

Siemens HIPATH 2000 manual

manuals.online logo
manuals.online logoBrands
  • About & Mission
  • Contact us
  • Privacy Policy
  • Terms and Conditions

Copyright 2025 Manuals.Online. All Rights Reserved.