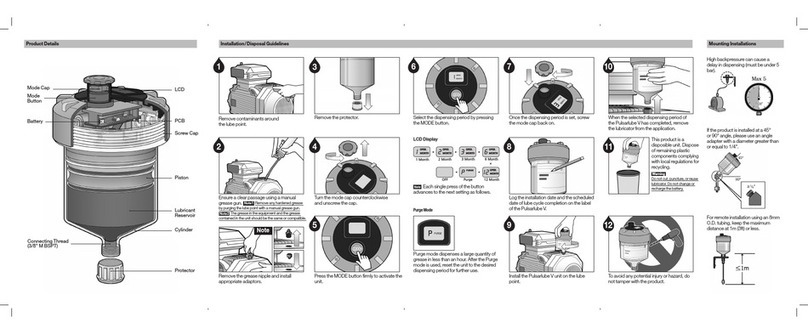
If ( + ) appear on LCD screen, dispensing period setting
is complete.
Press MODE button to select the dispensing period.
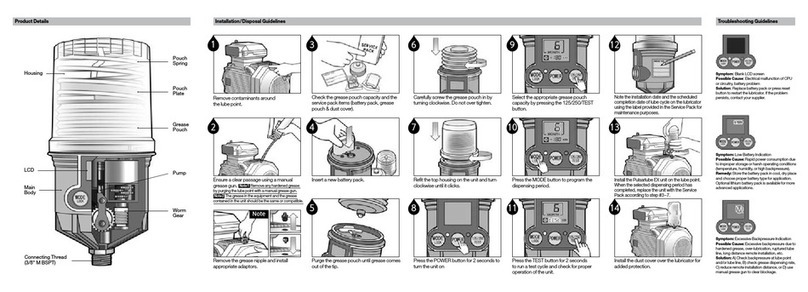
Remove contaminants around the lube
point.
Ensure a clear passage by purging the
lube point with a manual grease gun.
(Use the same or compatible grease.)
Remove the grease nipple and install
appropriate adaptors.
Carefully screw the grease pouch in by turning clockwise. Do
not over tighten.
Install the unit on the lube point. When the selected dispensing
period has completed, replace the Service Pack following
steps 2~6.
Purge the grease pouch until grease comes out of the tip and
install.
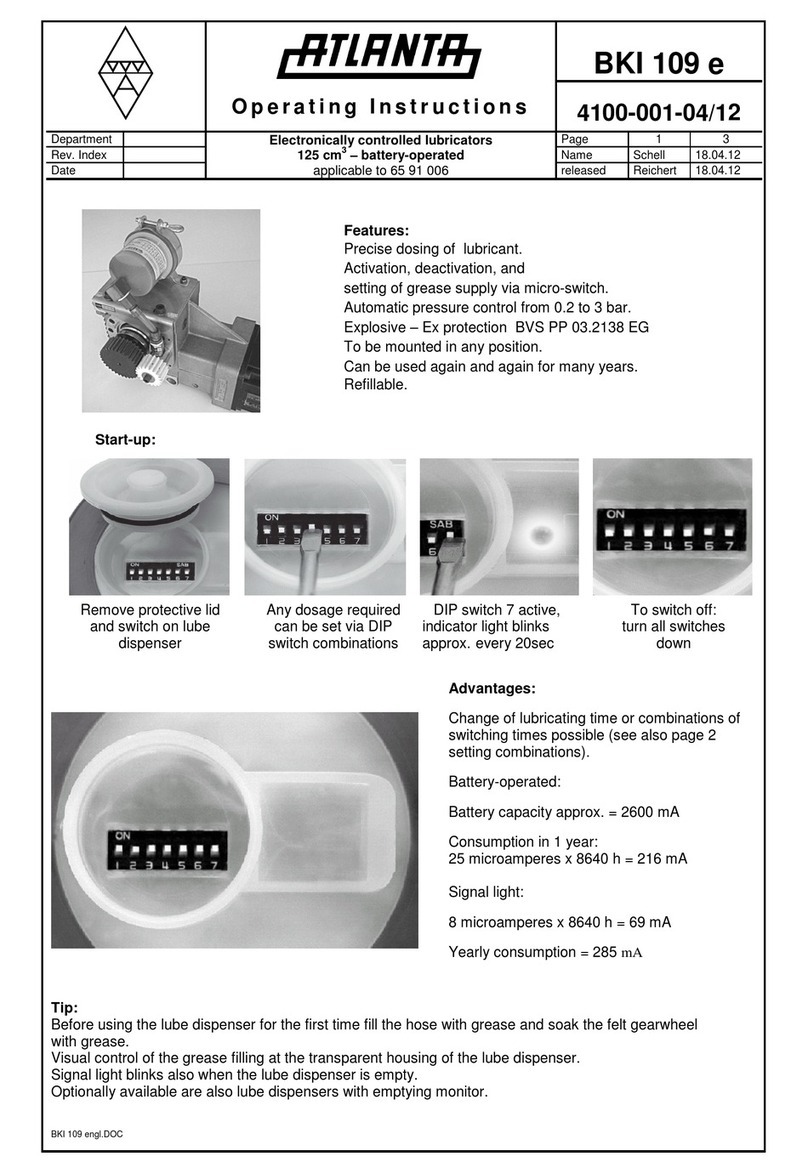
Press POWER button for 3 seconds to turn the unit on. (Check
LCD screen to make sure your purchased grease capacity.)
Attach the enclosed label to the lubricator and note the
installation date.
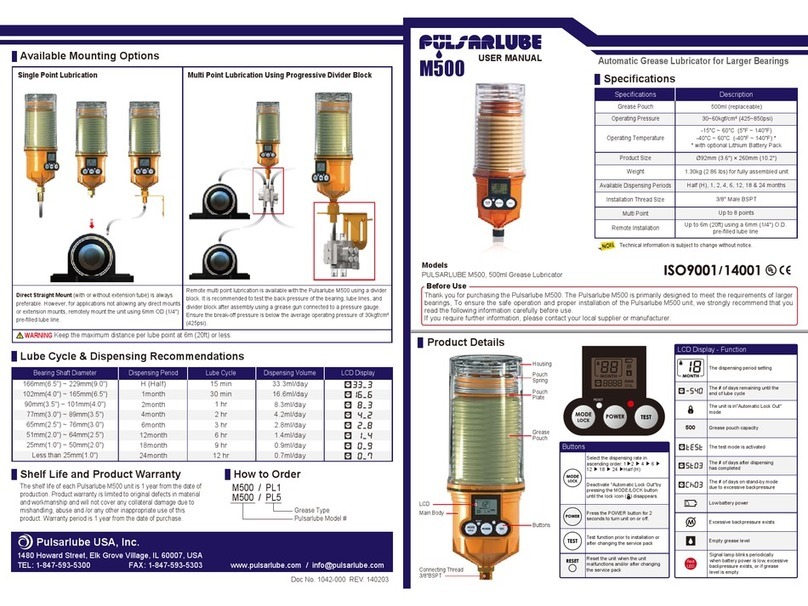
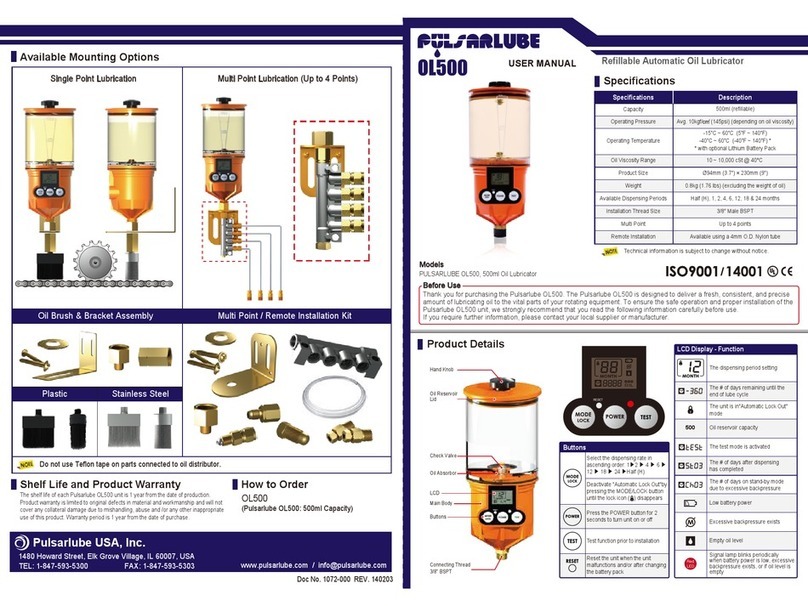
Dispensing Setting Guidelines
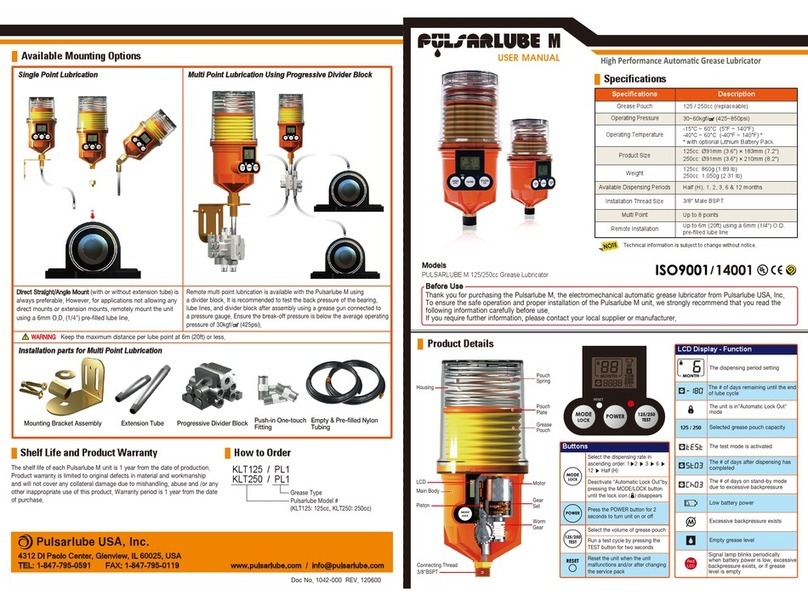
Product Details
Specifications
Warning
Remove the top housing, empty grease pouch, and used
battery pack. Insert new battery pack.
Check the service pack capacity and components (battery pack,
grease pouch, dust cover, & label).
Housing
Pouch Spring
Pouch Plate
Grease Pouch
Main Body
LCD
Connecting Thread PT
3/8" Male
14
3 6
7
912
Ret the top housing on the unit and turn clockwise until it
clicks.
Install the dust cover over the lubricator for added protection.
Make sure the battery clamp is rmly locked.
5 8 11
2
10
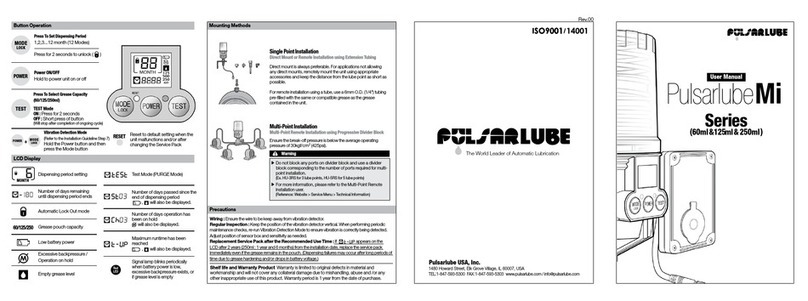
Mounting Methods
Direct Mount Installation
Single Point Remote Installation
Multi-Point Installation
Single Point Installation
Direct Mount or Remote Installation using Extension Tube
For applications not allowing any direct mounts, remotely
mount the unit using appropriate accessories and keep
the distance from the lube point as short as possible. For
remote installation using a tube, use a Ø6 (1/4") tube pre-
lled with the same or compatible grease as the grease
contained in the unit.
Multi-Point Installation
Multi-Point Remote Installation using Progressive Divider
Block (2~8 points)
Ensure the break-off pressure is below the average
operating pressure of 30bar (435psi).
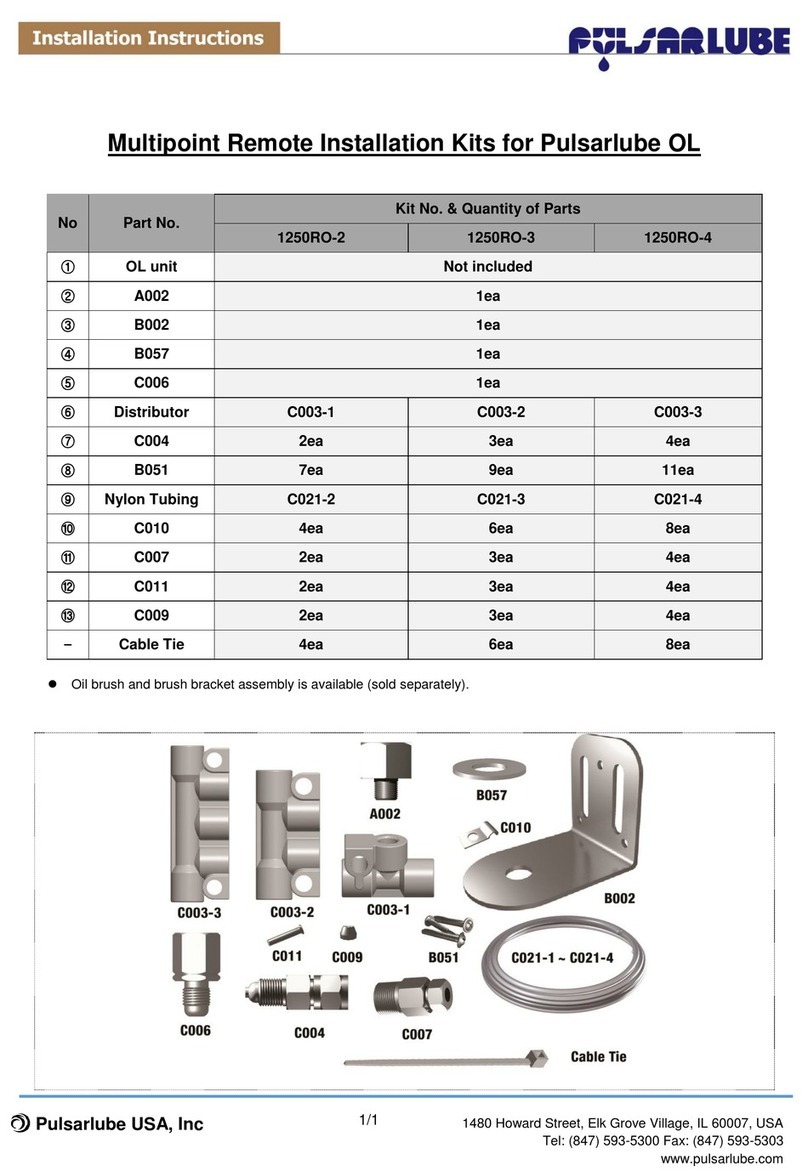
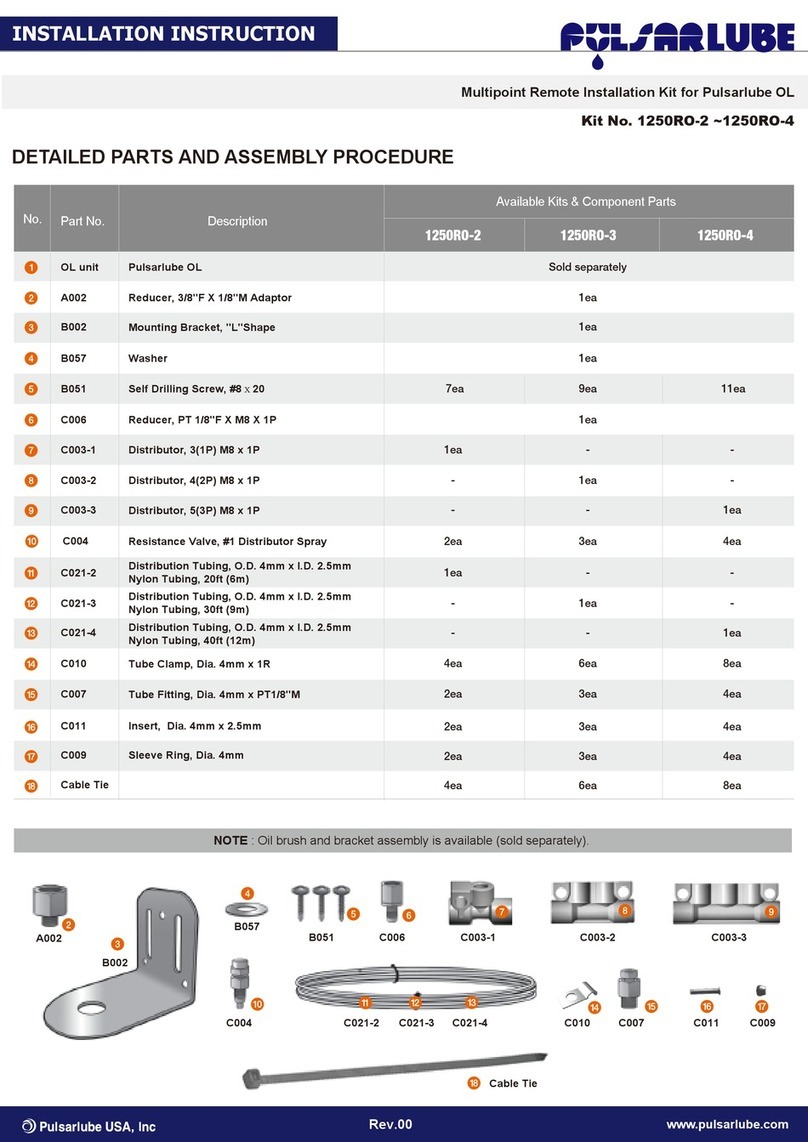
▶ For more information, please refer to the distributor
user manual. (Reference: Website > Service Menu >
Technical Information)
NOTE
NOTE
Alkaline, Lithium Battery Applicable
Lithium Battery Applicable Only
Specications Description Note
Average Operating Pressure 30bar (435psi)
Product specications
may be subject to change
for performance or quality
improvement without notice.
Operating Temperature Standard Alkaline Battery : -15˚C~60˚C (5°F~140°F)
Optional Lithium Battery : -40˚C~60˚C (-40°F~140°F)
Available Dispensing Periods 1~12 months
IP Code IP65
Bluetooth Specication BLE4.1 (Class 2)
App Android 5.0 / iOS 7.0 or newer
WAS Explorer / Chrome
Certificates
KLT Co., Ltd.
型号(Model):
BT60
CMIIT ID: 2019DJ0846
BT120 CMIIT ID: 2019DJ0847
BT240 CMIIT ID: 2019DJ1090
เครื่องโทรคมนาคมและอุปกรณ์นี้มีความสอดคล้องตามมาตรฐานหรือข้อกําหนดทางเทคนิคของ กสทช.
TA-2 019/512 7
This device complies with part 15 of the FCC rules. Operation is subject to the following two conditions: (1)This device may not cause harmful interference, and
(2) this device must accept any interference received, including interference that may cause undesired operation. This equipment has been tested and found to
comply with the limits for a Class B digital device, pursuant to part 15 of the FCC Rules. These limits are designed to provide reasonable protection against harmful
interference in a residential installation. This equipment generates, uses and can radiate radio frequency energy and, if not installed and used in accordance with
the instructions, may cause harmful interference to radio communications. However, there is no guarantee that interference will not occur in a particular installation.
If this equipment does cause harmful interference to radio or television reception, which can be determined by turning the equipment off and on, the user is
encouraged to correct the interference by one of the following measures:
• Reorient or relocate the receiving antenna.
• Increase the separation between the equipment and receiver.
• Connect the equipment into an outlet on a circuit different from which the receiver is connected.
• Consult the dealer or an experienced radio/TV technician for help.
