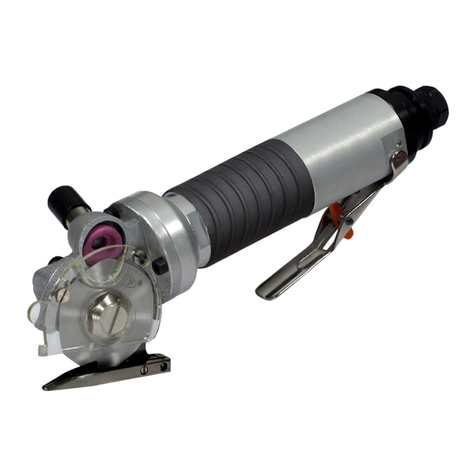
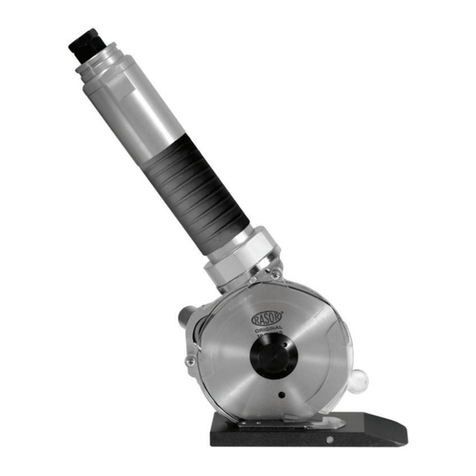
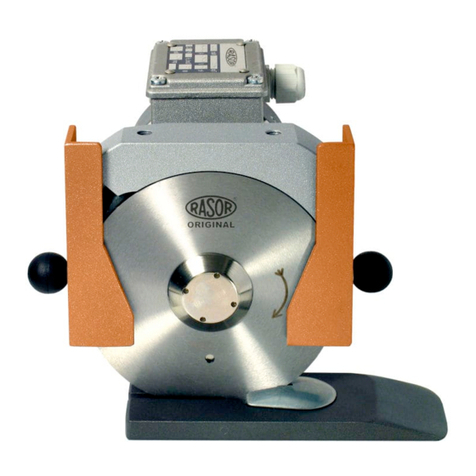
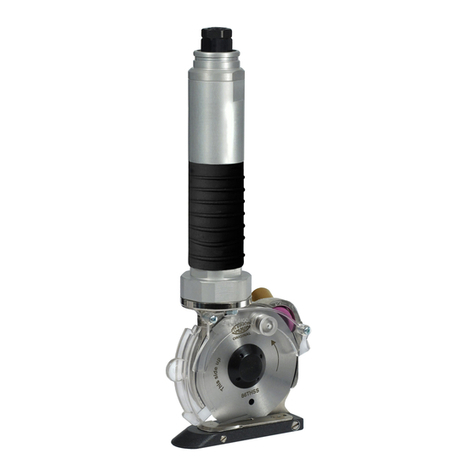
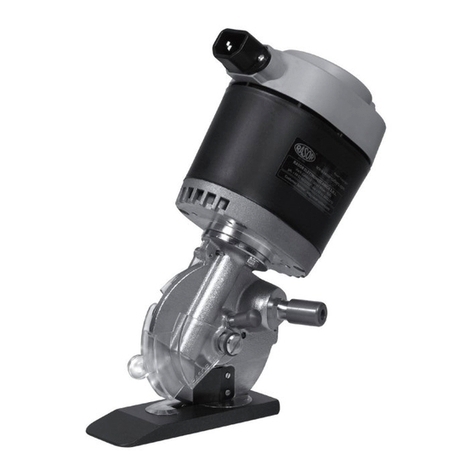
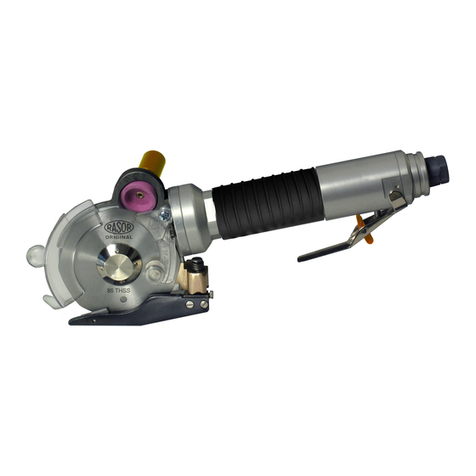
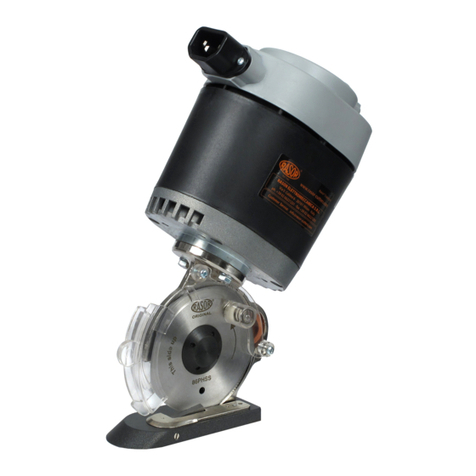
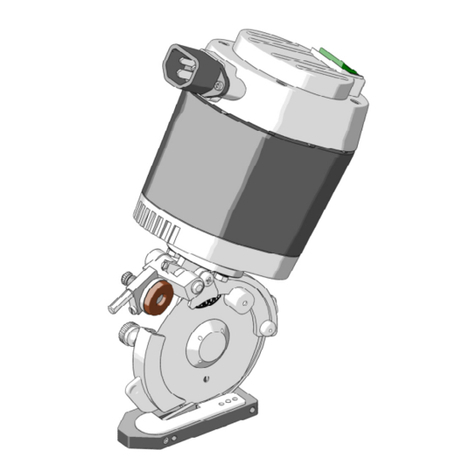
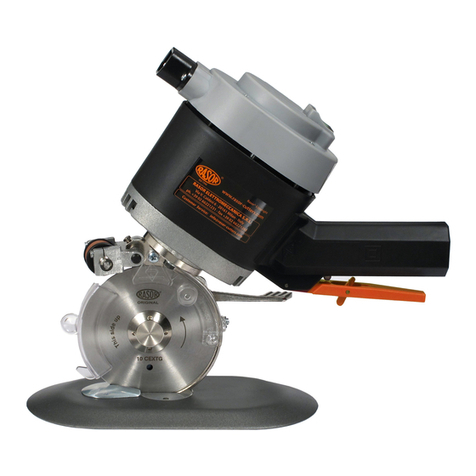
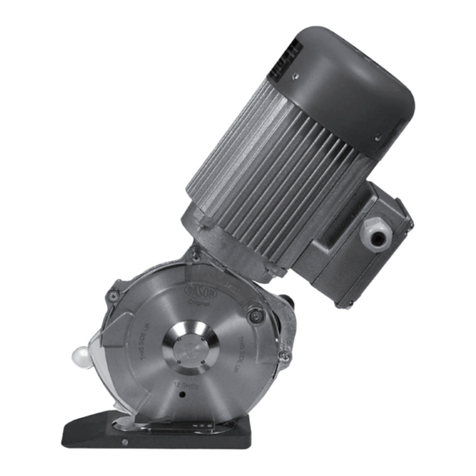
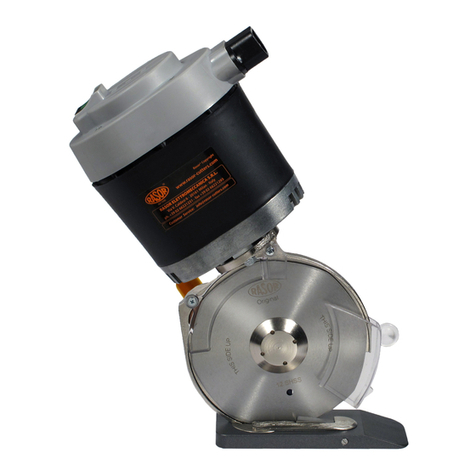
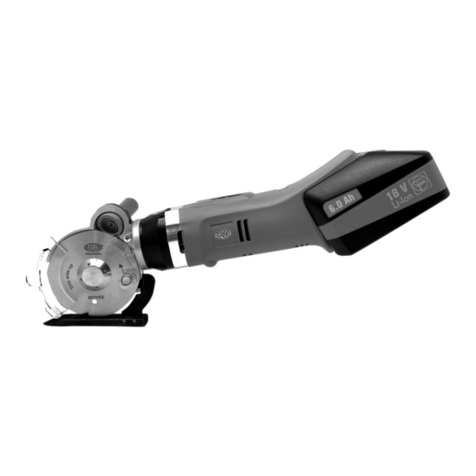
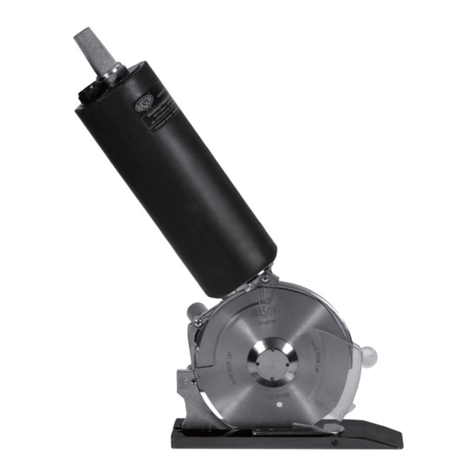
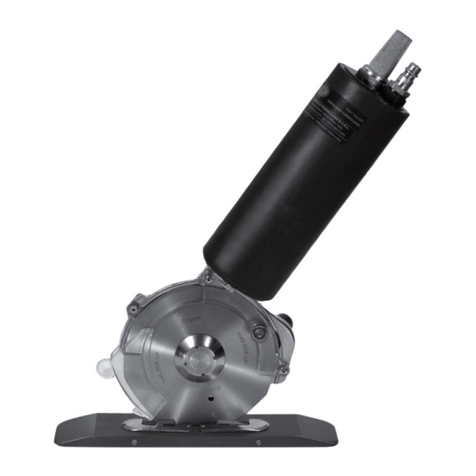
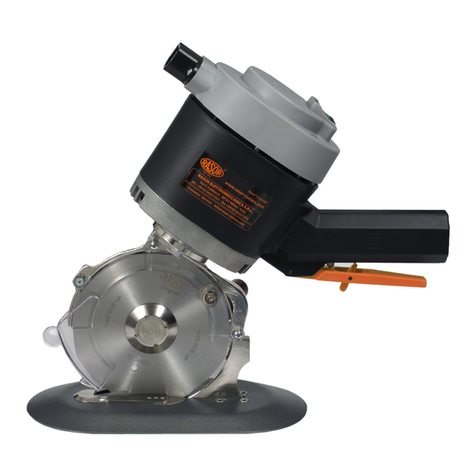
RASOR SW100S Mounting instructions

USEMANUAL English
CUTTINGUNIT
MOD.SW100S
ED.1-06/09

2
EN
COMPANY
ACKNOWLEDGMENT
DearCustomer,
thankyouforchoosingaRasor®ElettromeccanicaS.r.l.product.
Rasor®hasbeenareferencepointinthefieldofcuttingsystemsinthetextile,clothing,
furniture,tailoring,sport,chemical,automotive,nauticalandinsulatingmaterialsectorsfor
years.Itsproductionhasbeenalwayssynonymouswithreliabilityattestedbymanyof
satisfiedcustomers.
Rasor®qualitysystem supervisesall thecompanyactivities in orderto providetheCustomer
withaservicethatmeets its needsandexpectations intermsof productquality,delivery
reliabilityandstock of finishedproducts.
Allthepartsofthedeviceshavebeenplannedandproducedto guaranteeanoptimum
performance.InordertokeepthehighqualitylevelandthelongreliabiltyoftheRasor®
products,itisrecommendedto useonlyoriginalsparepartsandto contactthehead
officeforanymaintenancework.
Rasor®ElettromeccanicaS.r.l.wasestablishedinMilanin1946 bythetwopromotingpartners
Spinelli andCiminaghi.Formorethansixtyyearsithasbeenproducingautomaticcutting
systems,cuttingunits fortextileapplications andelectricandpneumaticcutters.
Initiallyconsideredasapointof referenceforcuttingsystemsinthe
textileapplications,theRasor®products arenowadayswidelyusedin
otherfields:chemical,automotive,nauticalandsportsectorsandin
furnituremanufacturing.
Rasor®canrelyontheprofessionalcontinuityof three generations,
thankstotheprecious supportof thepromotingpartner,to hispassion,dedicationand
greatexperienceof seventyyears.
Themaincharacteristicof Rasor®isthateachworkingphase,startingfromthemanufacturing
of theproductupto its packinganddeliveryiscarriedoutinRasor®premisesbyqualified
operatorswhohaveprofessionalygrownupfollowingthespiritof thecompanyandof its
founders.ThisensuresthehighqualitywhichRasor® hasalwaysconsideredasessential
sincethebeginningof its activity.
Followingtheinnovativespiritmentionedabove,ourcompanyisconstantlyfocusedonthe
improvementof theproductquality,onthestudyanddevelopmentof newmaterialsand
technologies.

EN
3
1.GENERALSAFETY RULES
ThismanualisanintegralpartofcuttingunitSW100Sandmustbecarefully
readbeforeusingitsinceitgivesimportantindicationswithregards toits safe
installation,useandmaintenance.Keepitwithcare.
BeforeusingcuttingunitSW100S,readcarefullythefollowinggeneralsafety
rules.
•PACKAGING.
Aftertakingoffthepackagingmakesurethatthecuttingunitisintact.In
caseofdoubtdonotuseitandcontactanauthorizedservicecentre.Donot
leavepiecesofpackaging(plasticbags,foampolystyrene,boxes,etc.)within
thereachofchildrenordisabledpersonssincetheyarepotentialsourcesof
danger.
•AVOIDDANGEROUSENVIRONMENTS.
PreventthecuttingunitSW100Scomponentsfromcomingincontactwith
damporwetsurfaces.
•KEEPCHILDRENAWAY.
Unauthorizedpersons,inparticularchildren,mustbekeptawayfromthe
workingarea.
•FEEDCABLE.
Preventthefeedcablefromcomingincontactwithhot objects,pointed
surfacesorsharpedges.Neverpullthefeedcableofthemachine.Itmust
neverbereplacedbytheuser.Ifnecessarycontactprofessionallyqualified
staff.
•KEEPTHE WORKINGAREAALWAYSINORDER.
Theworkplacemustalwaysbekeptinorderandwell lightened;liquidsoroil
tracesmustnotbepresent.
•ALWAYSUSECUTTINGUNITSSW100SPROPERLY.
Usethecuttingunitsonlytocarryouttheworkstheyhavebeendesigned
for;donotusethemimproperly.
•OBSERVETHEUSEOFTHE TOOLS.
Donotcutexcessivelythickmaterialsandalwayscheckbladeconditions.
•AVOIDACCIDENTALSTARTINGS.
BeforeconnectingcuttingunitSW100S,makesurethateverythingisinstalled
properly.
•CLOTHING.
Donotuselargeclothesoraccessoriesthatmightgetstuck inthemoving
parts.
•GOGGLESANDPROTECTIVEMETALMESHGLOVES.
Always usegoggles,protectivemetalmesh glovesapprovedbyRasor®during
useandmaintenanceoperations(accordingtoUNIEN388:2004standard).
•SPAREPARTS.
Duringmaintenanceandreplacementoperations useonlyoriginalspareparts.
Blademaintenancemust beonlyperformedbyRasor®technicians.
•INSTALLATION.
Anyinstallationthatisnot inconformitywiththese
specifications couldjeopardizeyoursafetyandcancelsthe
warranty.

4
EN
ALLRIGHTSARERESERVEDACCORDINGTOTHE
INTERNATIONALCOPYRIGHTCONVENTIONS,
Thereproductionof anypartof thismanual, inanyform,isforbiddenwithout
thepriorwrittenauthorizationofRasor®ElettromeccanicaS.r.l.
Thecontentof thisguidecanbemodifiedwithoutpriornotice.Greatcarehas
beentakenincollectingandcheckingthedocumentationcontainedinthis
manualto makeitascompleteandcomprehensibleaspossible.
Nothingcontainedinthismanualcanbeconsideredasawarranty,either
expressedorimplied-including,not inarestrictiveway,thesuitabilitywarranty
foranyspecialpurpose.Nothingcontainedinthismanualcanbeinterpretedasa
modificationorconfirmationof thetermsof anypurchasecontract.
Rasor®ElettromeccanicaS.r.l.machineshavenot beenconceivedtoworkinareasatriskof
explosions andathigh riskof fireandtheycannotcutwetordampmaterials.Moreover,they
cannotworkincaseofrain.
In caseofdamageormalfunction,cuttingunitSW100Smustnotbeuseduntil theCustomer
CareTechnicalServicehasrepairedthem.
Theoriginalconfigurationof thecuttingunitmustnot bechangedatall.
Onreceivingthemachinemakesurethesupplycorrespondstowhathasbeenordered.
In caseofnon-complianceimmediatelyinform Rasor®.
Alsomakesurethecuttingunithasnotbeendamagedduringtransport.
CustomerCareTechnicalService
WARNING
Theinstallerandthemaintenancemanmustknowthecontentof thismanual.Although
themainfeaturesof themachinedescribedinthismanualarenot subjecttochange,
Rasor®ElettromeccanicaS.r.l.reservestherightto modifythecomponents,details
andaccessoriesitdeemsnecessaryto improvethemachineorto meetmanufacturing
orcommercialrequirementsatanytimeandwithoutbeingobligedto updatethis
manualimmediately.
Informativeletter
Foranyinformation,pleasecontact
® ELETTROMECCANICAS.r.l.
ViaV.Caldesi,6;20161,MILANO(MI)-ITALY
Tel:+39.02.66221231;Fax:+39.02.66221293
e-mail: info@rasor-cutters.com
web: www.rasor-cutters.com
WARNING
RASOR

EN
5
SW100S
220 230 50 60 190
850
2.TRANSPORTAND PACKAGING
Thecuttingunitisdeliveredinacardboardbox,insidewhichtherearevarious options.The
codeof theorderedproductandits serialnumberareindicatedoutsidethepackage(see
picture1).Thefollowingaccessoriesarecontainedinabaginsidethepackage:
1) Poligonalblade;
2) Wrenchforbladenutdisassembly.
3) Shukocablewithoutplug;
4) Driftforbladedisassembly.
2
2
3.PLATE DATA
Themanufacturer'sidentificationandCESTANDARD2006/42/CEconformityplate(see picture
below) islocatedonthefrontpartof thecuttingunit.
Theplatemust not beremovedatall,evenifthemachineisresold.Alwaysreferto theserial
number(writtenontheplateitself)whencontactingthemanufacturer.
Severalsafetywarningsareprintedonacardwhichisappliedto thecuttingunitfeeding
cable;suchwarningsmust bestrictlyfollowedbyeveryonedealingwiththemachine.The
companyisnot to beheldresponsiblefordamageto propertyoraccidents to peoplewhich
mightoccuriftheabove-mentionedwarningsarenot observed.In such acase,theoperator
istheonlypersonresponsible.
3
READ
THE
INSTRUCTION
MANUAL
DONOT
REMOVE
THE
SAFETY
DEVICES
HIGH
VOLTAGE
SHEARING
RISK
USE
METAL
GLOVES
USE
GOGGLES
1
1
ClassII doubleinsulation
Serialnumber
Yearofproduction
Model
Electricdata
4

6
EN
4. PRODUCTDESCRIPTION
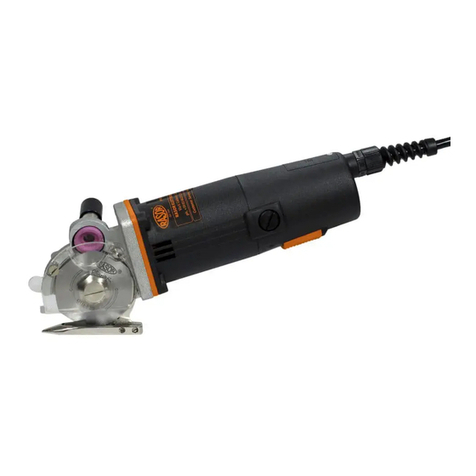
ThefixturedescribedinthismanualisacuttingunitmodelSW100Swhichcanbeassembled
onautomaticmachines(e.g.spreaders,computerizedcutting) bymeans of properholes
locatedinthemotorsupport.
SW100Scanoperatecontinuouslyanditcancutatvariouswidthsbymeansofmultipleinstallation.
Bycuttingwiththebladeandthecounterbladealwaysincontactandthanksto thesteel
upperqualityofthebladesupplied,SW100Sguaranteesthecleanseparationwithout
frayingsof thetwobordersof thecutmaterial.Moreover,the220 Voltsingle-phasemotor
guaranteesabladeperipheralspeedof 260 m/minallowinggreatcuttingperformancesin
termsof traversingspeed/speedof travel.
The100 mm bladediameterandthelightweight(only2,7 Kg) of thecuttingunitmakeit
ideallysuitedforsmall radius cutprofilesonmaterialswiththickness upto 3,5 -4cm.A
sharpenerassembledonthecuttingunitheadallowssharpeningthebladeatanymoment
withoutdisassemblingit.Aftercarryingoutthisoperation,itispossibleto startcutting
again.Ahigh powermotor,perfectlybalanced,with ahigh numberof revolutions andtotally
freeofmaintenance,reducesthevibrations to theminimum,sothatthecuttingunit
complieswithItalianLegislativeDecree No.187 dated19/8/2005, whichadopts European
DirectiveNo.2002/44/CEconcerningtherisksderivingfrommechanicalvibrations.The
mechanicalparts aremadeofhighresistancesteel, bronzeandaluminium andrequirelubrication
afterseveralworkinghours.
1
23
4
11
7
8
10
5
6
12
13
9
1Switchprovided withlight 7 Movable frontprotection
2Motorcover 8
Aluminiumbasecovered with
Teflon
®
3Connectorsocket 9 Poligonal blade
4 Motorframe 10 Plate blockingthe threads
5Sharpenerpushbutton 11 Greaser
6 Motorsupport 12 Carbide counterblade
13 Motorlowercoverwithassembly
holes
Devicecomponents

EN
7
7.FIELDOFAPPLICATION
6.NOISE LEVEL
NOTE
It isadvisableforcuttingunitSW100S’sownersto verifythecompliancewiththestandard
concerningsafetyof workers:Italianlegislativedecree N.277 ITEMIV(DATED15-08-91).
Themaximum acousticpressurelevelemittedbycuttingunitSW100Sisabout60 dB(A).
NoisetestshavebeencarriedoutincompliancewithStandardISO11202(1995).The
devicenoiselevels,measuredatdifferentdistances(withoutanysoundwavefilteringsystem),
varyintheextentof fewdb (A).
CuttingunitSW100Shasbeendesigned,manufacturedandassembledto cuteverykindof
fabricsormaterials,withtheexceptionof metal,plasticorwood,bymeans of rotarypoligonal
blades.
Thisequipmentmust not work:
-inareasproneto explosions;
-inpresenceof finedustorcorrosivegases;
-onwetordampmaterials;
-to cutplastic,metalandwoodenmaterials.
It isforbiddento usecuttingunitSW100Sforpurposesdifferentfromtheabove-mentioned
ones.
5.TECHNICALFEATURES
Thistechnicaldata isonlyindicative andmaybe subject tochangewithout notice.
6sidebladeØ100 mm,H.S.S. steel
CircularbladeØ100mm,Extrasteel
4sidebladeØ100 mm,Germany Extrasteel
6sidebladeØ100 mm,H.S.S.steelcovered
withTeflon
6sidebladeØ100 mm,carbidemetal
CuttercircularbladeØ100 mm,Extrasteel
Features oftheavailableblades
10EHSS
10SEXTG
10CFR
10EMD
10EHSSTF
10CSW
100 mm withcarbidecounterblade
850 rpm
about35 mm
Monophase220 V -90W
1A
2700g
3800g
1,5 mt
LUX200
<2,5m/s2
0~55°C
10~95%withoutcondensate
Temperature
Humidity
Weightwith package
Electriccablelenght
Minimumluminosityforworking
operations
Vibrationsatthestartup
Cuttingworkingdepth
Motorpower
Weight(with feedingcable)
CuttingunitSW100Sfeatures
Blade diameter
Bladespeed
Max.Absorption

8
EN
8.USE WARNINGS
We recommendfollowingtheindications belowinorderto workinsafetyconditions.
•All theoperations must becarriedoutcomplyingstrictlywiththesafetyrulesof the
countrywherethedeviceisto beinstalled.
•ItisSTRICTLYFORBIDDENto smokeduringtheinstallationoradjustmentoperations of
thecuttingunit.
•TheCustomerundertakesto complywithandmakehisstaffobservealltherulesand
regulationsinforceconcerningsafety,preventionof accidentsandhealthinthework
place.Therefore,theCustomerassumestheresponsibilitytostrictlyfollowalltherulesand
regulations inforce,as wellasthespecialprovisionsinforceinsportandpublicinstallations
theCustomerdeclaresto knowafterreceivingall therelativenecessaryinformation.
•The cuttingunit alsoworkswithoutitssafetyprotectivedevice.Thisprotectivedevice
must NEVERberemoved.
•Alwayschecktheresistanceof thematerialto becutandthekindofbladewhichisbeing
used.
•TheCustomershallequiphisownpersonnelwithalltheindividualsafetyprotectionsfor
theexecutionoftheworks,aswellaswiththeoneswhichmightbeprescribedbythe
Manufacturerduetospecificdangerconditionsoftheplantoroftheareawherethe
personnelmust work.
•Donot makeanyadjustmentwhilethebladeisworkingorwhiletheelectricplugis
connected.
•Always payattentionto theelectriccablepositiontopreventitfrom beingcutordamaged
bytheblade.
•ItisallowedtoassemblecuttingunitSW100SonmachinesO.E.M.onconditionthattheir
originalstructureisnot modified.Otherwise,theinterventionmust becertifiedbyRasor®.
Firstlymakesurethatthelinesandelectricsystemsof themachine,onwhichtheSW100S
will beinstalled,areableto supplythecuttingunitwithpowercorrectly,incompliancewith
thesafetyrules(forthefeaturerequiredsee par.5).
Wesuggest installingamagnetothermicsafetydevicebeforethecuttingunitandcheck
thatthegroundcircuitiseffective.Beforeworkingonthefeedingcable,unplugtheunit.
Check thatelectricconnectionsandprotectionscorrespondto the
drivingforceandto theplatedatavalues (voltageandcurrent),
requiredbythedifferentelectriccircuits.Possiblefaultyground
connections maketheworkingconditions unsafe.Possibledamages
arenot chargedto Rasor®.Byreferringto theEC 11-27/1standardall
theworkscarriedoutbymeans of electriccurrentmust beperformed
byastaff,whohasbeenprovidedwithall thedevicesrequiredby
theabove-mentionedstandard.Fortheworkscarriedoutunder
voltage,itisnecessarythattheemployercertifiesthesuitability,
againstformativeprocesses.AsthecuttingunitSW100Sissupplied
withoutplug,theusermust useaplughomologatedinthecountry
inwhich thecuttingunitisused.IntheEuropean CountriesaShukoplug
isrequired(see picture 3).Neverchangethelenghtof thecablesupplied.
ThecuttingunitSW100Sisaclass II electricdevice;therefore,itdoes
notneedearthing.
WARNING
3
9.ELECTRICCONNECTION

EN
9
10. RESIDUALRISKS
11.INSTALLATION AND USE
Eventhoughthecuttingunitissafe,operatorsmust payattentionto preservetheirand
otherpeople’ssafety.
LAttheendof theworkingoperations,themotorcouldbeveryhot.
LThecuttingbladecanworkeveniftheprotectivedeviceisdisassembled.
Toinstall andusethecuttingunitmanually,proceedasfollows:
1)Fixthecuttingunitonlevelsquaresoranglesbymeans of four5MAscrews,byinserting
theminthefourholeslocatedinthemotorlowercover(see pictures4and5).
NOTE
Thecuttingunitcanbeinstalledinanyposition/angle:vertically,laterallyanditcanbeturned
upsidedown.It isnot necessarythatthealuminium basetouchthemachinetable.
1)Laythematerialto becut;
2)Plugthecuttingunitinto theelectricaloutlet(see picture6);
3)Putthematerialonthecuttingfoot(see picture7);
4)Adjust thefrontmobileprotectionaccordingto thethicknessof thematerialtobecut(see
picture7);
5)Enabletheswitch;onceithas been enabled,itlights upwith agreen light(see picture8).
NOTE
CuttingunitSW100Scanworkinafixedposition(thematerialmoves)oritcanmove
forwardwhilethematerialiskeptinthesameposition.Makesurethematerialto becutis
properlystretched,preventingitfromcurling.
WARNING
Neverusethetwoboltswhich fixthemotortothecuttingparttofasten cuttingunitSW100S.
Thisoperationmaycausethemotorshafttobreak.Inthiscase,warrantyisnotvalid.
4 5
7
6
8

10
EN
12.BLADESHARPENING
13. LUBRICATION
Every3-4workinghours,itisnecessaryto lubricate
thepairof gears.Tocarryoutthisoperation,remove
protectiveplug“A”locatedonthemotorsupportof
thecuttingunitandfill itwithlubricatinggreaseRasor.
Screwplug“A”againfewturns.Screwplug“A”some
turns every3-4workinghours(see picture11).
Theblademust neverbedirtywithgreaseoroil. 11
WARNING
A
Aftermanyhoursof acontinuativeuseof thecutting
unit,orifitwouldnot beableto cutanymore,itis
necessaryto sharptheblade.
Tocarryoutthisoperation,startthebladeandpress
sharpener“2”locatedonitfor3-4seconds(bypressing
push button“1”,asshowninpicture9).
Repeattheoperation2-3times.
Ifthesharpeningoperationisnot effective,check the
wearof emerygrindingwheel“3”(see picture10).
Ifemerygrindingwheel“3”istoo wornordirty,replace
it.
1
2
10
3
9
14. MOTOR BRUSHREPLACEMENT
Wornmotorbrushescouldcreateacuttingunitmalfunction(nostarting,intermittent
start,etc.),thereforeitshouldbebetterto verifytheirwearperiodically.
Openthemotorcoverbyunscrewing4screws“4”onthecuttingunithead(see picture
12).Removethemetalcontacts thatclosethebrusheswithaslottedscrewdriver(see
picture13).Removethebrushesandcheck theirwear:ifthegraphitehasalengthshorter
than15 mm oritisuneven,replaceit(see picture14).
Closethemetalcontacts againbymakingsurethattheyadherewell to themetalpartof
thebrush.Finallyclosethemotorcoveragain.
14
12 13
4

EN
11
Ifthebladeisnomoreableto cut(evenafterrepeating
thesharpeningoperation severaltimes)itis necessaryto
replaceit.Tocarryoutthisoperation,usewrench“1”
anddrift“3”lockingtheblade(showninpicture15).
Toreplacetheblade,proceedasfollows:
1) Usesomeprotectivegloves incompliancewithLe-
gislativeDecree 242 dated19 March1996 (useof
personalprotectiondevices);
2) Removethefixedrearsafetyprotection“A”(see
picture16)byunscrewingthecross screw“C”
and“D”bymeans of ascrewdriver(not supplied
bythemanufacturer)asshowninpicture17.
Removethemobilefrontsafetyprotection“B” (see
picture16)byunscrewingpin“E”andremoving
thetwowashers“F”asshowninpicture17.
3) Insertdrift“3”(see picture15)into hole“G”,so
asto lock theblade(theholeontheblademust
correspondto theoneonthestructure).
4) Usewrench“1”to unscrewnut“H”andremove
blade“L”(see picture18).
5) Replacethewornbladewiththenewone“2”,
beingcarefultocenterthebladeonthegear,in
thecorrectposition,andremembertoassembleit,
sothattheRasorwritingcanbeseenbythe
operator.
6) Assembleall thecomponents againandcarryout
thesharpening.
15.BLADEREPLACEMENT
1
15
16
BA
17
C
D
F
G
L
1
H18
3
2
E

12
EN
17.SPAREPARTS /EXPLODEDVIEW
16.TROUBLESHOOTING
CODE DESCRIPTION CODE DESCRIPTION CODE DESCRIPTION CODE DESCRIPTION
10EHSS 6-SIDEBLADEØ100 mm,H.S.S.STEEL SW1076S SPRING WITH DOWEL T 100600 MOTORBRUSHES T 102904L CAPSWITCH WITH LIGHT,SERIES
2008
SW100500 CORRUGATED THRUSTWASHER SW107800 PLATFORM/BASESECTOR T 100700 BRUSH HOLDER T 104500 SCREWFASTENINGTHEFRONT
PROTECTION
SW101800 WORMSCREW -3P,M0.9 SW107900 SCREWFASTENINGTHE
COUNTERBLADEHOLDER T 100800 BRUSH HOLDERSPRING T 104501 CONVEXED WASHER
SW1018CPLCOMPLETEPAIROFGEAR SW108000 COUNTERBLADEHOLDERT 100900 SCREWFASTENINGTHEBRUSH
HOLDER T 104700 GREASERCAP
SW1019S MOTORLOWERCOVER SW108100 CARBIDECOUNTERBLADE T 101000 MOTORBEARING Ø7mm T 104800 GREASER
SW1020S MOTORUPPERCOVER SW108200 SCREWFASTENINGTHE
COUNTERBLADE T 101200 ANTI-GREASEWASHER T 104900 PLATEBLOCKING THETHREAD
SW1022S MOTORFRAMEWITH MAGNETS,
WITHOUT HANDLE SW108600 EMERY Ø25x9x6mm T 101300 COMPLETEROTOR220 V T 105000 SCREW2.6MAFASTENING THEPLATE
BLOCKING THETHREAD
SW1029S ELECTRONICFEEDING CIRCUIT SW1086CPLCOMPLETESHARPENER T 101301 COMPLETEROTOR110 V T 105200 MOTORSUPPORT FIXING BOLT
SW1037S SCREWFASTENINGTHEFEEDING
CIRCUIT SW108700 SHARPENERPIN T 101302 COMPLETEROTOR48 V T 105300 SPLIT WASHER
SW104100 REARPROTECTIONGUARD SW108800 EMERY SPRING Ø11 mm T 101500 FAN T 105400 ANTI-FRICTIONBUSH
SW104101 SCREWFASTENINGTHEREAR
PROTECTIONGUARD SW108900 SHARPENERBUSH T 101600 MOTORBEARING Ø10 mm T 105600 WASHER
SW104102 OILERRING SW109000 EMERY SPRING Ø6mm T 101700 ADJUSTING RING T 105700 RING LOCKINGTHEGEARBEVEL
BEARING
SW104103 OILERRING SPRING SW109100 SHARPENERCAPWITH BEARING T 101801 ELASTICPIN T 105800 GEARBEVELBEARING
SW1041CPLREARPROTECTIONSET SW109200 SCREWFASTENINGTHESHARPENER
CAP T 102001 SCREWFASTENINGTHEUPPERCOVER T 106000 LEFT SCREW FASTENINGTHEGEAR
BEVEL
SW104400 FRONT PROTECTIONGUARD SW109300 WASHER T 102100 SCREWFASTENINGTHELOWER
COVER T 106100 RING UNDERBLADE
SW1044CPLFRONT PROTECTIONSET T 100102 MOTORCAPWITH SLOT T 102201 PAIROFPERMANENT MAGNETS T 106300 RING NUT FASTENING THEBLADE
SW1055CPLCOMPLETEMOTORSUPPORT T 100200 SCREWFASTENINGTHEMOTORCAP T 102701 THREE-POLEPLUGWITH CABLE
GLAND T 107000 SCREWFASTENINGTHE
BASE/PLATFORM/SECTOR
SW1059CPLCOMPLETEGEARBEVEL T 100201 SCREWFASTENINGTHECONNECTOR
SOCKET T 102702 THREE-POLESOCKET T 107500 BLADEASSEMBLING/DISASSEMBLING
WRENCH
SW1074MD RIGHT BASEWITH BEVELmm
130x49x10 T 100300 ADJUSTMENT LOCKING SCREW T1027CPL FEEDING CABLEWITHOUT PLUG T 107600 DRIFT LOCKINGTHEBLADE
SW1074MDCP
L
RIGHT BASEWITH BEVELmm
130x49x10,COMPLETE
T 100400 MOTORBEARING ASJUSTMENT T 102904
CAPSWITCHWITH LIGHT,SERIES
2008
T 107900 LUBRICATING GREASE
à
SOLUTION
Checkthatthebladeandthecounterbladeareincontact
Checkthekindoffabric
Sharpentheblade
Checkthefabricthickness
Checkthecompatibilitybetweenbladeandfabric
Makesurethatthemotor turnscorrectly
Reducethespeedoftravel
Checkthecounterbladeintegrity
Carryoutthelubrication
Disassemblethebladeandremovethematerialresidues
Checkthewearofthepairofgears
Checktheelectricconnections
Checkthemotor brushes
Checkthefeedingcable
Checkpossibleelectricproblems onOEMmachine
Thecuttingunitstartsslowly,works
intermittentlyoritdoes notstart
6
PROBLEM
Thecuttingunitisnoisy
Thefabricisnotcutor itgets stuckbetween
thebladeandthecounterblade

dal 1946
T 102701
T 106300
10EHSS
SW1041CPL
SW108600
SW1086CPL
SW1055CPL
SW108700
SW108900
SW109200
SW109100
SW109300
T104800
T 105800
T 105700
T 106000
T 105600
SW1044CPL T 104500
SW 1018CPL
T101500
T 101300 - V220-230
T 101301 - V110
T 101302 - V48
T 102201
T 100300
T 102001
SW100500
T 100400
T 100900
T101200
T104501
T104501
T 100700
T 100900
T 100201
T 100600
T 102904
T 102702
T 102904L
T 107900
T 1027 CPL
T 107600
T 100200
T 100800
T 102100
T 107500
T 105200 T104700
T 105300
T 100102
T 101700
T 101801
T 101600
SW 108100
SW 107900
SW 1076S
SW 108200
SW 108000
SW 107800
T105000
T105000
SW 1022S
T101000
SW1029S
SW1037S SW1020S
SW1059CPL
SW101800
SW108800
SW109000
SW1059CPL
T105400
SW104101
SW104101
SW104100
SW104103
T 106100
SW104102
SW104400
SW 1074MDCPL
T107000
T 104900
SW1019S
SW 1074MD
®

WARRANTY
Rasor®ElettromeccanicaS.r.l. cuttingunithasa12 monthwarrantyfromthedateindicated
onthelast pageof thismanual,exceptincaseof differentwrittenagreements.
Thewarrantycoversallmanufacturingandmaterialdefects.Replacementandrepairoperations
arecoveredonlyifcarriedoutbyourcompanyandatourworkshop.
Thematerialto berepairedmust besentCARRIAGEFREE.
Oncethemachinehasbeenrepaired,itwill besentCARRIAGEFORWARDto thecustomer.
Thewarrantycoversneithertechnicians'interventiononsitenorthemachinedisassembly
fromtheinstallationplace.
Ifforpracticalreasons,oneof ourtechnicians issentto thepremises,thecustomerwill be
chargedthecosts plus thetravellingexpenses.
Thewarrantydoesnot include:
+failurecausedbywronguseorassembly,
+failurecausedbyexternalagents,
+failurecausedbylack of maintenanceorneglicence;
+bladesandparts subjectto wear.
WARRANTYFORFEITURE:
+Incaseof arrearageorotherbreachesof contract,
+Wheneverchangesorrepairsarecarriedoutonourcuttingunits withoutourprior
authorization,
+Whenevertheserialnumberistamperedwithorcancelled,
+Wheneverthedamageiscausedbyimproperuse,badtreatment,bumps,fallsand
othercausesnot dueto normalworkingconditions,
+Whenevertheunitseemstamperedwith,dismantledorpreviouslyrepairedby
unauthorizedstaff,
+Incasethecuttingunits areusedforpurposesthataredifferentfromtheones
describedinthis manual.
All repairoperations carriedoutunderwarrantydonot interruptits duration.
All disputeswill be settledin thecourt ofjusticeofMilan(Italy).
We thankyouinadvancefortheattentionyouwill payto thismanualandweinviteyouto
informus of anychangeyoudeemnecessaryto improveitandmakeitmorecomplete.

DECLARATIONOFCONFORMITY
We herebycertifythatthemachinespecifiedhereundercompliesto therequirements of
MachineryDirective2006/42/EC,ElectromagneticCompatibility89/336/EECandCEI EN60204-
1, Directive2002/44/EC(LegislativeDecree 187 of 19/08/2005)andto technicalrulingsUNI
EN414:2002, UNIENISO12100-1:2005 andUNIENISO12100-2:2005.
Noisetests havebeencarriedoutaccordingto UNIENISO11202 Standards.
CuttingunitSW100Shasbeenproducedaccordingto workmanlikestandards.
We declarethattheabove-mentionedgoodscomplywiththestandardsinforceconcerning
safetyandhygieneatworkthatcanbeappliedto thematerialitselfaccordingto thelocal
standard;theabove-mentionedgoodsarenot includedinthegoodsindicatedinannexIV,
art.4, paragraph1, (lettera),LawNo.459 of 24 July1996.
1.Category: ELECTRICCUTTINGUNIT
2.Manufacturer: RASOR®ELETTROMECCANICA S.R.L.
3.Tipe: SW100S
4.Serialnumber:..........................................................................................
5.Yearof manufacture:................................................................................
6.Manufacturedin: ITALY
7.Additionalinformation:..............................................................................
(Signature)
Date:
Warrantyexpiry:
12 months invoicedateorreceipt
RASORELETTROMECCANICAS.R.L.
CUTTING EQUIPMENTS

Authorizeddealer
(Stamp)
Table of contents
Other RASOR Cutter manuals

RASOR
RASOR DD120ML User manual

RASOR
RASOR FP861V2 Mounting instructions

RASOR
RASOR DD120DT User manual

RASOR
RASOR SW12SSM User manual

RASOR
RASOR GRT12SM Mounting instructions

RASOR
RASOR D 86PS User manual

RASOR
RASOR D86PS2 Mounting instructions

RASOR
RASOR DD120L User manual

RASOR
RASOR DD120LC User manual

RASOR
RASOR FP120DT Mounting instructions

RASOR
RASOR SW100 Mounting instructions

RASOR
RASOR GRT12 User manual

RASOR
RASOR SW12S Mounting instructions

RASOR
RASOR SW12SSX User manual

RASOR
RASOR GRT10 User manual

RASOR
RASOR DD120RC User manual

RASOR
RASOR DS503MT Mounting instructions

RASOR
RASOR GRT12SX User manual

RASOR
RASOR FP862MT Mounting instructions

RASOR
RASOR NERAPRO Operation instructions