manuals.online logo
Brands
  1. Home
  2. •
  3. Brands
  4. •
  5. Regency
  6. •
  7. Indoor Furnishing
  8. •
  9. Regency ONRD7630 User manual

Regency ONRD7630 User manual

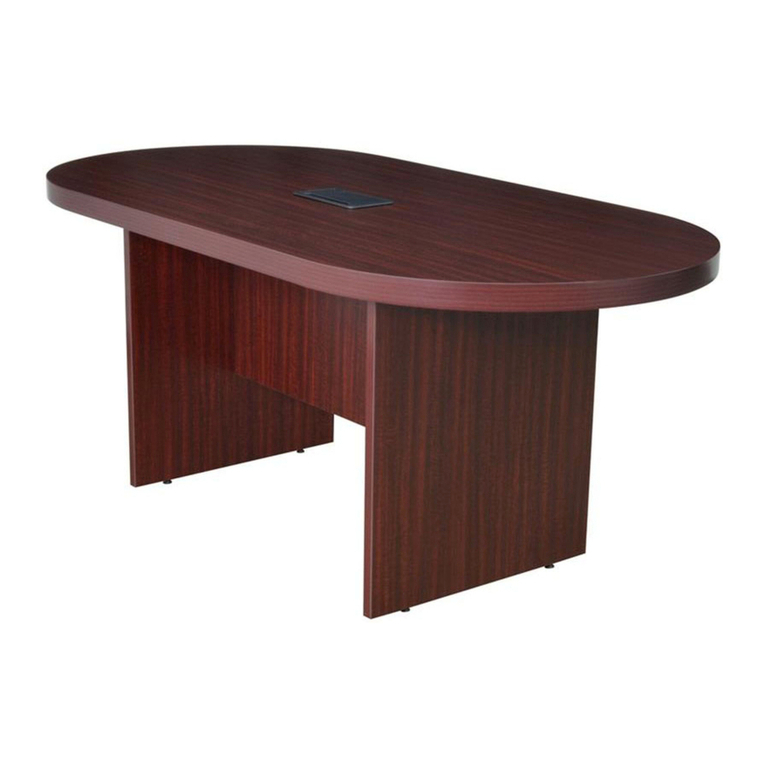
Organize your parts and hardware. You will need (2) people, a Phillips head screwdriver and rubber mallet.
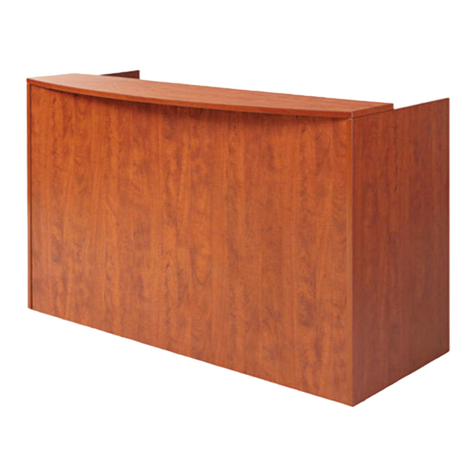
Reception Desk • ONRD7630 • INSTRUCTIONS
CARTONS: RD7630 (Box A + Box B)
Parts :
RD-A: Desk Top
(75.75” x 23.5” x 1”)
Quantity: 1
RD-B: Transaction Top
(40.25” x 10” x 25”)
Quantity: 1
RD-F: Transaction Leg
(36.75” x 29.5” x 1”)
Quantity: 1
RD-E: Center Leg
(37” x 9.75” x 1”)
Quantity: 1
IMPORTANT NOTICE:
Place all wooden parts on a clean and smooth surface such as a rug or carpet to avoid the parts from being scratched.
Check to be sure that you have all parts and hardware.
Remove all wrapping materials, including staples & packing straps before you start to assemble.
Do not tighten all screws/bolts until completely assembled.
Keep all hardware parts out of reach of children.
Any problems or questions call Regency Ofce Furniture at 1-866-816-9822
Cam Lock Assembly:
To open Cam, point arrow toward
Cam Pin hole. To lock Cam, turn
clockwise.
Figure 1:
RD-A
RD-L RD-I
RD-D
RD-C
RD-F
RD-J
RD-C: Desk Leg
(24.5” x 23.5” x 1”)
Quantity: 1
RD-K
RD-B
RD-E
RD-G
RD-H
(75.75” x 23.5” x 1”)
Quantity: 1
RD-D: Desk Modesty
(35.5” x 23.5” x 1”)
Quantity: 1
(37” x 9.75” x 1”)
RD-G: Transaction Modesty
(37” x 38.25” x 1”)
Quantity: 1
Parts List continued
on back.
Reception Desk
Page 1
Reception Desk • ONRD7630 • INSTRUCTIONS
Hardware :
M: Corner Bracket
Quantity: 1
N: Allen Key
Quantity: 1
O: Wood Cam Pins
Quantity: 2
P: Fine threaded
Cam Pins
Quantity: 10
Q: 3/4” Wood Screws
(19mm)
Quantity: 6
T: 3/4” Short Bolts
(19mm)
Quantity: 18
Any problems or questions call Regency Ofce Furniture at 1-866-816-9822
V: Glides
Quantity: 6
W: Insert Covers
Quantity: 18
Parts continued:
RD-H: Transaction
Foot Bracket
(29.5”)
Quantity: 1
RD-I: Desk Foot
Bracket
(23.5”)
Quantity: 1
RD-J: Desk Top
Bracket
(23.5”)
Quantity: 1
RD-K: Transaction
Top Bracket
(9.75”)
Quantity: 2
RD-L: Center Foot Bracket
(9.75”)
Quantity: 1
U: Locking Screws
Quantity: 2
R: Cam Caps
Quantity: 10
NOTE : PRODUCT IS REVERSIBLE.
ALL STEPS INCLUDE BOTH RIGHT AND LEFT ORIENTATIONS.
Please examine all parts before assembly. Hardware placement is critical.
S: 2” Long Bolts
(52mm)
Quantity: 6
X: 3” Screw/Washers
(76mm)
Quantity: 8
Reception Desk
Page 2
Reception Desk • ONRD7630 • INSTRUCTIONS
CARTONS: RD7630 (Box A + Box B)
Reception Desk • ONRD7630 • INSTRUCTIONS
Any problems or questions call Regency Ofce Furniture at 1-866-816-9822
STEP 1 : CHOOSE YOUR ORIENTATION.
For a RECEPTION DESK with RIGHT TRANSACTION TOP,
place your hardware as shown below.
For a RECEPTION DESK with LEFT TRANSACTION TOP,
place your hardware as shown below.
STEP 1A: Insert 2 Wood Cam Pins(O) & 3 Fine Threaded Cam Pins(P) into Transaction Leg(RD-F). Attach 1 Transaction
Top Bracket(RD-K) to the top of the Transaction Leg(RD-F) using 2 Long Bolts(S). Insert 2 Glides(V) into Transaction Foot
Bracket(RD-H), then attach Transaction Foot Bracket(B) to Transaction Leg(RD-F) using 3 Screw/Washers(X).
OO
SS
VV
XVV
X
RD-H
SS
RD-K
OO
NOTE : PLACE TRANSACTION LEG ON A CLEAN, NON SCRATCH SURFACE.
THIS PRODUCT IS BEST BUILT ON ITS SIDE.
PLEASE HAVE A SECOND PERSON SUPPORT ALL PARTS AS THE RECEPTION DESK IS BEING ASSEMBLED.
P
P
P
P
P
P
NOTE: Supports
face interior side
of Transaction
Leg(RD-F).
RD-F
(INTERIOR SIDE)
RD-F
(INTERIOR SIDE)
RD-H
RD-K
Reception Desk
Page 3
Reception Desk • ONRD7630 • INSTRUCTIONS
CARTONS: RD7630 (Box A + Box B)
Reception Desk • ONRD7630 • INSTRUCTIONS
Any problems or questions call Regency Ofce Furniture at 1-866-816-9822
STEP 2 : Attach Desk Top(RD-A) to Transaction Leg(RD-F)
by inserting Cam Pins into Cam locks. Lock Cams (Figure 1).
RD-F
RD-A
STEP 3: Attach Transaction Modesty(RD-G) to Transaction
Leg(RD-F) by inserting Cam Pins into Cam locks. Cam Locks
face interior of desk. Lock Cams (Figure 1).
RD-F
RD-G
RD-A
RD-F
STEP 4: HARDWARE PLACEMENT ON CENTER LEG(E) DEPENDS ON ORIENTATION. PLEASE EXAMINE CAREFULLY.
If you are following the instructions for a RECEPTION DESK
with RIGHT TRANSACTION TOP, place your hardware as
shown below.
If you are following the instructions for a RECEPTION DESK
with LEFT TRANSACTION TOP, place your hardware as
shown below.
STEP 4A: On Side A of the Center Leg(RD-E), insert 3 Fine Threaded Cam Pins(P). Attach 1 Transaction Top Bracket(RD-K) to the
top of the Center Leg(RD-E) using 2 Long Bolts(S). Insert 2 Glides(V) into Center Foot Bracket(RD-L), then attach Center Foot
Bracket(RD-L) to Center Leg(RD-E) using 2 Screw/Washers(X).
SS
V
RD-E
Side A
RD-E
Side B RD-E
Side A
RD-E
Side B
SS
VV V
P
P
P
P
P
P
P
P
P
P
XX
RD-L
RD-K
RD-L
NOTE: Supports face
in toward Side A. NOTE: Supports face
in toward Side B.
RD-G
RD-F
RD-K
Reception Desk
Page 4
Reception Desk • ONRD7630 • INSTRUCTIONS
CARTONS: RD7630 (Box A + Box B)
Reception Desk • ONRD7630 • INSTRUCTIONS
Any problems or questions call Regency Ofce Furniture at 1-866-816-9822
STEP 5 : Slide Center Leg(RD-E) into position on Desk Top(RD-A) and attach Center Leg to Transaction Modesty(RD-G) by insert-
ing Cam Pins into Cam locks. Lock Cams (Figure 1).
If you are following the instructions for a RECEPTION DESK with
RIGHT TRANSACTION TOP, install the Center Leg(RD-E) as
shown below.
If you are following the instructions for a RECEPTION DESK with
LEFT TRANSACTION TOP, install the Center Leg(RD-E) as
shown below.
RD-G
RD-A
STEP 6 : Attach Desk Modesty(RD-D) to Center Leg(RD-E) by inserting Cam Pins into Cam locks. Cam Locks face interior of desk.
Lock Cams (Figure 1).
RD-E RD-E
RD-D RD-D
RD-A
RD-G
RD-E RD-E
Side A
Side B
Side B
Side A
NOTE: Center Leg
interlinks with Desktop.
Reception Desk
Page 5
Reception Desk • ONRD7630 • INSTRUCTIONS
CARTONS: RD7630 (Box A + Box B)
Reception Desk • ONRD7630 • INSTRUCTIONS
Any problems or questions call Regency Ofce Furniture at 1-866-816-9822
STEP 7 : HARDWARE PLACEMENT ON DESK LEG(C) DEPENDS ON ORIENTATION. PLEASE EXAMAINE CAREFULLY.
If you are following the instructions for a RECEPTION DESK
with RIGHT TRANSACTION TOP, place your hardware as
shown below.
If you are following the instructions for a RECEPTION DESK
with LEFT TRANSACTION TOP, place your hardware as
shown below.
VV
RD-I
RD-J
S
S
STEP 7A: Insert 2 Locking Screws(U) into the top of the Desk Leg(RD-C). Attach Desk Top Bracket(RD-J) to Desk Leg(RD-C) by
inserting the Locking Screws(U) into the slide locking holes on Desk Top Bracket(RD-J). Slide into place. Insert 2 Long Bolts(S)
to lock bracket in place. Insert 2 Glides(V) into Desk Foot Bracket(RD-I), then attach Desk Foot Bracket to Desk Leg(RD-C) using
3 Screw/Washers(X). Finish by inserting 2 Fine Threaded Cam Pins(P) into Desk Leg(RD-C).
RD-C
UU
P
P
P
P
RD-J
S
S
UU
VV
RD-I
X
RD-C
X
Reception Desk
Page 6
Reception Desk • ONRD7630 • INSTRUCTIONS
CARTONS: RD7630 (Box A + Box B)
Reception Desk • ONRD7630 • INSTRUCTIONS
Any problems or questions call Regency Ofce Furniture at 1-866-816-9822
STEP 8: Attach Desk Leg(RD-C) to Desk Modesty(RD-D) by
inserting Cam Pins into Cam Locks. Lock Cams (Figure 1).
Attach Desk Leg(RD-C) to Desk Top(RD-A) with 6 Short
Bolts(T).
RD-C
T
TRD-DRD-D
STEP 9: TO REDUCE STRESS ON FOOT BRACKETS, Flip
Desk as shown below before positioning upright.
STEP 11A: Connect Center Leg(RD-E) to Desk Top(RD-A) by
attaching Corner Bracket(M) with 6 Wood Screws(Q).
STEP 11B: Finish by attaching all Insert Covers(W) and Cam
Caps(R) where necessary.
STEP 10: Attach Transaction Top(RD-B) to both
Transaction Top Brackets(RD-K) with 12 Short Bolts(T).
RD-B
RD-K
TRD-E
RD-A
M
Q
RD-C
RD-A RD-A
Reception Desk
Page 7
Reception Desk • ONRD7630 • INSTRUCTIONS
CARTONS: RD7630 (Box A + Box B)
Reception Desk • ONRD7630 • INSTRUCTIONS

This manual suits for next models

1

Other Regency Indoor Furnishing manuals
Regency TVCTRC12048 User manual

Regency

Regency TVCTRC12048 User manual

Regency LCTRT7135 User manual

Regency

Regency LCTRT7135 User manual

Regency Racetrack LCTRT7135 User manual

Regency

Regency Racetrack LCTRT7135 User manual

Regency SRDRT2BF User manual

Regency

Regency SRDRT2BF User manual

Regency ONCSBKBK6020 User manual

Regency

Regency ONCSBKBK6020 User manual

Regency ONRTSP4224 User manual

Regency

Regency ONRTSP4224 User manual

Regency ONHD3033 User manual

Regency

Regency ONHD3033 User manual

Regency LPFS2121 User manual

Regency

Regency LPFS2121 User manual

Regency ONSC3020 User manual

Regency

Regency ONSC3020 User manual

Regency ONDSSP6630 User manual

Regency

Regency ONDSSP6630 User manual

Regency LADSR7130 User manual

Regency

Regency LADSR7130 User manual

Regency SCTBS7135 User manual

Regency

Regency SCTBS7135 User manual

Regency LWMS3015 User manual

Regency

Regency LWMS3015 User manual

Regency LEGACY STORAGE CABINET LSC2935 User manual

Regency

Regency LEGACY STORAGE CABINET LSC2935 User manual

Regency ONCSLFBK7124 User manual

Regency

Regency ONCSLFBK7124 User manual

Regency MLD723048 User manual

Regency

Regency MLD723048 User manual

Regency ONSCD3624 User manual

Regency

Regency ONSCD3624 User manual

Regency ONCSSP7124 User manual

Regency

Regency ONCSSP7124 User manual
Regency 5303 User manual

Regency

Regency 5303 User manual

Regency Kobe MKTRCT4824 Instruction Manual

Regency

Regency Kobe MKTRCT4824 Instruction Manual

Regency BCTRC12048 User manual

Regency

Regency BCTRC12048 User manual

Regency MKTBX22 User manual

Regency

Regency MKTBX22 User manual

Regency ONCSBKBK7124 User manual

Regency

Regency ONCSBKBK7124 User manual

Regency ONCSLF7124 User manual

Regency

Regency ONCSLF7124 User manual
Popular Indoor Furnishing manuals by other brands

Living Spaces 305-S260-040 Assembly instructions

Living Spaces

Living Spaces 305-S260-040 Assembly instructions

Bush Business Furniture CH2701BLL-03 Assembly instructions

Bush Business Furniture

Bush Business Furniture CH2701BLL-03 Assembly instructions

rst brands CAPRI OP-ALCLB2-CI Assembly instructions

rst brands

rst brands CAPRI OP-ALCLB2-CI Assembly instructions

Whalen DME5233FPC-BRM Care and maintenance

Whalen

Whalen DME5233FPC-BRM Care and maintenance

Walker Edison AF16LOST Assembly instructions

Walker Edison

Walker Edison AF16LOST Assembly instructions

Rauch Kolding 86229.70 Assembly instructions

Rauch

Rauch Kolding 86229.70 Assembly instructions

Quest Leisure Products SuperLite Stow 155102B instructions

Quest Leisure Products

Quest Leisure Products SuperLite Stow 155102B instructions

Forte CMBV42R Assembling Instruction

Forte

Forte CMBV42R Assembling Instruction

bbf A177062H Assembly guide

bbf

bbf A177062H Assembly guide

Wren PEBBLE FI.PK.BED.222.002 Fittings guide

Wren

Wren PEBBLE FI.PK.BED.222.002 Fittings guide

Birlea SOMERSET DINING SET Assembly instructions

Birlea

Birlea SOMERSET DINING SET Assembly instructions

hygena Valencia 656/5776 Assembly instructions

hygena

hygena Valencia 656/5776 Assembly instructions

Sauder Worksense 427836 manual

Sauder

Sauder Worksense 427836 manual

Lightolier FIXTURE Instructions for installation

Lightolier

Lightolier FIXTURE Instructions for installation

Galipette SACHA P0K400 manual

Galipette

Galipette SACHA P0K400 manual

Altra furniture 5978330COM Assembly instructions

Altra furniture

Altra furniture 5978330COM Assembly instructions

Rauch M2659 Assembly instructions

Rauch

Rauch M2659 Assembly instructions

SI NANO ROLL 375 installation instructions

SI

SI NANO ROLL 375 installation instructions

manuals.online logo
manuals.online logoBrands
  • About & Mission
  • Contact us
  • Privacy Policy
  • Terms and Conditions

Copyright 2025 Manuals.Online. All Rights Reserved.