manuals.online logo
Brands
  1. Home
  2. •
  3. Brands
  4. •
  5. Regency
  6. •
  7. Indoor Furnishing
  8. •
  9. Regency ONHD3033 User manual

Regency ONHD3033 User manual

Organize your parts and hardware. You will need (2) people, a Phillips head screwdriver and rubber mallet.
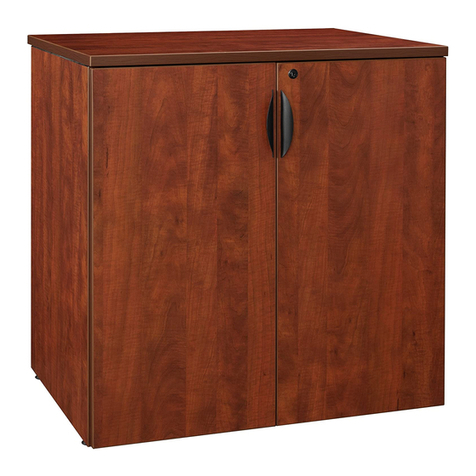
2-Shelf Tower with Doors • ONHD3033 • INSTRUCTIONS
CARTONS: ST3330, STD3033
Parts :
ST-A: Back Panel
(30.25” x 28” x 1”)
Quantity: 1
ST-E: Left Side
(15” x 31” x 1”)
Quantity: 1
ST-G: Top
(29.5” x 15” x 1”)
Quantity: 1
ST-B: Shelves
(28” x 13” x 1”)
Quantity: 2
ST-C: Center Support
Quantity: 1
IMPORTANT NOTICE:
Place all wooden parts on a clean and smooth surface such as a rug or carpet to avoid the parts from being scratched.
Check to be sure that you have all parts and hardware.
Remove all wrapping materials, including staples & packing straps before you start to assemble.
Do not tighten all screws/bolts until completely assembled.
Keep all hardware parts out of reach of children.
Any problems or questions call Regency Ofce Furniture at 1-866-816-9822
Cam Lock Assembly:
To open Cam, point arrow
toward Cam Pin hole. To lock
Cam, turn clockwise.
Figure 1:
ST-H
ST-E
ST-D
DR-F
ST-G
ST-F
ST-H: Base
(28” x 14.25” x 1”)
Quantity: 1
ST-F: Right Side
(15” x 31” x 1”)
Quantity: 1
ST-D: Foot Bracket
(15”D)
Quantity: 2
ST-C
DR-E: Left Door
(14” x 30” x 1”)
Quantity: 1
DR-F: Right Door
(14” x 30” x 1”)
Quantity: 1
DR-E
2-Shelf Tower with Doors
Page 1
Any problems or questions call Regency Ofce Furniture at 1-866-816-9822
Hardware :
I: Allen Key
Quantity: 1
O: Wood Cam Pins
Quantity: 14
N: 3/4” Wood Screws
(19mm)
Quantity: 23
M: Shelf Pins
Quantity: 8
J: 2.35” Long Bolt
(60mm)
Quantity: 1
Q: Glides
Quantity: 5
P: Cam Caps
Quantity: 14
K: 1.5” Medium Bolts
(38mm)
Quantity: 4
L: 3/4” Short Bolts
(19mm)
Quantity: 4
R: Washers
Quantity: 6
S: Handles
Quantity: 2
T: Hinge
Quantity: 4
U: Hinge
Bracket
Quantity: 4
V: Set of Keys
Quantity: 1
W: Latch Screw
(15mm)
Quantity: 2
X: Lock Latch
Quantity: 1
Y: Door Stop
Quantity: 1
STEP 1: Insert 1 Wood Cam Pin(O) in the Back Panel(ST-A).
Then, connect the Base(ST-H) to Back Panel(A) by inserting
and locking cams (Figure 1).
NOTE: Cam Locks on Base Panel face away from Back Panel.
ST-A
O
ST-A ST-H
STEP 2: Insert 8 Wood Cam Pins(O) into the Left Side(ST-E)
and Right Side(ST-F).
ST-E ST-F
OO
OO
OO
OO
2-Shelf Tower with Doors • ONHD3033 • INSTRUCTIONS
CARTONS: ST3330, STD3033
2-Shelf Tower with Doors
Page 2
Any problems or questions call Regency Ofce Furniture at 1-866-816-9822
ST-E ST-F
ST-H
STEP 3 : Attach the Left Side(ST-E) and Right Side(ST-F) to the
back and Base(ST-H) by inserting and locking cams (Figure 1).
STEP 4 : Insert 5 Wood Cam Pins(O) into Top(ST-G).
ST-G
OO
O
OO
STEP 5 : Connect the Top(ST-G) to the Left Side(ST-E), Right
Side(ST-F) and the Back Panel(ST-A) by inserting and locking
cams (Figure 1). ST-G
STEP 6 : Insert 1 Glide(Q) into the Center Support(ST-C).
Then, attach the Center Support(ST-C) to the Base(ST-H)
using 4 Short Bolts(L).
ST-E ST-F
ST-A
ST-H
Q
ST-C
STEP 7 : Attach each Foot Bracket(ST-D) to Base Panel(ST-H) by placing 1 Washer(R) between the base and each wood screw hole on
Foot Bracket(Figure 2). Then insert 4 Medium Bolts(K) and 6 Wood Screws(N). Also, insert 4 Glides(Q) into Foot Bracket(ST-D).
Q
Q
Q
Q
K
K
K
K
N
N
N
N
N
N
KN
N
K
N
R
RR
Figure 2
ST-D
ST-H
ST-D
STEP 8 : Insert 8 Shelf Pins(M) and place 2 Shelves(ST-B). Place Cam Caps(P) over cam locks.
2-Shelf Tower with Doors • ONHD3033 • INSTRUCTIONS
CARTONS: ST3330, STD3033
2-Shelf Tower with Doors
Page 3
STEP 9 : Use 2 Wood Screws(N) to attach each Hinge
Bracket(U) to the sides. The hinge adjustment screw on each
bracket should face toward the back of the unit.
Any problems or questions call Regency Ofce Furniture at 1-866-816-9822
U
U
U
U
STEP 10: Attach the Lock Latch(X) with 2 Latch Screws(W)
and Door Stop(Y) with 1 Wood Screws(P) to the Top(ST-G).
YX
W
PW
STEP 11 : Attach 1 Handle(S) to the Left Door(DR-E)
and Right Door(DR-F).
S
STEP 12 : Attach 2 Hinges(T) to the Left Door(DR-E) and Right
Door(DR-F) with 8 Wood Screws(N).
N
N
N
N
N
N
N
N
N
N
T
STEP 13A : Connect 4 Hinges(T) to Hinge Brackets(U).
STEP 13B: The screw(EA) located on Hinge Bracket(U) interlocks with the opening on Hinges(T) just as screw(EB) located on
Hinges(T) interlocks with the Hinge Bracket(U) opening. Tighten screw(EA) to secure door.
Note: The screw EB is an adjustment for the door position. Turn right to adjust door to center and left to adjust toward the side.
EA EB
U
T
ST-G
S
DR-F
DR-E
Hinge
Adjustment
Screw
U
2-Shelf Tower with Doors • ONHD3033 • INSTRUCTIONS
CARTONS: ST3330, STD3033
2-Shelf Tower with Doors
Page 4
Any problems or questions call Regency Ofce Furniture at 1-866-816-9822
OPTIONAL STEP FOR EXTRA STABILITY ON A 60”x20” LOW CREDENZA
OPTIONAL STEP A : Remove the Glide(Q) from the Center Support(ST-C).
OPTIONAL STEP B: Connect Tower to Low Credenza by inserting Long Bolt(J) through Credenza Top Hole and into the Center
Support(ST-C).
NOTE: THIS CONNECTION WILL PERMANENTLY DISFIGURE THE LOW CREDENZA TOP!
Credenza Top Hole
Low Credenza Top
ST-C
If you are attaching Tower w/ Doors to Low Credenza, Continue with Optional Step.
2-Shelf Tower with Doors • ONHD3033 • INSTRUCTIONS
CARTONS: ST3330, STD3033
2-Shelf Tower with Doors
Page 5

Other Regency Indoor Furnishing manuals
Regency ONDSSP6630 User manual

Regency

Regency ONDSSP6630 User manual

Regency MLD723048 User manual

Regency

Regency MLD723048 User manual

Regency MTBX22 User manual

Regency

Regency MTBX22 User manual

Regency TVRD7236 User manual

Regency

Regency TVRD7236 User manual

Regency LSC7236 User manual

Regency

Regency LSC7236 User manual

Regency LRT4724 User manual

Regency

Regency LRT4724 User manual

Regency MADET2540 User manual

Regency

Regency MADET2540 User manual

Regency LCTRT7135 User manual

Regency

Regency LCTRT7135 User manual

Regency ONCSLFBK7124 User manual

Regency

Regency ONCSLFBK7124 User manual

Regency TTRC4824 User manual

Regency

Regency TTRC4824 User manual

Regency ONCSBKBK6020 User manual

Regency

Regency ONCSBKBK6020 User manual

Regency 5303 User manual

Regency

Regency 5303 User manual

Regency ONCSLFBK6020 TT6020 User manual

Regency

Regency ONCSLFBK6020 TT6020 User manual

Regency Mia 2000 User manual

Regency

Regency Mia 2000 User manual

Regency MKTBX22 User manual

Regency

Regency MKTBX22 User manual

Regency ONBFLF3020 User manual

Regency

Regency ONBFLF3020 User manual
Regency LWMS3015 User manual

Regency

Regency LWMS3015 User manual

Regency TT6224 User manual

Regency

Regency TT6224 User manual

Regency BCTRC12048 User manual

Regency

Regency BCTRC12048 User manual

Regency Kobe MKTRCT4824 Instruction Manual

Regency

Regency Kobe MKTRCT4824 Instruction Manual

Regency ONCSLF7124 User manual

Regency

Regency ONCSLF7124 User manual

Regency Legacy LCTRT12047 User manual

Regency

Regency Legacy LCTRT12047 User manual
Regency LPFS2121 User manual

Regency

Regency LPFS2121 User manual

Regency BBNCH2148 User manual

Regency

Regency BBNCH2148 User manual

Popular Indoor Furnishing manuals by other brands

Costway HW63116 manual

Costway

Costway HW63116 manual

SEI HZ640200TX Assembly instructions

SEI

SEI HZ640200TX Assembly instructions

Next 681641 Assembly instructions

Next

Next 681641 Assembly instructions

Stone Forest PFS-TD-36 WSD6 Series quick start guide

Stone Forest

Stone Forest PFS-TD-36 WSD6 Series quick start guide

Cheyenne MS0841052219COM Assembly instructions

Cheyenne

Cheyenne MS0841052219COM Assembly instructions

Ameriwood HOME 1625500EBL Instruction booklet

Ameriwood HOME

Ameriwood HOME 1625500EBL Instruction booklet

Linon Monaco 0217RED-01-KD-U Assembly instructions

Linon

Linon Monaco 0217RED-01-KD-U Assembly instructions

VS Pareto-Twin 21758 Assembly instructions

VS

VS Pareto-Twin 21758 Assembly instructions

Loctek ET118W-N installation guide

Loctek

Loctek ET118W-N installation guide

Sunset Furniture Sunset Trading DLU-TPD-4242-B Assembly instruction

Sunset Furniture

Sunset Furniture Sunset Trading DLU-TPD-4242-B Assembly instruction

Sensio Nebula SE30798P0 manual

Sensio

Sensio Nebula SE30798P0 manual

IKEA Oxsten quick start guide

IKEA

IKEA Oxsten quick start guide

Birlea SAFARI SAFBBGRY Assembly instructions

Birlea

Birlea SAFARI SAFBBGRY Assembly instructions

Belleze 014-HG-40001 Assembly

Belleze

Belleze 014-HG-40001 Assembly

Filippi 1971 VittEr PANCAKE manual

Filippi 1971

Filippi 1971 VittEr PANCAKE manual

Quelle 693326 Assembly instructions

Quelle

Quelle 693326 Assembly instructions

Dunelm Fulton Tall 4 Door Cabinet instructions

Dunelm

Dunelm Fulton Tall 4 Door Cabinet instructions

comfortel ADELE 7529 owner's manual

comfortel

comfortel ADELE 7529 owner's manual

manuals.online logo
manuals.online logoBrands
  • About & Mission
  • Contact us
  • Privacy Policy
  • Terms and Conditions

Copyright 2025 Manuals.Online. All Rights Reserved.