Note –If the Detector does not identify movement within the detection
zone, it is necessary to change Detector position by means of swivel bracket
(in case of wall mounting the horizontal turning angle of the Detector on swivel
bracket – ± 450, vertical – not less than 200).
Under absence of movement inside the detection zone, LED indicator should
not light.
Upon the expiry of 5 min of either of the two testing modes, the Detector
automatically changes to normal mode of operation (if DIP-switch «3» is in ON
position, alarm message generation is displayed by LED indicator lighting red).
The detection zone position in space can be appraised visually by changing
camera to continuous mode of operation and monitoring movements by video
display unit.
LED Indicator Disabling
For the Detector operation masking, the mode of LED indicator disabling is
provided. DIP-switch «3» is in OFF position. In this mode LED is operable only
during first minute after energizing or during failure message generation.
Self-Test Mode
The Detector provides self-testing of the following parameters: amplifier
operability, input voltage, ambient temperature.
In case of self-test failure (amplifier failure, voltage drop lower than 10.0 V,
ambient temperature out of permissible temperature range), «Failure» message
is generated by opening the relay output contacts repeated by periodical LED
indicator blinking green at 1 Hz frequency, the camera is switched OFF.
«Failure» message duration – 15 min. After elimination of malfunction, the
Detector returns to switching and self-test mode.
ATTENTION! The Detector must be checked at least once annually for
functional testing.
ATTENTION! In the secured zone there must be warning about CCTV
monitoring of the object area.
Storage and Transportation
The Detectors in their original packing may be shipped by any transport
means in covered vehicles (in railway, cars, trucks, sealed heated compartments
of aircraft, ship cargo holds, etc). The storage room should be free from
current-conducting dust, acid vapors, alkali and gases that cause corrosion and
destroy insulation
The Detectors in their original packing may be stored not more than 3 months.
During this period the Detector package should not have bloodshot spots and
impurities.
Upon the expiry of 3 months, the Detector should be released from the package.
Manufacturer’s Guarantees
The Manufacturer guarantees conformity of the Detector to it’s Technical
Specifications if conditions of transportation, storage, assembling and operation
are observed. The guaranteed storage period is 27 months since the date of
manufacturing the Detector.
The guaranteed period of operation is 24 months since the date of
commissioning within the storage period guaranteed.
The Detectors that are found to non-conforming to it’s Technical Requirements
shall be repaired by the Manufacturer, provided the installation and operation
rules have been complied with.
Acceptance and Packing Certificate
Passive infrared detector «Foton-17»,
serial number ____________,
has been manufactured in compliance with the active technical documentation
and classified as fit for operation and packed by «RIELTA» JSC.
Person in charge of acceptance and packing
QC representative_________________ __________________.
day, year, month
Table 3 – DIP-switches Setting
Mode DIP-switch
DIP-Switches Position
ON OFF
Sensitivity «1» Normal High
Testing «2» Sensitivity
adjustment
Detection zone
alignment
Indicator «3» ON OFF
Alarm message duration Alarm message duration is set by DIP-switches «4» & «5»
position. See Table 4
Table 4
DIP-switches
Alarm message duration
«4» «5»
OFF OFF Continuously
ON OFF 10 sec
OFF ON 30 sec
ON ON 120 sec
LED Indication
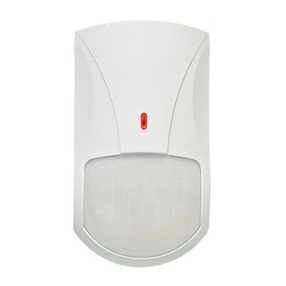
Two-color LED indicator located at the front cover displays the Detector mode.
Table 5 – The Detector state during message transmission.
Message LED Color LED State TV-camera State
«Warm-up Time» RED Periodical blinking at 1 Hz
frequency during 1 min Operation during 1 min
«Norm» - OFF OFF
«Alarm» RED ON ON
«Failure» GREEN Periodical blinking at 1Hz
frequency during 15 min OFF
«Temperature
problem» GREEN
Periodical blinking at 1 Hz
frequency during thermal
excursion period
Operation
10 sec during an alarm
message generation
«TV monitoring» GREEN
Periodical blinking at
0.5 Hz frequency during
TV-camera operation
Continuous operation
Functional Check
After energizing of the Detector, self-testing process is realized during one
minute. It ensures control of the following parameters: input voltage, ambient
temperature, operation capacity of the amplifier channel. During the procedure,
the LED indicator is blinking red (irrespective of the DIP-switch «3» position), relay
contacts are opened, TV-camera is in operation.
Testing Mode
Upon the expiry of the warm-up time, the Detector is ready for operation.
Checking procedure provides two testing modes, lasting 5 min.
1) Detection zone position location
DIP-switches position: «2» – OFF, «3» – ON. This mode is intended for each
beam of detection zone positioning in the secured premises. Under the condition
of each beam crossing the LED indicator switches for 0.25 sec. Optimal speed
of movement at maximal distance – 0.5 m/sec.
2) Sensitivity mode adjustment
DIP-switches position: «2» – ON, «3» – ON. This mode is intended for Detector
sensitivity appraising (the distance, which is possible to pass through the detection
zone up to the point, where the movement is detected, and alarm message
is generated). The LED indicator blinks for 0.25 period under the condition of
detection zone beam crossing, and for 5 sec during alarm message generation.
High sensitivity level – DIP-switch «1» is in OFF position. It is the basic
operation mode. «Alarm» message is generated after 2 – 4 steps within the
detection zone (after single LED indicator switching ON for 0.25 sec period).
Normal sensitivity level – DIP-switch «1» is in ON position. This mode is
recommended for the rooms with severe interference conditions. «Alarm» message
is generated after 4 – 5 steps within the detection zone (after two-shot LED
indicator switching ON for 0.25 sec period).
Stop after each alarm message generation, wait until the LED indicator is
disabled for and 8 – 10 sec, then continue movement through the detection zone.
Rev.1 of 20.02.2014
№00044
Made in Russia
«RIELTA» JSC, www.rielta.com,
Tel./fax. +7 (812) 233-0302, 703-1360,

