manuals.online logo
Brands
  1. Home
  2. •
  3. Brands
  4. •
  5. Sauder
  6. •
  7. Indoor Furnishing
  8. •
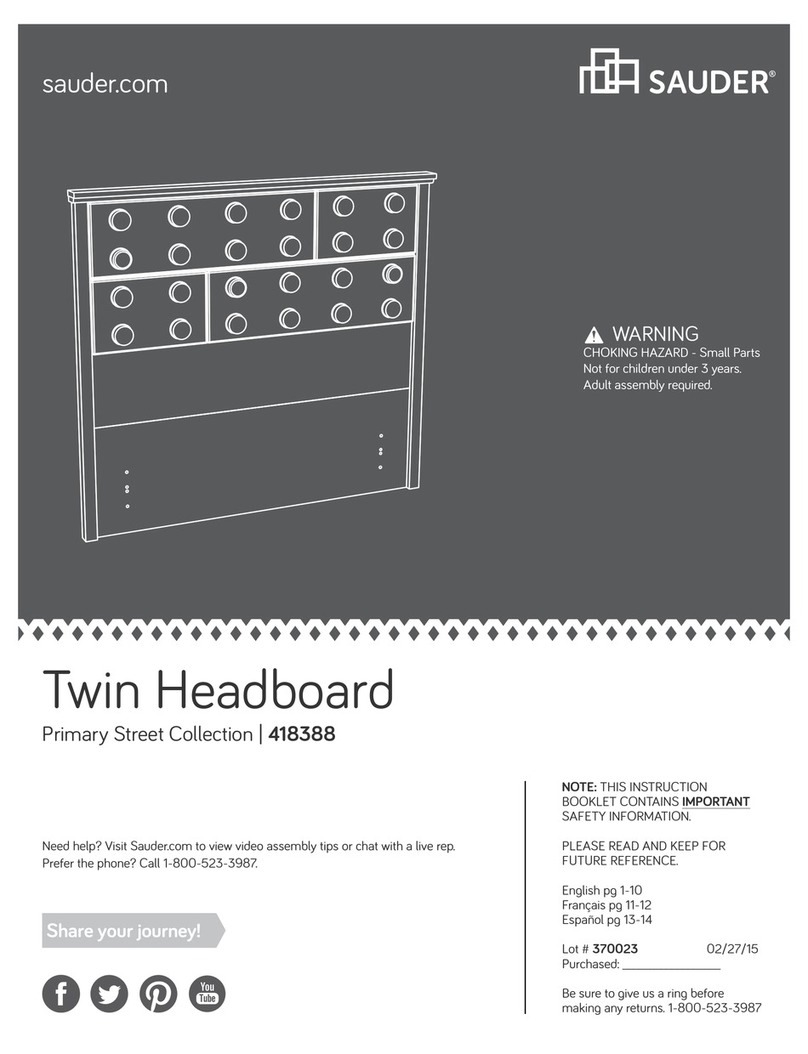
  9. Sauder WHISKER User manual

Sauder WHISKER User manual

If you have assembly questions or need a replacement part, please contact Sauder directly at
www.sauder.com or 800-445-1527.
Customer Service is available Monday-Friday - 9 a.m. to 5:30 p.m. EST (except holidays)
WHISKER BARN DOOR DOG CRATE
support@whisker.com | 1.877.250.7729 | Mon-Fri, 9am-5pm EST
Part Identication
Hardware Identication
Hardware Usage Guide
Assembly Steps
Français
Español
Safety
Warranty
No. 2 Phillips Screwdriver
Tip Shown Actual Size
REGISTER YOUR NEW
PRODUCT ONLINE
For immediate service,
our website is available 24
hours per day, 7 days per
week, to order replacement
parts, access assembly tips,
register your product and
view Sauder products.
www.sauder.com/service
3
4
5
6-36
37-40
41-44
45-46
47
THANK YOU FOR PURCHASING THE BARN DOOR DOG CRATE!
I am thrilled that Whisker and Sauder furniture have partnered
together to bring you the highest-quality pet furniture. At
Whisker, we design and deliver rened pet accessories that
delight both pets and people. Whisker and Sauder products
are made with environmentally responsible materials and
world-class manufacturing processes. Together, our companies
are bringing pet parents a premium line of stylish yet functional
pet furniture that is built to last. Enjoy!
Jacob Zuppke, President of Whisker
429610 whiskersupport.com
Page 2
ASSEMBLY TOOLS REQUIREDTABLE OF CONTENTS
åWhile not all parts are labeled, some of the parts will have a label or an inked letter on the edge to
help distinguish similar parts from each other. Use this part identication to help identify similar parts.
Now you know
our ABCs.
A TOP (1)
B SHELF (1)
C BOTTOM (1)
D LARGE BACK (1)
E SMALL BACK (1)
G UPRIGHT (1)
H DOOR MOLDING (1)
J RIGHT END (1)
L FIXED DOOR (1)
M SLIDING DOOR (1)
O LEFT DRAWER FRONT (1)
P RIGHT DRAWER FRONT (1)
R LEFT DRAWER SIDE (2)
S RIGHT DRAWER SIDE (2)
T DRAWER BACK (2)
U DRAWER BOTTOM (2)
VFOOT (2)
W BARN DOOR RAIL (1)
X BRACE (3)
Y CUSHION (1)
Z LEFT END (1)
B
D
C
A
E
G
H
Z
L
M
J
W
Y
V
V
X
X
X
U
U
S
S
O
P
R
R
T
T
429610whiskersupport.com Page 3
PART IDENTIFICATION
åScrews are shown actual size. You may receive extra hardware with your unit.
(EXTENSION SET SHOWN SEPARATED)
1EXTENSION RAIL - 4 2EXTENSION SLIDE - 4 CAM SCREW -25
3HIDDEN CAM - 25
4
WOOD DOWEL - 28
5L-WRENCH - 1
6LOCK - 1
7RETAINING BAR - 2
8
APPLIQUE CARD - 1
9WHEEL SUPPORT - 2
10 PULL - 2
11 USB POWER
HUB - 1
12
9/16" PAN HEAD SCREW - 11
13 14 1-9/16" PAN HEAD SCREW - 10 1/2" HEX HEAD SCREW - 6
15
21 13/16" MACHINE SCREW - 4
19 1-3/16" FLAT HEAD SCREW - 8 9/16" FLAT HEAD SCREW - 4
20
16 1/2" FLAT HEAD SCREW - 24 1-3/16" HEX HEAD SCREW - 6
17 1/2" PAN HEAD SCREW - 10
18
429610 whiskersupport.com
Page 4
HARDWARE IDENTIFICATION
HOW TO USE A HIDDEN CAM & CAM SCREW OR CAM DOWEL
NOTE: Various CAM SCREWS or a CAM DOWEL may be used.
Cam Dowel
Cam Screws
Turn the CAM SCREW
or gently tap the
CAM DOWEL until the
shoulder is against the
surface of the part.
1.
3.
Insert the CAM SCREW or CAM DOWEL into
the HIDDEN CAM. Tighten the HIDDEN CAM.
1
2
2.
Arrow
Push a HIDDEN CAM into
the part. The arrow in
the HIDDEN CAM must
point toward the hole in
the edge of the board.
Hole
Hidden Cam
429610whiskersupport.com Page 5
HARDWARE USAGE GUIDE
View our assembly video at
www.whisker.com/support
å Assemble your unit on a carpeted oor or on the empty
carton to avoid scratching your unit or the oor.
å Push seven HIDDEN CAMS (4) into the SHELF (B), and
DOOR MOLDING (H).
å Turn three CAM SCREWS (3) into the SHELF (B).
If you're doing
this to help a
friend, don't leave
without a bite.
B
H
4
Arrow
Arrow
4
3
429610 whiskersupport.com
Page 6
STEP 1
å Fasten the BARN DOOR RAIL (W) to
the DOOR MOLDING (H). Use three 9/16"
PAN HEAD SCREWS (13).
å Insert two WOOD DOWELS (5) into
the SHELF (B).
å Fasten the DOOR MOLDING (H)
to the SHELF (B). Tighten three
HIDDEN CAMS.
å NOTE: Be sure the WOOD DOWELS
in the SHELF insert into the
DOOR MOLDING.
å Turn two CAM SCREWS (3) into the
DOOR MOLDING (H) as shown.
B
H
W
H
9/16" PAN HEAD SCREW
(3 used in this step)
13
3
5
5
Surface with
HIDDEN CAMS
Edge with
fewer holes
429610whiskersupport.com Page 7
STEP 2
å Push two HIDDEN CAMS (4) into the LARGE BACK (D).
D
4
Arrow
Arrow
4
429610 whiskersupport.com
Page 8
STEP 3
å Insert two WOOD DOWELS (5) into the SHELF (B).
å Fasten the SHELF (B) to the LARGE BACK (D). Use a 1-9/16" PAN
HEAD SCREW (14).
å NOTE: Be sure the WOOD DOWELS in the SHELF insert into the
LARGE BACK.
D
B
H
5
5
1-9/16" PAN HEAD SCREW
(1 used in this step)
14
Surface with HIDDEN CAMS
429610whiskersupport.com Page 9
STEP 4
å Push two HIDDEN CAMS (4) into the UPRIGHT (G).
G
4
Arrow
429610 whiskersupport.com
Page 10
STEP 5
å Separate the EXTENSION SLIDES (2) from the EXTENSION RAILS (1) as shown in the upper
diagram below. Be prepared, the parts are greasy.
å Fasten an EXTENSION RAIL (1) to the UPRIGHT (G). Use three 1/2" FLAT HEAD SCREWS (16).
å NOTE: For each EXTENSION RAIL, turn a SCREW into the 1st hole shown in the diagram.
Then, slide the inner cartridge of the EXTENSION RAIL in to nd the other holes that line
up with the holes in the UPRIGHT. Turn a SCREW into each hole.
å NOTE: The EXTENSION SLIDES will be used later for the DRAWERS.
G
Open end
1
1/2" FLAT HEAD SCREW
(3 used in this step)
16
1
2
Open end
Push the black lever and pull
the SLIDE from the RAIL.
1st
Surface with HIDDEN CAMS
1st
429610whiskersupport.com Page 11
STEP 6
å Flip the UPRIGHT (G) over.
å Fasten an EXTENSION RAIL (1) to the UPRIGHT (G). Use three 1/2" FLAT HEAD SCREWS (16).
å NOTE: For each EXTENSION RAIL, turn a SCREW into the 1st hole shown in the diagram.
Then, slide the inner cartridge of the EXTENSION RAIL in to nd the other holes that line up
with the holes in the UPRIGHT. Turn a SCREW into each hole.
G
1
1st
Open end
1/2" FLAT HEAD SCREW
(3 used in this step)
16
1
Open end 1st
429610 whiskersupport.com
Page 12
STEP 7
å Insert two WOOD DOWELS (5) into the SHELF (B).
å Fasten the UPRIGHT (G) to the SHELF (B). Use two
1-9/16" PAN HEAD SCREWS (14).
å NOTE: Be sure the WOOD DOWELS in the SHELF
insert into the UPRIGHT.
G
D
B
5
5
1-9/16" PAN HEAD SCREW
(2 used in this step)
14
Open end
Surface with
HIDDEN CAMS
429610whiskersupport.com Page 13
STEP 8
å Push four HIDDEN CAMS (4) into the ENDS (J and Z).
å Turn six CAM SCREWS (3) into the ENDS (J and Z).
Z
J
4
Arrow
Arrow
43
3
3
3
429610 whiskersupport.com
Page 14
STEP 9
å Fasten two EXTENSION RAILS (1) to the ENDS (J and Z).
Use six 1/2" FLAT HEAD SCREWS (16).
å NOTE: For each EXTENSION RAIL, turn a SCREW into
the 1st hole shown in the diagram. Then, slide the inner
cartridge of the EXTENSION RAIL in to nd the other
holes that line up with the holes in the ENDS. Turn a
SCREW into each hole.
1/2" FLAT HEAD SCREW
(6 used in this step)
16
1
Open end 1st
Z
J
1st
1st
Open end
Open end
1
1
429610whiskersupport.com Page 15
STEP 10
å Insert eight WOOD DOWELS (5) into the ENDS (J and Z).
å Fasten the ENDS (J and Z) to the SHELF (B) and LARGE BACK (D).
Tighten six HIDDEN CAMS.
å NOTE: Be sure the WOOD DOWELS in the ENDS insert into the
SHELF and LARGE BACK.
D
B
Z
J
5
5(8 used)
Open end
Open end
429610 whiskersupport.com
Page 16
STEP 11
å Push two HIDDEN CAMS (4) into the FIXED DOOR (L).
4
Arrow
L
429610whiskersupport.com Page 17
STEP 12
å You will need someone to hold the FIXED DOOR (L) until the
BOTTOM (C) is fastened.
å Insert a WOOD DOWEL (5) into the DOOR MOLDING (H).
å Fasten the FIXED DOOR (L) to the DOOR MOLDING (H). Tighten two
HIDDEN CAMS.
å NOTE: Be sure the WOOD DOWEL in the DOOR MOLDING inserts into
the FIXED DOOR.
Surface without HIDDEN CAMS
L
H
5
429610 whiskersupport.com
Page 18
STEP 13
å Insert seven WOOD DOWELS (5) into the BOTTOM (C).
å Fasten the BOTTOM (C) to the LARGE BACK (D), ENDS (J and Z),
and FIXED DOOR (L). Use seven 1-9/16" PAN HEAD SCREWS (14).
å NOTE: You should start each SCREW a few turns before
completely tightening any of them.
å NOTE: Be sure the WOOD DOWELS in the BOTTOM insert into
the LARGE BACK, ENDS, and FIXED DOOR.
L
D
Z
J
C
Surface without
DOOR TRACK
This hole must be here.
5
5
5
1-9/16" PAN HEAD SCREW
(7 used in this step)
14
429610whiskersupport.com Page 19
STEP 14
å Fasten the FEET (V) to the BRACES (X). Tighten six 1/2"
HEX HEAD SCREWS (15) using the L-WRENCH (6).
å NOTE: You should start each SCREW a few turns before
completely tightening any of them.
V
V
X
X
X
6
1/2" HEX HEAD SCREW
(6 used in this step)
15
15
429610 whiskersupport.com
Page 20
STEP 15

Other manuals for WHISKER

1

Other Sauder Indoor Furnishing manuals

Sauder Carson Forge 420422 User manual

Sauder

Sauder Carson Forge 420422 User manual

Sauder Harbor View 423661 User manual

Sauder

Sauder Harbor View 423661 User manual

Sauder Barrister Lane 414729 User manual

Sauder

Sauder Barrister Lane 414729 User manual

Sauder Trestle 416955 User manual

Sauder

Sauder Trestle 416955 User manual

Sauder WoodTrac closets 359540 User manual

Sauder

Sauder WoodTrac closets 359540 User manual

Sauder 411312 User manual

Sauder

Sauder 411312 User manual

Sauder Moderna 5427968 User manual

Sauder

Sauder Moderna 5427968 User manual

Sauder Whitaker Point Hutch 429371 User manual

Sauder

Sauder Whitaker Point Hutch 429371 User manual

Sauder Trestle 424128 User manual

Sauder

Sauder Trestle 424128 User manual

Sauder Office Works Affirm 426307 User manual

Sauder

Sauder Office Works Affirm 426307 User manual

Sauder Worksense MASON PEAK 427835 User manual

Sauder

Sauder Worksense MASON PEAK 427835 User manual

Sauder HomePlus Series User manual

Sauder

Sauder HomePlus Series User manual

Sauder OfficeWorks AFFIRM 427440 User manual

Sauder

Sauder OfficeWorks AFFIRM 427440 User manual

Sauder Manhattan Gate 429249 User manual

Sauder

Sauder Manhattan Gate 429249 User manual

Sauder 413678 User manual

Sauder

Sauder 413678 User manual

Sauder Edge Water Series User manual

Sauder

Sauder Edge Water Series User manual

Sauder 413852 User manual

Sauder

Sauder 413852 User manual

Sauder Craft Armoire User manual

Sauder

Sauder Craft Armoire User manual

Sauder 412913 User manual

Sauder

Sauder 412913 User manual

Sauder Summit Station 425015 User manual

Sauder

Sauder Summit Station 425015 User manual

Sauder Boone Mountain 416562 User manual

Sauder

Sauder Boone Mountain 416562 User manual

Sauder Cannery Bridge 429414 User manual

Sauder

Sauder Cannery Bridge 429414 User manual

Sauder Carson Forge 415572 User manual

Sauder

Sauder Carson Forge 415572 User manual

Sauder Sewing/Craft Cart User manual

Sauder

Sauder Sewing/Craft Cart User manual

Popular Indoor Furnishing manuals by other brands

KCare Air Comfort Compact Lift Chair user manual

KCare

KCare Air Comfort Compact Lift Chair user manual

Naggura 1025B instruction manual

Naggura

Naggura 1025B instruction manual

OfficeSource RCN4731 Assembly instructions

OfficeSource

OfficeSource RCN4731 Assembly instructions

Easy Track RB1448 Assembly instructions

Easy Track

Easy Track RB1448 Assembly instructions

Coaster 205042 Assembly instructions

Coaster

Coaster 205042 Assembly instructions

Costway FP10181 user manual

Costway

Costway FP10181 user manual

Balmani Mitra 39442 instruction manual

Balmani

Balmani Mitra 39442 instruction manual

Homelegance 5162WW-36 Assembly instruction

Homelegance

Homelegance 5162WW-36 Assembly instruction

easyfurn PIANO P2.318.33 installation instructions

easyfurn

easyfurn PIANO P2.318.33 installation instructions

Rauch AA068.5259 Assembly instructions

Rauch

Rauch AA068.5259 Assembly instructions

euro3plast PLUST PLANET CHAIR Assembly instruction

euro3plast

euro3plast PLUST PLANET CHAIR Assembly instruction

Kesseböhmer TopFlex Assembly instructions

Kesseböhmer

Kesseböhmer TopFlex Assembly instructions

modway MOD-6388 manual

modway

modway MOD-6388 manual

Sandusky KDE7824 Assembly instructions

Sandusky

Sandusky KDE7824 Assembly instructions

Evolur CHANGING TRAY Assembly instructions

Evolur

Evolur CHANGING TRAY Assembly instructions

Kobalt 0019002 manual

Kobalt

Kobalt 0019002 manual

Constructor HI280 User and assembly guide

Constructor

Constructor HI280 User and assembly guide

Bensons for Beds LIVIA STK770201 Assembly instructions

Bensons for Beds

Bensons for Beds LIVIA STK770201 Assembly instructions

manuals.online logo
manuals.online logoBrands
  • About & Mission
  • Contact us
  • Privacy Policy
  • Terms and Conditions

Copyright 2025 Manuals.Online. All Rights Reserved.