manuals.online logo
Brands
  1. Home
  2. •
  3. Brands
  4. •
  5. Sauder
  6. •
  7. Indoor Furnishing
  8. •
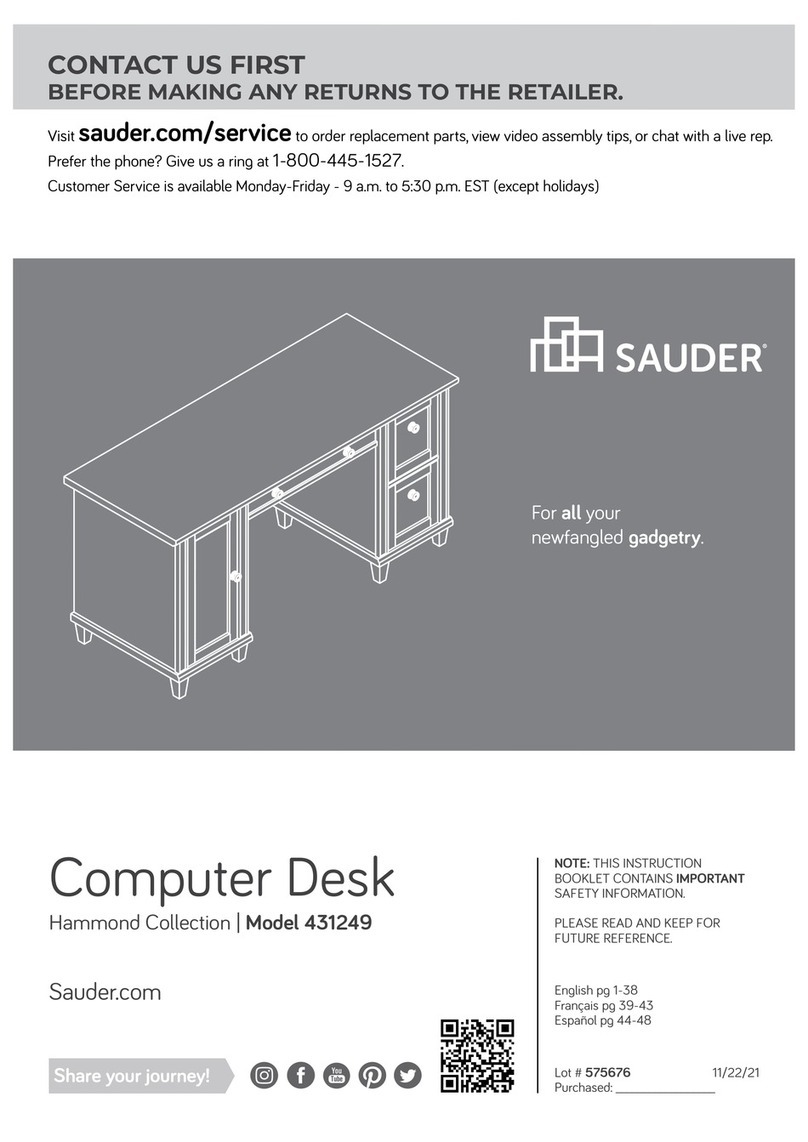
  9. Sauder Boone Mountain 416562 User manual

Sauder Boone Mountain 416562 User manual

NOTE: THIS INSTRUCTION
BOOKLET CONTAINS IMPORTANT
SAFETY INFORMATION.
PLEASE READ AND KEEP FOR
FUTURE REFERENCE.
English pg 1-20
Français pg 21-24
Español pg 25-28
Lot # 366987 11/06/14
Purchased: __________________
Be sure to give us a ring before
making any returns. 1-800-523-3987
Coee Table
Boone Mountain Collection | 416562
Need help? Visit Sauder.com to view video assembly tips or chat with a live rep.
Prefer the phone? Call 1-800-523-3987.
Share your journey!
sauder.com
Guaranteed to hold
other beverages, too.
Table of Contents Assembly Tools Required
2-3
4
5-20
21-24
24-28
29-30
31
Part Identification
Hardware Identification
Assembly Steps
Français
Español
Safety
Warranty
Hammer
Not actual size
No. 2 Phillips Screwdriver
Tip Shown Actual Size
Skip the power trip.
This time.
416562 www.sauder.com/servicesPage 2
Part Identification
åWhile not all parts are labeled, some of the parts will have a label or an inked letter on the edge
to help distinguish similar parts from each other. Use this part identification to help identify similar parts.
A END (2)
C RIGHT UPRIGHT (2)
D LEFT UPRIGHT (2)
E TOP (1)
F SHELF (1)
G BACK (1)
H INNER LEG (6)
I FRONT LEG (3)
J SMALL INNER LEG (6)
K REAR LEG (3)
L DRAWER FRONT (4)
D258 DRAWER SIDE (4)
D264 DRAWER BOX FRONT/BACK (4)
D598 DRAWER BOTTOM (2)
Tape Measure
Part Identification Now you know
our ABCs.
416562www.sauder.com/services Page 3
A
L
C
D
E
F
G
H
I
J
K
L
L
L
K
K
H
H
H
H
H
I
I
J
J
J
J
J
D
C
A
D598
D258
D264
D264
D258
D598
D258
D264
D264
D258
Hardware Identification
åScrews are shown actual size. You may receive extra hardware with your unit.
416562 www.sauder.com/servicesPage 4
45BA CABINET RIGHT - 2 45BD DRAWER LEFT - 2
45BC DRAWER RIGHT - 2
45BB CABINET LEFT - 2
I-BEAM - 18
56M
BLACK 1-1/8" PAN HEAD SCREW - 6
9S3S GOLD 5/16" FLAT HEAD SCREW - 16
CAM SCREW - 16
8F
30S BLACK 1-9/16" FLAT HEAD SCREW - 16
HIDDEN CAM - 35
1F CAM DOWEL - 19
2F
SILVER 1-1/2" MACHINE SCREW - 4
95S
PULL - 4
103K
LONG SILVER 1-5/8" MACHINE SCREW - 4
80S
Step 1 Look for this icon. It means a
video assembly tip is available at
www.sauder.com/services/tips
å Assemble your unit on a carpeted floor or on the empty
carton to avoid scratching your unit or the floor.
å NOTE: This unit will be easier to build with two people.
å Push thirty-five HIDDEN CAMS (1F) into the ENDS (A),
UPRIGHTS (C and D), SHELF (F), and BACK (G). Then,
insert the metal end of a CAM DOWEL (2F) into nineteen
HIDDEN CAMS.
416562www.sauder.com/services Page 5
Arrow
1F
2F
1F
Arrow
(19 used)
Insert the metal end of the CAM
DOWEL into the HIDDEN CAM.
Arrow
Do not tighten the HIDDEN CAMS in this step.
Do not insert
CAM DOWELS
into these edges.
Do not insert
CAM DOWELS
into these edges.
Arrow
The arrow in the HIDDEN
CAM must point toward the
hole in the edge of the board.
Hole
(35 used)
Do not insert CAM
DOWELS into this part.
A
C
D
F
G
D
C
A
Scan this QR code or go to this address:
http://qr.sauder.com/?ID=1009
to watch a video on how to assemble your unit.
Step 2
å Turn sixteen CAM SCREWS (8F) into the LEGS (I and K).
å NOTE: Use the exact holes shown.
416562 www.sauder.com/servicesPage 6
I
K
K
K
I
I
8F (16 used)
These holes are
closer to this edge.
These holes
are further
from this edge.
StepStep 3
å Fasten the CABINET RIGHTS (45BA) to the RIGHT
UPRIGHTS (C) and the CABINET LEFTS (45BB) to the
LEFT UPRIGHTS (D). Use eight GOLD 5/16" FLAT HEAD
SCREWS (3S) through holes #1 and #4.
416562www.sauder.com/services Page 7
GOLD 5/16" FLAT HEAD SCREW
(8 used in this step)
3S
1
3
2
1
3
2
Roller end
Roller end
4
4
Roller end
Roller end
1
3
2
4
1
3
2
4
45BB
45BB
45BA
45BA
C
D
D
C
Surface with
HIDDEN CAMS
Edges with
CAM DOWELS
Edges with
CAM DOWELS
Surface with
HIDDEN CAMS
Surface with
HIDDEN CAMS
Surface with
HIDDEN CAMS
Edge with
CAM DOWELS
Edge with
CAM DOWELS
Edge without
CAM DOWEL
Edge without
CAM DOWEL
Remember:
Righty tighty.
Lefty loosey.
Step
å Fasten the SHELF (F) to the REAR LEGS (K). Tighten six
HIDDEN CAMS.
Step 4
416562 www.sauder.com/servicesPage 8
1
2
Surface with
HIDDEN CAMS
These holes must be here.
F
K
K
K
StepStep 5
å Place three INNER LEGS (H) over the REAR LEGS (K) and line
up the grooves.
å NOTE: The INNER LEGS (H) should be against the SHELF (F).
å Slide two I-BEAMS (56M) into each set of LEGS (H and K).
å NOTE: The arrows in the I-BEAMS should point toward
the SHELF (F).
å NOTE: You may need to use your hammer to gently tap the
I-BEAMS in.
416562www.sauder.com/services Page 9
Surface without
HIDDEN CAMS
F
K
K
K
H
H
H
56M
56M
56M
56M
Arrow
Step
å Fasten the BACK (G) to the REAR LEGS (K) Use six
BLACK 1-1/8" PAN HEAD SCREWS (9S).
å NOTE: Start each SCREW a few turns before completely
tightening any of them.
Step 6
416562 www.sauder.com/servicesPage 10
K
K
K
G
Surface with HIDDEN CAMS
Edge with
CAM DOWELS
BLACK 1-1/8" PAN HEAD SCREW
(6 used in this step)
9S
StepStep 7
å Fasten the UPRIGHTS (C and D) to the BACK (G). Tighten
four HIDDEN CAMS.
416562www.sauder.com/services Page 11
G
Start Tighten
Arrow
Minimum
190 degrees
Caution
Risk of damage or
injury. HIDDEN CAMS
must be completely
tightened. HIDDEN
CAMS that are not
completely tightened
may loosen, and parts
may separate. To
completely tighten:
Arrow
Maximum
210 degrees
C
D
D
C
Surface with
HIDDEN CAMS
Surface
without
HIDDEN
CAMS
Step
å Fasten the ENDS (A) to the TOP (E). Tighten four
HIDDEN CAMS.
Step 8
416562 www.sauder.com/servicesPage 12
Arrow
Minimum
190 degrees
Maximum
210 degrees
Surface with
HIDDEN CAMS
Surface without
HIDDEN CAMS
These holes must be here.
E
A
A
Use the holes closer to the edge.
StepStep 9
å NOTE: You may need someone's help in this step.
å Fasten the UPRIGHTS (C and D) and BACK (G) to the
TOP (E). Tighten eleven HIDDEN CAMS.
å NOTE: Be sure to support the side of the SHELF (F) that is
not attached.
416562www.sauder.com/services Page 13
E
Arrow
Minimum
190 degrees
Maximum
210 degrees
G
C
D
D
C
F
Don't worry. It isn't
Rome. This can be built
in a day.
Step
å Place the remaining three INNER LEGS (H) over the
FRONT LEGS (I) and line up the grooves.
å NOTE: The INNER LEGS (H) should be about 5-1/4" from
the tops of the FRONT LEGS (I).
å Slide two I-BEAMS (56M) into each set of LEGS (H and I).
å NOTE: The arrows in the I-BEAMS should point toward
the bottoms of the LEGS.
å NOTE: You may need to use your
hammer to gently tap the I-BEAMS in.
å Fasten the FRONT LEGS (I) to the
UPRIGHTS (C and D) and SHELF (F).
Tighten ten HIDDEN CAMS.
Step 10
416562 www.sauder.com/servicesPage 14
I
I
I
56M
56M
56M
56M
H
H
H
I
I
I
Bottom of the LEG
5-1/4"
5-1/4"
5-1/4"
F
C
D
D
C
Arrow
Bottom of the LEG
The CAM
SCREWS
are closer to
this edge.
No CAM SCREW
No CAM SCREW
The CAM SCREW is
closer to this edge.
The CAM SCREW is
further from this edge.
StepStep 11
å Place the SMALL INNER LEGS (J) against the
LEGS (I and K) and line up the grooves.
å Slide an I-BEAM (56M) into each set of LEGS.
å NOTE: The arrows in the I-BEAMS should point
toward the SHELF (F).
å NOTE: You may need to use your hammer to gently tap
the I-BEAMS in.
416562www.sauder.com/services Page 15
F
56M
56M
56M
56M
56M
56M
56M
I
I
I
J
J
J
J
J
J
K
K
K
Arrow
Step
å Fasten two DRAWER FRONTS (L) and two
PULLS (103K) to the BACK (G). Use four LONG
SILVER 1-5/8" MACHINE SCREWS (80S).
Step 12
416562 www.sauder.com/servicesPage 16
LONG SILVER 1-5/8" MACHINE SCREW
(4 used in this step)
80S
L
L
G
103K
103K
Curved edge
Flat edge
StepStep 13
å Fasten two DRAWER SIDES (D258) to a DRAWER BOX
FRONT/BACK (D264). Use four BLACK 1-9/16" FLAT
HEAD SCREWS (30S).
å Slide a DRAWER BOTTOM (D598) into the grooves in the
DRAWER SIDES (D258) and DRAWER BACK (D264).
å Repeat this step for the other drawer.
416562www.sauder.com/services Page 17
D598
D264
D258
D258
D258
D258
Finished
surface
Groove
BLACK 1-9/16" FLAT HEAD SCREW
(8 used in this step)
30S
D264
StepStep 14
416562 www.sauder.com/servicesPage 18
å Fasten a DRAWER BOX FRONT/BACK (D264) to the
DRAWER SIDES (D258). Use four BLACK 1-9/16" FLAT
HEAD SCREWS (30S).
å NOTE: Be sure the DRAWER BOTTOM (D598) inserts into
the groove in the DRAWER BOX FRONT/BACK (D264).
å Fasten a PULL (103K) and DRAWER FRONT (L) to one
of the DRAWER BOX FRONT/BACKS (D264). Use two
SILVER 1-1/2" MACHINE SCREWS (95S).
å Repeat this step for the other drawer.
D598
D264
D258
D258
103K L
Flat edge
BLACK 1-9/16" FLAT HEAD SCREW
(8 used in this step)
30S
SILVER 1-1/2" MACHINE SCREW
(4 used in this step)
95S
StepStep 15
416562www.sauder.com/services Page 19
45BD
45BD
45BC
45BC
1
3
2
Roller end
Roller end
å Fasten a DRAWER RIGHT (45BC) and DRAWER
LEFT (45BD) to the DRAWER SIDES (D258). Use four GOLD
5/16" FLAT HEAD SCREWS (3S) through holes #2 and #4.
å Repeat this step for the other drawer.
4
1
3
2
4
GOLD 5/16" FLAT HEAD SCREW
(8 used in this step)
3S
D258
D258
Step
å Carefully stand your unit upright.
å To insert the drawers into your unit, tip the front of the
drawers down and drop the rollers on the drawers behind
the rollers on the unit. Lift the fronts of the drawers up
and slide them into the unit.
å NOTE: Please read the back pages of the instruction
booklet for important safety information.
å This completes assembly. Clean with your favorite
furniture polish or a damp cloth. Wipe dry.
Step 16
416562 www.sauder.com/servicesPage 20
And to celebrate, why not share your success story?
60 lbs.
30 lbs.
10 lbs. each
Pro Tip: Lift with your
legs. And, you know,
your arms.

Other Sauder Indoor Furnishing manuals

Sauder 420477 User manual

Sauder

Sauder 420477 User manual

Sauder 411606 User manual

Sauder

Sauder 411606 User manual

Sauder 422294 User manual

Sauder

Sauder 422294 User manual

Sauder Nova Loft 425211 User manual

Sauder

Sauder Nova Loft 425211 User manual

Sauder Worksense MASON PEAK 427827 User manual

Sauder

Sauder Worksense MASON PEAK 427827 User manual

Sauder Harbor View 158015 User manual

Sauder

Sauder Harbor View 158015 User manual

Sauder 411802 User manual

Sauder

Sauder 411802 User manual

Sauder Cannery Bridge 431315 User manual

Sauder

Sauder Cannery Bridge 431315 User manual

Sauder North Avenue 420050 User manual

Sauder

Sauder North Avenue 420050 User manual

Sauder Original Cottage 414183 User manual

Sauder

Sauder Original Cottage 414183 User manual

Sauder 401294 User manual

Sauder

Sauder 401294 User manual

Sauder 408726 User manual

Sauder

Sauder 408726 User manual

Sauder Cannery Bridge 429510 User manual

Sauder

Sauder Cannery Bridge 429510 User manual

Sauder Boulevard Cafe 420650 User manual

Sauder

Sauder Boulevard Cafe 420650 User manual

Sauder Sewing/Craft Cart User manual

Sauder

Sauder Sewing/Craft Cart User manual

Sauder OfficeWorks AFFIRM 426279 User manual

Sauder

Sauder OfficeWorks AFFIRM 426279 User manual

Sauder 415465 User manual

Sauder

Sauder 415465 User manual

Sauder Harbor View 401685 User manual

Sauder

Sauder Harbor View 401685 User manual

Sauder 410794 User manual

Sauder

Sauder 410794 User manual

Sauder 415978 User manual

Sauder

Sauder 415978 User manual

Sauder 420545 User manual

Sauder

Sauder 420545 User manual

Sauder 420203 User manual

Sauder

Sauder 420203 User manual

Sauder Pallada Series 411843 User manual

Sauder

Sauder Pallada Series 411843 User manual

Sauder 423731 User manual

Sauder

Sauder 423731 User manual

Popular Indoor Furnishing manuals by other brands

Forte ATDS92411 Assembling Instruction

Forte

Forte ATDS92411 Assembling Instruction

Rauch Koluna M2650 Assembly instructions

Rauch

Rauch Koluna M2650 Assembly instructions

TEMPUR Hybrid Flex Instructions for use and care

TEMPUR

TEMPUR Hybrid Flex Instructions for use and care

Core Products Boston BT240 Assembly instructions

Core Products

Core Products Boston BT240 Assembly instructions

Delinia iD B120 Assembly instructions

Delinia iD

Delinia iD B120 Assembly instructions

siena GARDEN Falun 120.569 Assembly instruction

siena GARDEN

siena GARDEN Falun 120.569 Assembly instruction

Habitat Leaf 808070 Assembly instructions

Habitat

Habitat Leaf 808070 Assembly instructions

Herman Miller Sayl manual

Herman Miller

Herman Miller Sayl manual

physa HOVE BLACK user manual

physa

physa HOVE BLACK user manual

Costway JZ10069CF Instruction booklet

Costway

Costway JZ10069CF Instruction booklet

Performance Furnishings PLTLEGBEV-48 Assembly instructions

Performance Furnishings

Performance Furnishings PLTLEGBEV-48 Assembly instructions

Canvas PARKSVILLE 168-0096-4 Assembly instructions

Canvas

Canvas PARKSVILLE 168-0096-4 Assembly instructions

IKEA BOHOLMEN 202.021.15 manual

IKEA

IKEA BOHOLMEN 202.021.15 manual

UVI Chair SIMPLE Assembly guide

UVI Chair

UVI Chair SIMPLE Assembly guide

Croydex 5012044112446 Assembly instructions

Croydex

Croydex 5012044112446 Assembly instructions

MYSTIQUE B033 quick guide

MYSTIQUE

MYSTIQUE B033 quick guide

Happy Babies HAPPY RN03 Assembly instructions

Happy Babies

Happy Babies HAPPY RN03 Assembly instructions

Office Star Products EX9385 operating instructions

Office Star Products

Office Star Products EX9385 operating instructions

manuals.online logo
manuals.online logoBrands
  • About & Mission
  • Contact us
  • Privacy Policy
  • Terms and Conditions

Copyright 2025 Manuals.Online. All Rights Reserved.