manuals.online logo
Brands
  1. Home
  2. •
  3. Brands
  4. •
  5. Sauder
  6. •
  7. Indoor Furnishing
  8. •
  9. Sauder Edge Water 422406 User manual

Sauder Edge Water 422406 User manual

Need help? Visit Sauder.com to view video assembly tips or chat with a live rep.
Prefer the phone? Call 1-800-523-3987.
Share your journey!
sauder.com
NOTE: THIS INSTRUCTION
BOOKLET CONTAINS IMPORTANT
SAFETY INFORMATION.
PLEASE READ AND KEEP FOR
FUTURE REFERENCE.
English pg 1-17
Français pg 18-19
Español pg 20-21
Lot # 506376 07/07/17
Purchased: __________________
Be sure to give us a ring before
making any returns. 1-800-523-3987
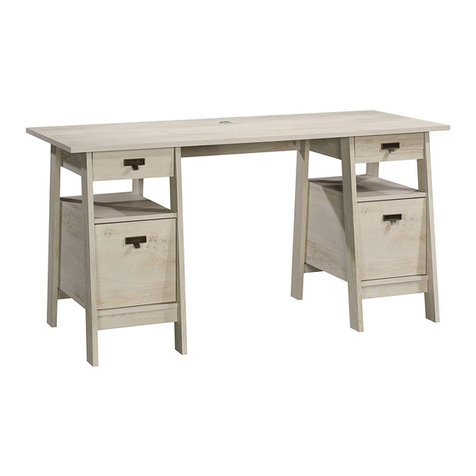
Side Table
Edge Water Collection | Model 422406
One heck of a sidekick.
Table of Contents Assembly Tools Required
Hammer
Not actual size
No. 2 Phillips Screwdriver
Tip Shown Actual Size
Skip the power trip.
This time.
3
4
5-17
18-19
20-21
22
23
Part Identification
Hardware Identification
Assembly Steps
Français
Español
Safety
Warranty
422406 www.sauder.com/servicesPage 2
Part Identification
åWhile not all parts are labeled, some of the parts will have a label or an inked letter on the edge
to help distinguish similar parts from each other. Use this part identification to help identify similar parts.
Now you know
our ABCs.
A END (2)
B TOP (1)
C BOTTOM (1)
D BACK (1)
D16 RIGHT DRAWER SIDE (1)
D17 LEFT DRAWER SIDE (1)
D154 DRAWER BACK (1)
D959 DRAWER BOTTOM (1)
E RIGHT FRONT LEG (1)
F LEFT FRONT LEG (1)
G RIGHT REAR LEG (1)
H LEFT REAR LEG (1)
I SIDE SKIRT (2)
J SKIRT (2)
K DRAWER FRONT (1)
L FOOT (4)
422406www.sauder.com/services Page 3
A
B
C
D
E
F
G
H
I
J
KL
D16
D17
D154
D959
L
LL
I
J
A
Hardware Identification
åScrews are shown actual size. You may receive extra hardware with your unit.
422406 www.sauder.com/servicesPage 4
35GA CABINET RIGHT - 1 35GB CABINET LEFT - 1 35GC DRAWER RIGHT - 1 35GD DRAWER LEFT - 1
BLACK 7/8" MACHINE SCREW - 1
37S
3S GOLD 5/16" FLAT HEAD SCREW - 8
10A SLIDE CAM - 2
17K KNOB - 1
CAM SCREW - 14
8F
WOOD DOWEL - 4
15F
HIDDEN CAM - 26
1F CAM DOWEL - 6
2F
SMALL CAM
SCREW - 6
20F
30S BLACK 1-9/16" FLAT HEAD SCREW - 8
Step 1 Look for this icon. It means a
video assembly tip is available at
www.sauder.com/services/tips
å Assemble your unit on a carpeted floor or on the empty
carton to avoid scratching your unit or the floor.
å Push six HIDDEN CAMS (1F) into the ENDS (A) and BACK (D).
Then, insert the metal end of a CAM DOWEL (2F) into each
HIDDEN CAM.
422406www.sauder.com/services Page 5
Do not tighten the HIDDEN CAMS in this step.
Insert the metal end of the CAM
DOWEL into the HIDDEN CAM.
Arrow
A
D
A
Arrow
1F
2F
(6 used)
Step 2
å Push twenty HIDDEN CAMS (1F) into the ENDS (A),
BOTTOM (C), BACK (D), and SKIRTS (I and J).
Arrow
1F
Arrow
The arrow in the HIDDEN
CAM must point toward the
hole in the edge of the board.
Hole
1F
Arrow
(20 used)
A
C
D
I
J
A
J
I1F
Arrow
Arrow
1F
422406 www.sauder.com/servicesPage 6
Some assembly
(and snacks) required.
Step 3
å Turn six SMALL CAM SCREWS (20F) into
the SKIRTS (I and J).
I
J
J
I
20F
(6 used)
422406www.sauder.com/services Page 7
Step 4
422406 www.sauder.com/servicesPage 8
8F
å Turn fourteen CAM SCREWS (8F) into
the LEGS (E, F, G, and H).
E
F
G
H
8F
8F
(14 used)
å Fasten the LEGS (E, F, G, and H) to the ENDS (A) and
SIDE SKIRTS (I). Tighten eight HIDDEN CAMS.
Step 5
422406www.sauder.com/services Page 9
1
2
A
Surface
with
HIDDEN
CAMS
Surface
with
HIDDEN
CAMS
A
I
E
F
HG
Edge with
CAM SCREW
These surfaces
should be even.
Edge with
CAM SCREW
I
Edge with
CAM DOWELS
Suface with
HIDDEN CAMS
Suface with
HIDDEN CAMS
Step 6
422406 www.sauder.com/servicesPage 10
å Fasten the CABINET RIGHT (35GA) and the CABINET
LEFT (35GB) to the ENDS (A). Use four GOLD 5/16"
FLAT HEAD SCREWS (3S) through holes #1 and #3.
å Fasten the FEET (L) to the LEGS (E, F, G, and H). Use
four BLACK 1-9/16" FLAT HEAD SCREWS (30S).
1
2
3
1
2
3
Roller end
GOLD 5/16" FLAT HEAD SCREW
(4 used in this step)
3S
E
F
A
A
Roller end
Use the exact
holes shown.
Use the exact
holes shown.
L
L
BLACK 1-9/16" FLAT HEAD SCREW
(4 used for the FEET)
30S
L
L
H
G
å Fasten the SKIRTS (J) to the BOTTOM (C). Tighten four
HIDDEN CAMS.
Step 7
422406www.sauder.com/services Page 11
C
J
J
Surface with
HIDDEN CAMS
Surface with HIDDEN CAMS
Surface without HIDDEN CAMS
Edge without
CAM SCREWS
Edge without
CAM SCREWS
Don't worry. It isn't
Rome. This can be built
in a day.
å Fasten the BOTTOM (C), BACK (D), and SKIRTS (J) to the
LEGS (E, F, G, and H) and SIDE SKIRTS (I). Tighten eight
HIDDEN CAMS.
Step 8
422406 www.sauder.com/servicesPage 12
C
D
E
F
H
G
J
J
I
I
Surface with
HIDDEN CAMS
Surface and edge
with HIDDEN CAMS
å Insert four WOOD DOWELS (15F) into the LEGS (E, F, G, and H).
å Fasten the TOP (B) to the ENDS (A) and BACK (D). Tighten six
HIDDEN CAMS.
å NOTE: Be sure the WOOD DOWELS in the LEGS insert into the
holes in the TOP.
Step 9
422406www.sauder.com/services Page 13
Start Tighten
Arrow
Minimum
190 degrees
Caution
Risk of damage or
injury. HIDDEN CAMS
must be completely
tightened. HIDDEN
CAMS that are not
completely tightened
may loosen, and parts
may separate. To
completely tighten:
Arrow
Maximum
210 degrees
E
F
H
D
A
A
B
15F 15F
G
Step 10
422406 www.sauder.com/servicesPage 14
VIEW THE T-LOCK BOX VIDEO
å Fasten the DRAWER BACK (D154) to the DRAWER SIDES (D16 and D17). Use four BLACK 1-9/16" FLAT HEAD SCREWS (30S).
å NOTE: Be sure the DRAWER BOTTOM (D959) inserts into the groove of the DRAWER BACK (D154).
12
3
å Insert the DRAWER SIDES (D16 and D17) at an angle
into the slot at each end of the DRAWER FRONT (K).
å Slide the DRAWER BOTTOM (D959) into the grooves in the
DRAWER SIDES (D16 and D17) and DRAWER FRONT (K).
The tabs should insert freely
into the slots. Gently tilt the
DRAWER SIDES side to side
until the tabs slip into the slots.
Groove
30S
Start each screw a few turns before
completely tightening any of them.
BLACK 1-9/16" FLAT HEAD SCREW
(4 used in this step)
Be sure the DRAWER
BOTTOM inserts into the
DRAWER FRONT groove.
D16
D17
D959
D959
D16
D154
D17
K
Unfinished
surface
With the palm of your
hand, tap the DRAWER
BOTTOM down into
the groove.
Be sure the
DRAWER
BOTTOM
inserts into
the DRAWER
BACK groove.
D16
D17
K
Step 11
422406www.sauder.com/services Page 15
å Insert a SLIDE CAM (10A) into the DRAWER SIDES (D16 and D17).
å Fasten the DRAWER RIGHT (35GC) to the RIGHT DRAWER SIDE (D16)
and the DRAWER LEFT (35GD) to the LEFT DRAWER SIDE (D17). Use
four GOLD 5/16" FLAT HEAD SCREWS (3S) through holes #1 and #3.
å NOTE: The screw head in the CAM must be visible through the slotted
hole in the SLIDE.
å Fasten the KNOB (17K) to the DRAWER FRONT (K). Use a BLACK 7/8"
MACHINE SCREW (37S).
1
2
3
1
2
3
GOLD 5/16" FLAT HEAD SCREW
(4 used in this step)
3S
Roller end
Roller end
D16
D17
Screw head - turn CAM to line up holes in
the SLIDES with holes in DRAWER SIDES
10A
10A
K
17K
BLACK 7/8" MACHINE SCREW
(1 used for the KNOB)
37S
Step 12
422406 www.sauder.com/servicesPage 16
å Carefully stand your unit upright.
å To insert the drawer into your unit, tip the front of the
drawer down and drop the rollers on the drawer behind
the rollers on the unit. Lift the front of the drawer up and
slide it into the unit.
Place the roller on the SLIDE
behind the roller on the RAIL.
40 lbs.
15 lbs.
30 lbs.
Pro Tip: Lift with your
legs. And, you know,
your arms.
Step 13
422406www.sauder.com/services Page 17
å To make adjustments to the drawers, loosen SCREW #3 in the SLIDES a 1/4 turn, then turn the CAM clockwise or
counter-clockwise. Notice how the drawer raises or lowers as you turn the CAM. The higher the screw in the oblong hole,
the higher your drawer front will be. The lower the screw, the lower the drawer front. By adjusting the drawers this way, it
will help the DRAWER FRONTS line up better when closed. Tighten the SCREW when finished with adjustments.
å NOTE: Please read the back pages of the instruction booklet for important safety information.
å This completes assembly. Clean with your favorite furniture polish or a damp cloth. Wipe dry.
CamThe higher the screw in the oblong hole,
the higher your drawer front will be. The
lower the screw, the lower the drawer front.
Loosen screw #3 a 1/4 turn, turn the cam a 1/4 turn
maximum in both the clockwise and counter-clockwise
directions to make adjustments, and then tighten screw #3.
And to celebrate, why not share your success story?
A l’usage exclusif du
Canada Noter la date
d’achat de cet élément
et conserver le livret
pour future référence.
Pour contacter Sauder
en ce qui concerne cet
élément, faire référence
au numéro de lot et
numéro de modèle en
appelant notre numéro
sans frais.
Lot nº : ____________
Date de
l’achat: ____________
LISTE DE PIÈCES
REFERENCE DESCRIPTION QUANTITÉ
LISTE DE PIÈCES
REFERENCE DESCRIPTION QUANTITÉ
NOUS SOMMES LA POUR VOUS AIDER!
Nous faisons de notre mieux pour nous assurer que votre meuble
arrive dans d’excellentes conditions. Nos représentants du service
Clientèle sont aimables et prêts à vous aider au cas où une pièce
aurait été endommagée ou manquerait (ou si vous aviez besoin
d’aide pour l’assemblage). NE RAMENEZ PAS LE MEUBLE AU
MAGASIN. Au Canada, composez ce numéro d’appel gratuit:
1-800-523-3987
Du lundi au vendredi, de 9 heures du matin à
5:30 heures du soir (horaire Côte Est)
(sauf jours fériés)
Si une pièce a besoin d’être remplacée, la pièce de remplacement
sera envoyée dans les 48 heures. (Sauf week-ends et jours fériés)
Utilisez les instructions d’assemblage en français avec les
schémas étape par étape du manuel d’instruction en anglais.
Chaque étape en français correspond à la même étape
en anglais. La pièce devant être attachée à l’élément est
représentée en gris sur les schémas de chaque étape pour plus
de précision. Comparer la “Liste de pièces” ci-dessous avec
la “PART IDENTIFICATION” du manuel en anglais pour vous
familiariser avec les pièces avant l’assemblage.
REMARQUE : CE MANUEL D’INSTRUCTIONS CONTIENT
D’IMPORTANTES INFORMATIONS RELATIVES À LA SÉCURITÉ.
À LIRE ET CONSERVER POUR TOUTE RÉFÉRENCE FUTURE.
35GA
ÉLÉMENT DROITE.......................................................1
35GB
ÉLÉMENT GAUCHE...................................................1
35GC
TIROIR DROIT.................................................................1
35GD
TIROIR GAUCHE...........................................................1
10A EXCENTRIQUE DE COULISSE.........................2
1F EXCENTRIQUE ESCAMOTABLE.................26
2F CHEVILLE D'EXCENTRIQUE ..............................6
8F VIS D'EXCENTRIQUE .............................................14
15F CHEVILLE EN BOIS...................................................4
20F PETITE VIS D'EXCENTRIQUE............................6
17K BOUTON.............................................................................1
3S VIS TÊTE PLATE 8 mm DORÉE......................8
30S VIS TÊTE PLATE 40 mm NOIRE....................8
37S VIS À MÉTAUX 22 mm NOIRE..........................1
A EXTRÉMITÉ......................................................................2
B DESSUS...............................................................................1
C DESSOUS...........................................................................1
D ARRIÈRE ..............................................................................1
D16 CÔTÉ DROIT DE TIROIR........................................1
D17 CÔTÉ GAUCHE DE TIROIR..................................1
D154 ARRIÈRE DE TIROIR...................................................1
D959
FOND DE TIROIR..........................................................1
E PIED AVANT DROIT....................................................1
F PIED AVANT GAUCHE.............................................1
G PIED ARRIÈRE DROIT...............................................1
H PIED ARRIÈRE GAUCHE.........................................1
I PLINTHE LATÉRALE.................................................2
J PLINTHE.............................................................................2
K DEVANT DE TIROIR....................................................1
L PIED........................................................................................4
Table d’appointModèle 422406
422406 www.sauder.com/servicesPage 18
ÉTAPE 9
Insérer quatre CHEVILLES EN BOIS (15F) dans les PIEDS (E, F, G et H).
Fixer le DESSUS (B) aux EXTRÉMITÉS (A) et à l'ARRIÈRE (D).
Serrer six EXCENTRIQUES ESCAMOTABLES.
REMARQUE : S'assurer de bien insérer les CHEVILLES EN BOIS
situées sur les PIEDS dans les trous dans le DESSUS.
ÉTAPE 8
Fixer le DESSOUS (C), l'ARRIÈRE (D) et les PLINTHES (J) aux
PIEDS (E, F, G et H) et aux PLINTHES LATERALES (I). Serrer huit
EXCENTRIQUES ESCAMOTABLES.
ÉTAPE 9 (SUITE)
Attention: Risque des dégâts ou blessures. Les Excentriques
Escamotables doivent être serrés à bloc. Les Excentriques
Escamotables que ne sont pas serrées à bloc peuvent desserrer
et les pièces peuvent séparer. Pour serrer à bloc, faire tourner
l'excentrique escamotable de 210 degrés.
ÉTAPE 6
Fixer l'ÉLÉMENT DROITE (35GA) et l'ÉLÉMENT GAUCHE (35GB)
aux EXTRÉMITÉS (A). Utiliser quatre VIS TÊTE PLATE 8 mm
DORÉES (3S) à travers les trous nº 1 et nº 3.
Fixer les PIEDS (L) aux PIEDS (E, F, G et H). Utiliser quatre VIS
TÊTE PLATE 40 mm NOIRES (30S).
ÉTAPE 5
Fixer les PIEDS (E, F, G et H) aux EXTRÉMITÉS (A et B) et aux PLINTHES
LATERALES (I). Serrer huit EXCENTRIQUES ESCAMOTABLES.
ÉTAPE 3
Serrer six PETITES VIS D'EXCENTRIQUE (20F) dans les PLINTHES (I et J).
ÉTAPE 1
Ne pas serrer les EXCENTRIQUES ESCAMOTABLES dans cette étape.
Assembler l'élément sur un sol à moquette ou sur le carton vide
pour éviter d'endommager l'élément ou le sol.
Enfoncer six EXCENTRIQUES ESCAMOTABLES (1F) dans les
EXTRÉMITÉS (A) et l'ARRIÈRE (D). Ensuite, insérer l'extrémité
en métal de la CHEVILLE D'EXCENTRIQUE (2F) dans chaque
EXCENTRIQUE ESCAMOTABLE.
422406www.sauder.com/services Page 19
ÉTAPE 7
Fixer les PLINTHES (J) au DESSOUS (C). Serrer quatre
EXCENTRIQUES ESCAMOTABLES.
ÉTAPE 11
Insérer une EXCENTRIQUE DE COULISSE (10A) dans les CÔTÉS
DE TIROIR (D16 et D17).
Fixer un TIROIR DROIT (35GC) sur le CÔTÉ DROIT DE TIROIR (D16)
et un TIROIR GAUCHE (35GD) sur le CÔTÉ GAUCHE DE TIROIR (D17).
Utiliser quatre VIS TÊTE PLATE 8 mm DORÉES (3S) à travers les
trous nº 1 et nº 3.
REMARQUE : La tête de vis dans l'EXCENTRIQUE doit être visible
à travers le trou fendu dans la COULISSE.
Fixer un BOUTON (17K) au DEVANT DE TIROIR (K). Utiliser une
VIS À MÉTAUX 22 mm NOIRE (37
ÉTAPE 12
Relever, avec précaution, l'élément dans sa position verticale.
Pour insérer le tiroir dans l'élément, abaisser le devant du tiroir et faire
passer les roulettes situées sur le tiroir derrière les roulettes situées
sur l'élément. Relever le devant du tiroir et l'enfiler dans l'élément.
ÉTAPE 13
Pour ajuster les tiroirs, desserrer la VIS nº 3 dans les COULISSES
un quart de tour et tourner ensuite la CAME dans le sens des
aiguilles d'une montre ou dans le sens contraire. Noter que le tiroir
monte ou descend lorsque l'on tourne la CAME. Plus la vis dans
le trou oblong est haute, plus le devant de tiroir sera haut. Plus la
vis est basse, plus le devant de tiroir sera bas. Ajuster les tiroirs
de cette manière permet aux DEVANTS DE TIROIR d'être mieux
alignés une fois fermés. Resserrer la VIS après d'avoir ajusté.
REMARQUE : Prière de lire les informations importantes sur la
sécurité figurant sur les pages arrière du manuel d’instructions.
Ceci complète l'assemblage. Nettoyer à l’aide d’une encaustique
pour meubles ou d’un chion humide. Essuyer.
ÉTAPE 2
Enfoncer vingt EXCENTRIQUES ESCAMOTABLES (1F) dans les
EXTRÉMITÉS (A), le DESSOUS (C), l'ARRIÈRE (D) et les PLINTHES (I et J).
ÉTAPE 4
Faire tourner quatorze VIS D'EXCENTRIQUE (8F) dans les PIEDS (E, F, G et H).
ÉTAPE 10
1 Insérer les CÔTÉS DE TIROIR (D16 et D17) en biseau dans la
fente dans chaque extrémité du DEVANT DE TIROIR (K).
2 Enfiler le FOND DE TIROIR (D959) dans les rainures des
CÔTÉS DE TIROIR (D16 et D17) et du DEVANT DE TIROIR (K).
3 Fixer l'ARRIÈRE DE TIROIR (D154) aux CÔTÉS DE TIROIR (D16
et D17). Utiliser quatre VIS TÊTE PLATE 40 mm NOIRES (30S).
REMARQUE : S'assurer que le FOND DE TIROIR (D959)
s'encastre dans la rainure de l'ARRIÈRE DE TIROIR (D154).
A l’usage exclusif du
Canada Noter la date
d’achat de cet élément
et conserver le livret
pour future référence.
Pour contacter Sauder
en ce qui concerne cet
élément, faire référence
au numéro de lot et
numéro de modèle en
appelant notre numéro
sans frais.
Lot nº : ____________
Date de
l’achat: ____________
LISTA DE PARTES
ITEM DESCRIPCIÓN CANTIDAD
ESTAMOS AQUI PARA AYUDAR!
Tratamos de asegurar que su mueble llega en condición excelente.
Nuestros representantes de Servicio al Cliente son amables y
listos para ayudarle con servicio rápido y eficiente si una parte
está defectuosa o ausente (o si necesita ayuda con el ensamblaje).
NO DEVUELVA LA UNIDAD A LA TIENDA. Llame este número sin
cargo:
1-800-523-3987
Lunes a viernes, 9:00 a.m. - 5:30 p.m.
Hora oficial del Este
(excepto días festivos)
Si requiere un repuesto de una parte, será enviado dentro de
48 horas (excepto los fines de semana y días festivos)
Use estas instrucciones de ensamblaje en español junto con las
figuras paso-a-paso provistas en el folleto inglés. Cada paso
en español corresponde al mismo paso en inglés. Se destacan
las figuras de cada paso con una tonalidad oscura para mostrar
precisamente cual parte se debe montar a la unidad. Compare
la “Lista de Part” abajo con la “Part Identification” en el folleto en
inglés para familiarizarse con Las partes de ensamblaje.
NOTA: ESTE FOLLETO DE INSTRUCCIONES CONTIENE
INFORMACIÓN IMPORTANTE SOBRE LA SEGURIDAD. POR
FAVOR LEA Y GUÁRDELO PARA REFERENCIA EN EL FUTURO.
LISTA DE PARTES
ITEM DESCRIPCIÓN CANTIDAD
35GA
GABINETE DERECHO..............................................1
35GB
GABINETE IZQUIERDO...........................................1
35GC
CAJÓN DERECHO......................................................1
35GD
CAJÓN IZQUIERDO...................................................1
10A EXCÉNTRICO DE CORREDERA.......................2
1F EXCÉNTRICO ESCONDIDO ...........................26
2F PASADOR DE EXCÉNTRICO..............................6
8F BIELA DE EXCÉNTRICO......................................14
15F PASADOR DE MADERA.........................................4
20F BIELA DE EXCÉNTRICO PEQUEÑA.............6
17K POMO...................................................................................1
3S TORNILLO DORADO DE
CABEZA PERDIDA de 8 mm..............................8
30S TORNILLO NEGRO DE CABEZA
PERDIDA de 40 mm.................................................8
37S TORNILLO NEGRO PARA METAL
de 22 mm...........................................................................1
A EXTREMO..........................................................................2
B PANEL SUPERIOR.......................................................1
C FONDO.................................................................................1
D DORSO.................................................................................1
D16 LADO DERECHO DE CAJÓN.............................1
D17 LADO IZQUIERDO DE CAJÓN..........................1
D154 DORSO DE CAJÓN....................................................1
D959
FONDO DE CAJÓN....................................................1
E PATA DELANTERA DERECHA............................1
F PATA DELANTERA IZQUIERDA.........................1
G PATA POSTERIOR DERECHA.............................1
H PATA POSTERIOR IZQUIERDA..........................1
I FALDÓN LATERAL.....................................................2
J FALDÓN..............................................................................2
K CARA DE CAJÓN.........................................................1
L PATA.......................................................................................4
Mesa LateralModelo 422406
422406 www.sauder.com/servicesPage 20

Other Sauder Indoor Furnishing manuals
Sauder Steel River 427654 User manual

Sauder

Sauder Steel River 427654 User manual

Sauder Rock Glen 425773 User manual

Sauder

Sauder Rock Glen 425773 User manual

Sauder August Hill 433851 User manual

Sauder

Sauder August Hill 433851 User manual

Sauder Avenue Eight 416513 User manual

Sauder

Sauder Avenue Eight 416513 User manual

Sauder Shoal Creek 420272 User manual

Sauder

Sauder Shoal Creek 420272 User manual

Sauder North Avenue 424933 User manual

Sauder

Sauder North Avenue 424933 User manual

Sauder Harbor View 420474 User manual

Sauder

Sauder Harbor View 420474 User manual

Sauder 415421 User manual

Sauder

Sauder 415421 User manual

Sauder Credenza Soft Modern 414986 User manual

Sauder

Sauder Credenza Soft Modern 414986 User manual

Sauder 408951 User manual

Sauder

Sauder 408951 User manual

Sauder Boulevard Cafe 422355 User manual

Sauder

Sauder Boulevard Cafe 422355 User manual

Sauder 413072 User manual

Sauder

Sauder 413072 User manual

Sauder Cannery Bridge 418326 User manual

Sauder

Sauder Cannery Bridge 418326 User manual

Sauder Jaclyn Smith Gatsby 416403 User manual

Sauder

Sauder Jaclyn Smith Gatsby 416403 User manual

Sauder 422893 User manual

Sauder

Sauder 422893 User manual

Sauder 408995 User manual

Sauder

Sauder 408995 User manual

Sauder Shoal Creek Night Stand 410412 User manual

Sauder

Sauder Shoal Creek Night Stand 410412 User manual

Sauder 420545 User manual

Sauder

Sauder 420545 User manual

Sauder Pallada Series 411843 User manual

Sauder

Sauder Pallada Series 411843 User manual

Sauder Edge Water 408696 User manual

Sauder

Sauder Edge Water 408696 User manual

Sauder Carson Forge 416967 User manual

Sauder

Sauder Carson Forge 416967 User manual

Sauder Graham Hill 422811 User manual

Sauder

Sauder Graham Hill 422811 User manual

Sauder 401442 User manual

Sauder

Sauder 401442 User manual

Sauder 418735 User manual

Sauder

Sauder 418735 User manual

Popular Indoor Furnishing manuals by other brands

U-Line H-5054 Assembly instructions

U-Line

U-Line H-5054 Assembly instructions

Universal Furniture 192-655 instruction sheet

Universal Furniture

Universal Furniture 192-655 instruction sheet

DHP 4120229WE Instruction booklet

DHP

DHP 4120229WE Instruction booklet

iHome LUX quick start guide

iHome

iHome LUX quick start guide

Walker Edison AH52APC Assembly instructions

Walker Edison

Walker Edison AH52APC Assembly instructions

Respawn RSP-1063-BLK installation guide

Respawn

Respawn RSP-1063-BLK installation guide

Bedz King Twin Mission Bed Assembly instructions

Bedz King

Bedz King Twin Mission Bed Assembly instructions

Argos HOME Crystal II 3ft Frame Assembly instructions

Argos

Argos HOME Crystal II 3ft Frame Assembly instructions

Cooper Lighting Metalux Indoor Lighting Accessories Specification sheet

Cooper Lighting

Cooper Lighting Metalux Indoor Lighting Accessories Specification sheet

Bush Business Furniture EO6AI Assembly instructions

Bush Business Furniture

Bush Business Furniture EO6AI Assembly instructions

Baxton Studio Agatis 0097 Assembly instructions

Baxton Studio

Baxton Studio Agatis 0097 Assembly instructions

AFi NANTUCKET MURPHY quick start guide

AFi

AFi NANTUCKET MURPHY quick start guide

J.Burrows JBWATSONDK Assembly instruction

J.Burrows

J.Burrows JBWATSONDK Assembly instruction

Furniture of America CM7365D-M Assembly instructions

Furniture of America

Furniture of America CM7365D-M Assembly instructions

Hoppekids BASIC-A5-1 Assembly instruction

Hoppekids

Hoppekids BASIC-A5-1 Assembly instruction

SAUTHON easy CANNELLE IK161A Technical manual

SAUTHON easy

SAUTHON easy CANNELLE IK161A Technical manual

VRGO VRGO Chair instruction manual

VRGO

VRGO VRGO Chair instruction manual

Noblewell NWCT1B instruction manual

Noblewell

Noblewell NWCT1B instruction manual

manuals.online logo
manuals.online logoBrands
  • About & Mission
  • Contact us
  • Privacy Policy
  • Terms and Conditions

Copyright 2025 Manuals.Online. All Rights Reserved.