manuals.online logo
Brands
  1. Home
  2. •
  3. Brands
  4. •
  5. Sauder
  6. •
  7. Indoor Furnishing
  8. •
  9. Sauder 410147 User manual

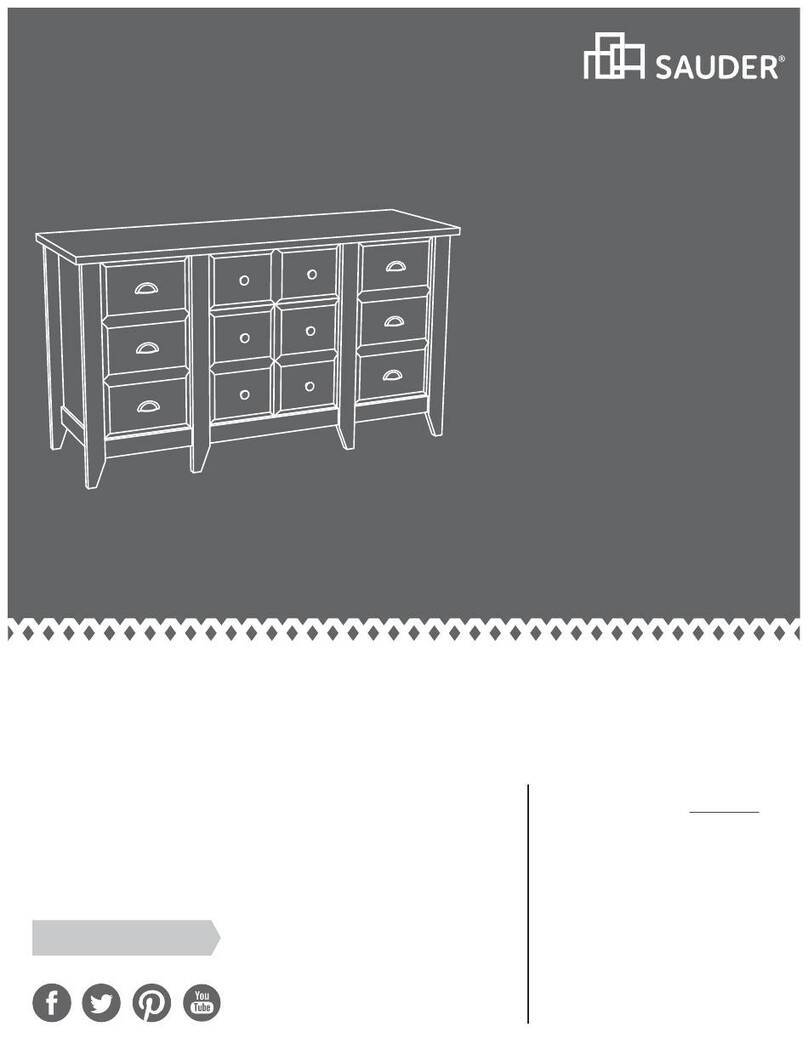
Sauder 410147 User manual

NOTE: THIS INSTRUCTION
BOOKLET CONTAINS IMPORTANT
SAFETY INFORMATION.
PLEASE READ AND KEEP FOR
FUTURE REFERENCE.
English pg 1-20
Français pg 21-23
Español pg 24-26
Lot # 376037 08/12/15
Purchased: __________________
Be sure to give us a ring before
making any returns. 1-800-523-3987
Full/Queen Headboard
Shoal Creek Collection | 410147
Need help? Visit Sauder.com to view video assembly tips or chat with a live rep.
Prefer the phone? Call 1-800-523-3987.
Share your journey!
sauder.com
You are getting sleepy.
Very sleepy.
Table of Contents Assembly Tools Required
2-3
4-5
6-20
21-23
24-26
27
Part Identification
Hardware Identification
Assembly Steps
Français
Español
Warranty
Hammer
Not actual size
No. 2 Phillips Screwdriver
Tip Shown Actual Size
Skip the power trip.
This time.
410147 www.sauder.com/servicesPage 2
Part Identification
åWhile not all parts are labeled, some of the parts will have a label or an inked letter on the edge
to help distinguish similar parts from each other. Use this part identification to help identify similar parts.
A RIGHT END (1)
B LEFT END (1)
C RIGHT UPRIGHT (1)
D LEFT UPRIGHT (1)
E TOP (1)
F PANEL (1)
G SHELF (1)
H SMALL SHELF (2)
I BACK (1)
J DRAWER BOTTOM (2)
K DRAWER FRONT (2)
L DRAWER BACK (2)
M DRAWER SIDE (4)
Part Identification Now you know
our ABCs.
410147www.sauder.com/services Page 3
A
B
C
D
E
F
G
H
I
JK
LM
H
JK
LM
M
M
Hardware Identification
åScrews are shown actual size. You may receive extra hardware with your unit.
410147 www.sauder.com/servicesPage 4
NUT - 4
YWASHER - 4
Z
ANGLE BRACKET - 5
R
SUPPORT PIN - 4
W
CAM COVER - 4
X
TWIST-LOCK®FASTENER - 6
N
METAL PIN - 8
V
CAM DOWEL - 12
P2
HIDDEN CAM - 12
O2
KNOB - 2
T
HEADBOARD BRACKET - 2
Q
UTAPE CARD - 5
SDRAWER FRONT
BRACKET - 4
Hardware Identification
åScrews are shown actual size. You may receive extra hardware with your unit.
410147www.sauder.com/services Page 5
BLACK 9/16" LARGE HEAD SCREW - 22
DD
BLACK 1-1/4" FLAT HEAD SCREW - 4
AA
NAIL - 58
FF
BLACK 1/2" FLAT HEAD SCREW - 8
EE
GOLD 1" MACHINE SCREW - 2
CC
SILVER 1-1/4" BOLT - 4
117S
Step 1 Look for this icon. It means a
video assembly tip is available at
www.sauder.com/services/tips
å Assemble your unit on a carpeted floor or on the empty
carton to avoid scratching your unit or the floor.
å To begin assembly, push a SAUDER TWIST-LOCK®
FASTENER (N) into the large holes in the UPRIGHTS (C and D).
410147 www.sauder.com/servicesPage 6
C
D
N
N
Do not tighten the TWIST-LOCK® FASTENERS in this step.
å Push twelve HIDDEN CAMS (O2) into the ENDS (A and B),
PANEL (F), and SHELF (G). Then, insert the metal end of a
CAM DOWEL (P2) into each HIDDEN CAM.
Step 2
410147www.sauder.com/services Page 7
A
B
F
G
Arrow
02
P2
Arrow
O2
P2
Insert the metal end of the CAM
DOWEL into the HIDDEN CAM.
Arrow
Do not tighten the HIDDEN CAMS in this step.
(12 used)
Step 3
å Using your hammer, gently tap four SUPPORT PINS (W) into
the holes in the ENDS (A and B) and UPRIGHTS (C and D).
410147 www.sauder.com/servicesPage 8
A
B
C
D
W
W
Remember:
Righty tighty.
Lefty loosey.
å Fasten the UPRIGHTS (C and D) to the TOP (E). Tighten
two TWIST-LOCK® FASTENERS.
Step 4
410147www.sauder.com/services Page 9
E
C
D
Angled edge
Long finished edge
Surface with
TWIST-LOCK®
FASTENERS
Surface without
TWIST-LOCK®
FASTENERS
How to use the SAUDER TWIST-LOCK®FASTENER
1. Insert the dowel end of the FASTENER into the hole of the
adjoining part.
NOTE: The dowel end of the FASTENER must remain fully
inserted in the hole of the adjoining part while locking
the FASTENER.
2. Tighten the FASTENER with a Phillips screwdriver as tight
as possible.
Dowel end
Do not stand the unit upright without the
BACK fastened. The unit may collapse.
Caution
Step 5
å Insert four METAL PINS (V) into each SMALL SHELF (H).
å Insert the METAL PINS (V) in one end of the SMALL
SHELVES (H) into the holes in the UPRIGHTS (C and D).
410147 www.sauder.com/servicesPage 10
C
D
H
H
V
V
Finished edge
Finished edge
(8 used)
Unfinished
surface Unfinished
surface
å Fasten the SHELF (G) to the UPRIGHTS (C and D).
Tighten four TWIST-LOCK® FASTENERS.
Step 6
410147www.sauder.com/services Page 11
C
D
G
Surface
with
HIDDEN
CAMS
Rounded edge
Step 7
å Fasten the LEFT END (B) to the TOP (E) and SHELF (G).
Tighten four HIDDEN CAMS.
å NOTE: Be sure the METAL PINS in the SMALL SHELF (H)
insert into the holes in the LEFT END (B).
410147 www.sauder.com/servicesPage 12
H
G
E
B
Surface
with
HIDDEN
CAMS
Angled edge
Start Tighten
Arrow
Minimum
190 degrees
Caution
Risk of damage or
injury. HIDDEN CAMS
must be completely
tightened. HIDDEN
CAMS that are not
completely tightened
may loosen, and parts
may separate. To
completely tighten:
Arrow
Maximum
210 degrees
Now might be a
good time to refresh
your drink.
å Fasten five ANGLE BRACKETS (R) to the PANEL (F). Use
five BLACK 9/16" LARGE HEAD SCREWS (DD).
å NOTE: Be sure the edges of the ANGLE BRACKETS are
even with the edge of the PANEL.
å Carefully stand your unit on its TOP (E).
å Fasten the PANEL (F) to the LEFT END (B). Tighten two
HIDDEN CAMS.
å Then, fasten the PANEL (F) to the SHELF (G). Use five
BLACK 9/16" LARGE HEAD SCREWS (DD).
Step 8
410147www.sauder.com/services Page 13
R
F
F
B
G
Surface
with
HIDDEN
CAMS
Surface
with
HIDDEN
CAMS
BLACK 9/16" LARGE HEAD SCREW
(10 used in this step)
DD
Arrow
Minimum
190 degrees
Maximum
210 degrees
Step 9
å Fasten the RIGHT END (A) to the TOP (E), SHELF (G), and
PANEL (F). Tighten six HIDDEN CAMS.
å NOTE: Be sure the METAL PINS in the SMALL SHELF (H)
insert into the holes in the RIGHT END (A).
410147 www.sauder.com/servicesPage 14
F
A
E
G
H
Surface
without
HIDDEN
CAMS
Arrow
Minimum
190 degrees
Maximum
210 degrees
Angled edge
å Carefully turn your unit over onto its front edges. Unfold
the BACK (I) and lay it over your unit.
å Make equal margins along all four edges of the BACK (I).
Push on opposite corners of your unit if needed to make
it "square".
å Fasten the BACK (I) to your unit using the NAILS (FF).
å NOTE: Be sure to tap NAILS into the holes that line up
over the UPRIGHTS (C and D).
å NOTE: Perforations have been provided for access
through the BACK. Carefully cut out the holes needed.
Step 10
410147www.sauder.com/services Page 15
I
Unfinished surface
Do not stand the unit upright without the
BACK fastened. The unit may collapse.
Caution
These holes must line up over the UPRIGHTS (C and D).
NAIL
(38 used in this step)
FF
Step 11
å Fasten the DRAWER FRONT BRACKETS (S) to the
DRAWER SIDES (M). Use four BLACK 1/2" FLAT
HEAD SCREWS (EE).
å Then, fasten the DRAWER SIDES (M) to the
DRAWER FRONT (K). Use two BLACK 9/16"
LARGE HEAD SCREWS (DD).
å Repeat this step for the other drawer.
410147 www.sauder.com/servicesPage 16
M
M
S
M
M
K
Finished edge
Finished edge
BLACK 9/16" LARGE HEAD SCREW
(4 used for the DRAWER FRONTS)
DD
Unfinished edge
BLACK 1/2" FLAT HEAD SCREW
(8 used for the BRACKETS)
EE
Hole is closer to this edge.
å Peel the double-sided TAPE from the TAPE CARD (U).
Apply five pieces of TAPE to the DRAWER FRONT (K).
å NOTE: You may want to crease the flap on the DRAWER
BOTTOM (J) before applying the BOTTOM to the
DRAWER FRONT (K).
å Press the flap of the DRAWER BOTTOM (J) onto the
DRAWER FRONT (K).
å Fasten the DRAWER BACK (L) to the DRAWER SIDES (M).
Use two BLACK 1-1/4" FLAT HEAD SCREWS (AA).
å Repeat this step for the other drawer.
Step 12
410147www.sauder.com/services Page 17
K
U
J
M
M
L
J
K
The finished surface should be
facing the DRAWER FRONT (K).
Finished
surface
Finished edge
Flap
Flap
BLACK 1-1/4" FLAT HEAD SCREW
(4 used in this step)
AA
Step 13
å Carefully turn your drawer over and fold the DRAWER
BOTTOM (J) so it rests on the DRAWER BACK (L) and
DRAWER SIDES (M).
å Fasten the DRAWER BOTTOM (J) to the DRAWER
BACK (L) and DRAWER SIDES (M). Use ten NAILS (FF).
å Repeat this step for the other drawer.
410147 www.sauder.com/servicesPage 18
M
M
L
J
J
M
L
NAIL
(20 used in this step)
FF
Almost time to
celebrate! With a nap.
å NOTE: You may want to crease the flaps on the DRAWER
BOTTOM (J) before applying TAPE to the DRAWER BOTTOM.
å Peel the double-sided TAPE from the TAPE CARD (U). Apply
four pieces of TAPE to the DRAWER BOTTOM (J) and stick the
flaps of the DRAWER BOTTOM (J) onto the TAPE.
å Fasten a KNOB (T) to the DRAWER FRONT (K). Use a GOLD 1"
MACHINE SCREW (CC).
å Repeat this step for the other drawer.
Step 14
410147www.sauder.com/services Page 19
J
U
J
K
T
Flap
GOLD 1" MACHINE SCREW
(2 used in this step)
CC
Want options? Customize
your item with add-on
hardware kits available
on sauder.com.
Step 15
å Carefully stand your unit upright and insert the drawers into your unit.
å Push a CAM COVER (X) onto each visible HIDDEN CAM.
å Fasten the HEADBOARD BRACKETS (Q) to the ENDS (A and B). Use eight BLACK 9/16" LARGE HEAD SCREWS (DD).
Use the holes that are best suited for the height of your bedframe.
å Fasten the bedframe to the HEADBOARD BRACKETS (Q). Use the SILVER 1-1/4" BOLTS (117S), NUTS (Y)
and WASHERS (Z).
å This completes assembly. Clean with your favorite furniture polish or a damp cloth. Wipe dry.
410147 www.sauder.com/servicesPage 20
A
B
Q
Q
X
20 lbs.
3 lbs.
3 lbs.
5 lbs.
5 lbs.
25 lbs.
(4 used)
To cover HIDDEN CAMS
BLACK 9/16" LARGE HEAD SCREW
(8 used in this step)
DD
And to celebrate, why not share your success story?
117S YZ
(4 of each used in this step)
WASHER NUTSILVER 1-1/4" BOLT

Other Sauder Indoor Furnishing manuals
Sauder Pogo 414433 User manual

Sauder

Sauder Pogo 414433 User manual

Sauder Heritage Collection User manual

Sauder

Sauder Heritage Collection User manual

Sauder Aspen Post 427022 User manual

Sauder

Sauder Aspen Post 427022 User manual

Sauder Palladia Highboy 411626 User manual

Sauder

Sauder Palladia Highboy 411626 User manual

Sauder Aspen Post 427018 User manual

Sauder

Sauder Aspen Post 427018 User manual

Sauder 422197 User manual

Sauder

Sauder 422197 User manual

Sauder Palladia Collection 412902 User manual

Sauder

Sauder Palladia Collection 412902 User manual

Sauder beginnings 413324 User manual

Sauder

Sauder beginnings 413324 User manual

Sauder 431238 User manual

Sauder

Sauder 431238 User manual

Sauder 426928 User manual

Sauder

Sauder 426928 User manual

Sauder Transit 414417 User manual

Sauder

Sauder Transit 414417 User manual

Sauder Office Port Series User manual

Sauder

Sauder Office Port Series User manual

Sauder Heritage Hill 109843 User manual

Sauder

Sauder Heritage Hill 109843 User manual

Sauder 409714 User manual

Sauder

Sauder 409714 User manual

Sauder Embassy Point 414192 User manual

Sauder

Sauder Embassy Point 414192 User manual

Sauder Cannery Bridge 429512 User manual

Sauder

Sauder Cannery Bridge 429512 User manual

Sauder Englewood 426909 User manual

Sauder

Sauder Englewood 426909 User manual

Sauder 402159 User manual

Sauder

Sauder 402159 User manual

Sauder Palladia 413998 User manual

Sauder

Sauder Palladia 413998 User manual

Sauder Beginnings Series User manual

Sauder

Sauder Beginnings Series User manual

Sauder 402159 User manual

Sauder

Sauder 402159 User manual

Sauder Barrister Lane 416798 User manual

Sauder

Sauder Barrister Lane 416798 User manual

Sauder 420477 User manual

Sauder

Sauder 420477 User manual

Sauder Via 422624 User manual

Sauder

Sauder Via 422624 User manual

Popular Indoor Furnishing manuals by other brands

HJH office TURAN Assembly instructions

HJH office

HJH office TURAN Assembly instructions

AVB B8270-F-HBFB Assembly instructions

AVB

AVB B8270-F-HBFB Assembly instructions

Star SE06E1FB quick start guide

Star

Star SE06E1FB quick start guide

imovr Cadence installation manual

imovr

imovr Cadence installation manual

Philips 14649-8 operating instructions

Philips

Philips 14649-8 operating instructions

atmosphera Chrysa 179070 Assembly instructions

atmosphera

atmosphera Chrysa 179070 Assembly instructions

WIEMANN 991295 manual

WIEMANN

WIEMANN 991295 manual

HJH office SMART PREMIUM TOP WORK 99 Assembly instructions

HJH office

HJH office SMART PREMIUM TOP WORK 99 Assembly instructions

Practical Cabinets B09 Assembly instructions

Practical Cabinets

Practical Cabinets B09 Assembly instructions

ducduc OSLO Assembly instructions

ducduc

ducduc OSLO Assembly instructions

Kidco Premier Gateway Series user guide

Kidco

Kidco Premier Gateway Series user guide

Coaster 193498B1 Assembly instructions

Coaster

Coaster 193498B1 Assembly instructions

hammel EDGE M40 manual

hammel

hammel EDGE M40 manual

Mocka Zara Coffee Table Assembly instructions

Mocka

Mocka Zara Coffee Table Assembly instructions

Woodard Woodcliff WDC-WOO-STBL Assembly instructions

Woodard

Woodard Woodcliff WDC-WOO-STBL Assembly instructions

BIG FURNITURE WAREHOUSE 303 W Y D GM quick start guide

BIG FURNITURE WAREHOUSE

BIG FURNITURE WAREHOUSE 303 W Y D GM quick start guide

Signature Design by Ashley 10028211 Assembly instructions

Signature Design by Ashley

Signature Design by Ashley 10028211 Assembly instructions

Impuls CM01 Assembly instructions

Impuls

Impuls CM01 Assembly instructions

manuals.online logo
manuals.online logoBrands
  • About & Mission
  • Contact us
  • Privacy Policy
  • Terms and Conditions

Copyright 2025 Manuals.Online. All Rights Reserved.