Sealey SM2399 User manual

Thank you for purchasing a Sealey product. Manufactured to a high standard this product will, if used according to these instructions
and properly maintained, give you years of trouble free performance.
1. SAFETY INSTRUCTIONS
IMPORTANT: PLEASE READ THESE INSTRUCTIONS CAREFULLY. NOTE THE SAFE OPERATIONAL REQUIREMENTS, WARNINGS AND
CAUTIONS. USE THIS PRODUCT CORRECTLY AND WITH CARE FOR THE PURPOSE FOR WHICH IT IS INTENDED. FAILURE TO DO SO MAY
CAUSE DAMAGE OR PERSONAL INJURY, AND WILL INVALIDATE THE WARRANTY. PLEASE KEEP INSTRUCTIONS SAFE FOR FUTURE USE.
INSTRUCTIONS FOR:
SPRAY GUN CLEANING TANK
Model: SM2399
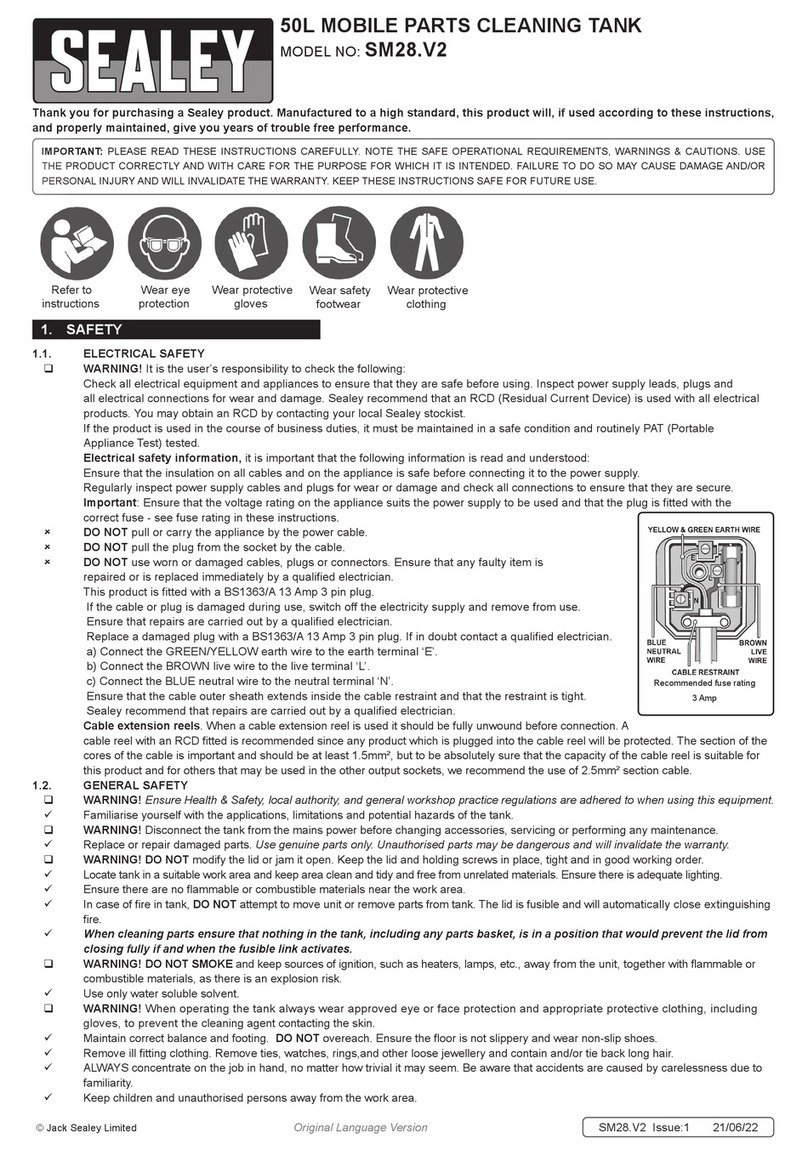
pWARNING! Ensure health & safety, local authority, and general workshop practice regulations are adhered to when using this equipment.
p
p
p
WARNING! Disconnect the washer from the air supply before changing accessories, servicing or performing any maintenance.
Maintain the washer in good condition (use an authorised service agent).
Replace or repair damaged parts. Use genuine parts only. Non authorised parts may be dangerous and will invalidate the warranty.
Locate the washer in an adequate working area for its function, Ensure the washer is stood on a firm level surface. Keep area clean
and tidy and free from unrelated materials. Ensure the area is well ventilated and has adequate lighting.
pWARNING! Installation site must be equipped with suitable fire extinguishers (water must not be used) and escape routes.
p
p
p
WARNING! Ensure correct air pressure is maintained and not exceeded. Recommended pressure 75-100psi.
Keep air hose away from heat, oil and sharp edges. Check air hose for wear before each use, and ensure that all connections are secure.
Use only recommended solvents as a cleaning agent, do not pour any other type of cleaning fluid into the tank.
Keep the washer clean. Remove and clean the filter regularly for best and safest performance.
Keep sources of ignition, such as heaters, lamps, etc away from the unit, together with flammable or combustible materials.
p
p
p
WARNING! Wear approved safety eye protection, mask and gloves. If fluid gets on skin or in eyes wash thoroughly with water
and take any other action as required by the solvent instructions.
Remove ill fitting clothing. ties, watches, rings, and other loose jewellery, and contain long hair, and wear appropriate protective clothing.
Maintain correct balance and footing. Ensure the floor is not slippery and wear non slip shoes.
Keep non essential persons away from the working area.
In case of fire in parts unit, do not attempt to remove parts, or the washer.
p
p
p
WARNING! DO NOT smoke whilst handling gunwash or solvents - risk of explosion.
DO NOT use the cleaner without the fume extraction flue attached, and ensure the flue removes the fumes appropriately.
DO NOT use the washer for any purpose other than for which it is designed.
DO NOT operate the washer if any parts are missing or damaged as this may cause failure or possible personal injury.
DO NOT over fill the washer, and DO NOT use the washer without the cloth filter in base of unit.
DO NOT direct air from the air hose at yourself or others.
DO NOT operate the washer when you are tired, under the influence of alcohol, drugs or intoxicating medication.
When cleaning is complete, ensure all controls are in the off position and that the air supply is turned off.
p
p
p
WARNING! It is the users responsibility to ensure that there is no uncontrolled discharge of any fluids used with this unit and that
appropriate arrangements have been made for correct disposal of waste fluids in accordance with government and local authority regulations.
SM2399 - 0000 - (1) - 160799
SPECIFICATIONS
Operating pressure . . . . . . . . . . . . . . . . . . . . .75-90psi
Air Consumption . . . . . . . . . . . . . . . . . . . . . . . .4/7cfm
Cleans . . . . . . . . . . . . . . . . . . . . . . . . .2 pots + 2 guns
Width/Depth/height (mm) . . . . . . . . . . . .440x475x1020
Weight . . . . . . . . . . . . . . . . . . . . . . . . . . . . . . . . .28kg
2. INTRODUCTION & SPECIFICATIONS
The SM2399 is a compact unit suitable for small body shop use. The tank is robustly manufactured, and features an air extraction, stainless steel
wash tank with brass distribution bars. A self reciprocating pump delivers up to 12 ltrs / min with an air input pressure of 75-100psi and consumes
approx 4/7cfm. This ensures a high volume of solvent is delivered through the spray jet nozzles and optimise the cleaning performance. The unit
is suitable for cleaning gravity, suction and HVLP guns.
3.1. Ensure the air valve is in the "off" position before connecting to the air supply.
3.2. You will require an air pressure of more than 75psi, and an air volume of more than 4 cfm for operating the unit.
3.3. p
p
p
WARNING! Ensure the air supply does not exceed 100PSI. Too high an air pressure and unclean air will shorten the product
life due to excessive wear, and may be dangerous causing possible damage and personal injury.
3.4. Drain the air supply tank daily. Water in the air line will damage the item being supplied.
3.5. Clean the air inlet filter screen weekly. For recommended
hook-up, see diagram to right.
3.6. Line pressure should be increased to compensate for
unusually long air hoses (over 8 metres). The minimum
hose diameter should be 10mm I.D. and fittings must
have the same inside dimensions.
3.7. Keep hose away from heat, oil and sharp edges.
Check hoses for wear, and make certain that
all connections are secure.
3.8. The cleaners input connection is 1/4 BSP.
3. AIR SUPPLY
HOOK UP
Unpack the product and check there are no damaged or missing parts.
If there is a problem contact your supplier immediately.
4.1. INSTALLING THE MACHINE.
4.1.1. Position unit in a well ventilated area on a solid level floor
with good access to a suitable air supply. Consider the
handling and storage of waste fluids.
4.1.2. Connect the air supply system to the inlet on the right hand
side of tank (fig1.1).
4.1.3. Fit a 3 (75mm) flue over the cleaners air extraction outlet
(fig 1.2). Ensure the first 1m of flue is vertical and
thereafter the flue may curve to the designated ventilation
outlet which should remove fumes to the outside of the building.
A range of adaptors are available from your Sealey dealer (fig 3).
4.2. CONNECTING THE SOLVENT SUPPLY.
p
p
p
WARNING! Wear approved safety eye protection, mask and
gloves. If fluid gets on skin or in eyes wash thoroughly with water
and take any other action as required by the solvent instructions.
4.2.1. Open a 25ltr container of cleaning solvent (3) and insert
the extraction filter (4) to the bottom of the drum.
4.2.2. Place the outlet drain hose (5) into the top of the solvent
container. If necessary, disconnect hose quick release coupling
to allow insertion of the extraction hose.
To do so lift the locking ring (fig 2. A) and once inserted into the
solvent drum re-connect the hose.
4.2.3. Push the solvent drum under the cleaning unit.
The height of unit may be increased by adjusting legs (6).
4.2.4. Place the work screen and green filter (7) in the bottom of
the tank. The cleaning tank is now ready for use.
5.2. CLEANING
5.2.1. Place the paint cup/pot into cleaning tank and over the top of a pair of square nozzle jets.
5.2.2. The spray gun air cap may be either loosened or removed completely and put into the tank.
5.2.3. To open the spray gun for cleaning, fit the trigger clip to the gun (fig 5.A).
5.2.4. Place the spray gun into the tank over cleaning nozzles as follows:
a) If suction gun, fit directly onto taper nozzle (fig 6.A).
b) If gun is a gravity or pressure type use nozzle extensions (fig 6.B & C).
5.2.5. Close the lid. You are now ready to commence the cleaning operation.
5.2.6. Turn the pump lever (fig 1.8) ON and the cleaning will commence .
The units air system will draw solvent through the filter in the bottom of the fluid container and expel an atomised spray through the
manifold nozzles in the cleaning tank. Solvent will drain through the outlet hose in the bottom of the tank back into the drum.
5.2.7. If during cleaning the lid is opened, a microswitch will automatically halt the cleaning process and the fumes will be extracted through
the units extraction flue (fig 1.2). By closing the lid the cleaning will recommence.
5.2.8. When all the items are clean, turn the air supply off, open the tank lid, and extract item accordingly. DO NOT store guns in tank.
NOTE: For best result remove as much residual paint as possible, and clean the equipment immediately after use.
pWARNING! It is the operators responsibility to ensure that there is no uncontrolled discharge of any fluids used with this unit and
that appropriate arrangements have been made for correct disposal of waste fluids in accordance with government and local authority regulations.
p
p
WARNING! Wear approved safety eye protection, mask and gloves. If fluid gets on skin or in eyes wash thoroughly with water
and take any other action as required by the solvent instructions.
5.1. PREPARING TANK & ITEMS FOR CLEANING.
5.1.1. Turn air supply on, and open drainer tap (fig 4 & fig 2.B) by rotating to the vertical position.
5.1.2. Check the spray gun to be cleaned, empty and store any excess paint for future use. For best result, remove as much residual paint
as possible, Loosen dirt and remove stubborn paint residue with aid of a brush (not included). Clean spray gun immediately after use.
4. INSTALLATION
5. OPERATING INSTRUCTIONS
fig 1
fig 4 fig 5 fig 6
fig 3 SM/C04
SM/C05
SM/C06
SM/C07
fig 2

Declaration of Conformity We, the sole importer into the UK, declare that the product listed here
is in conformity with the following EEC standards and directives
The construction file for this product is held by the Manufacturer and may be inspected on request by contacting Jack
Sealey Ltd
For Jack Sealey Ltd. Sole importer into the UK of Sealey Power Products
1st August 1999
SPRAY GUN CLEANING TANK
MODEL SM2399
93/68/EEC CE Marking Directive
89/336/EEC Directive (S.I. 1992/2372) & Amendments
98/37/EEC Machinery Directive (S.I 1992/3073)
Signed by Mark Sweetman
01284 757500 01284 703534
E-mail:
sales@sealey.co.uk
NOTE: It is our policy to continually improve products and as such we reserve the right to alter data, specifications and component parts without prior notice.
IMPORTANT: No liability is accepted for incorrect use of this equipment
WARRANTY: Guarantee is 12 months from purchase date, proof of which will be required for any claim.
INFORMATION: Call us for a copy of our latest catalogue on 01284 757525 and leave your full name and address including your postcode.
Sole UK Distributor
Sealey Group,
Bury St. Edmunds, Suffolk.
pWARNING! It is the operators responsibility to ensure that there is no uncontrolled discharge of any fluids used with this unit and that
appropriate arrangements have been made for correct disposal of waste fluids in accordance with government and local authority regulations.
p
p
p
WARNING! Disconnect the washer from the air supply before changing accessories, servicing or performing any maintenance.
p
p
p
WARNING! Wear approved safety eye protection, mask and gloves. If fluid gets on skin or in eyes wash thoroughly with water
and take any other action as required by the solvent instructions.
6.1 TO CHANGE SOLVENT
The amount of guns a 25 litre drum of solvent can clean will depend upon the amount of residue paint which is left in spray
equipment. We recommend however that the solvent is changed on a regular basis to provide optimum machine performance.
6.1.1. Close the drain tap, and remove drain hose and filter from container. Store the used solvent in accordance with regulations.
6.1.2. Clean the filter before reuse.
5.1.3. Insert the filter and hose into a new solvent drum as in section 4.
Wipe up any spillage immediately.
6.2. MAINTENANCE.
6.2.1. Clean the inside of the tank just before changing the solvent. To do so, close the drain tap (fig 4 & 2.B), start the machine and allow
a quantity of fluid to enter the tank. Turn machine off, lift lid and use the fluid to clean out the inside of the tank, removing any residue
waste. Open the drain valve to empty the tank.
6.2.2. Keep pick-up filter clean by rinsing in solvent and blowing out with an air line.
6.2.3. Change the green base filter (Model no SM2399/15) every three months, or more frequent if heavy use.
6.2.4. Regularly check to ensure there are no obstructions to the extraction flue.
6.2.5. Periodically check for correct operation of lid cut-off device and air extraction.
6.2.6. Regularly inspect the air hoses and fittings to ensure their integrity.
6.2.7. Keep the outside of the unit clean.
6. SOLVENT CHANGE & MAINTENANCE
Table of contents
Other Sealey Cleaning Equipment manuals

Sealey
Sealey SM20.V2 User manual

Sealey
Sealey SM40D.V2 User manual

Sealey
Sealey SM21.V4 Owner's manual

Sealey
Sealey SM19.V2 User manual

Sealey
Sealey POWER PRODUCTS SM221 User manual

Sealey
Sealey SM28 User manual

Sealey
Sealey VMA 911 User manual

Sealey
Sealey SM20T User manual

Sealey
Sealey VMA913 User manual

Sealey
Sealey SM233 User manual

Sealey
Sealey SM21/C User manual

Sealey
Sealey SM19.V3 User manual

Sealey
Sealey SM21.V3 User manual

Sealey
Sealey SM40D.V2 User manual

Sealey
Sealey SM26 User manual

Sealey
Sealey SCT09 User manual

Sealey
Sealey SM21.V4 User manual

Sealey
Sealey POWER PRODUCTS SM20.V3 User manual

Sealey
Sealey AE900 User manual

Sealey
Sealey SM28.V2 User manual