manuals.online logo
Brands
  1. Home
  2. •
  3. Brands
  4. •
  5. Sealey
  6. •
  7. Cleaning Equipment
  8. •
  9. Sealey SM233 User manual

Sealey SM233 User manual

5. OPERATING INSTRUCTIONS
Thank you for purchasing a Sealey product. Manufactured to a high standard this product will, if used according to these instructions
and properly maintained, give you years of trouble free performance.
1. SAFETY INSTRUCTIONS
IMPORTANT: PLEASE READ THESE INSTRUCTIONS CAREFULLY. NOTE THE SAFE OPERATIONAL REQUIREMENTS, WARNINGS AND CAUTIONS.
USE THIS PRODUCT CORRECTLY AND WITH CARE FOR THE PURPOSE FOR WHICH IT IS INTENDED. FAILURE TO DO SO MAY CAUSE
DAMAGE AND/OR PERSONAL INJURY AND WILL INVALIDATE THE WARRANTY. PLEASE KEEP INSTRUCTIONS SAFE FOR FUTURE USE.
INSTRUCTIONS FOR: AIR OPERATED WATER
BASED SPRAY GUN CLEANING TANK
MODEL NO: SM233
!WARNING! Ensure Health & Safety, local authority, general
workshop practice regulations are adhered to when using
equipment.
!WARNING! Installation site must be equipped with suitable
fire extinguishers (water must not be used) and escape routes.
!WARNING! Disconnect the air supply from the tank before
changing accessories, servicing or performing any maintenance.
"Maintain the tank in good condition (use an authorised service agent).
"Replace or repair damaged parts. Use genuine parts only.
Unauthorised parts may be dangerous and will invalidate the warranty.
"Locate the tank in a suitable working area. Ensure the tank
stands on a firm level surface. Keep area clean and tidy and free
from unrelated materials. Ensure the area is well ventilated and
has adequate lighting.
!WARNING! Ensure correct air pressure is maintained and not
exceeded. Recommended pressure (40 - 60psi).
"Keep air hose away from heat, oil and sharp edges. Check air
hose for wear before each use, and ensure that all connections
are secure.
!WARNING! This tank is for use only with solvents for water
based paints.
"Use only recommended solvents as a cleaning agent, do not pour
any other type of cleaning fluid into the tank.
"Keep the tank clean. Remove and clean the suction filter regularly
for best performance.
!WARNING! DO NOT SMOKE and keep sources of ignition,
such as heaters, lamps, etc. away from the unit, together with
flammable or combustible materials, as there is an explosion risk.
!WARNING! Wear approved safety eye protection, mask and
gloves. If solvent gets on skin or in eyes wash thoroughly
with water and take any other action as required by the
solvent instructions.
"Remove ill fitting clothing, ties, watches, rings and other loose
jewellery, contain long hair, and wear appropriate protective clothing.
"Maintain correct balance and footing. Ensure the floor is not
slippery and wear non-slip shoes.
"Keep non-essential persons away from the working area.
"In case of fire in tank, do not attempt to move the unit or remove
spray guns.
#DO NOT use the tank with the lid open and DO NOT use it for
spray gun testing.
#DO NOT use the tank for any purpose other than for which it is
designed.
#DO NOT operate the tank if any parts are missing or damaged as
this may cause failure and/or possible personal injury.
#DO NOT over-fill the tank (max capacity 19 litres).
#DO NOT direct air from the air hose at yourself or others.
#DO NOT operate the tank when you are tired or under the
influence of alcohol, drugs or intoxicating medication.
"When cleaning is complete, ensure all control valves are in the
‘off’ position and that the air supply is turned off.
!WARNING! It is operator’s responsibility to ensure that there
is no uncontrolled discharge of any fluids used with this unit
and that appropriate arrangements have been made for correct
disposal of waste in accordance with government/local authority
regulations.
!WARNING! Do run the washer without the screen platform.
SM233 - 1 - 210607
2. INTRODUCTION & SPECIFICATION
SPECIFICATION:
Operating pressure . . . . . . . . . . . . . . . . . . . . . . . . . .40-60 psi
Air consumption . . . . . . . . . . . . . . . . . . . . . . . . . . . . . .2-4 cfm
Noise . . . . . . . . . . . . . . . . . . . . . . . . . . . . . . . . . . . . . . . .75db
Interior tank . . . . . . . . . . . . . . . . . . . . . . . . . . . . . . . .Polythene
Cleans . . . . . . . . . . . . . . . . . . . . . . . . . . . . . . .2 pots + 2 guns
Water capacity . . . . . . . . . . . . . . . . . . . . . . . . . . . . . . . . .19ltr
Width x depth x height . . . . . . . . . . . . . . .470 x 650 x 1000mm
Weight . . . . . . . . . . . . . . . . . . . . . . . . . . . . . . . . . . . . . .33.5kg
NOTE: The air supply for the SM233 must be equipped with a
regulator, filter/separator and oiler in order to ensure safe
operation and to prolong the life of the product. These items are
not supplied and must be purchased separately.
Consult your local Sealey dealer for a suitable product.
For recommended hook-up, see diagram below.
4.1.Ensure that the pump air valve and air inlet ball valve are closed
before connecting the air supply. See fig.3.
4.2.An air pressure of 40-60psi, and an available air volume of
2 - 4cfm will be required to operate the unit.
!WARNING! Ensure air supply is clean and does not exceed
60psi. Too high an air pressure and/or unclean air will
shorten the product life due to excessive wear, and may be
dangerous, causing possible damage and personal injury.
4.3.Drain the air supply tank daily. Water in the air line will damage
the unit.
4.4.Clean the air supply filter weekly.
4.5.Line pressure should be increased to compensate for unusually
long air hoses (over 8 metres). The minimum hose internal
diameter should be 10mm and fittings must have the same
internal dimension.
4.6.Keep hose away from heat, oil and sharp edges. Check hoses for
wear, and make certain that all connections are secure.
4.7.The air inlet connection is 1/4”NPT.
4. AIR SUPPLY
HOOK-UP
3. ASSEMBLY
Refer to fig.4.
3.1.Attach legs to the cabinet with the screws, washers and nuts
provided . Fit drain valve to base of tank.
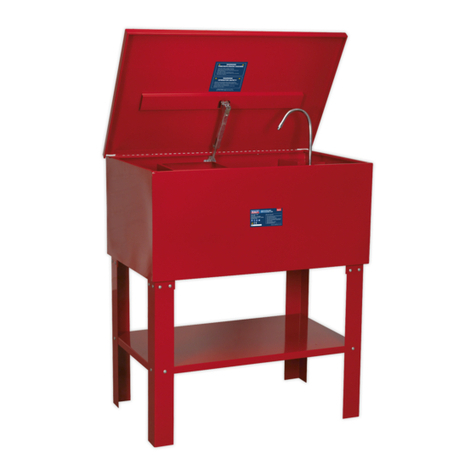
Fully enclosed, corrosion resistant tank suitable for containing
water and detergent necessary for cleaning spray guns using
water-based paint. Powerful and reliable diaphragm pump system
washes up to two guns simultaneously. Semi automatic operation.
!WARNING! Ensure you follow the safety instructions.
Wear approved safety gloves, goggles, mask, and
suitable clothing.
5.1. PREPARING TANK & ITEMS FOR CLEANING (See fig.3)
5.1.2. Ensure tank drain valve is closed and then pour solvent into
tank. Ensure final level is at least 25mm above pump suction
strainer.
5.1.3. Confirm that the pump air valve is closed and air supply
pressure is regulated to not more than 60psi. Turn on air
supply at air inlet ball valve.
5.1.4. Partially open pump air valve and allow pump to run slowly for
approx. 2 minutes to purge fluid used for manufacturer’s tests.
Note: Always operate with lid closed.
5.1.5. Check the spray gun to be cleaned, empty and store any
excess paint for future use. For best results clean immediately
after use, having removed as much residual paint as possible.
5.1.6. To open the spray gun for cleaning, squeeze trigger and fit
trigger lock as shown in fig.2.
5.1.7. Two gun supports are provided, one short (see fig.1A) and one
long (see fig.1B). Use whichever support suits the configuration
of the gun to be cleaned. In general, guns which have top
entry paint inlets (e.g gravity feed) can be put on either support
provided they do not foul on the underside of the lid. Guns
which have bottom entry paint inlets (e.g suction feed) will
usually go onto the longer support. If required the extension on
the long support can be removed to give two short supports.
5.1.8. For pressure fed guns up to 2ltr capacity place the syphon stem
of the pot cover over the short support and position the gun
and hoses on the screen platform. Over this capacity disconnect
the gun from the lines and place on the long support.
5.1.9. Place pots over nozzles ‘C’ (fig.1 - Mesh screen omitted for clarity).
5.2. CLEANING
5.2.1. Ensure washer lid is closed and then fully open pump air valve.
The pump will now operate and expel an atomized spray through
the nozzles in the cleaning tank.
5.2.2. Cleaning will be complete after 60 seconds, at which time pump
should be turned off by closing the pump air valve. Do not operate
pump for longer than 2 minutes at any one time as this will
reduce seal life.
5.2.3 When cleaning is complete turn the air inlet ball valve off.
5.2.4. Open lid and remove cleaned equipment.
NOTE:If, during cleaning, lid is inadvertently opened, the cleaning
process will automatically stop. Close lid for cleaning to continue.
DO NOT store guns in tank.
Declaration of Conformity We, the sole importer into the UK, declare that the product listed here
is in conformity with the following standards and directives
The construction file for this product is held by the Manufacturer and may be
inspected, by a national authority, upon request by contacting Jack Sealey Ltd.
For Jack Sealey Ltd. Sole importer into
the UK of Sealey Power Products.
21st June 2007
SPRAY GUN CLEANER
MODEL SM233
93/68/EEC CE Marking Directive
98/37/EC Machinery Directive
Signed by Tim Thompson
01284 757500
01284 703534 sales@sealey.co.uk
Sole UK Distributor
Sealey Group,
Bury St. Edmunds, Suffolk.
www.sealey.co.uk
Web
email
NOTE: It is our policy to continually improve products and as such we reserve the right to alter data, specifications and component parts without prior notice.
IMPORTANT: No liability is accepted for incorrect use of this product.
WARRANTY: Guarantee is 12 months from purchase date, proof of which will be required for any claim.
INFORMATION: For a copy of our catalogue and latest promotions call us on 01284 757525 and leave your full name, address and postcode.
6. SOLVENT CHANGE & MAINTENANCE
!WARNING! It is operator’s responsibility to ensure that there
is no uncontrolled discharge of any fluids used with this unit
and that appropriate arrangements have been made for correct
disposal of waste in accordance with government/local
authority regulations.
!WARNING! Disconnect the air supply from the unit before
changing accessories, servicing or performing any
maintenance.
!WARNING! Wear approved safety gloves, goggles, mask
and suitable clothing.
6.1. SOLVENT REPLACEMENT. The number of guns the solvent
can clean will depend upon the amount of residual paint which
is left in spray equipment. We recommend however that the
solvent is changed on a regular basis to provide optimum
cleaning performance and that paint sludge is removed weekly,
as detailed below.
6.1.1. Sludge removal.
Drain 2 litres of solvent/sludge from drain valve. Close valve
and add clean solvent to tank to bring level up to at least
25mm above strainer.
6.1.2. Solvent change. Completely drain dirty solvent as in 6.1.1.
Clean inside of tank and strainer before refilling with
clean solvent. Store the used solvent in accordance with
regulations. Wipe up any spillage immediately.
6.2. MAINTENANCE. Regularly check that opening the washer lid
automatically stops the spray.
6.2.1. Regularly check and top-up the oil in the air supply oiler.
6.2.2. Periodically, remove pump end cap and add grease internally.
6.2.3. Keep the outside of the unit clean.
fig. 1 fig. 2
fig. 3
Parts support is available for this product. To obtain a parts listing and/or diagram,
please log on to www.sealey.co.uk, email sales@sealey.co.uk or phone 01284 757500.

Other Sealey Cleaning Equipment manuals

Sealey SM19.V2 User manual

Sealey

Sealey SM19.V2 User manual

Sealey SM19.V3 User manual

Sealey

Sealey SM19.V3 User manual

Sealey SM21/C User manual

Sealey

Sealey SM21/C User manual

Sealey POWER PRODUCTS SM19.V2 User manual

Sealey

Sealey POWER PRODUCTS SM19.V2 User manual

Sealey SM22 User manual

Sealey

Sealey SM22 User manual

Sealey SM2399 User manual

Sealey

Sealey SM2399 User manual

Sealey SM28.V2 User manual

Sealey

Sealey SM28.V2 User manual

Sealey SM40D.V2 User manual

Sealey

Sealey SM40D.V2 User manual

Sealey SCT03.V2 User manual

Sealey

Sealey SCT03.V2 User manual

Sealey SCT03 User manual

Sealey

Sealey SCT03 User manual

Sealey VMA 911 User manual

Sealey

Sealey VMA 911 User manual

Sealey SM21.V4 User manual

Sealey

Sealey SM21.V4 User manual

Sealey AE900 User manual

Sealey

Sealey AE900 User manual

Sealey SCT09 User manual

Sealey

Sealey SCT09 User manual

Sealey SM40D.V2 User manual

Sealey

Sealey SM40D.V2 User manual

Sealey SM22.V2 User manual

Sealey

Sealey SM22.V2 User manual

Sealey DPF1 User manual

Sealey

Sealey DPF1 User manual

Sealey SM21.V4 Owner's manual

Sealey

Sealey SM21.V4 Owner's manual

Sealey SM20T User manual

Sealey

Sealey SM20T User manual

Sealey SM20.V2 User manual

Sealey

Sealey SM20.V2 User manual

Sealey APMS67 User manual

Sealey

Sealey APMS67 User manual

Sealey PC310 User manual

Sealey

Sealey PC310 User manual

Sealey VMA913 User manual

Sealey

Sealey VMA913 User manual

Sealey POWER PRODUCTS SM20.V3 User manual

Sealey

Sealey POWER PRODUCTS SM20.V3 User manual

Popular Cleaning Equipment manuals by other brands

Kaivac Autovac Operator's & parts manual

Kaivac

Kaivac Autovac Operator's & parts manual

Weller WDC 2 operating instructions

Weller

Weller WDC 2 operating instructions

Eurotops 29115 quick start guide

Eurotops

Eurotops 29115 quick start guide

Bymat Brushline 1150 RS user manual

Bymat

Bymat Brushline 1150 RS user manual

unGer OmniClean CLBK1D Assembly instructions

unGer

unGer OmniClean CLBK1D Assembly instructions

Elfbot 1080 instruction manual

Elfbot

Elfbot 1080 instruction manual

Kärcher 8.760-090.0 Operator's manual

Kärcher

Kärcher 8.760-090.0 Operator's manual

PREMIER AUTOMATION HydroCleaner Operator's manual

PREMIER AUTOMATION

PREMIER AUTOMATION HydroCleaner Operator's manual

Westfalia 82 86 28 instruction manual

Westfalia

Westfalia 82 86 28 instruction manual

EINHELL BT-HP 160 operating instructions

EINHELL

EINHELL BT-HP 160 operating instructions

Belanger QuickFire Wrap Around Signature Series owner's manual

Belanger

Belanger QuickFire Wrap Around Signature Series owner's manual

SmartBurn SmartBurn How to use

SmartBurn

SmartBurn SmartBurn How to use

Hutt W77 Product Manual & Warranty Card

Hutt

Hutt W77 Product Manual & Warranty Card

Suevia 130.5011 EASYCLEANER Mounting instructions

Suevia

Suevia 130.5011 EASYCLEANER Mounting instructions

Axi MTC HC-300 Installation, operating and maintenance manual

Axi

Axi MTC HC-300 Installation, operating and maintenance manual

Thermax AF2 owner's manual

Thermax

Thermax AF2 owner's manual

Drester Boxer Triple Combi Operator's manual

Drester

Drester Boxer Triple Combi Operator's manual

Harbor Freight Tools Bauer 191101A-B Owner's manual & safety instructions

Harbor Freight Tools

Harbor Freight Tools Bauer 191101A-B Owner's manual & safety instructions

manuals.online logo
manuals.online logoBrands
  • About & Mission
  • Contact us
  • Privacy Policy
  • Terms and Conditions

Copyright 2025 Manuals.Online. All Rights Reserved.