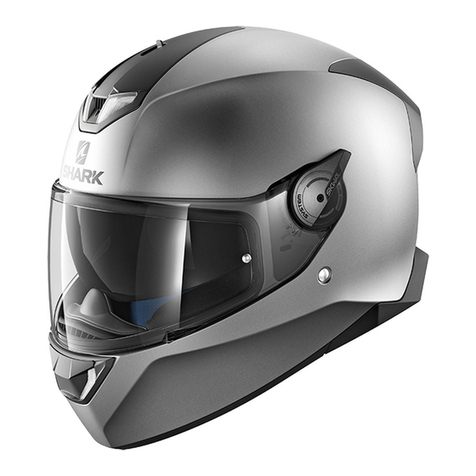
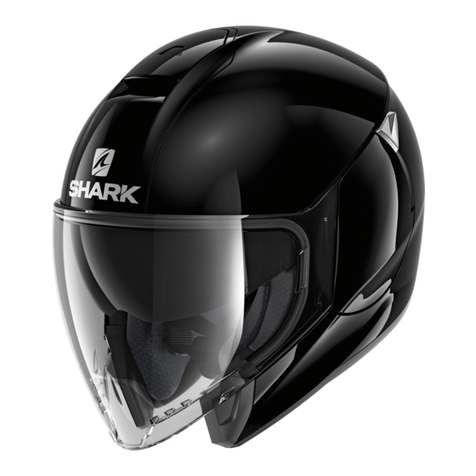
Shark D-SKWAL 3 User manual

1
D-SKWAL 3
D-SKWAL 3_V1_27042023
WARNING!
Carefully read, understand and follow the instructions
provided in this manual, and keep it in a safe place for
future reference. If you have any doubt whatsoever
regarding the use or care of your helmet, please see
your retailer for assistance or advice. Failure to follow
the warnings and instructions provided herein can
result in the failure of the helmet to protect you in an
accident, resulting in a head injury or death.
ATTENTION !
Veuillez lire avec attention, comprendre et suivre les
instructions fournies dans ce manuel, et veuillez le
garder en lieu sûr pour vous en servir ultérieurement.
En cas de doute concernant l’utilisation ou l’entretien
du casque, veuillez demander l’aide ou l’avis de
votre revendeur. Tout non respect des précautions
et recommandations fournies dans ce manuel peut
entraîner une défaillance dans l’efficacité du casque
à vous protéger en cas d’accident, provoquant une
blessure grave ou la mort.
WARNUNG!
Lesen Sie diese Anleitung aufmerksam durch und
bewahren Sie sie sorgfältig auf. Bei Fragen zur
Verwendung oder Pflege Ihres Helms wenden Sie sich
an Ihren Einzelhändler. Falls Sie die Warnungen und
Hinweise dieser Anleitung nicht befolgen, kann das
die Schutzwirkung des Helms im Falle eines Unfalls
beeinträchtigen, was zu einer schweren oder tödlichen
Kopfverletzung führen kann.
ATTENZIONE!
Leggere con attenzione, capire e seguire le istruzioni
fornite in questo libretto e conservarlo in luogo sicuro
per potersene servire ulteriormente. In caso di dubbio
riguardo l’utilizzo o la manutenzione del casco, chiedere
l’aiuto o l’avviso del proprio rivenditore. Il non rispetto
delle precauzioni e raccomandazioni fornite in questo
libretto può provocare una mancanza dell’efficacità del
casco a proteggere in caso d’incidente, provocando una
ferita grave o la morte.
ATENCIÓN!
Lea atentamente, siga las instrucciones de este manual
y guárdelo en lugar seguro para futuras referencias. Si
tuviera cualquier duda sobre la utilización o cuidado
de su casco por favor diríjase a su establecimiento
habitual. No seguir los avisos y consejos de utilización
presentes en este manuscrito podría disminuir la
protección para la cual este casco esta diseñado,
pudiendo causar traumatismos craneales o incluso la
muerte en caso de accidente.
“This user’s manual and its images can not be considered as
contractual. SHARK reserves the right to improve the quality of pro-
ducon. The images contained in this document are SHARK’s exclusive
property. Any reproducon is forbidden“.
“Ce manuel d’ulisaon ainsi que les images contenues ne peuvent
être considérés comme contractuels. SHARK se réserve le droit d’amé-
liorer la qualité de la producon. Les images contenues dans ce docu-
ment sont la propriété exclusive de SHARK. Toute reproducon est
interdite“.
“Diese Bedienungsanleitung und seine Bilder sind nicht Vertragsbes-
tandteil. SHARK behält sich das Recht vor, die Qualität der Herstellung
zu verbessern.
Die in diesem Dokument enthaltenen Bilder sind der alleinige Besitz von
SHARK. Jede Vervielfälgung ist untersagt“.
“Questo manuale d’uso e le immagini in esso contenute non posso-
no essere considera come contrauali. SHARK si riserva il dirio di ot-
mizzare la qualità della produzione. Le immagini riportate nel presente
documento sono di proprietà esclusiva di SHARK. Riproduzione vietata“.
“Este manual del usuario y sus imágenes no pueden ser considerados
como contractuales. SHARK se reserva el derecho de mejorar la calidad de
la producción. Las imágenes contenidas en este documento son propiedad
exclusiva de SHARK. Prohibida toda reproducción».
OWNER’S MANUAL - MANUEL D’UTILISATION - BENUTZERHANDBUCH - LIBRETTO ISTRUZIONI - MANUAL DEL USUARIO

2
ENGLISH
PRECAUTIONS AND RECOMMENDATIONS
1. Even if the helmet meets or exceeds
international standards applicable to the
manufacture of helmets, always ride with
care. The helmet cannot fully protect the
user from all possible impacts at high
or low speeds. All safety equipment has
its limits, and a head injury can occur in
an accident, even if a helmet is worn.
However, to protect yourself from death or
permanent impairment due to a head injury,
it is essential that the helmet size fits your
head size and that the chinstrap is properly
tightened as described in this manual.
2. This helmet is designed to cushion the
impact through the partial destruction of
the helmet shell and/or of the internal
impact absorber. This damage may be
invisible. Therefore, if the helmet suffers an
impact, even if it is merely dropped on the
ground, it must be returned to be inspected,
replaced or destroyed, even if it does not
appear damaged. If in doubt, and if you
are unsure whether this rule applies to the
impact in question, contact your supplier
before using the helmet again.
3. Ahelmet, like all products, can deteriorate
over time depending on how it is used.
Please check the helmet for any signs of
deterioration or damage before each use.
The size of the helmet must always match
the size of your head. If this is not the
case, then the helmet has stretched and
must be replaced. Never wear a damaged
helmet. Even if the helmet is not damaged
or deteriorated, it is recommended that you
replace it five years after purchase.
4. Do not modify the helmet in any way.
Never pierce or cut any part of the helmet.
Any modification may damage the helmet,
thereby reducing its ability to protect you
from an impact.
5. Handle the helmet with care. Never sit
on it or throw it on the ground. Never ride
with your helmet hanging over any part of
your motorcycle.
6. Never use petroleum, petroleum
products, chemicals or any other solvent to
clean the helmet, shell or visor.Additionally,
your helmet should never be exposed to the
fumes from these solvents (for example,
by leaving it on your motorcycle’s fuel
tank cap). These chemicals could cause
invisible, serious damage to the helmet,
thus reducing its ability to protect you.
Only use mild soap, warm water and a soft
rag to clean and wipe down the helmet
and visor.
7. Never apply paint, stickers or adhesive
tape to the shell or visor. These could cause
invisible damage to your helmet and thus
reduce the helmet’s ability to protect you.
8. No modifications to the helmet must
affect its original design as manufactured.
Accessories must be installed according
to the helmet manufacturer’s instructions.
Only the accessories tested during the
helmet certification process guarantee that
the helmet’s performance, in terms of the
protection it provides when fitted with
these accessories, remains compliant with
its certification.
9. A reduction in hearing, in the field of
view, and in head movements will be
experienced when wearing the helmet.
Please adjust your riding accordingly.
10. Dry your helmet at room temperature.
Never expose it to temperatures above
approximately 160°F/70°C, which could
happen, for example, if your helmet is left
on the passenger seat or in the boot of
a car.
Always keep the helmet away from heat
sources, such as the exhaust pipe or the top
box of a motorcycle.
11. If you have any comments or questions
about the helmet, please contact SHARK or
your nearest supplier.
CAUTION! We do not guarantee this
product’s ability to fully protect the
user from all possible high- or low-speed
impacts or from potentially life-threatening
injuries. The helmet user recognises and
acknowledges that there are risks inherent
in riding a motorcycle, which risks are not
limited to impacts of any kind, at both high
or low speeds. By purchasing and using
this product, the user expressly, voluntarily
and knowingly assumes and accepts these
risks and releases SHARK from any and
all liability up to the maximum extent
permissible by law for any losses that may
result.

6
2
7
3
5
1
4
XS-53/54 cm S-55/56 cm M-57/58 cm
L-59/60 cm XL-61/62 cm XXL-63/64 cm
6a 6b
ENGLISH
HELMET ANATOMY
• Precautions and recommendations .............................................................................................. 2
• Helmet anatomy ............................................................................................................................... 3
• Choosing the right size .............................................................................................................. 4 - 5
• Morpho Pad ................................................................................................................................. 6 - 7
• Chinstrap ......................................................................................................................................8 - 9
• Visor -Pinlock® ...................................................................................................................... 10 - 13
• Sun visor .................................................................................................................................. 14 - 15
• Air stream - Vents .................................................................................................................. 16 - 17
• Anti-fog mask ..................................................................................................................................17
• Maintaining fabrics .........................................................................................................................18
• Anti-fog breath guard .......................................................................................................... 19 + 24
• Interior foams ......................................................................................................................... 19 - 23
• Easy-Fit .............................................................................................................................................25
• Intercom B902 SK ..........................................................................................................................25
• Legal information ............................................................................................................................26
1) VZ400 visor
2) Sun visor 4
3) Sun visor control buon
4) Upper vent
5) Lower vent
6) Chinstrap:
6a) Double D-ring fastener 6b) «Precise
Lock» fastener
7) Visor gripper and air stream
WARNING! When riding in France, the
highway code requires the use of safety
reectors (supplied separately in a pouch)
posioned in accordance with the appended
drawing.
WARNING! The USA imposes specic
regulaons; helmets with ECE cercaon
only must not be used in these territories unless
also DOTFMVSS 218-cered.

4
B
ENGLISH
CHOOSING THE RIGHT SIZE
WARNING! No helmet can
fully protect the user from all
possible impacts at high or low
speeds. However, for eecve pro-
tecon, the helmet must be the right
size and the chinstrap must be pro-
perly ghtened as described in the
manual. It is dangerous not to use a
helmet that ts properly or not to
ghten the chinstrap fastener cor-
rectly, as the helmet could come o
of your head in the event of an acci-
dent, resulng in serious or
life-threatening injuries.
Each helmet size from XS to XXL is
designed for a specic head size. To
measure your head circumference,
wrap a tape measure horizontal-
ly around your head, 2.5 cm above
your eyebrows. If the measurement
falls between two given sizes, try the
smaller helmet rst.
However, since skull morphologies
vary, the size references are given
solely to guide you towards choosing
the most suitable size for your head.
For eecve protecon, check that
the helmet ts your head properly.
When choosing a new helmet, check
that your head is rmly seated in
the helmet, with the top of the eld
of view posioned above your eye-
brows. Also check that the chins-
trap is properly ghtened as shown
overleaf.
1. Your head must be well encased
in the helmet and your cheeks must
provide a good hold. If this is not the
case, the chosen helmet is too big. In
this case try a smaller size. See Fig. A.
2. With the chinstrap properly ghte-
ned, make sure that the helmet does
not move too much up and down or
sideways. You should feel your skin
pull on your head and face when you
move the helmet. If this is not the
case, the chosen helmet is too big. In
this case try a smaller size. See Fig. B.

5
CD
ENGLISH
CHOOSING THE RIGHT SIZE
3. With the chinstrap ghtened, grab
the back of the helmet by the base
and try to pull it o your head in a
twisng moon.
Then try to remove the helmet by
grasping it by the base of the chin
guard.
This must be done vigorously. If the
helmet starts to come o, the chosen
helmet is too big. In this case, try a
smaller size.
4. Tilt your head forwards as far as
possible. The base of the chin guard
should not touch your chest.
See Fig. C.
5. Tilt your head backwards as far
as possible. The base of the helmet
should not touch your back.
See Fig. D.
Hair must not be rolled or ed up in-
side the helmet. Do not put anything
in/on your hair inside the helmet. Do
not add anything to the interior of the
helmet to adjust its posion on your
head.
If you have any quesons about how
to choose the right helmet size, ask
your retailer for advice. Each of these
steps must be repeated throughout
the helmet’s life, as comfort foams
can change over me. If the helmet
no longer ts properly during its life,
it should be replaced.
WARNING! Never lend your
helmet to someone else without
ensuring that it ts that person, by
following the instrucons in this
manual.
WARNING! If you nd the
helmet does not t perfectly aer
following these instrucons, DO
NOT USE IT. In such a case, choose
a dierent size or model.

6
1
2
ENGLISH
Your D-SKWAL 3 features a brand new occipital adjustment system called
the «Morpho Pad». This removable and washable strip allows the helmet to
be better adjusted to fit your head at the nape of the neck according to your
morphology. The strip is positioned behind the comfort liner at the nape of the
neck (see images 1 & 2).
3 - Slide the Morpho Pad through its two securing straps to remove it.
MORPHO PAD

7
4
1
2
ENGLISH
4 – The Morpho Pad has now been removed. The comfort liner can be
re-installed, see p. 20.
1 – Slide the Morpho Pad through its two securing straps.
2 - The Morpho Pad is now operational. The comfort liner can be re-installed,
see p. 21.
MORPHO PAD

8
DDFF
ENGLISH
CHINSTRAP
Depending on the version and country,
your D-SKWAL 3 helmet is equipped with
a «Precise Lock» ratchet chinstrap or with a
double D-ring chinstrap fastener.
PRECISE LOCK
The «Precise Lock» ratchet system allows for
fine and precise adjustment due to its long,
ladder portion.
However, check that the length of the
chinstrap is suitable for your morphology
before purchasing. Adjust the chinstrap
length using the slider (Fig. A, B, C, D). Put
on your D-SKWAL 3 helmet and attach the
retention system. When the «Precise Lock»
is set to the middle position, the chinstrap
should be properly tightened under the
chin to ensure that the helmet fits securely
without causing discomfort or pain.
To secure the chinstrap, simply push the
ladder strap into the slot in the ring strap
until it is perfectly taught (Fig. E). The ladder
strap engages and locks automatically.
To release the chinstrap, lift the lever (Fig.
F) and pull the ladder strap out of the ring
strap. Although the ladder strap allows the
fit to be refined for each use, it is important
to regularly check that the chinstrap length
setting is correct.
WARNING! Never ride with the
chinstrap unfastened or too loose,
even if the interior liner gives you a feeling
of support, as the helmet may come o in
the event of a fall.
Never apply lubricants, acids, grease
or solvents to any part of the chinstrap
fastener.
WARNING! In order to provide su-
cient protecon, this helmet must t
properly and be securely fastened.
Any helmet that has been subjected to a
violent impact must be replaced.
C H I N S T R A P

9
C
D
B
ENGLISH
WARNING! Never use the ring as
the only way of fastening the chins-
trap. In order to be properly ghtened, the
chinstrap must pass through the double-D
ring straps as instructed. Improper use of
the chinstrap can cause your helmet to
be thrown o in an accident, leaving your
head unprotected. Try to pull on the chins-
trap with your ngers. If the strap loosens
in any way, you have not fastened the
chinstrap properly in the
double-D ring straps. If this is the case,
repeat the steps shown opposite.
Never ride with the chinstrap unfastened,
improperly fastened or incorrectly po-
sioned. Although your cheeks give the
impression that the helmet is securely
held in place, it would be thrown o in an
accident, leaving your head unprotected.
If you have any doubts regarding the
helmet’s fastening system, do not use the
helmet. Ask your retailer for advice.
1. Slide the longer part of the chinstrap
through the two rings, making sure that the
comfort pad is properly positioned between
the strap and your neck. See Fig. A.
2. Use the end of the chinstrap to form a
loop around the outer ring and pass it back
through the inner ring. See Fig. B.
3. Pull on the end of the strap until the
chinstrap is tight. The chinstrap must be
positioned against your neck, not under your
chin. It should be as tight as possible without
hurting or hindering breathing. See Fig. C.
4. Clip in place the snap fastener at the free
end of the strap to prevent the strap from
flailing in the air. See Fig. D.
C H I N S T R A P

10
1
4
5
2
ENGLISH
P I N L O C K V I S O R ®
Your D-SKWAL 3 is equipped with a
brand-new quick visor removal system.
Press down twice on either side of the
visor at the same time to easily release
the visor.
1 - Open the visor by applying pressure
under the central visor grip.
4 – On each of the mechanical side plates,
on either side of the visor, locate the
button marked «R» on the right side and
«L» on the left side.
5 - Press the «L» & «R» buttons simul-
taneously, then use your other fingers
on either side to push beneath the visor
to remove it towards the back of the
helmet. Hold on to the visor at the end of
this process.
2 – Raise the visor.
3 – The visor must be opened as far as
it will go.

11
1
2
4
MIN MAX
ENGLISH
P I N L O C K V I S O R ®
1 – Place the visor on a work surface and
on a soft covering. Make sure that the
inner surface of the visor is clean. Use a
coin to check that the external adjustment
levers are positioned inwards (positioned
to «INT»).
2 – Place the PINLOCK® lens on the
visor. The silicone seal of the PINLOCK®
lens must be in contact with the inner
surface of the visor. The PINLOCK® logo
is visible on the outside of the visor.
3 - Insert one side of the PINLOCK® lens
into one of the two pins at the ends of the
visor and hold it in position.
4 – Extend and flex the visor and fit the
second side of the PINLOCK® lens into
the second pin. Release the visor so that it
reacquires its curved shape.
Clean the visor using mild liquid soap,
lukewarm water and a soft damp rag only.
Allow the visor to dry naturally before
reassembling it.
Your D-SKWAL 3 is pre-designed to fit
a PINLOCK®; a flexible plastic lens that
absorbs moisture. When fitted against
your visor, it offers very effective anti-
fog protection. It prevents the formation
of micro-droplets that compromise your
field of view.

12
5
7
6
MIN MAX
1
ENGLISH
5 - Make sure that the entire silicone
seal of the lens is adhered to the visor,
otherwise adjust the tension of the lens
using the external adjustment levers and
a coin.
6 – Turn the 2 levers outwards to increase
the tension of the lens (rotate towards
«MAX»).
1 – Locate the visor notch system on each
of the side plates of the visor mechanism.
7 - Remove the protective film from the
PINLOCK® lens before reinstalling the
visor on the helmet.
Clean the lens using mild liquid soap,
lukewarm water and a soft damp rag only.
Allow the lens to dry naturally before
reassembling it.
P I N L O C K V I S O R ®

2
4
ENGLISH
2 – Hold the visor in its raised position in
front of the side plates and bring it to rest
against the visor step on either side.
3 - The visor locks into place by pressing
on either side of the visor and moving it
downwards in a circular motion.
4 – An audible «click» confirms that the
visor is locked in position.
P I N L O C K V I S O R ®

14
1
2
ENGLISH
S U N V I S O R
Your D-SKWAL 3 is equipped with an
integrated sun visor with anti-fog
treatment for comfort in sunny and humid
weather. It is operated by the button
integrated into the upper vent.
1 - The sun visor is in the lowered
position when the button is positioned
forwards.
2 - To retract the sun visor, move the
button backwards.
To ensure its protection and prolong its
life, the outer surface of the sun visor
has been treated with an anti-scratch
and anti-fog coating.
For maintenance and cleaning, please
follow the same advice as for the outer
visor.

15
1
2
4
5
ENGLISH
S U N V I S O R
Lower the sun visor completely using the
upper control (see p.14).
1 - Gently pull the sun visor downwards
by hand to visually release its central
attachment.
2 - Remove the central fixing pin with
a screwdriver or any other pointed
instrument.
3 - Un-clip the sun visor sideways from
one side and then the other by pulling it
towards you and keeping it straight.
Perform the removal operations in reverse
order as follows.
Bring the sun visor handling button into
the down position; slide it towards the
front of the helmet (see p.14).
4 - Re-clip the sun visor sideways on one
side and then on the other.
5 - Using a screwdriver or a pointed
instrument of any kind, press the central
fixing pin from the inside and then re-clip
the sun visor by raising it slightly.

16
1
2
4
1
2
ENGLISH
A I R S T R E A M • V E N T S
For more everyday comfort, the visor lock
mechanism of the D-SKWAL 3 helmet has
been designed to offer an additional “air
stream” adjustment notch that guarantees
continuous ventilation that is much
appreciated in hot weather.
1 - Open the visor; lift the visor by the
central visor grip.
3 - Lower the visor until the central
visor grip comes to stop (without forcing)
against its lock button.
2 - Raise the visor as far as it will go.
4 - To close the visor completely, lower
it by pressing the visor grip on the lock
button.
1 - To open the lower vent, move the slider
to its bottom position.
2 - Return the slider to its top position to
close the vent.

17
1
2
1
2
ENGLISH
V E N T S • A N T I - F O G M A S K
1 & 2 - To use the upper vent, move the
button backwards (open) (1); forwards
(closed) (2).
helmet is equipped with a removable anti-
fog mask.
1 - Move it sideways in translation for
installation or removal.
2 - Make sure that the anti-fog mask is
correctly clipped into place.

18
ENGLISH
F A B R I C S
CLEANING THE INTERIOR
The inner fabric parts are washable.
To avoid causing damage, please
closely follow the instructions
below:
The cheek pads and comfort
liner must be washed by hand in
lukewarm soapy water (at approx.
30°). Do not use aggressive
detergents. Instead, use either a
small dose of a mild detergent or
household soap. Fabrics and foams
must be completely dry before use.
Drying must take place at room
temperature. Never iron the fabric
parts. For leather-like or fabric
parts that are integral with the
safety components, use a sponge
or rag slightly dampened with a
little household soap, then rinse
with clean water.
Avoid using too much water on
polystyrene components.
It is important to check that all
interior parts are completely dry
before using the helmet.
WARNING! Damage to the
interior foams will compromise
the proper fit of your helmet. If it
no longer fits your head, the helmet
can come off, leaving your head
unprotected and causing serious
and potentially life-threatening
injuries.
FABRICS
Comfort foams and fabrics used for
the D-SKWAL 3 will allow you to
fully appreciate the performance of
your helmet. The parts that come
into contact with your skin are made
of a fabric that guarantees a pleasant
feel, good absorption of perspiration
and good resistance to ageing. Our
fabrics in contact with the skin are
treated to limit the spread of bacteria,
and thus reduce bad odours.
WARNING! Although selec-
ted for their resistance and
durability, all parts of the inner
lining are subject to normal wear
and tear depending on how you care
for and maintain your helmet, how
long it is used for, and the acidity
of your perspiration. If you notice
any ageing, we recommend repla-
cing your interior liners in order to
keep your helmet perfectly clean
and comfortable over time.
Your retailer can provide repla-
cement parts, as well as optional
cheek pads of varying thicknesses
and densities if the standard choice
does not fit the morphology of your
face.
WARNING! Every time you
put on your helmet, check that
it fits your head properly.

19
1
2
1
2
ENGLISH
ANTI-FOG BREATH GUARD • INTERIOR FOAMS
The breath guard strongly reduces air
turbulence and contributes to ensuring
that the helmet remains perfectly
soundproof. However, it can be removed
as follows :
One side at a time and then centrally, pull
the guard towards you to release it from
its location (1 to 3).
1 - Open the main visor.
2 - Turn the helmet over and undo each
cheek pad, one after the other.
Un-clip each cheek pad from each of its 3
fixing slots in the following order: the rear
end, then the middle, and finally the front.
Pull into the helmet.

20
4
1
2
3 - Turn the helmet over again to more
easily undo two front snap fasteners, one
side velcro fastener and one rear snap
fastener on each cheek pad. Hold the two
velcro surfaces on either side in place as
much as possible in order to gently loosen
the area (A).
4 - Completely remove each of the cheek
pads from the inside by sliding them onto
each end of the chinstrap while turning
the helmet over if necessary.
ENGLISH
I N T E R I O R F O A M S
1 & 2 - Slide your hand underneath the
back of the comfort liner and pull it
towards you on both sides to release the
comfort liner from its two clip fasteners.
Table of contents
Languages:
Other Shark Motorcycle Accessories manuals

Shark
Shark Heritage User manual

Shark
Shark RACE-R PRO GP 06 User manual

Shark
Shark Nano User manual

Shark
Shark SKWAL 2 User manual

Shark
Shark Vision - R User manual

Shark
Shark Racer-R User manual

Shark
Shark Explore-R User manual

Shark
Shark Spartan GT Carbon User manual

Shark
Shark ATV-DRAK User manual

Shark
Shark SKWAL 2 User manual

Shark
Shark Evoline 3 Series User manual

Shark
Shark S 700 User manual

Shark
Shark EvoLine User manual

Shark
Shark S 600 User manual

Shark
Shark DRAK User manual

Shark
Shark Spartan Carbon User manual

Shark
Shark Vancore User manual

Shark
Shark SPEED-R User manual

Shark
Shark RSR2 User manual

Shark
Shark SX 2 User manual