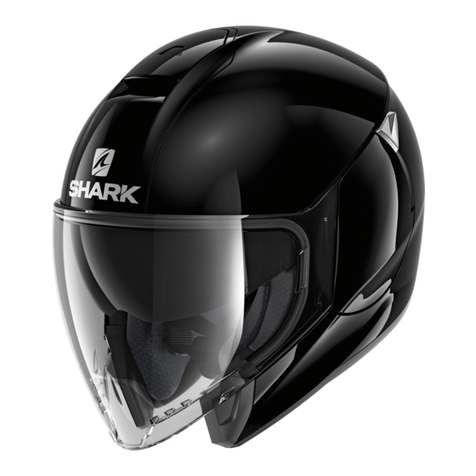
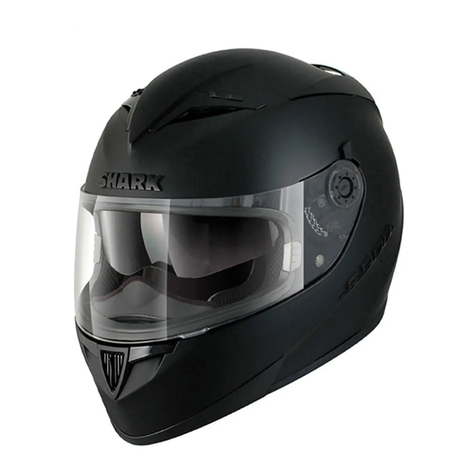
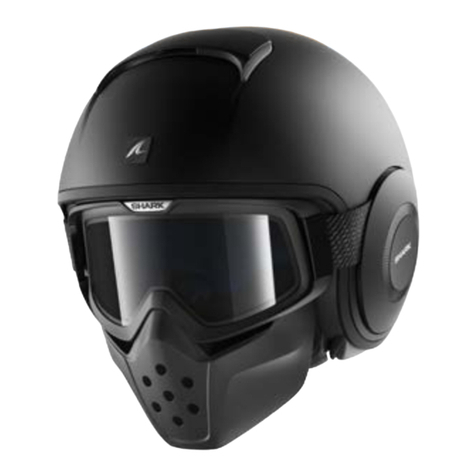
Shark RIDILL User manual

RIDILL
Ridill-V01a-110718
OWNER’S MANUAL
WARNING
Carefully read, understand and follow the
instructions provided in this manual, and
keep it in a safe place for future reference. If you
have any doubt whatsoever regarding the use
or care of your helmet, please see your retailer
for assistance or advice. Failure to follow the
warnings and instructions provided herein can
result in the failure of the helmet to protect you
in an accident, resulting in a head injury or death.

2
Thank you for purchasing this SHARK RIDILL
helmet.
We are certain that you will be completely sa-
tisfied with this helmet.
Meeting the most rigorous international safety
standards, however this helmet cannot protect
the user in every circumstance, it is so recom-
mended to drive carefully.
Your helmet has been designed for a motorcy-
cle use only and not for any other purpose.
This SHARK RIDILL helmet is approved and
meets the ECE R 22/05 standards, so it meets the
demands imposed in every country recognizing
this regulation on its own territory.
WARNING! The United-States have a spe-
cific regulation, the helmets ECE approved
only cannot be used in these territories without
the complementary DOT FMVSS 218 approval.
WARNING! For French traffic, the Highway
Code requires safety reflectors (supplied
separately in a packet) to be fitted in accordance
with the enclosed plan.
• Anatomy of the helmets .......................................................... 3
• A helmet in your size ..................................................................4 - 5
• Chin strap ..................................................................................6 - 7
• Visor ......................................................................................... 8 - 9
• The sun shield ........................................................................10 - 13
• Textile parts............................................................................14 - 15
• Cleaning........................................................................................ 16
• Ventilations.............................................................................17 - 18
• 5 year guarantee........................................................................... 19
• Legally required information.......................................................... 20
CONTENTS
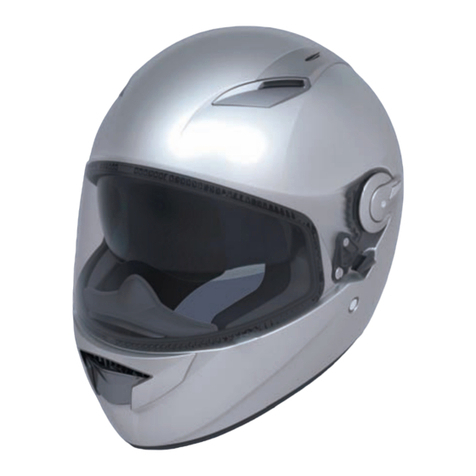
ANATOMY OF THE HELMET

3
1
2
3
4
5
7
8
1) Visor
2) Sun shield
3) Sun shield mechanism handle
4) Upper ventilation
5) Lower ventilation
6) Chin strap buckle
(according to versions and countries)
7) Base seal
8) Visor seal
WARNING! The United-States have a spe-
cific regulation, the helmets ECE approved
only cannot be used in these territories without
the complementary DOT FMVSS 218 approval.
WARNING! For French traffic, the Highway
Code requires safety reflectors (supplied
separately in a packet) to be fitted in accordance
with the enclosed plan.
• Anatomy of the helmets .......................................................... 3
• A helmet in your size ..................................................................4 - 5
• Chin strap ..................................................................................6 - 7
• Visor ......................................................................................... 8 - 9
• The sun shield ........................................................................10 - 13
• Textile parts............................................................................14 - 15
• Cleaning........................................................................................ 16
• Ventilations.............................................................................17 - 18
• 5 year guarantee........................................................................... 19
• Legally required information.......................................................... 20
6 - Double-D ring chinstrap buckle
6 - “Precise Lock“ chinstrap buckle
CONTENTS
ANATOMY OF THE HELMET

4
B
WARNING! No helmet can protect
the wearer from all foreseeable
high or low speed impacts. However, for
maximum protection, the helmet must be
of proper fit and the chin strap must be
securely fastened as described in this
manual. Failure to have a proper fit and
to securely fasten the chin strap is dange-
rous, as the helmet could come off in an
accident, resulting in severe head injury
or death.
CHOOSE YOUR SIZE
Each helmet is designed to corres-
pond to a head measurement (from for
XS up to XL). To measure your head size,
wrap a tape measure horizontally around
your head at a height of approximately
one inch (2.5cm) above your eyebrows.
If your head measurement falls between
two sizes, first try on the smaller helmet.
However, because of different head
shapes, this size reference can only be
considered as a guide. For maximum pro-
tection, it is necessary to check that the
helmet is well suited for the shape of your
head. When trying a brand new helmet,
make sure that your head is pushed into
the helmet as far as possible, with the
front part just above your eyebrows, and
with the chin strap securely fastened as
described on the next page.
1. The helmet should feel very snug all
around your head and fairly tight on the
cheek pads. If not, it is too big for you;
select a smaller size.
See figure A.
2. With the chin strap properly fastened
(see instructions), be sure that the helmet
cannot be moved excessively from side to
side or up and down.
You should feel the skin of your head and
face being pulled as you move the helmet.
If not, the helmet is too big for you; select
A HELMET IN YOUR SIZE

5
CD
XS 53/54
S55/56
M57/58
L59/60
XL 61
shapes, this size reference can only be
considered as a guide. For maximum pro-
tection, it is necessary to check that the
helmet is well suited for the shape of your
head. When trying a brand new helmet,
make sure that your head is pushed into
the helmet as far as possible, with the
front part just above your eyebrows, and
with the chin strap securely fastened as
described on the next page.
1. The helmet should feel very snug all
around your head and fairly tight on the
cheek pads. If not, it is too big for you;
select a smaller size.
See figure A.
2. With the chin strap properly fastened
(see instructions), be sure that the helmet
cannot be moved excessively from side to
side or up and down.
You should feel the skin of your head and
face being pulled as you move the helmet.
If not, the helmet is too big for you; select
A HELMET IN YOUR SIZE
a smaller size. See figure B.
3. Grasp the back of the helmet at the
base and attempt to pull the helmet
off your head. Next, push the helmet
upwards from beneath the chin
guard. You should push and pull with
relatively significant force. If the helmet
starts to come off, the helmet is too big
for you; select a smaller size.
4. Bend your head forward as far as pos-
sible. The chin guard must not touch your
chest. See figure C.
5. Bend your head backwards as far as
possible. The helmet shell must not touch
your back. See figure D.
Never wrap your hair inside the
helmet, or place anything in or on your
hair inside the helmet. Never insert
padding to modify the position of the
helmet on the head.
If you have any questions about properly
sizing your helmet, see your retailer for
assistance.
Each of these tests must be repeated
throughout the life of the helmet, as the
comfort padding may wear or change
over time. If, during the life of your
helmet, your helmet does not maintain
the correct fit, you must replace the
helmet.
WARNING! Never lend your helmet
to others without insuring a proper
fit in accordance with these instructions.
WARNING! If you cannot obtain
a proper fit in accordance with
these instructions, DO NOT USE THE
HELMET. Select a different helmet size or
model.
Sizing (cm)
A HELMET IN YOUR SIZE

6
ABC
DEF
CHIN STRAP
Depending on the various versions and the
country concerned, your SHARK RIDILL helmet
is equipped with a chin strap with a “Precise
Lock” rapid buckle with a snap lock or one with a
double-D ring. Proper use of the chin strap is cri-
tical for proper performance of the helmet. Never
alter your chin strap in any way. For example, never
cut it or add holes, or apply buttons, studs or other
items to your chin strap. During the life of your
helmet, be sure that the chin strap never suffers
any type of abrasion or cut, and that its total length
does not change. If it does, replace your helmet.
PRECISE LOCK
The “Precise Lock” snap lock system gives you
precise and accurate adjustment because of the
considerable length of its notched section.
However, it is essential on purchase to adapt the
length of the chin strap to your measurements.
Adjust the length of the strap using the adjusting
buckle (Figs. A, B, C and D).
Choose your SHARK RIDILL helmet and attach
the holding system. When the “Precise Lock” is
adjusted to the medium position, the chin strap
must be correctly tensioned under the chin to
hold the helmet firmly without causing you any
discomfort or pain.
To fasten the chin strap, all you have to do is to
thread the tongue into its place on the buckle until
tension is perfect (Fig. E). The tongue connects and
is automatically blocked.
To release the chin strap, you have to pull on the
lever (Fig. F) and remove the tongue from the buc-
kle. Although the notched tongue enables you to
change the adjustment precisely on each use, it is
important to check frequently that the adjustment
of the strap length is correct.
WARNING! Never ride with the chin strap loose
or insufficiently tightened. Even though the
interior padding gives you the impression of being
held, your helmet risks coming off in a fall.
Never apply lubricating or acid products or grease or
solvents to the chin strap buckle parts.
DOUBLE-D RING
A - Slide the long part of the chin strap through
the two D rings, positioning the comfort pad correctly
between the chin strap and your neck.
B - Then bring the end of the chin strap
back through the lower of the two D rings
CHIN STRAP
7
B
C
D
A
Choose your SHARK RIDILL helmet and attach
the holding system. When the “Precise Lock” is
adjusted to the medium position, the chin strap
must be correctly tensioned under the chin to
hold the helmet firmly without causing you any
discomfort or pain.
To fasten the chin strap, all you have to do is to
thread the tongue into its place on the buckle until
tension is perfect (Fig. E). The tongue connects and
is automatically blocked.
To release the chin strap, you have to pull on the
lever (Fig. F) and remove the tongue from the buc-
kle. Although the notched tongue enables you to
change the adjustment precisely on each use, it is
important to check frequently that the adjustment
of the strap length is correct.
WARNING! Never ride with the chin strap loose
or insufficiently tightened. Even though the
interior padding gives you the impression of being
held, your helmet risks coming off in a fall.
Never apply lubricating or acid products or grease or
solvents to the chin strap buckle parts.
WARNING! Never use the strap loop to
secure your helmet to your head. In order to
be properly fastened, you must thread the strap
through the double-D-rings. Failure to properly
use the double-D-rings will cause your helmet
to become dislodged during an accident, leaving
your head completely unprotected and resulting
in severe head injury or death. Try to pull down
on the chin strap with your fingers. If the strap
loosens in any way, you have not properly tightened
the chin strap with the double-D rings.
Repeat the steps above. Never ride with the chin strap
loose, improperly fastened or improperly positioned.
Even though the comfort padding gives you the
impression that the helmet is securely held in place,
it will come off in an accident, leaving your head
completely unprotected.
If you have any doubt concerning the fastening
system of your helmet, do not use the helmet. Contact
your dealer for assistance.
DOUBLE-D RING
A - Slide the long part of the chin strap through
the two D rings, positioning the comfort pad correctly
between the chin strap and your neck.
B - Then bring the end of the chin strap
back through the lower of the two D rings
as shown in the diagram.
C - Pull the strap until you feel resistance from
the strap and it is held in place under your chin
without being too tight, so that you have no
difficulty in breathing.
D - Slide the free end of the chin strap into the
plastic strap loop on the comfort padding, in order
to prevent the strap from fluttering in the wind.
CHIN STRAP

8
VISOR
REMOVAL
Removing the visor:
Press on the centre of the button (1)
while pushing the visor to the front of
the helmet (2). Repeat the operation on
the other side.
WARNING! If you are not sure that
you properly replaced the visor, do not use
the helmet. The visor could suddenly and
without warning become detached from
the helmet while riding, causing you to lose
control of your motorcycle, resulting in an
accident, personal injury, or death.
Contact your retailer for any assistance or
advice. Do not ride with an open visor and
do not try to open or adjust the visor while
riding. The visor could suddenly and without
warning become detached from the helmet,
leaving your eyes and face unprotected. In
addition, your head could be pulled to the
side, causing you to lose control of your
motorcycle. These events could cause you to
lose control of your motorcycle, resulting in
an accident, personal injury or death.

9
VISOR
REMOVAL
RE PLACE
the helmet (2). Repeat the operation on
the other side.
Fitting the visor:
With the visor in open position, place the
visor buttons in the slides provided on
the plate (3). With your hand flat on the
visor push until it clicks into place (3).
leaving your eyes and face unprotected. In
addition, your head could be pulled to the
side, causing you to lose control of your
motorcycle. These events could cause you to
lose control of your motorcycle, resulting in
an accident, personal injury or death.
WARNING! Tinted or dark visors
should never be used at night or
under poor visibility conditions as they
reduce your ability to see. Never ride with
a fogged visor.
WARNING! If your visor no longer pro-
vides you with clear visibility after
a period of service, you must immedia-
tely replace it. Never ride if your visor is
scratched, dirty, foggy or with your vision
obscured in any way. Always ride with perfect
visibility.

10
B-1
C-1
A-1
REMOVAL
A/ Removal
- Move the sun shield to the lower position
- Move the sun visor as indicated by the ar-
row to release the hook (Fig. A1).
- Pull the sun shield delicately downward
and unclip the sun shield at
the sides on each side (Fig. B1-C1).
SUN SHIELD
REMOVAL
WARNING! This sun visor can-
not be used when the light is
strong and you ride in an area where
you may have a sudden change in
visibility (ex tunnel). In all cases where visi-
bility is reduced, the beginning or end of the
day, night, rain or fog, the sun visor must be
set high to not to degrade your vision.
WARNING! If your visor and/or
sun shield no longer provides you
with clear visibility, you must immediately
replace it. Never ride if your sun shield is
scratched, dirty, foggy or with your vision
obscured in any way. Always ride with per-
fect visibility. Never ride with the sun shield
as eye protection. You must always ride with
the visor in the lowered position.
WARNING! If you are not sure that
you properly replaced the sun shield,
do not use the helmet. The sun shield
could suddenly and without warning become
detached from the helmet while riding, cau-
sing you to lose control of your motorcycle,
resulting in an accident, personal injury, or
death. Contact your retailer for any assis-
tance or advice.

11
A-1
B-1
C-1
REMOVAL
A/ Removal
- Move the sun shield to the lower position
- Move the sun visor as indicated by the ar-
row to release the hook (Fig. A1).
- Pull the sun shield delicately downward
and unclip the sun shield at
the sides on each side (Fig. B1-C1).
REPLACEMENT
Carry out the previous operation in reverse
order:
- Move the handling button to the lower
position.
- Clip the sun shield on at one side and then
the other (Figs. A1–B1).
- Using a screwdriver or similar pointed
instrument, apply pressure to the central fixing
button and then clip the sun shield back on
by lifting it slightly (Fig. C1).
SUN SHIELD
REMOVAL
REPLACE
WARNING! This sun visor can-
not be used when the light is
strong and you ride in an area where
you may have a sudden change in
visibility (ex tunnel). In all cases where visi-
bility is reduced, the beginning or end of the
day, night, rain or fog, the sun visor must be
set high to not to degrade your vision.
WARNING! If your visor and/or
sun shield no longer provides you
with clear visibility, you must immediately
replace it. Never ride if your sun shield is
scratched, dirty, foggy or with your vision
obscured in any way. Always ride with per-
fect visibility. Never ride with the sun shield
as eye protection. You must always ride with
the visor in the lowered position.
WARNING! If you are not sure that
you properly replaced the sun shield,
do not use the helmet. The sun shield
could suddenly and without warning become
detached from the helmet while riding, cau-
sing you to lose control of your motorcycle,
resulting in an accident, personal injury, or
death. Contact your retailer for any assis-
tance or advice.

12
ATTENTION • WARNING
• ACHTUNG • ATTENZIONE • ATENCIÓN
LE PARE-SOLEIL
Le casque SHARK RIDILL est équipé d’un
pare-soleil intégré à commande extérieure.
ATTENTION : ce pare-soleil ne peut être utilisé
que lorsque la luminosité est forte et que vous ne
circulez pas dans une zone où vous risquez d’avoir
un changement brusque de visibilité (tunnel par
exemple). Dans tous les cas où la visibilité est
réduite, début ou fin de journée, nuits, temps de
pluie ou de brouillard…, le paresoleil doit être en
position haute pour ne pas dégrader votre vision.
N’utilisez jamais le pare-soleil sans l’écran comme
seule protection. Vous devez toujours rouler avec
l’écran en position basse.
THE SUN SHIELD
The SHARK helmet RIDILL is equipped with an Inte-
gral sun shield with external controls.
WARNING: This sun shield can be used only in
bright glare and when you are not riding in an
area in which you risk having a sudden change in
visibility (a tunnel, for example). In all situations of
reduced visibility, at the beginning or end of the
day, at night, when it is raining or foggy, etc. the
sun shield must be kept in the high position so that
your vision is not impaired. Never use sunshield as
unique protection, without the main visor. You must
always ride with visor down.
SONNENBLE NDE
Der SHARK Helme RIDILL ist mit einer integrierten
Sonnenblende mit Außensteuerung ausgestattet.
ACHTUNG: Diese Sonnenblende kann nur benutzt
werden, wenn das Licht ausreichend hell ist und Sie
nicht in einem Bereich fahren, in dem ein plötzlicher
Sichtbarkeitswechsel stattfinden kann (z. B. Tun-
nel). In allen Fällen, in denen die Sichtbarkeit
eingeschränkt ist, also morgens und abends,
nachts, bei Regenfällen oder Nebel... muss sich die
Sonnenblende in der hohen Position befinden,
damit Ihre Sicht nicht eingeschränkt wird.
Verwenden Sie das Sonnenvisier nie als alleinigen
Schutz, also ohne das eigentliche Visier. Fahren Sie
stets mit geschlossenem Visier.
PARA SOLE
Il casco SHARK RIDILL è provvisto di parasole inte-
grato a comando esterno.
ATTENZIONE: questo parasole può essere utilizzato
solamente in caso di luce intensa e non deve essere
attivato qualora ci sposti in zone in cui non sussista
il rischio di cambio repentino di visibilità (ad es. nei
tunnel). In tutti i casi di visibilità ridotta, a inizio
o fine giornata, di notte, in caso di pioggia o di
nebbia… il parasole deve rimanere in posizione
sollevata in modo tale da non ridurre la visibilità.
Non utilizzate mai il visierino solare da solo, come
protezione utilizzate anche la visiera principale.
Dovete sempre condurre con la visiera principale
abbassata.
EL PARA SOL
El SHARK casco RIDILL está equipado con un
parasol integrado con mando exterior.
ATENCIÓN: este parasol solamente puede utilizarse
con gran luminosidad y cuando no se circule por
una zona en la que se corre el riesgo de que la
luminosidad cambie bruscamente (túnel, por
ejemplo). En todos los casos en los que la visibilidad
es reducida, al comenzar o finalizar el día, noche,
lluvia o niebla… el parasol debe estar en posición
alta a fin de no degradar la visón.
Nunca utilice la pantalla solar iterior como ùnica
proteccion sin la pantalla exterior. Siempre debe
conducir con la pantalla cerrada.
SUN SHIELD

13
THE SUN SHIELD
The RIDILL is equipped with an Integral sun
shield with external controls.
WARNING!This sun shield can be used only
in bright glare and when you are not riding in
an area in which you risk having a sudden change
in visibility (a tunnel, for example). In all situations
of reduced visibility, at the beginning or end of the
day, at night, when it is raining or foggy, etc. the sun
shield must be kept in the high position so that your
vision is not impaired.
Warning! If your visor and/or sun shield no
longer provide you with excellent visibility
after a period of service, it is absolutely essential
for you to replace them. We advise you always to
ride with perfect visibility. Never use sunshield as
unique protection, without the main visor. You must
always ride with visor down as described in pre-
vious section.
SUN SHIELD

14
B
C
A
ED
TEXTILE PARTS
TEXTILE PARTS
REMOVAL
1/ Ensure that the 2 sides of the chin strap are not
joined by the fastening buckle;
2/ Remove the cheek pads from their support by de-
taching the snaps and release the 2 sides of the chin
strap from these cheek pads (A-B-C) ;
3/ Extract the support of the front lining applying a
pressure towards the rear (D).
4/ Remove the nape shield from its seat, the entire
lining is now detached from the helmet (E).
WARNING!
If you have any doubt what-
soever regarding the removal or replace-
ment of the interior padding, DO NOT USE YOUR
HELMET. Contact your retailer for assistance or
advise. NEVER use your helmet with any part of
the interior padding removed. The helmet will not
protect you in an accident.
REPLACE

15
BA C
FD
E
TEXTILE PARTS
TEXTILE PARTS
REMOVAL
WARNING!
If you have any doubt what-
soever regarding the removal or replace-
ment of the interior padding, DO NOT USE YOUR
HELMET. Contact your retailer for assistance or
advise. NEVER use your helmet with any part of
the interior padding removed. The helmet will not
protect you in an accident.
Follow the instructions for the removal, starting
from the end:
1/ Insert the front part in its base, make you sure that
the 3 clips are properly grasped (a) ;
2/ Place the nape shield in its seat, centring it correc-
tly in the helmet (B) ;
2bis / Place the lining on the Velcro parts of the EPS.
3/ Thread each side of the chin strap in the proper
seat in the cheek pads (C) ;
4/ Press the cheek pads until you hear the click of the
snaps, ensure that the bracket of the nape shield is
correctly positioned (D-E-F) ;
5/ Always make sure that there is no crease of
the chin straps under the cheek pads.
WARNING! Damaged interior padding
will compromise the fit of your helmet on
your head and could allow the helmet to come
off your head in an accident, resulting in a head
injury or death.
REPLACE

16
TEXTILE PARTS - CLEANING
THE TEXTILES
The RIDILL make it easy for you to appre-
ciate fully the performance of your helmet.
The parts in contact with the skin are made
in a fabric that is guaranteed to feel pleasant,
to absorb perspiration well and to resist wear
satisfactorily. We treat surfaces to limit the
risk of mould and bacteria.
WARNING! Although they are selected
for their quality of resistance and satis-
factory wear, all the interior padding is subject
to normal wear depending on use and care
and maintenance, the length of use and also
the degree of acidity of your perspiration. If
you note any wear, we
advise you to replace the interior padding
in order to keep your helmet perfectly clean
and comfortable.
Your SHARK supplier can propose you with
replacement parts and also offer you cheek
pads of different thicknesses and densities,
should the standard selection not correspond
to the contours of your face.
CLEANING THE INTERIOR
The interior textile parts are washable; it is im-
portant to follow the instructions below scru-
pulously to avoid damaging them:
The cheek pads and head section must be
hand washed in warm, soapy water (about
30°). Do not use aggressive detergents but
either a product for delicate materials in
low dilution or household soap. It is essential
to dry textile and foam parts completely before
using them. They must be dried at room tem-
perature. Never iron textile parts. For parts with
a leather appearance or textiles attached to
safety elements, use a slightly damp sponge or
cloth and household soap and rinse with clean
water. Avoid allowing too much water to
come into contact with polystyrene parts.
WARNING! It is essential to ensure that
all interior parts are perfectly dry before
using the helmet.

17
2
1
VENTILATIONS
LOWER VENTILATION.
The principal function of this air intake
is to direct a flow of fresh air over the inte-
rior surface of the visor in order to limit the
risk of misting. The fresh air di
fused cuts off contact with the
hot air emitted by breathing
or even by the head inside the helmet.
To open (1) or close (2) the lower ventila-
tion, press the button as indicated.
TEXTILE PARTS - CLEANING
CLEANING THE INTERIOR
The interior textile parts are washable; it is im-
portant to follow the instructions below scru-
pulously to avoid damaging them:
The cheek pads and head section must be
hand washed in warm, soapy water (about
30°). Do not use aggressive detergents but
either a product for delicate materials in
low dilution or household soap. It is essential
to dry textile and foam parts completely before
using them. They must be dried at room tem-
perature. Never iron textile parts. For parts with
a leather appearance or textiles attached to
safety elements, use a slightly damp sponge or
cloth and household soap and rinse with clean
water. Avoid allowing too much water to
come into contact with polystyrene parts.
WARNING! It is essential to ensure that
all interior parts are perfectly dry before
using the helmet.

18
1
2
A
B
UPPER VENTILATION.
The upper air intake (Fig. A) allows air to enter onto
the upper part of the head and thus renew the air in
the head section. The channels incorporated in the
internal shock absorbers facilitate the circulation
of air over the surface of the head.
The quality and design of the textile comfort parts
contribute to the proper distribution of air. The
position of the upper ventilation system is de-
signed to optimise the effectiveness of its intake
of air. Depending on the type of your motorbike,
the fairing may reduce the effectiveness of this
ventilation.
The ventilation is in the open position when the
tongue is pushed backwards (1) and closed when
the tongue is pushed forwards (2).
Warning! Do not open or close any vents
while operating your motorcycle. You
could lose control of your motorcycle, resul-
ting in an accident, personal injury or death.
VENTILATIONS
5 YEARS WARRANTY
5 YEARS WARRANTY
You have recently purchased a SHARK helmet for your safety
and pleasure. It has been designed with the greatest care to
satisfy your every requirement. For your safety, and that of
your passenger, you must respect all the rules of prudence
when using your two-wheeled vehicle. The SHARK 5-YEARS
warranty guarantees the initial purchaser that any possible
manufacturing fault or material defect will be covered by the
SHARK warranty.
Limitations
If during the warranty period (5 years as from the date of
purchase), a problem covered by the warranty were to arise,
SHARK, through the intermediary of its sales network, under-
takes to repair or replace any defective components, up to a
maximum limit which is the purchase value of the helmet.
Any labour costs are normally paid by the SHARK network,
but are submitted for approval prior to the work being car-
ried out. If the repair requires components to be dispatched
incurring transportation costs, the SHARK network shall cover
these costs up to a limit which is the cost of transport by the
national postal service at the normal rate.
Exclusions
This warranty only covers problems related to materials or
manufacturing. SHARK cannot be held liable with regard to
the product in the following cases :
Any damage following
1) a fall or accident
2) a technical modification made by the user or a third party
(glue, adhesives, paint, screws, etc.)
3) use of or contact with: harmful chemical products (inclu-
ding methylated spirits on the visor treatments), or an intense
heat source
4) incorrect use: abnormal conditions (e.g. underwater), lack
of maintenance or care
5) ageing due to normal wear of the inner fabrics or foams,
the appearance of the external parts, or the visor (scratches,
marks, etc.)
6) abnormal and prolonged exposure to ultra-violet light, in
particular for the decorative colours. In addition, SHARK can-
not consider subjective considerations related to use of the
helmet as defects covered by the warranty : problems with
comfort, size, noise or whistling, aerodynamics, etc.

19
5 YEARS WARRANTY
5 YEARS WARRANTY
You have recently purchased a SHARK helmet for your safety
and pleasure. It has been designed with the greatest care to
satisfy your every requirement. For your safety, and that of
your passenger, you must respect all the rules of prudence
when using your two-wheeled vehicle. The SHARK 5-YEARS
warranty guarantees the initial purchaser that any possible
manufacturing fault or material defect will be covered by the
SHARK warranty.
Limitations
If during the warranty period (5 years as from the date of
purchase), a problem covered by the warranty were to arise,
SHARK, through the intermediary of its sales network, under-
takes to repair or replace any defective components, up to a
maximum limit which is the purchase value of the helmet.
Any labour costs are normally paid by the SHARK network,
but are submitted for approval prior to the work being car-
ried out. If the repair requires components to be dispatched
incurring transportation costs, the SHARK network shall cover
these costs up to a limit which is the cost of transport by the
national postal service at the normal rate.
Exclusions
This warranty only covers problems related to materials or
manufacturing. SHARK cannot be held liable with regard to
the product in the following cases :
Any damage following
1) a fall or accident
2) a technical modification made by the user or a third party
(glue, adhesives, paint, screws, etc.)
3) use of or contact with: harmful chemical products (inclu-
ding methylated spirits on the visor treatments), or an intense
heat source
4) incorrect use: abnormal conditions (e.g. underwater), lack
of maintenance or care
5) ageing due to normal wear of the inner fabrics or foams,
the appearance of the external parts, or the visor (scratches,
marks, etc.)
6) abnormal and prolonged exposure to ultra-violet light, in
particular for the decorative colours. In addition, SHARK can-
not consider subjective considerations related to use of the
helmet as defects covered by the warranty : problems with
comfort, size, noise or whistling, aerodynamics, etc.
SHARK cannot be held liable for the temporary non-availa-
bility of the helmet while it is being enhanced to satisfy the
needs of its owner. In all cases, the maximum warranty period
is 5 years. Replacement of a component during this period
does not prolong this period.
Procedure
When the helmet is sold go to our website www.shark-
helmets.com in order to activate your warranty.
All warranty claims must be made to the SHARK dealer that
sold the helmet.
For a warranty claim to be considered, the purchaser must
notify the dealer of the problem that has arisen, and return
the helmet that is the subject of the claim, together with the
warranty card filled out when the helmet was purchased. This
warranty does not affect in any way the statutory rights of the
purchaser as stipulated by directive 1999/44CE.
The effects of this specific and limited warranty shall
come to an end after a period of 5 years as from the
date of purchase. After this period, if you continue to
use a helmet regularly, we recommend that to bene-
fit from optimum protection and comfort you should
replace your helmet. This is because certain external
factors - general wear, certain impacts - could be prejudicial
to the safety characteristics of this essential piece of protec-
tive equipment.
Limit SHARK reserves the right to carry out work within the
terms of the warranty using replacement parts from the most
recent version compatible with the model concerned, and is
unable to guarantee perfect harmonisation of the paint or
decorative elements associated with specific production runs
and/or limited editions. In addition, the natural deterioration of
colours over a period of time can cause mismatching in the
adaptation of colours of spare parts.
If SHARK is unable to carry out the repair for technical reasons
or because a component is not available, SHARK undertakes
to make the customer an advantageous offer, taking account
of the age of the helmet, consisting in either an identical new
helmet or an equivalent model manufactured at the time of
the repair, if the original model is no longer available.
This warranty is only valid for european continent.

LEGAL INFORMATION: this helmet was specifically
designed for motorcycle use. It is not to be subjected to any tech-
nical modification. In order to offer an adequate level of protec-
tion, this helmet has to be properly adjusted and securely fitted.
Any helmet which has been subjected to a severe impact must
be replaced.
CAUTION: Do not apply any paint, stickers, petrol or any other
solvent to this helmet. Only the visors, which have been appro-
ved N°E11-050439 and marketed under SHARK’s reference
VZ67 can be used with this helmet. This visor is made of injected
polycarbonate.To keep the good optical quality of the visor and
the coatings do not use any solvent, petrol, abrasive paste or si-
milar products for cleaning. We advise to use a soft rag with cool
water and mild soap. Visors printed “DAYTIME USE ONLY” must
not be used at night or in poor visibility conditions.
Other manuals for RIDILL
1
Table of contents
Other Shark Motorcycle Accessories manuals

Shark
Shark SK User manual

Shark
Shark VARIAL RS Installation instructions

Shark
Shark SKWAL 2 User manual

Shark
Shark SPEED-R User manual

Shark
Shark Explore-R User manual

Shark
Shark DRAK User manual

Shark
Shark Race-R PRO User manual

Shark
Shark S 700 User manual

Shark
Shark Raw User manual

Shark
Shark Vision-R User manual

Shark
Shark Vancore User manual

Shark
Shark OpenLine User manual

Shark
Shark D-SKWAL 3 User manual

Shark
Shark S 800 User manual

Shark
Shark Micro User manual

Shark
Shark ATV-DRAK User manual

Shark
Shark RSF 2 RACE User manual

Shark
Shark VARIAL User manual

Shark
Shark Evo-One User manual

Shark
Shark Vancore 2 User manual